Can You Sand Painted Walls: When and How to Do It Safely
You can sand painted walls if you take precautions, confirm there’s no lead, and match your method and grit to the job. Start by testing for lead with an EPA kit or professional; stop and call pros if lead’s present. Clear and seal the area, wear an N95/P100, goggles and gloves, and control dust with drop cloths and a HEPA scrubber. Use coarse to remove, medium to smooth, fine for prep, and follow with primer and cleanup — more practical tips follow.
What This Guide Covers and Who It’s For
Before you grab sandpaper, know what this guide covers and whether it’s for you.
You’ll learn practical sanding techniques, safety basics, and prep steps for different paint types without getting bogged down in theory.
Learn straightforward sanding techniques, safety essentials, and paint-specific prep—practical steps, no heavy theory.
It’s for DIYers repairing small flaws, prepping for repainting, or comparing methods.
It won’t assume professional tools or advanced restoration skills.
Can You Sand Painted Walls Safely?
If you follow a few basic precautions, you can sand painted walls safely without creating health hazards or damaging the surface.
You’ll assess paint compatibility, choose proper sanding techniques, and protect yourself. Follow these steps:
- Test paint compatibility with solvent and adhesion checks.
- Use appropriate grit and gentle sanding techniques.
- Wear PPE and ventilate thoroughly.
- Contain dust and clean surfaces after sanding.
Quick Checklist Before You Start Sanding
Before you start sanding, make a quick list of the tools and materials you’ll need—sandpaper grits, sanding block or pole sander, vacuum or tack cloth, and drop cloths.
Put on safety gear like an N95 mask, eye protection, and gloves, and make sure the room is well-ventilated.
Check for lead paint or fragile surfaces and plan how you’ll control dust.
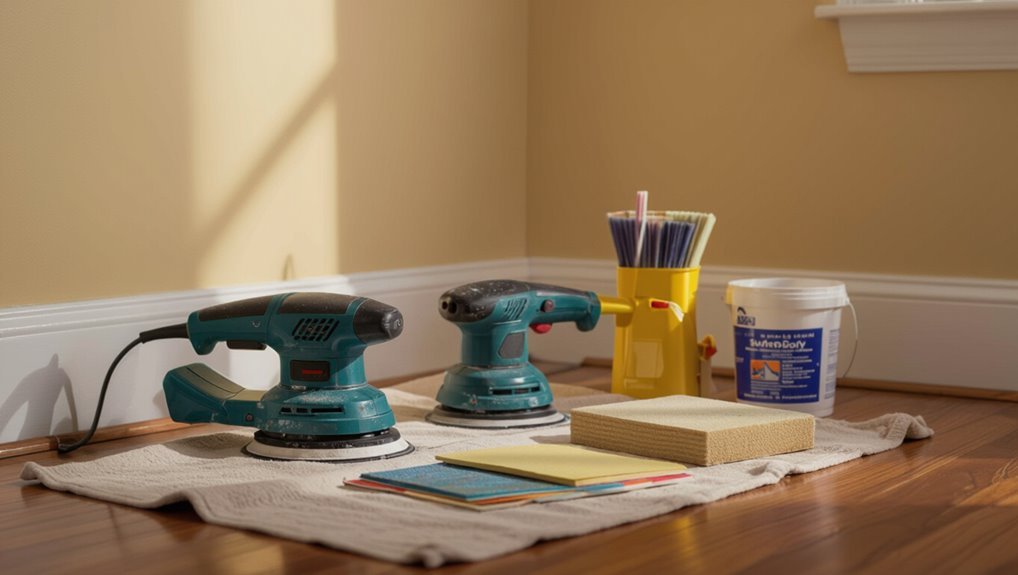
Tools And Materials
Checklist in hand, you’re ready to gather the tools and materials you’ll need to sand painted walls safely and effectively.
Choose items that support proper sanding techniques and surface preparation without overkill.
- Sandpaper assortment (80–220 grit) and sanding block
- Orbital sander for large areas
- Tack cloths and vacuum with brush attachment
- Filler, putty knife, primer, and clean rags
Safety Precautions
Because sanding stirs up dust, you’ll want to take a few quick safety steps so the job’s effective and healthy:
wear protective gear—N95 mask, goggles, and gloves—seal vents, and cover furniture.
Test for lead if paint is old.
Use dust-collecting sanders or a HEPA vacuum, choose gentle sanding techniques, work in well-ventilated stages, and keep pets and kids away.
How To Tell What Paint Is On Your Wall
Want to know what paint’s on your wall? You can identify paint types and wall finishes with simple tests and observation.
- Check sheen: matte, eggshell, satin, semi-gloss, gloss.
- Rub test: water for latex; solvent for oil.
- Scratch test: adhesion and layers reveal history.
- Smell and drying time: quick for latex, longer for oil-based.
How To Check For Lead Paint Before Sanding
Before you grab sandpaper, how can you be sure the paint won’t put you or your household at risk?
Check age and condition; homes built before 1978 often contain lead paint.
Use EPA-approved test kits or hire certified testers — those testing methods detect lead reliably.
Follow safety protocols: ventilate, seal work area, wear PPE.
Take DIY precautions and stop if results are positive.
When To Call A Pro For Lead-Painted Surfaces
If your paint dates from before 1978 or your test shows lead, don’t try risky sanding yourself.
You should call certified professionals who know containment, cleanup, and legal requirements. They’ll confirm the hazard level and handle removal or stabilization safely.
Assess Paint Age
How old is the paint on your walls, and why does it matter?
You should consider paint lifespan and paint composition to judge risk; older oil-based or pre-1978 coatings raise concern. If unsure, call a pro.
- Check house age
- Inspect paint layers
- Note chipping or dust
- Prioritize professional help for older finishes
Test For Lead
Wondering whether that old paint could be hazardous? You should do lead testing before sanding if your home predates 1978 or the paint looks deteriorated.
Use EPA-approved DIY kits for a quick check, but stop and call a pro if results are positive, you suspect widespread contamination, or the work will disturb large areas.
Prioritize paint safety and avoid DIY risks.
Hire Certified Professionals
When your lead test comes back positive or the paint is crumbling on large surfaces, call a certified lead-abatement professional to protect your family and avoid costly mistakes.
- They’ll assess risk and plan safe paint removal.
- They’ll control dust and seal the work area.
- They’ll manage waste and legal disposal.
- They’ll handle thorough surface preparation and final clearance testing before you reoccupy.
Decide: How Much Paint Removal Do You Need?
Why strip any paint at all? You’ll assess paint thickness, adhesion, and underlying damage to decide removal extent.
If layers are thin and sound, spot sanding and primer may suffice; thick, flaky buildup often needs deeper removal.
Match sanding techniques to goals—coarse for bulk, fine for finish—and plan containment, disposal, and time so you don’t under- or over-strip.
When Feathering Edges Beats Full Stripping
If your assessment shows mostly sound paint with only thin ridges or small chips, feathering the edges often beats stripping the whole surface.
You’ll save time and preserve substrate by using feathering techniques and careful edge blending. Choose tools and grits, clean dust, inspect for adhesion, and spot-prime before repainting.
- Sand ridge tips
- Blend to surrounding sheen
- Vacuum and tack
- Spot-prime
Sanding Latex Vs. Oil-Based Paint: Key Differences
When you sand latex paint it usually leaves a softer, powdery texture, while oil-based paint tends to cut smoother but can feel slightly waxy.
That difference affects the grit you choose and how much work you’ll need to get a uniform surface.
Also plan for cleanup: latex sanding makes fine, easy-to-blow dust, whereas oil-based sanding creates heavier, stickier particles that need tack cloths and proper disposal.
Surface Texture Differences
Although both latex and oil-based paints can cover a wall evenly, their cured textures behave quite differently under the sander: latex dries into a slightly flexible film that tends to gum up sandpaper and produce a softer, featherable edge, while oil-based paint cures harder and creates a crisper surface that sands to a smoother, more consistent finish.
- Expect texture variations with latex.
- Oil gives crisper results.
- Watch for surface imperfections on both.
- Match grit to paint type.
Dust And Cleanup
1 thing you’ll notice right away is that sanding latex and oil-based paints creates very different dust and cleanup needs: latex tends to clog sandpaper and produce heavier, slightly tacky dust that sticks to surfaces, while oil-based paint sands into finer, powdery particles that spread more readily but clean up with solvents. You’ll manage dust with vacuums; choose cleanup methods accordingly.
| Paint Type | Dust Character | Cleanup |
|---|---|---|
| Latex | Tacky | Vacuum, wipe |
| Oil-based | Powdery | Solvent, cloth |
| Mixed | Variable | Combined methods |
Tools For Hand Sanding Painted Walls
Gather the right hand-sanding tools before you start, because the right scraper, sanding block, and selection of grits will make the job faster and cleaner.
You’ll use hand sanding for precise wall preparation, remove drips, and smooth changes.
Essentials:
- Flexible sanding block
- Assorted sandpaper (80–220 grit)
- Metal scraper
- Tack cloth and dust mask
Choose A Power Sander: Orbital Vs. Detail
Once you’ve smoothed trouble spots by hand, a power sander will speed up the rest of the job; choose between an orbital for broad, even sanding and a detail sander for tight corners and trim.
You’ll pick sander types based on surface area and access. Use proper sanding techniques: keep motion even, avoid pressure that gouges, and switch to a detail sander for edges.
Which Abrasive Grit To Start With
When deciding which abrasive grit to start with, consider how much paint you need to remove and how rough the surface is.
You’ll choose grit based on material and finish needs, balancing speed versus control. Use proper sanding techniques and thoughtful grit selection to avoid damage.
- Coarse for heavy removal
- Medium for smoothing
- Fine for prep
- Very fine for final touch
Abrasives For Glossy Or Enamel Finishes
For glossy or enamel finishes you’ll want to pick a fine grit—typically 220 to 400—to scuff without cutting through the topcoat.
Decide between wet sanding (smoother results, less dust) and dry sanding (faster, messier) based on the room and your tolerance for cleanup.
Start gently and test a small area so you can adjust grit or method before tackling the whole wall.
Choosing The Right Grit
Picking the right grit makes sanding glossy or enamel finishes much easier and safer for the underlying surface.
You’ll use grit selection to control aggressiveness and avoid damage, and adjust sanding techniques based on finish and flaws.
- 220–320 for scuffing gloss
- 400–600 for smoothing enamel
- 800+ for polishing
- Start coarser, finish finer
Wet Vs Dry Sanding
Although both wet and dry sanding can level and de-gloss painted or enamel surfaces, you’ll choose between them based on finish sensitivity and dust control: dry sanding’s faster stock removal works for rough prep but sprays dust and raises heat, while wet sanding uses water to lubricate and cool the abrasive, reduces clogging and dust, and yields a smoother, swirl-free result ideal for high-gloss or enamel finishes.
| Method | Best use |
|---|---|
| Dry sanding | Rapid stock removal |
| Wet sanding | Fine finishing |
| Dry sanding | Prep undercoats |
| Wet sanding | Gloss/enamel touch-ups |
Sanding Blocks, Sponges, and Pads For Painted Walls
Sanding blocks, sponges, and pads give you control and even pressure when smoothing painted walls, making them ideal for touch-ups and prep work.
Use them to refine sanding techniques and guarantee consistent surface preparation before repainting. Choose grit and firmness by task, and work with the grain or in circles as needed.
- Block for flats
- Sponge for contours
- Pad for light scuffing
- Mini for corners
When To Wet Sand Instead Of Dry Sanding
When should you choose wet sanding over dry sanding? You’ll pick wet sanding techniques for glossy or delicate finishes, to reduce dust, and to get ultra-smooth results. Use dry sanding benefits when speed and heavy material removal matter. Match method to surface and finish goals.
| Situation | Recommendation |
|---|---|
| Glossy paint | Wet |
| Heavy sanding | Dry |
| Fine finish | Wet |
| Quick prep | Dry |
Preparing The Room: Furniture, Coverings, and Masking
Start by clearing the room of as much furniture as you can and move remaining pieces to the center, covering them tightly with drop cloths or plastic sheeting to keep dust and grit off surfaces.
Tape the coverings down and seal vents, trim, and baseboards with painter’s tape to protect finishes and create clean lines for masking.
- Plan furniture removal route.
- Lay wall coverings floor-to-ceiling.
- Mask trim and outlets precisely.
- Secure seams and vents.
PPE Checklist For Sanding Paint
Although it might seem simple, you’ll need the right personal protective equipment to keep dust, paint particles, and fumes from harming your eyes, lungs, and skin during sanding.
Wear N95 or P100 respirators, sealed goggles, nitrile gloves, and disposable coveralls. PPE essentials also include hearing protection for power sanders.
Follow proper sanding techniques to minimize exposure and replace gear if contaminated or damaged.
Dust Control To Protect Your Home and HVAC
Beyond protecting yourself, you’ll want to keep sanding dust out of the rest of the house and away from your HVAC system, which can spread fine particles through ducts and filters.
- Seal doors and vents for dust containment.
- Run a portable HEPA air scrubber.
- Use tack cloths and wet wiping.
- Change HVAC filters after work for HVAC protection.
Set Up Dust Collection For Power Sanders
Before you fire up a power sander, make sure you’ve chosen a vacuum rated for fine dust and compatible with your sander’s dust shroud.
Attach the correct shroud to the sander and confirm the hose fit is snug so suction actually captures particles.
Finally, seal off the room with plastic sheeting and tape to keep settled dust from spreading through your home.
Choose The Right Vacuum
One good dust-collection setup makes sanding painted walls safer and much cleaner: pick a vacuum rated for fine dust, use a HEPA filter, and connect it directly to your power sander or a dedicated dust port to capture particles at the source.
- Compare vacuum types for airflow and filtration.
- Prioritize HEPA and sealed systems.
- Check hose diameter and adapters.
- Verify motor protection and vacuum features like auto-shutoff.
Use Compatible Dust Shrouds
When you attach a dust shroud that matches your sander and vacuum, you’ll capture most of the sanding dust at the source and keep your work area cleaner and safer.
Choose a shroud sized for your tool, seal connections, and use compatible hoses.
Learn dust shroud benefits and practical dust collection techniques to reduce airborne particles, improve visibility, and protect health during powered sanding.
Seal Off The Work Area
Seal off the work area to keep sanding dust from spreading through your home and clogging your dust collection efforts.
You’ll set plastic sheeting, tape doorways, and route your sander’s hose to a HEPA vacuum.
Keep windows or a small fan to maintain ventilation without blowing dust around.
- Tape seams
- Hang barriers
- Connect dust hose
- Monitor airflow
Step-By-Step Prep Before Touching Sandpaper
Before you pick up any sandpaper, prepare the room and the wall so sanding does the job without creating extra work or damage. You’ll check for loose paint, clean dust, patch holes, and choose appropriate sanding techniques for surface type. Use PPE. Follow this quick checklist:
| Task | Action |
|---|---|
| Clear room | Remove furniture |
| Protect floors | Drop cloths |
| Clean wall | Degrease |
| Patch holes | Fill & dry |
| PPE | Mask & goggles |
How To Sand Flat Walls Without Swirl Marks
If you want a smooth, even finish without swirl marks, sand with consistent pressure and slow, overlapping strokes while keeping the paper flat against the wall.
Use a finer grit and a sanding block or pole sander to avoid cupping from your hand.
- Choose 220–320 grit for final sanding.
- Sand in long, even passes.
- Keep the paper flat to prevent swirl marks.
- Wipe dust frequently for proper sanding techniques and swirl prevention.
Techniques For Sanding Textured Walls
Tackle textured walls by matching your sanding approach to the texture type—knockdown, orange peel, or popcorn each need different pressure, grit, and tools; use a light touch and work in small sections so you don’t flatten the pattern or over-sand high spots.
For textured surfaces, choose softer abrasives, hand-sand crests lightly, use sanding blocks or flexible pads, and finish with dust control.
How To Sand Trim, Baseboards, and Moulding Safely
When you sand trim, baseboards, and moulding, work slowly and use the right tools so you don’t gouge profiles or damage adjacent walls and floors.
Use proper sanding safety and gentle sanding methods for various moulding types and baseboard styles.
- Choose grit for trim sanding and moulding preparation.
- Use hand blocks for trim finishes.
- Mask floors for baseboard techniques.
- Vacuum dust frequently.
Repair Gouges and Divots After Sanding
Start by evaluating each gouge and divot so you know what filler and technique to use; small surface scratches need a light skim coat while deeper gouges require layering.
For gouge repair, remove loose paint, apply appropriate filler in thin passes, sand between layers, then finish smooth.
For divot filling, press filler into the cavity, level with a putty knife, let cure, and sand flush.
How To Prime and Seal After Sanding Painted Surfaces
After sanding, prime and seal the surface promptly to lock in repairs, promote paint adhesion, and create a uniform base for your topcoat.
Use proper priming techniques and sealing methods to prevent stains and guarantee durability.
Use correct priming and sealing to stop stains and ensure long-lasting, durable results
Follow these steps:
- Clean dust and tack cloth.
- Apply an appropriate primer coat.
- Sand light between coats.
- Use a compatible sealer before topcoat.
Best Primers For Previously Painted Walls
When you’re prepping previously painted walls, picking the right primer makes all the difference.
Consider oil-based primers for tough adhesion and durability, high-bonding latex primers if you need flexibility and easier cleanup, or stain-blocking shellacs to seal stubborn stains and tannin bleed.
Choose based on the existing finish and the problem you need to solve.
Oil-Based Primer Options
Although oil-based primers take longer to dry, they’re often your best bet for previously painted walls that have stains, tannin bleed, or glossy finishes that resist adhesion.
You’ll appreciate oil-based advantages like stain blocking and durable sealing.
Consider these primer types and options:
- Shellac-based for quick stain seal
- Alkyd for durability
- Long-oil formulas for flexibility
- Specialty stain-blocking blends
High-Bonding Latex Primers
If oil-based primers suit heavy stains or glossy surfaces, you might prefer high-bonding latex primers for most previously painted walls because they offer fast drying, easier cleanup, and excellent adhesion to a variety of existing finishes.
You’ll get high bonding benefits when you follow proper surface cleaning, light scuffing, and recommended application techniques—roll or brush evenly, maintain thin coats, and allow full cure before sanding or repainting.
Stain-Blocking Shellacs
1 reliable choice for sealing tough stains is stain-blocking shellac primer, and you’ll find it excels at locking in watermarks, smoke discoloration, and tannin bleed that other primers struggle with.
You’ll appreciate its stain resistance and fast drying; shellac finishes bond well to glossy surfaces.
Consider these uses:
- Watermarks
- Smoke stains
- Tannin bleed
- Glossy old paint
Choosing Sanding Grit: Repainting Vs. Glazing
When you’re prepping walls for a fresh coat of paint versus a thin glaze, the grit you choose makes a big difference: coarser grits remove old finish and imperfections quickly, while finer grits smooth without stripping too much surface texture. You’ll match sanding techniques to paint compatibility: use 80–120 for repainting, 220–320 for glazing.
| Task | Grit | Purpose |
|---|---|---|
| Repaint | 80–120 | Remove flaws |
| Glaze prep | 220–320 | Smooth surface |
| Between coats | 320–400 | Light scuffing |
Speed Tips: Sand Faster Without Losing Finish Quality
Pick the right grit for the job so you remove material quickly without scuffing the finish.
Use the proper tool—orbital sanders speed work on large areas while sanding blocks give control on edges.
Keep your pressure even so you stay fast but don’t burn through the paint.
Choose The Right Grit
Start with the coarsest grit that removes imperfections quickly, then step down to finer grits to restore a smooth finish—this sequence lets you sand faster without sacrificing quality.
- 80–120 grit for heavy unevenness.
- 150–180 grit to blend edges.
- 220 grit for final smoothing.
- 320+ grit for ultra-fine touch.
Use precise grit selection and proven sanding techniques to cut time and keep finish quality.
Use The Right Tool
Because the right tool matches the job, you’ll sand faster and keep a smoother finish by choosing power and hand tools that suit the paint type and surface condition.
Pick orbital sanders for large flat areas and sanding blocks for edges.
Match abrasive grit to defects, swap pads to prevent glazing, and vary sanding techniques with tool selection to speed work while preserving finish quality and avoiding swirl marks.
Maintain Consistent Pressure
Keep a steady hand: applying even pressure as you sand prevents gouges, streaks, and uneven gloss that slow you down later.
You’ll develop a consistent technique by focusing on pressure control, small overlapping passes, and checking progress often. Practice saves time and preserves finish quality.
- Use light, even strokes
- Keep pad flat
- Monitor surface regularly
- Rest to reassess
Common Sanding Mistakes and How To Avoid Them
When you rush sanding or skip the prep, you’ll see problems later—uneven surfaces, visible scratch marks, and paint that won’t adhere properly; these are the most common mistakes people make and each has a simple fix if you know what to look for.
Use proper sanding technique tips: start with correct grit progression, keep even pressure, clean dust, and replace clogged paper to avoid common errors.
How To Test Your Prep Before Repainting
Before you repaint, you’ll want to run a couple quick checks to make sure your prep will hold up.
Try a simple adhesion test (press and pull tape) and inspect for grease, dust, or residue with a damp cloth to confirm surface cleanliness.
If either test fails, address adhesion or cleaning before you prime and paint.
Adhesion Test Methods
How well will your new paint stick to the old surface? Use simple adhesion testing to confirm paint adhesion before sanding.
Try these quick methods:
- Tape test: press strong tape, rip off, check for paint lift.
- Cross-hatch: score small grid, apply tape, inspect loss.
- Scrape test: gentle metal spoon edge for adhesion feel.
- Spot repaint: small patch to observe bonding.
Surface Cleanliness Check
Because dust, grease, or leftover soap can ruin a new coat, you should verify the surface is truly clean before repainting by doing a few quick, targeted checks.
Wipe with a damp microfiber, test a small area with isopropyl alcohol, and inspect under good light.
Meet basic surface preparation and cleanliness standards before sanding or priming to guarantee adhesion and a smooth finish.
Cleanup Checklist After Sanding Painted Walls
1 clear plan will make cleanup after sanding painted walls quick and safe. You’ll want efficient cleanup methods and careful dust disposal without spreading particles.
- Vacuum with HEPA filter, move top‑to‑bottom.
- Wipe surfaces with damp microfiber cloths.
- Change and seal vacuum bags/filters.
- Inspect corners, baseboards, vents; repeat cleaning where needed.
Safe Disposal Of Sanding Dust and Paint Chips
When you finish sanding, treat the dust and paint chips as potentially hazardous waste and handle them deliberately: collect debris with a HEPA vacuum or dampened wipes, place it in heavy-duty, resealable bags, and label them before disposal so haulers know what they’re taking. Follow local disposal rules, improve sanding techniques to minimize waste, and maintain strict dust management.
| Action | Why |
|---|---|
| Bag debris | Containment |
| HEPA vacuum | Capture fine dust |
| Label bags | Inform haulers |
| Check rules | Compliance |
DIY Cost Estimate Vs. Hiring a Pro
After you’ve dealt with dust and disposal, the next question is whether you should tackle sanding and repainting yourself or hire a pro.
- DIY budgeting: tally materials, tools, and Time investment.
- Professional fees: get quotes reflecting Skill level and insurance.
- Cost comparison: weigh hourly rates versus tool buy‑in and errors.
- Project scope: complex jobs often justify pros; small rooms favor DIY.
When To Use Chemical Strippers Instead Of Sanding
If a painted surface is thick, brittle, or has multiple layers—including old lead-based coatings—you’ll want to reach for a chemical stripper instead of sanding; it removes coatings more quickly, reduces airborne dust and lead hazards, and gets into crevices that sanders can’t.
Choose chemical alternatives when sanding would damage substrate or spread dust. Seek eco friendly options, follow label safety, and ventilate.
What Lead-Dust Regulations Mean For Your Project
Before you start sanding, you’ll want to confirm whether the paint contains lead so you can follow the right rules.
If testing shows lead, know the legal work thresholds that trigger certified practices and notifications.
Plan for proper dust containment and cleanup to keep your household safe and stay compliant.
Lead Paint Identification
How can you tell whether the paint on your walls contains lead, and why does that matter for sanding? You must identify lead paint in historical homes because health risks dictate strict safety regulations.
Use testing methods or hire professional services. Consider removal techniques, PPE, containment, and homeowner responsibilities.
- Test kits
- Lab analysis
- Pro inspection
- Interim controls
Legal Work Thresholds
When you’re planning repairs or renovations in a home that might’ve lead paint, know that work thresholds determine whether you must follow strict lead-safe work practices or can proceed with standard sanding and painting.
You need to understand legal responsibilities tied to square footage disturbed, occupant vulnerability, and testing results.
Follow compliance guidelines, document findings, and hire certified contractors when thresholds trigger regulated lead-dust controls.
Safe Dust Containment
If your project disturbs painted surfaces that might contain lead, you’ll need to contain dust to protect occupants and comply with regulations; that means sealing work areas, controlling dust migration, and using HEPA-filtered cleanup methods so toxic particles don’t spread through the home.
- Plan dust management zones.
- Use plastic sheeting and taped seams.
- Employ HEPA vacuums for cleanup.
- Follow containment strategies and local lead rules.
Document Safety Steps For Resale Or Inspections
Because resale and inspections demand clear records, document every safety step you take when preparing painted walls for sanding.
Note dates, materials tested (for lead), containment methods, PPE used, and waste disposal.
Keep photos and receipts to support resale value and meet inspection standards.
Include clear photos and receipts to document your work—essential proof for inspections and buyer confidence.
Store records with your home files and provide copies to inspectors or potential buyers to prove compliance.
Troubleshooting: Paint Peeling After Sanding
If paint starts peeling after you sand, first check for underlying moisture that’s breaking the bond.
Scrape or sand away any loose paint until you reach a stable edge.
Then prime the exposed area with a suitable primer before repainting to guarantee proper adhesion.
Identify Underlying Moisture
When paint peels after sanding, check for moisture first — it’s often the hidden cause that sabotages adhesion.
- Use a moisture detection meter across suspect areas during wall inspection.
- Look for discoloration, soft spots, bubbling, or efflorescence.
- Test humidity and plumbing leaks nearby.
- Dry and repair the source before repainting to guarantee new paint bonds properly.
Remove Loose Paint
Start by knocking away any remaining loose paint so the new coating has a solid surface to grip.
Use a scraper, stiff brush, or putty knife to remove flakes, then sand feathered edges smooth.
Clean dust thoroughly.
Assess damaged areas and apply appropriate repair techniques—fill gouges, level seams, and sand once dry—so the surface is stable and ready for the next restoration steps.
Reprime Before Repainting
Because sanding can expose bare drywall or old primer, you’ll want to re-prime any repaired or scuffed areas before repainting to guarantee proper adhesion and prevent future peeling.
- Choose primer types for the substrate: drywall, plaster, or glossy surfaces.
- Use repriming techniques: thin coats, brush-cut roller, feather edges.
- Let primer fully dry per instructions.
- Lightly sand between coats for smooth finish.
Sanding Exterior Painted Walls: What’s Different
Although the basic sanding steps are similar, sanding exterior painted walls involves different challenges and precautions than indoor surfaces.
You’ll face tougher surfaces, weathered layers, and possible lead or mildew. Use appropriate sanding techniques, coarser grits, and power tools cautiously.
Protect surrounding areas, wear respiratory protection, and avoid sanding in wet or windy conditions.
Check exterior paint compatibility before refinishing.
Decide: Sand, Strip, Or Repaint?
Wondering whether to sand, strip, or simply repaint? You’ll weigh paint adhesion, surface damage, and paint compatibility before choosing.
Use proper sanding techniques for minor flaws; strip if coatings are peeling or incompatible; repaint when surface is sound. Consider time, cost, and health risks.
- Assess adhesion
- Check compatibility
- Choose method
- Prepare properly
Frequently Asked Questions
Can I Sand Painted Walls Over Wallpaper Without Removing It First?
You can’t reliably sand painted walls over wallpaper; you’ll damage wall texture and compromise paint adhesion. You should remove wallpaper first, fix substrate irregularities, then sand and prime to guarantee proper adhesion and a smooth finish.
How Long Should Newly Applied Primer Cure Before Sanding?
About 24 hours is typical: studies show 60% of primers reach handling strength within a day. You’ll let primer drying occur 24–48 hours, then use gentle sanding techniques with fine grit for smooth, safe results.
Will Sanding Affect Fire-Resistant or Soundproof Wall Assemblies?
Yes — sanding can compromise fire resistant coatings and soundproof materials if you remove or damage their surfaces; you’ll avoid issues by using gentle methods, low-abrasion grit, testing small areas, and consulting manufacturers first.
Can I Sand Painted Walls in Humid or Cold Weather Conditions?
Sticky, soggy summer or crisp, chilly conditions — yes, you can sand in humidty effects or cold weather, but you’ll adapt: use dehumidifiers or heaters, allow paint to cure, work slowly, and avoid sanding when moisture’s measurable.
Are There Safe Sanding Alternatives for Fragile Antique Plaster Walls?
Yes — you can avoid abrasive sanding on fragile plaster by using vacuum suction, soft-bristle brushing, micro-sanding pads, and chemical strippers tailored for antique wall preservation; you’ll prefer gentle sanding techniques combined with consolidation and patching.
Conclusion
Sanding painted walls can refresh a room, but do it right. I once sanded my hallway without testing for lead and learned the hard way—vacuuming up a visible dust cloud taught me that prep matters. Follow the checklist, test for lead, wear a respirator and use dustless methods. If paint peels or it’s an exterior job, consider stripping instead. With care, sanding’s a quick fix; without it, you’ll regret the cleanup.