Do You Need to Prime Painted Walls Before Texturing? Here’s the Truth
You usually should prime painted walls before texturing if the surface is glossy, stained, patched, oil-based, or has poor adhesion, because primer improves bonding, blocks stains, and creates a uniform base for texture; you can skip priming on clean, well-adhered, matte finishes or when using self-priming texture products, but always test adhesion first to avoid peeling and uneven sheen—keep going and you’ll get clear steps, primer choices, and when to save time or spend it wisely.
Do You Need to Prime Painted Walls Before Texturing? Quick Answer
Yes — you should prime painted walls before texturing if the existing paint is glossy, stained, or patched, or if you need better texture adhesion.
If the surface is a clean, matte latex finish with no repairs, you can often skip primer.
Check the wall condition and paint type to decide quickly.
Direct short answer (yes/no and when)
Usually you do—prime painted walls before texturing when the existing paint is glossy, stained, or unevenly sealed; if the surface is flat, clean, and well-adhered, you can often skip priming.
So, do I need to prime painted walls before texturing?
Yes for glossy, stained, patched, or poorly bonded paint; no for sound, matte, clean surfaces—inspect and test adhesion first.
Basic Understanding What Priming and Texturing Mean
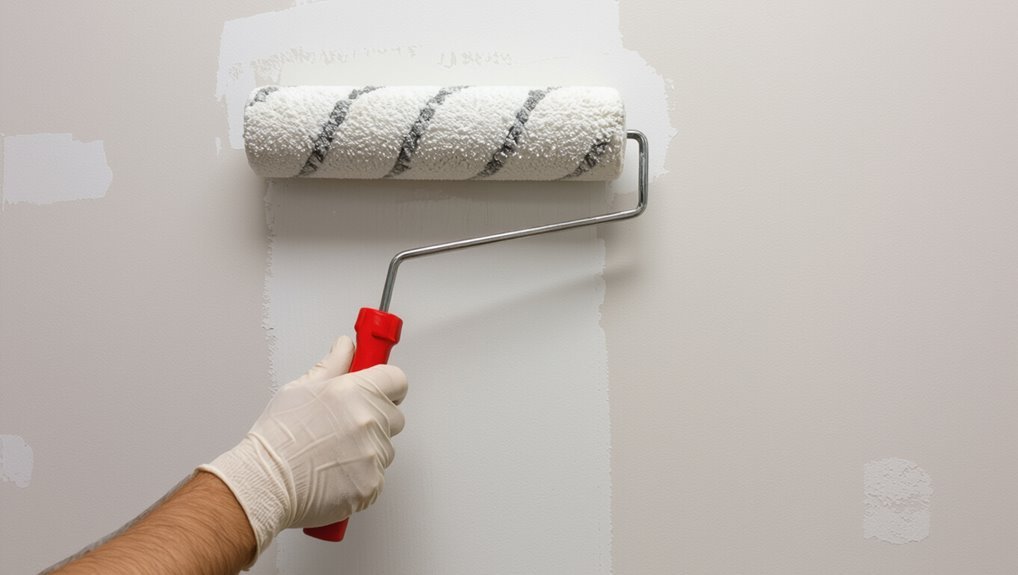
When you prime a wall, you’re applying a preparatory coat that bonds to the surface and helps paint adhere evenly.
Texturing adds a patterned or tactile finish—like knockdown or orange peel—that can hide imperfections and change how light plays on the surface.
Different primers work better with different paints (latex primers for latex paints, oil-based or bonding primers for enamels and slick surfaces) so choosing the right match matters before you texture.
What is priming?
Priming is a preparatory coating you apply to walls before painting or texturing to seal porous surfaces, improve adhesion, and create a uniform base so finishes go on smoothly and last longer.
You’ll choose primers for surface type, stain blocking, or bonding.
Priming evens porosity, prevents uneven sheen, reduces the number of finish coats needed, and helps paint or texture adhere and perform reliably.
What is wall texturing?
Wall texturing is the process of applying a finish—using materials like joint compound, plaster, or spray-on texture—to create a patterned or tactile surface on your walls.
You choose techniques (knockdown, orange peel, skip trowel) and tools to add depth, hide imperfections, or change style.
You can texture new drywall or repaint surfaces, but proper adhesion and curing matter for lasting results.
How primers interact with different paint types (latex, oil, enamel)
Because different paints bond and cure differently, the primer you choose affects how well texture material sticks and how the finish looks.
If walls have latex, use a water-based bonding primer to promote adhesion and prevent peeling.
For oil or alkyd finishes, choose a solvent-based primer or a specialty bonding primer.
Enamel surfaces often need scuffing plus a high-adhesion primer before texturing.
Why Priming Matters Before Texturing
You’ll want to prime before texturing because it helps the new texture bond evenly to the surface for better adhesion and longer-lasting results.
A good primer also blocks moisture and stains that could bleed through and ruin the texture.
Plus, priming evens out absorption so the finish looks consistent and durable over time.
Adhesion and bonding benefits
When you’re applying texture over painted surfaces, priming strengthens the bond between the old paint and the new texture, helping the material stick evenly instead of peeling or cracking later.
You’ll create a uniform surface that improves mechanical grip and reduces delamination risk.
Primer fills slight surface imperfections and balances porosity so your texture adheres consistently, lasts longer, and resists spotting or edge lift.
Moisture and stain blocking
If moisture or stains are lurking in the wall, priming before you texture will stop them from bleeding through and ruining the finish.
You’ll block water marks, smoke, tannin bleed, and other discoloration with a stain-blocking primer. That prevents rework and keeps your texture true to color.
Choose a primer rated for stains and mold resistance to protect the surface long-term.
Uniform absorption and finish consistency
Because different paints and wall substrates soak up primers and texture compound at different rates, priming first evens out absorption so your texture adheres and cures predictably.
You’ll get a consistent finish because primer creates a uniform surface tension and porosity. That means fewer thin spots, even coloration after painting, and predictable workability when you apply texture—reducing touch-ups and visible inconsistencies.
Longevity and durability of texture coats
Although you might rush straight to texturing, priming first gives your texture coat a stable, compatible base that resists peeling, cracking, and premature wear.
You’ll extend the finish’s life, reduce maintenance, and prevent moisture or substrate issues from compromising adhesion.
Priming also seals varied surfaces so the texture cures uniformly, keeping patterns intact and minimizing touch-ups over years of normal use.
When You Can Skip Priming (Quick Scenarios)
If you’ve just painted and the finish has good adhesion with a compatible paint, you can often skip a separate primer.
You can also forego priming when the wall stays the same color and sheen and only needed minimal repairs.
Finally, many self-priming texture products are formulated to bond without a prior primer, so check the product specs before deciding.
Recently painted walls with compatible paint and good adhesion
When the existing paint is fully cured, compatible with your new texture, and firmly adhered to the wall, you can usually skip a primer and apply texture directly—just make sure the surface is clean, dry, and free of loose flakes or chalking before you begin.
If the finish is intact and adhesion is strong, lightly scuff for mechanical bite, dust, then texture as directed.
Same color and sheen with minimal repairs
Because the existing paint matches your new texture in both color and sheen and you’ve only made a few small repairs, you can usually skip priming and go straight to texturing.
Just guarantee repaired patches are sanded smooth, feathered into surrounding paint, and clean of dust.
If adhesion’s solid and color blends, texture will hide minor imperfections without a primer step.
When using self-priming texture products
You can also skip primer when you choose a self-priming texture product designed to stick and seal in one coat. These mixes bond to clean, sound paint, saving time and materials.
Still, follow manufacturer directions, test adhesion on a small area, and repair loose paint first.
For high-traffic rooms or drastic color changes, primer is usually wiser despite product claims.
When You Must Prime Before Texturing
If you’re working over previously glossy or oil-based paint, you’ll need to prime to guarantee the texture adheres.
You should also prime stained, smoky, or water-damaged walls and any new drywall or patched areas to seal and even the surface.
Finally, prime when you’re making a significant color change or applying high-contrast textures so you get uniform coverage and true color.
Previously glossy or oil-based paint surfaces
Ever wondered why glossy or oil-based paints cause trouble when you try to texture? They repel new coatings and prevent proper adhesion, so texture compound can peel or flake.
You should scuff sand or use a high-bond primer designed for slick surfaces. That creates a tooth for the texture to grip, ensuring durability and preventing costly repairs after you finish the job.
Stained, smoky, or water-damaged walls
When walls show stains from water, smoke, or nicotine, prime them before texturing so those contaminants don’t bleed through and ruin the finish; a stain-blocking primer seals odors and tannins, ensuring your texture adheres and looks uniform.
You’ll also stop discoloration from reappearing, improve adhesion over damaged areas, and create a consistent base that prevents costly rework or spotty results after texturing.
New drywall or patched areas
New drywall and patched areas always need priming before texturing because bare gypsum and joint compound absorb paint and texture unevenly.
Prime them to create a uniform surface that prevents blotchy patches and guarantees the texture and paint cover consistently.
You should sand, clean, and apply a drywall primer or sealer; let it dry fully so texture adheres evenly and finishes look professional.
Significant color changes or high-contrast textures
Thinking about dramatically changing a wall color or moving from a dark base to a light, you should prime before texturing to prevent the old shade from bleeding through and to guarantee the new texture reads uniformly.
Without a primer, thin or high-contrast textures can reveal underlying tones and make coverage uneven.
You’ll save time and materials, achieve true color, and avoid patchy results when you prime first.
How to Determine If Existing Paint is Suitable for Texturing
Before you texture, you’ll want to check the existing paint’s adhesion with a simple tape test or scratch test (Step 1).
Next, make sure the surface is clean and free of grease, dust, or mildew that could prevent proper bonding (Step 2).
Finally, test porosity by applying a few drops of water to see if it soaks in or beads up, which tells you whether the wall will absorb primer or texture (Step 3).
Adhesion test (tape test and scratch test) Step 1
Start by checking how well the existing paint sticks—an adhesion test tells you if the surface will hold new texture or if you need to strip or prime first.
Perform a tape test on small areas, then do a scratch test with a coin or screwdriver. If paint flakes or peels, prime or remove it before texturing.
- Tape test
- Scratch test
- Inspect results
Surface cleanliness and contaminant check Step 2
2 simple checks will tell you if the wall is clean enough for texture: wipe it with a damp cloth or trisodium phosphate (TSP) solution to remove dust, grease, and smoke residue, then feel for slick spots or residue once it dries.
You’ll address contaminants before texturing by:
- Removing grease or fingerprints with cleaner.
- Degreasing smoke or nicotine stains.
- Ensuring no leftover cleaning residue.
Porosity and absorption check Step 3
If the old paint soaks up water or a test primer, it’s usually ready for texture; if it beads or resists, you’ll need to strip or sand it first.
Check small areas to confirm absorption, then proceed only if porous. If not, prep is required.
- Dampen and observe
- Apply primer spot
- Sand or strip nonabsorbent sections
Step-by-Step Guide to Preparing Painted Walls for Texturing
Before you texture, you’ll want to follow a clear checklist so the finish adheres and looks even.
Start by inspecting the surface, then clean, degloss, and sand as needed.
Repair any cracks or holes, and pick a primer that matches the job—bonding, stain-blocking, latex, or alkyd.
Finally, apply the primer with proper coverage, observe dry times, and add extra coats only when necessary.
Step 1: Inspect and assess the surface
Start by giving the wall a close, systematic inspection so you can spot any issues that will affect adhesion or the final texture.
Look for cracks, peeling paint, and uneven patches. Note substrate type and previous coatings. Record problem areas and prioritize repairs before priming or texturing.
- Cracks/holes
- Peeling/blistering
- Surface irregularities
Step 2: Clean and degloss (washing, TSP, sanding)

After you’ve marked repairs from the inspection, give the wall a thorough cleaning and deglossing so the new texture will stick.
Remove dirt, grease, and chalky residue before texture application. Use TSP substitute for heavy grime, rinse well, then sand glossy finishes to dull the surface.
Follow with a clean wipe-down.
- Wash with TSP substitute
- Rinse thoroughly
- Sand glossy areas
Step 3: Repair cracks, holes, and uneven areas
Patch and level any damage so your texture goes on smooth and hides flaws rather than highlighting them.
Use a durable filler for holes, widen and fill hairline cracks, and sand high spots flush. Prime repaired spots if porous.
- Fill holes and dents
- Repair and tape cracks
- Sand and feather edges
Step 4: Choose the right primer type (bonding, stain-blocking, latex/alkyd)
Because the right primer bonds the new texture and prevents stains and adhesion problems, choose a product that matches your wall’s condition and the texture material you’ll use. Pick bonding primer for slick surfaces, stain-blocking for discoloration, and latex or alkyd based on flexibility and solvent resistance. Feel confident—your choice matters.
| Type | Strength | Emotion |
|---|---|---|
| Bonding | High | Relief |
| Stain-block | Neutralize | Confidence |
| Latex/Alkyd | Flexible | Assurance |
Step 5: Apply primer correctly (coverage, dry times, number of coats)
When you apply primer correctly, you’ll guarantee even coverage, proper adhesion for the texture, and predictable dry times; follow these focused steps to avoid problems.
- Roll or brush evenly, aiming for the manufacturer’s recommended spread rate.
- Respect stated dry times between coats and before texturing—temperature and humidity matter.
- Apply a second coat only if coverage is thin or surfaces are highly porous.
Step 6: Apply texture material and finish (technique tips)
With primer set and fully dry, you’re ready to lay on the texture—this is where technique makes the finish look professional.
Work in small sections, keep compound mixed to manufacturer consistency, and apply evenly with a roller, brush, or hopper gun.
Use consistent pressure and motion, knock down peaks if desired, and blend seams while wet.
Let cure before painting or sealing.
Comparing Primer Types and When to Use Each
When choosing a primer before texturing, you’ll weigh latex primers for general use, oil-based or bonding primers for slick or previously glossy surfaces, and specialty options for specific problems.
Use stain-blocking or shellac-based primers to tackle smoke, water stains, or heavy tannin bleed-through.
Pick the primer that matches the substrate and the issue you need to solve to guarantee texture adhesion and a uniform finish.
Latex primers vs. oil-based primers vs. bonding primers
Although primers all aim to create a stable base for texture, you’ll choose between latex, oil-based, and bonding primers based on the surface, existing paint, and the type of texture you’ll apply. Choose latex for standard drywall, oil-based for glossy or problematic surfaces, and bonding for slick or challenging substrates.
| Type | Best for | Notes |
|---|---|---|
| Latex | Drywall | Quick dry |
| Oil-based | Glossy paint | Strong adhesion |
| Bonding | Plaster/ceramic | For hard-to-stick surfaces |
Specialty primers (stain-blocking, shellac-based) and their use cases
If you’re dealing with stains, smoke damage, or strong odors, specialty primers like stain-blocking and shellac-based formulas stop bleed-through where regular primers can’t.
You’ll use stain-blockers for water, tannin, or marker stains; shellac-based primers for severe smoke, nicotine, or pet odors and glossy surfaces.
They dry fast, seal contaminants, and guarantee your texture and paint adhere without discoloration.
Common Mistakes to Avoid When Priming for Texture
Don’t skip simple adhesion tests—you’ll want to know if the primer will stick before you texture.
Avoid using the wrong primer on glossy or oily surfaces, and never texture dirty or poorly prepped walls.
Also be careful not to over-prime or under-prime—coverage errors cause poor bond and uneven texture.
Skipping adhesion tests
Wondering whether you can skip an adhesion test? Don’t. You’ll risk texture failing to stick, peeling later, or showing uneven coverage.
Test small sections with tape or a patch primer first to confirm bond. If adhesion’s poor, sand or use a specific bonding primer.
Taking this quick step prevents rework, saves money, and guarantees a durable, consistent textured finish.
Using wrong primer for glossy/oily surfaces
After checking adhesion, you’ve got to pick the right primer for glossy or oily surfaces—using a standard latex primer here is a common mistake that’ll lead to poor bonding and flaking texture.
Choose a high-adhesion bonding primer or an oil-based/sealer designed for slick finishes.
Apply per manufacturer directions, sanding glossy spots first, to guarantee texture adheres and lasts without lifting or peeling.
Applying texture on dirty or poorly prepped walls
If you skip proper cleaning or prep, your texture won’t stick and will flake off sooner than you expect.
Don’t apply texture over dust, grease, loose paint, or mold. You should wash, sand, and patch imperfections, then remove residues and let surfaces dry.
Skipping these steps causes poor adhesion, visible failures, and extra repairs—so prep thoroughly before texturing.
Over-priming or under-priming (coverage errors)
When you misjudge primer coverage—either slathering on too much or skimping—you’ll create problems that show up quickly in the texture coat.
If you over-prime, texture may not adhere or will slip, hiding depth and causing peeling. If you under-prime, absorbent spots will suck up texture, leaving uneven color and bond failures.
Aim for even, manufacturer-recommended coverage and test a small area first.
Best Practices and Pro Tips for Long-Lasting Textured Walls
To get textured walls that last, you’ll want to control temperature and humidity so primers and texture cure properly.
Use the right tools and steady techniques for even primer coats and consistent texture patterns.
Also match your primer’s tint and sheen to the texture material so color and finish stay uniform over time.
Ideal environmental conditions (temperature, humidity)
Although paint and texture can cure in a range of conditions, you’ll get the best, longest-lasting results by working in a stable environment: aim for 50–77°F (10–25°C) and relative humidity between 40–60%.
Avoid extreme cold, heat, or high humidity that slow curing or cause blistering and adhesion issues.
Use fans and dehumidifiers when needed, and delay textured work during rapid temperature swings.
Tools and techniques for smooth priming and consistent texture

Stable temperature and humidity give you the best chance for a flawless finish, but your tools and technique make that finish last.
Use high-quality rollers and brushes, a consistent nap length, and a clean, properly mixed primer. Work in overlapping strokes, maintain wet edges, and sand lightly between coats.
Clean tools promptly and replace worn rollers to keep texture uniform and durable.
Matching primer to texture material for color and sheen consistency
Wondering how to avoid visible seams and sheen differences once you texture?
Match primer to your texture: use a tinted primer when texture adds depth, and pick primer with similar sheen—matte for flat textures, eggshell for subtle luster.
Test a small patch, let it dry, then inspect under different light. Consistent color and sheen prevent patchy appearance and make paint coverage uniform.
Cost and Time Considerations
You should weigh the upfront costs of primer and labor against the savings of skipping it—primer and application add material and time but can prevent costly rework.
Skipping priming may save money initially but can lead to patching, adhesion failures, or extra coats later that eat into your budget.
Also consider that priming adds prep time now but often shortens overall project time by reducing mistakes and touch-ups.
Rough cost comparison: priming vs. skipping (materials and labor)
If you skip priming, you’ll save on primer and labor up front, but that economy can be misleading once you factor rework and texture adhesion issues; priming typically adds material cost ($15–$30 per gallon for good-quality primer) and about an extra hour or two of labor per room, while skipping it can cut immediate costs by roughly 10–20% yet raise the risk of failures that cost far more to fix.
| Option | Outcome |
|---|---|
| Prime | Higher upfront cost |
| Skip | Lower immediate cost |
| Prime | Better adhesion |
| Skip | Higher rework risk |
| Prime | Long-term saving |
Time impacts: additional prep time vs. potential rework
Beyond the money, time plays a big role in the priming decision: priming adds an hour or two of prep per room for application and drying.
But skipping it can invite texture adhesion problems that eat up far more hours in repairs.
You’ll save short-term time by skipping primer, but risk sanding, patching, and retexturing that extend the project and disrupt schedules.
Real-World Scenarios and Recommendations
If your wall has fresh latex paint, you can usually texture without priming after a light scuff and cleaning.
If it’s glossy enamel, you’ll want to sand and prime to guarantee the texture adheres.
For stained or damaged walls, you’ll need to repair, seal stains, and prime before texturing.
Scenario A: Fresh latex paint recommended approach
When you’re working with fresh latex paint—dried for at least 24–48 hours—prime usually isn’t necessary before applying a texture, but you should check the paint’s sheen and surface dust first.
If the surface is clean, matte or eggshell, and fully cured, go ahead with your chosen texture.
Lightly scuff high spots, remove dust, and test a small area to confirm adhesion.
Scenario B: Glossy enamel paint recommended approach
The guidance for fresh latex doesn’t always apply to glossy enamel finishes, so you’ll need a different approach.
Sand glossy surfaces lightly with fine-grit paper to dull the sheen, clean thoroughly to remove grease, and apply a high-adhesion bonding primer specifically for glossy enamels.
That primer guarantees texture materials stick uniformly, prevents peeling, and saves time compared to skipping adhesion prep.
Scenario C: Stained/damaged wall recommended approach
Because stains and surface damage can bleed through or prevent texture from adhering, you should repair and seal affected areas before texturing.
Scrape loose material, fill holes with patching compound, sand smooth, then apply a stain-blocking primer or shellac-based sealer.
For water or smoke stains, treat the source first.
Once sealed and dry, texture adheres reliably and finish coats look uniform.
FAQ
You’ve got practical questions—like whether you can texture over oil-based paint without priming or how long to wait after priming—so let’s answer them clearly.
You’ll also learn if primer will change color or texture, when shellac primer is needed for stains, and whether tinted primer can cut down on texture coats.
Keep these FAQs handy as you plan your project.
Can I texture directly over oil-based paint without priming?
Wondering if you can texture directly over oil-based paint without priming? You generally shouldn’t.
Oil finishes resist adhesion, so texture compound may peel or crack. If the oil paint is aged, glossy, or intact, sand lightly and apply a bonding primer designed for slick surfaces.
That guarantees proper grip and long-lasting texture — skipping primer risks failures and extra repairs.
Will primer change the color or texture appearance?
Will a primer change how the color or texture looks once you finish?
Primer can slightly mute glossy finishes and deepen porous surfaces, so colors may read a bit richer or flatter depending on primer type.
It won’t alter texture markedly if you use a compatible primer; bonding primers keep texture true.
Always test a small area to confirm final appearance before full application.
How long should I wait after priming before texturing?
If a primer can subtly change how a finish looks, you’ll also want to know when it’s safe to apply texture so the bond and appearance hold up.
Wait until the primer is fully dry and cured—typically 1–24 hours for latex primers, longer for oil-based (24–48 hours).
Check manufacturer instructions and touch-test a discreet spot before texturing to guarantee adhesion.
Is shellac primer necessary for smoke or water stains?
When tackling smoke or water stains, you’ll usually want a stain-blocking primer—and shellac primer is often the most reliable choice because it seals tannins, odors, and heavy discoloration better than most latex or oil primers.
You don’t always need shellac, but for persistent stains it’s the safest bet. Apply it to bare or stained spots, let it fully dry, then texture.
Can I use tinted primer to reduce the number of coats of texture?
Curious whether tinted primer can cut down on how many texture coats you need? Yes — tinting primer toward your final texture color helps hide underlying paint variations, letting you apply fewer texture passes.
It won’t replace proper surface prep or heavy textures, though. Match tint closely, test a small area, and adjust; you’ll often save one light coat but not always eliminate extra work.
Conclusion Quick Decision Checklist
Use this simple flowchart-style checklist to decide whether you should prime or skip priming before texturing.
Check for glossy paint, stains, or repairs—if any are present, you’ll want to prime first; if the surface is matte, clean, and sound, you can usually skip priming.
Follow the quick yes/no steps and you’ll make a confident choice for your project.
Simple flowchart-style checklist for DIYers (prime vs. skip)
If you’re deciding quickly whether to prime painted walls before texturing, this checklist walks you through the key choices so you can act confidently—assess paint condition, sheen, previous repairs, and the texture product’s instructions to reach a clear yes-or-no.
Use this quick flow:
- Peel, flake, or bare patches? Prime.
- High-sheen or glossy? Prime.
- Good adhesion, flat sheen, and manufacturer allows skip? Skip.