How to Get Wall Texture After Patching for Seamless Repair
You can make a patched wall disappear by matching the texture, feathering edges, and blending paint to the surrounding surface. First identify the texture type and scale, then prep and fill with joint compound or spackle. Recreate the pattern with the right tool — sponge, brush, roller, or spray — and feather out thinly. Sand only if needed, prime, then paint to match sheen. Follow step-by-step tips and practice drills to get a flawless finish.
What This Guide Will Teach You
Before you start, know exactly what you’ll learn here: how to identify the existing wall texture, choose the right patching materials and tools, match or recreate the texture, and finish the repair so it blends seamlessly with the surrounding surface.
You’ll get clear Texture Techniques, stepwise guidance on matching tone and pattern, and tips for Seamless Blending so your repair disappears into the wall.
Quick Match: A 3-Step Repair Workflow
You’ll gather the right materials and tools first so you can work cleanly and efficiently.
Next, you’ll apply texture and blend and feather the edges to make the repair disappear.
Finally, you’ll inspect and touch up until the finish matches the surrounding wall.
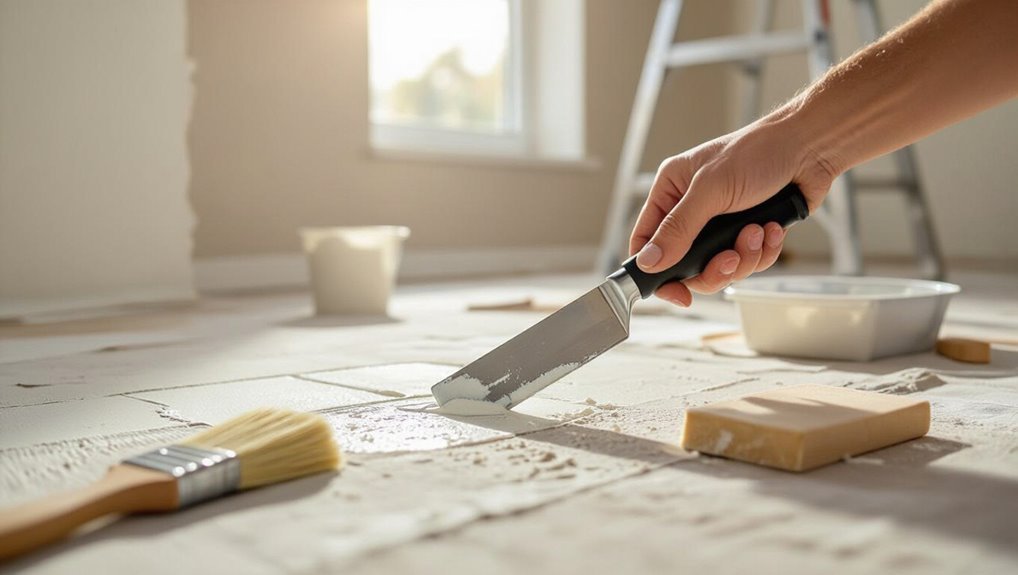
Materials And Tools
Grab three core items and you’ll cover most small wall-patch jobs: a quality joint compound or spackling, a finishing putty knife (2–6 inches depending on hole size), and a sanding block with medium-to-fine grit. Focus tools selection and material types for efficiency.
| Item | Purpose |
|---|---|
| Joint compound | Fills and textures |
| Putty knife | Applies compound |
Blend And Feather
When you’re ready to blend and feather, work wet edges into the surrounding wall so the repair disappears at eye level.
You’ll use feathering techniques to thin the compound outward, matching texture with light taps or strokes.
Apply blending methods to soften connections, inspect from various angles, then sand sparingly once dry to preserve texture while erasing visible seams for a seamless repair.
Tools for Matching Wall Texture
You’ll need the right tools to get a seamless texture match, from spray texture equipment for larger areas to hand tools for fine-tuning.
I’ll cover the common spray rigs and nozzles, plus the trowels, knives, and brushes that help you mimic the original finish.
With the right accessories and a bit of practice, you’ll reproduce the texture without it standing out.
Tools For Texture Application
Matching wall texture after a patch takes the right tools, and having them organized before you start will save time and frustration.
Gather hawk, trowel, knives, sponge float, brushes, and rollers suited to texture application techniques. Include various nozzle tips, mixing paddle, and buckets.
Practice texture matching methods on scrap drywall so you can apply consistent pressure and speed for seamless results.
Spray Texture Equipment
Once you’ve got your hand tools laid out and practiced, it’s time to move to spray equipment for larger or stippled textures.
You’ll choose compressors, hopper guns, and compatible spray nozzles to replicate texture patterns quickly. Match pressure and nozzle size, test on scrap, and adjust for viscosity.
- Compressor with regulator
- Hopper gun options
- Assorted spray nozzles
- Test panels
Hand Tools And Accessories
A few key hand tools and accessories will let you recreate most common wall textures after patching: varying taping knives and putty knives for feathering edges, a hawk or mud pan to hold compound, texture brushes and combs for patterns, and a selection of sanding blocks and abrasive pads for final blending.
Choose hand tool types, texture rollers, spray guns alternatives, mixing tools, repair accessories, blending tools, application techniques, safety gear, and proper surface preparation.
Materials: Joint Compound, Spackle, and Texture Spray
To get a seamless patch, you’ll want the right materials: joint compound for feathering and filling, spackle for small repairs, and texture spray for recreating surface patterns.
You’ll choose joint compound types for speed or finish, and focus on spackle application technique.
Consider these essentials:
- All-purpose vs. lightweight compound
- Quick-setting options
- Latex spackle tips
- Texture spray nozzle choices
Inspect Texture: Identify Type, Scale, and Application Method
Before you start matching texture, take a close look at the existing surface so you can identify the pattern, scale, and how it was applied. You’ll perform texture analysis to note size and direction, then compare application techniques to replicate results. Use the table to record quick observations.
| Feature | Notes |
|---|---|
| Pattern | |
| Scale | |
| Application |
Prep the Patched Area for Blending
Now that you’ve identified the texture pattern, scale, and application method, prep the patched area so the new texture will blend seamlessly.
You’ll focus on patch preparation and blending techniques: clean dust, sand smooth, remove loose edges, and apply primer.
Follow these steps:
- Clean area with damp cloth
- Sand to keyed surface
- Vacuum and tack cloth
- Apply compatible primer for adhesion and uniform absorbency
Feather Edges for a Seamless Transition
When you feather the patch edges, you’re smoothing the blend so the new texture disappears into the existing wall; use a wide drywall knife or trowel and apply thinner coats as you step outward, gradually reducing compound thickness until it matches the surrounding surface.
Practice feathering techniques by overlapping light passes, sanding lightly between layers, and checking in different light to achieve seamless finishes.
Mix Joint Compound to the Right Consistency
Mix the joint compound to a creamy, lump-free consistency that’s easy to spread but won’t sag off vertical patches; aim for something like thick pancake batter—smooth enough to knife out thin, but tacky enough to hold texture and feathering.
You’ll control mixing ratios and application techniques by testing and adjusting:
- Start with measured water
- Whisk thoroughly
- Check tack and flow
- Re-mix briefly before use
Thin or Thicken Premixed Texture Correctly
If your premixed texture is too thick or thin, adjust it gradually—add small amounts of water to thin or a bit more compound to thicken until you get close.
Test the texture by spraying or dabbing onto a scrap piece of drywall or cardboard to see how it lands and dries.
Keep tweaking in small increments until the spray or dab pattern matches the surrounding wall.
Adjust Consistency Gradually
Start by testing a small amount of premixed texture so you can see how it behaves on your wall — you’ll want a creamy, spreadable consistency that holds peaks without sagging.
You’ll make texture consistency tweaks with gradual adjustments:
- Add water teaspoon-wise for thinning
- Fold in dry mix for thickening
- Mix slowly to avoid air
- Re-test until match
Test Spray Or Dab
Once you’ve got a workable batch, test the texture on a scrap piece or an inconspicuous wall spot by spraying or dabbing—this tells you instantly whether it needs thinning or thickening.
Use your spray technique first; if it splatters or drips, thin slightly.
Dab with a sponge to check body; if it won’t hold peaks, thicken a bit.
Repeat until texture consistency matches.
Test Texture Samples on Scrap Board
Mix several texture mixes on a scrap board and apply small test patches so you can compare how they actually look when they dry.
You’ll evaluate texture types and use sample boards for realistic testing techniques.
Note blending methods and adjust consistency to match the wall.
Try:
- thin knockdown
- heavy orange peel
- fine popcorn
- light skip trowel
Using a Sponge to Mimic Texture Patterns
If you want a quick, controllable way to reproduce subtle wall textures, using a sponge gives you both speed and variation without special tools.
You press, dab, and lift to build texture patterns that match surrounding finishes. Use a torn natural sponge, practice the sponge technique on scrap, vary pressure and angle, blend edges, and work small areas for consistent results.
Using a Brush or Broom for Directional Textures
After you’ve practiced sponge patterns, try a brush or broom to create directional textures that match combed or dragged finishes.
You’ll control stroke length and pressure to blend patches seamlessly using brush techniques and broom applications.
Try these approaches:
- Light, short strokes for subtle combing
- Longer pulls for pronounced drag effects
- Vary pressure to match surrounding texture
- Clean tools to avoid glaze buildup
Using a Roller to Create Orange Peel Effects
Pick a roller with the right nap for orange peel — usually a 3/8″ to 1/2″ synthetic cover — so you’ll get the right droplet size.
Thin your texture or paint slightly and test the consistency until it sprays and leaves small bumps without running.
Roll with consistent pressure and overlapping passes to keep the texture even across the wall.
Choosing The Right Roller
1 good roller can make or break your orange peel texture, so choose one with the right nap length and material for your wall and compound.
You’ll match roller types to desired texture patterns and surface roughness. Consider these options:
- Short nap for light, fine orange peel
- Medium nap for standard walls
- Long nap for rough surfaces
- Synthetic for easy cleanup
Adjusting Paint Consistency
When you’re aiming for an orange peel finish, thin your paint or joint compound just enough so it flows through the roller without running—too thick and the peaks won’t form, too thin and the texture will collapse.
Check paint viscosity with a small test, adjusting slightly to balance coverage and texture uniformity.
Work in small sections, rechecking consistency as you go.
Technique For Even Texture
Although the trick looks simple, getting an even orange-peel texture with a roller takes steady motion and controlled pressure: you’ll practice texture matching and master repair techniques by following steps and adjusting as you go.
- Choose correct roller nap
- Thin compound for spray-like consistency
- Maintain consistent wrist motion
- Feather edges lightly to blend
Recreating Orange Peel Texture by Hand
Start by gathering the right tools and materials so you can recreate orange peel texture by hand without guessing.
Mix a thin compound, practice orange peel techniques on scrap drywall, then apply with a spray bulb or stipple brush.
Work from patched area outward for seamless texture blending. Feather edges, vary pressure for matched splatter, let dry, and sand lightly to finish.
Repair and Retexture Knockdown Walls
When you’re fixing a knockdown wall, start by matching the spray pattern and the knife pressure so the new texture blends with the old.
Feather the patch edges thinly with joint compound and smooth gradations so the knockdown effect reads consistently.
Test on a scrap board and adjust your spray distance and knockdown timing before touching the wall.
Matching Knockdown Texture
If you’ve patched a knockdown-textured wall, getting the repair to disappear means matching both the texture pattern and the paint sheen so the spot blends seamlessly with the surrounding surface.
You’ll focus on knockdown characteristics and texture consistency, then:
- Match compound thickness
- Recreate blade pressure and angle
- Feather the applied texture edges
- Use identical paint sheen and finish
Feathering Patch Edges
After you’ve matched the compound thickness and recreated the knockdown blade pattern, feathering the patch edges will make the repair disappear into the surrounding texture.
You’ll blend outward with a damp sponge and wide knife, using feathering techniques to thin connections. Focus on subtle edge smoothing, light pressure, and short strokes.
Let each pass dry slightly, then inspect and touch up until the seam vanishes.
Use a Knockdown Knife to Finish Knockdown Texture
Grab a knockdown knife and glide it across the wet texture to flatten the peaks and create the signature mottled look; you’ll work at a shallow angle and pull steadily so the knife lightly drags the long ridges into softer islands.
Use proper knockdown techniques and aim for texture consistency.
- Hold knife at 10–20°
- Work in overlapping passes
- Keep compound wetness even
- Practice pressure control
Choose the Right Technique for Popcorn Ceilings
One key choice you’ll make is whether to repair the popcorn ceiling in place, skim-coat the whole surface, or remove the texture entirely; each option depends on damage level, ceiling height, and whether the original material contains asbestos. You’ll weigh popcorn ceiling techniques and texture repair options, balancing time, cost, and finish.
| Option | Time | Finish |
|---|---|---|
| Repair | Low | Patchy |
| Skim-coat | Medium | Smooth |
| Remove | High | Clean |
Repair Popcorn Ceilings Safely (Asbestos Considerations)
Before you touch a popcorn ceiling, you should test for asbestos if your home was built before the 1980s, because disturbing it can release dangerous fibers.
If tests are positive or you’re unsure, follow wet methods, minimize scraping, and wear proper PPE to reduce risk.
For large areas, positive results, or any doubt, hire licensed professionals who can remove or encapsulate the material safely.
Test For Asbestos
Worried your popcorn ceiling might contain asbestos? You should arrange professional asbestos testing before any repair and follow safety precautions.
Don’t sample yourself unless trained. Steps to proceed:
- Hire a certified lab for a bulk sample
- Keep area sealed and undisturbed
- Wear minimal contact clothing until pros arrive
- Notify occupants and avoid airflow disturbances
Safe Work Practices
If your popcorn ceiling has been confirmed or is suspected to contain asbestos, take strict safety measures and don’t try to remove or sand the texture yourself.
Instead, secure safety gear and protective eyewear, maintain proper ventilation, and isolate hazardous materials.
Keep workspace organization tight, practice ladder safety and ergonomic techniques to reduce strain, and have first aid ready in case of accidents.
When To Hire Professionals
When you suspect a popcorn ceiling contains asbestos or the patching job risks disturbing textured material, hire a licensed asbestos abatement or drywall specialist rather than tackling it yourself. They’ve got the training, containment equipment, and disposal protocols to keep you and your home safe.
You’ll need a professional assessment and texture expertise to decide next steps:
- confirmed asbestos testing
- containment setup
- safe removal or repair
- certified disposal
Replicate Heavy Stomp or Slap Brush Textures
Heavy stomp and slap brush textures give patched walls bold, pronounced patterns that can hide imperfections and match existing finishes. You’ll create them by applying slightly thicker joint compound and using controlled, rhythmic impacts with a stomp brush or stiff-bristled brush to form raised peaks and arcs.
Practice stomp brush techniques and experiment with slap texture variations, tapping rhythm, compound thickness, and brush angle for consistent results.
Match Subtle Stipple and Clay-Like Textures
To match subtle stipple and clay-like textures after patching, start by studying the surrounding finish so you can recreate its scale and softness. You’ll use a thin, slightly thinned joint compound and a soft, wide brush or sponge to build gentle peaks and rounded valleys with light, randomized dabbing motions.
- Test on scrap drywall for subtle texture
- Thin for clay application consistency
- Use randomized, light dabs
- Feather edges to blend seamlessly
Blend Multiple Passes for Complex Textures
Start by planning your layer order so the heavier base textures go down first and finer details sit on top.
Time your variations by letting each pass set just enough to hold shape before adding the next, and use feathering strokes between passes to blend edges smoothly.
That approach keeps shifts natural and prevents obvious seams.
Layer Order Strategy
When you blend multiple texture passes, plan the order so each layer builds on the previous one: lay down broad base textures first, add mid-level details next, and finish with fine highlights or stippling to sell depth and variation.
You’ll choose layer types and adjust texture applications for each pass. Consider sequence tips:
- Base skim coat
- Mid coarse knockdown
- Fine stipple or spray
- Light feathering blend
Texture Variation Timing
Although you’ll layer textures over several passes, timing each application matters as much as technique—you should vary drying intervals and tool pressure so each coat reads differently and the seams blend naturally.
You’ll plan texture application in stages, using timing techniques to pause or speed curing, alternate tools, and adjust pressure. That controlled rhythm creates depth without overworking or muddying the finish.
Feathering Between Passes
Because each pass changes the surface subtly, you’ll feather the edges to blend layers so the texture reads as one continuous field rather than stacked rings.
You’ll use feathering techniques and blending methods to match pattern, pressure, and timing. Practice small areas, then expand.
Tips:
- Vary tool angle
- Lighten pressure at edges
- Overlap passes by 30%
- Work while compound is damp
When to Use Spray Texture and How to Select the Nozzle
If your patch covers a large area or you want a quick, consistent finish, you’ll reach for a spray texture rather than a hand-applied method. You’ll use spray application techniques and follow nozzle selection tips: pick wider nozzles for heavy coverage, smaller for fine texture. Test on scrap, adjust distance and pressure.
| Nozzle Type | Best Use |
|---|---|
| Wide | Heavy coverage |
| Fine | Light texture |
Thin or Adjust Texture Spray for Scale and Coverage
You’ll want to fine-tune the spray nozzle to control the pattern and scale so the patch matches the rest of the wall.
If the texture looks too heavy or clumpy, thin the mixture slightly and test on a scrap board until the coverage and droplet size match.
Keep notes on nozzle setting and thinning ratio so you can replicate the result across the repair.
Adjust Spray Nozzle
Start by dialing in the spray nozzle to match the patch size and desired texture—thinner tips concentrate the spray for small repairs, while wider orifice settings spread material for larger areas or coarser textures.
You’ll adjust nozzle settings to control pattern, using spray techniques that match surrounding texture.
Tips:
- Test on scrap
- Vary distance
- Keep consistent speed
- Clean nozzle between passes
Thin Texture Mixture
Match the texture mix to the scale and coverage you need by thinning the compound until it sprays and levels like the surrounding finish.
You’ll test small patches, adjust water or additive slowly, and judge texture consistency visually.
Use controlled application techniques, maintain nozzle distance, and blend edges while material is wet.
Stop thinning once spray forms the same peaks and valleys as the wall.
How to Sand (Or Avoid Sanding) Textured Patches
When your patched area has texture, decide whether to sand or blend it in based on the texture type and how visible the repair will be; light, fine textures often require only feathering while heavy or stippled patterns usually need careful sanding and reapplication to match.
Match sanding to texture and visibility: feather light finishes, sand and reapply heavy or stippled areas for seamless repairs.
Use proper sanding techniques and patch preparation to avoid damage.
- Test a small area first
- Use fine-grit paper
- Feather edges gently
- Reapply sparingly
How Long to Wait Between Texture and Paint?
After you’ve sanded or feathered the patch to blend with the surrounding texture, give the new compound time to fully cure before painting—usually 24 to 72 hours depending on the product, layer thickness, humidity, and temperature.
Check manufacturer drying time and verify surface feels dry. Waiting improves paint adhesion and prevents peeling or bubbling.
If unsure, err on the longer side for best results.
Prime Patched Texture for Uniform Paint Absorption
Because fresh joint compound and surrounding paint absorb differently, you should prime the patched area before repainting so the finish goes on evenly.
Use primer to seal and balance porosity, applying texture absorption techniques and uniform paint strategies. Choose a stain-blocking primer, feather edges, and sand lightly.
- Shellac or latex primer
- Thin even coats
- Dry between coats
- Sand and tack before topcoat
Match Paint Sheen and Color Over Textured Patches
When you repaint a patched, textured area, matching the paint sheen is as important as the color to avoid visible spots.
Use the same finish (flat, eggshell, satin, etc.) as the surrounding wall so light reflects consistently.
Feather your brush or roller strokes and blend color tones at the edges to hide shifts.
Match Paint Sheen
Matching the paint sheen is as important as matching color, since sheen affects how light hits the patch and can make a perfectly colored repair stand out.
You’ll do a quick sheen comparison of finishes and choose paint types that match. Check these steps:
- Inspect original finish under natural light
- Test samples on spare drywall
- Dry before judging sheen
- Use matching finish paint can labeling
Blend Color Tones
If you want the repaired area to disappear, blend both color tones and sheen so light reads the patch the same as the surrounding wall.
Test color matching on a small textured scrap, allow dry time, and observe tone variation under different lighting. Adjust pigment or mix small batches until the patch matches.
Feather edges and use the same sheen for seamless integration.
Camouflage Small Repairs With Quick Touch-Ups
Anyone can hide small wall repairs quickly with a few targeted touch-ups that blend texture and paint.
You’ll use texture blending and simple repair techniques to match surrounding finish, feather edges, and repaint.
Follow these steps:
- Clean and sand the patch
- Apply matching texture with a sponge or brush
- Feather joint compound thinly
- Spot-prime, then blend paint with light cross-strokes
Match Texture on High Ceilings and Hard-to-Reach Areas
Small touch-ups work well on low walls, but high ceilings and hard-to-reach spots call for a different approach.
Use extension poles, scaffolding, or a stable ladder and practice your high ceiling techniques on scrap drywall.
Match spray patterns and pressure, blend edges with a soft brush, and consider hard to reach solutions like telescoping tools or a helper to steady equipment for safer, consistent texture.
Estimate Time and Cost for a Texture Repair Job
A realistic estimate for a texture repair job hinges on three things: the size of the repair area, the type of texture you’re matching, and how accessible the spot is—expect a 30-minute patch to a several-hour job for larger or hard-to-reach areas.
Use time estimation and cost analysis to plan:
- material costs (compound, primer, paint)
- labor minutes needed
- tool rental or purchase
- cleanup and drying time
DIY vs. Hiring a Pro: Decision Criteria and Red Flags
Decide whether your skill level matches the texture technique required—simple knockdown or orange peel can be DIY, but complex matching takes practice.
If you see large cracks, water damage, uneven substrate, or previous poor repairs, that’s a warning sign to hire a pro.
Don’t start the job if you’re unsure you can blend the texture invisibly or if mistakes will cost more to fix.
Skill Level Needed
You can often handle minor patching and simple texture matching yourself, but know when the job needs a pro: if the patch is large, the texture pattern is complex, or you lack the tools and time, hire someone.
Use beginner techniques for small repairs; reserve advanced methods for tricky surfaces.
- Assess tools available
- Match texture scale
- Practice on scrap
- Budget time realistically
Warning Signs To Hire
If the repair looks bigger or more complex than you first thought, call a pro—it’s cheaper than fixing mistakes.
Watch for Warning Signs: large cracks, water damage, uneven substrate, or failed previous patches.
If you lack tools, time, or confidence, consider Hiring Professionals.
They’ll assess structural issues, match texture, and prevent costly rework, saving time and stress.
Document Texture Type and Repair Steps for Later Touch-Ups
Because textures vary so much, record the exact type and every repair step as you finish the patch so you can match it later.
You’ll want a clear texture documentation and repair checklist to save mix ratios, tools, timings, and finish. Keep notes and photos.
Useful items to log:
- texture type and grain
- material mix and proportions
- tools and application method
- drying time and sanding steps
Common Mistakes That Make Patches Obvious: And Fixes
When patches stand out, it’s usually from a few predictable mistakes you can avoid: mismatched texture, wrong finish sheen, improper feathering, or uneven paint blending.
Check texture match, sand feather edges, and match sheen to reduce patch visibility.
Use proper blending techniques—thin coats, stippling or skim coats—and let layers cure before repainting so repaired areas disappear into the surrounding wall.
Troubleshooting: Texture Looks Different After Painting
Patching techniques like feathering and matching sheen help hide repairs, but paint can still change how texture reads.
You’ll check surface prep and timing to restore texture consistency and guarantee paint adhesion.
- Inspect primer coverage and sanding
- Match paint type and sheen
- Apply thin, even coats
- Use same spray or roller technique
Adjust as needed to blend repairs seamlessly.
Troubleshooting: Texture Crumbles or Falls Off-Solutions
If your texture is crumbling or falling off after repairs, you’ll want to act quickly to prevent further damage and rework.
Check for poor texture adhesion by tapping and inspecting the substrate. Remove loose material, clean dust, and apply a bonding primer.
Use proper repair techniques—thin layers, correct drying times, and feathered edges—to guarantee the new texture bonds and lasts.
Troubleshooting: Visible Seams After Texture-Blend Fixes
Loose or flaking texture is one problem; seams that show after you’ve blended new texture into old are another and they stick out visually even when the patch itself is sound.
You’ll troubleshoot seam visibility by refining texture blending and surface prep:
- Feather edges thinly
- Match spray pattern or hand technique
- Sand lightly after drying
- Reapply very thin skim coats where needed
Recommended Products and Brands Pros Use
One reliable approach is to choose pro-grade materials that match your job’s scale and finish—contractors commonly reach for lightweight joint compounds for skim coats, all-purpose setting compounds for deep fills, and aerosol texture sprays for spot matching.
You’ll want texture brands favored in professional recommendations, concise product comparisons, clear application techniques, consistent texture consistency, and compact repair essentials to finish seams seamlessly.
Safety Tips for Ceilings and Texture Sprayers
Matching the right products is only half the job—you also need to protect yourself and your surroundings when working overhead with ceilings and texture sprayers.
Follow safety guidelines for ventilation, eye and respiratory protection, and secure ladders during texture application. Keep a clean work area and cover furniture.
- Wear N95 or better mask
- Use safety goggles
- Stabilize ladders
- Protect floors and vents
Practice Drills to Master Common Texture Techniques
Because mastering texture takes repetition, set up short, focused drills that let you practice spray patterns, brush strokes, and knockdowns until they feel natural. You’ll build texture techniques, refine common methods, and accelerate texture mastery. Use practice drills to develop blending skills and repair strategies, timing, pressure, and tool angles while testing on scrap board before touching patched walls.
| Drill | Focus | Goal |
|---|---|---|
| Spray | Pattern | Consistency |
| Brush | Strokes | Variation |
| Knockdown | Timing | Smoothness |
| Blend | Edge | Seamless |
| Finish | Inspection | Confidence |
When to Refinish an Entire Wall or Ceiling for a Cohesive Look
When should you refinish the whole wall or ceiling instead of spot-patching?
You should refinish when uneven textures, faded paint, or multiple patches disrupt cohesive patterns and wall aesthetics.
Choose full refinish if damage is widespread, patterns misalign, repairs are numerous, or lighting highlights inconsistencies.
- damage is extensive
- pattern mismatch
- many scattered repairs
- lighting reveals flaws
Frequently Asked Questions
Can Humidity Affect Texture Drying and Final Appearance?
Yes — humidity effects drying time and texture consistency; you’ll notice slower drying, sagging or uneven finish in high humidity and quicker, brittle results in low humidity. You’ll want to control moisture for predictable, consistent texture outcomes.
How to Match Texture on Painted Wallpaper or Textured Paint?
You’ll blend texture application techniques and use matching tools like rollers, brushes, or stipple sponges to replicate the pattern, test on scrap, adjust compound viscosity, feather edges, then prime and repaint to conceal differences seamlessly.
Will Textured Patches Hide Uneven Drywall Joints Long-Term?
Studies show up to 30% of repairs reappear within a year; you’ll need proper patch durability and taping to prevent that. You’ll reduce joint visibility long-term if you prep, apply reinforcement, and finish correctly.
Are There Eco-Friendly Texture Products for Sensitive Occupants?
Yes — you can choose eco friendly options like low‑VOC joint compounds, clay or lime plasters, and natural fiber texture mixes; you’ll follow gentle texture application techniques and ventilation to protect sensitive occupants and indoor air quality.
Can Texture Be Repaired Under Wallpaper Without Removal?
Yes — you can repair texture under wallpaper if you test texture adhesion first; you’ll need compatible materials and guarantee wallpaper compatibility, use thin skim coats or injectable fillers, and let adhesives fully cure before reapplying finishes.
Conclusion
You’ve learned the steps to blend new repair into old texture—now it’s time to act. Like a conductor cueing the final chord, you’ll match scale, pressure, and timing so the patched note disappears into the wall’s song. Trust your tools, practice the strokes, and step back often to read the surface. With patience and a steady hand, your repair will vanish, leaving the room’s quiet rhythm uninterrupted and whole.