How to Texture Walls With Spackle for Diy Finishes
You can texture walls with spackle using simple tools and steps: prep and clean the surface, apply a thin base coat, then work small sections with a knife, trowel, brush, or roller to create knockdown, skip-trowel, orange-peel, or swirl effects. Let layers dry fully, sand lightly for highlights, prime, and choose an appropriate paint sheen. Use lightweight spackle for quick fixes and heavier formulas for deeper texture. Keep going to learn tips on tools, timing, and finishes.
Who This Guide Is For and What You’ll Learn
This guide is for DIYers, renters, and homeowners who want to fix or create textured walls without hiring a pro.
You’ll learn how DIY enthusiasts improve wall aesthetics through proper surface preparation, understand texture variety and spackle benefits, and get beginner tips on application techniques.
Expect guidance on creative finishes, current design trends, and practical wall upgrades you can tackle confidently.
Quick Start: Can You DIY Spackle Texture?
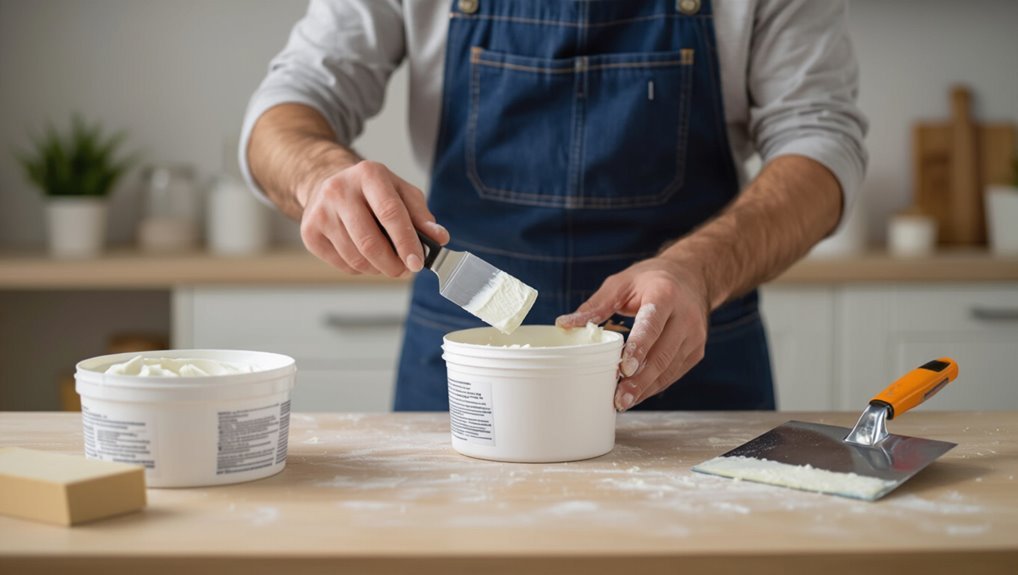
Yes—you can DIY spackle texture with just a few basic tools and materials like spackle, a putty knife, sanding block, and drop cloth.
Start by prepping the wall, apply spackle in thin layers, and use your knife or a texture tool to create the desired pattern.
With patience and simple technique steps, you’ll get professional-looking results without specialized equipment.
Tools And Materials
Before you start, gather the right tools and materials so you don’t get halfway through the job and have to stop.
You’ll need spackle, mixing tools, various knives, trowels, hawks, sanding blocks, drop cloths, primer, and paint.
Choose items that suit your spackle applications and desired texture variations.
Proper tools support DIY techniques and improve wall aesthetics while saving time.
Basic Technique Steps
Now that you’ve gathered your tools and materials, you can start applying spackle to create the texture you want.
Work in small sections: spread a thin base coat, then add peaks or swirls with a trowel or knife.
Vary pressure and angle for different spackle techniques.
Let dry, sand lightly for highlights, and prime before painting to enhance wall aesthetics.
What Is Spackle Wall Texturing?
Spackle wall texturing is a simple technique where you apply and shape spackle to create patterns or a uniform finish on drywall.
You’ll use small trowels, knives, brushes, or rollers to build texture.
It highlights spackle benefits like fast-drying convenience and easy repairs while offering varied texturing techniques for subtle or bold effects.
You control depth, rhythm, and final look.
When to Choose Spackle vs. Joint Compound or Plaster
After you’ve gotten comfortable shaping spackle for texture, you’ll want to decide whether it’s the right material for the job compared with joint compound or plaster. You’ll choose spackle for quick fixes and small textures—spackle benefits include fast drying and low shrinkage. For large areas, consider joint compound comparison: it’s easier to blend and sand; plaster suits structural, durable finishes.
| Material | Best Use | Dry Time |
|---|---|---|
| Spackle | Small textures | Fast |
| Joint Compound | Large areas | Moderate |
| Plaster | Durable finishes | Slow |
Tools and Materials for Spackle Textures
One set of basic tools will get you almost any spackle texture you want: a variety of putty knives (1–6 inches), a hawk or mud pan, several texture brushes or rollers, and a sanding block for light feathering.
You’ll also want mixing sticks, drop cloths, gloves, and a spray bottle. These let you control spackle application and achieve different texture styles cleanly and efficiently.
Choose the Right Spackle for Your Walls
You’ll want to know the main spackle types—ready-mix, powder, and lightweight—so you can pick one that suits your texture technique.
Match the spackle to the wall material and the size of the repair or texture job for best adhesion and finish. Choosing the right product upfront saves time and prevents rework.
Spackle Types Explained
Picking the right spackle makes repairs easier and gives a cleaner finish, so start by matching the product to the job: lightweight spackles for small nail holes and fast drying, all-purpose or vinyl spackles for medium repairs, and polyester or epoxy fillers for large holes and structural fixes.
Know spackle types and choose one compatible with your planned texture finishes to guarantee adhesion and sanding behavior.
Match Surface And Job
Match the spackle to both the wall surface and the size of the repair so the material bonds properly and finishes smoothly.
You’ll pick lightweight spackle for small dings, setting or joint compound for larger holes, and exterior-grade for moisture-prone areas.
Check surface compatibility with drywall, plaster, or masonry, and choose a product that accepts your desired texture styles so sanding and blending stay predictable.
How Much Spackle Will You Need?
A little planning goes a long way when deciding how much spackle you’ll need: measure the total area of dents, holes, and seams, estimate depth, and convert that into a volume so you can buy the right amount. Use a spackle coverage calculation for estimating consumption and add 10–15% waste for sanding and touch-ups.
| Damage Type | Area (sq in) | Depth (in) |
|---|---|---|
| Small holes | 0–12 | 0.1–0.25 |
| Medium holes | 13–48 | 0.25–0.5 |
| Large patches | 49+ | 0.5+ |
Inspecting Drywall Before Texturing
Before you texture, closely inspect the drywall for loose tape, uneven joints, cracks, and remaining fasteners that could telegraph through the finish.
Walk the room, checking drywall types and seams, feeling for hollows or ridges.
Note variations in wall condition so you can adjust compound choice and technique.
Spot differences in wall condition so you can choose the right compound and adjust your technique accordingly.
Mark trouble spots clearly and plan targeted fixes before applying texture.
Clean and Repair Common Wall Damage First
Start by clearing dust, grease, and loose paint from the walls so your spackle will bond properly.
Perform a Wall Assessment to identify Damage Types and Common Issues.
Focus Surface Preparation before Repair Techniques like Fixing Cracks and Hole Patching.
Do Wall Cleaning, then repair.
- Fixing Cracks promptly
- Hole Patching for larger damage
- Smooth edges for better adhesion
Protect Floors, Trim, and Fixtures
Once the walls are clean and repaired, protect the surrounding surfaces so your spackle work doesn’t create a bigger mess.
Lay down durable floor covering and use drop cloths for surface safeguarding.
Cover floors with heavy-duty sheets and drop cloths to protect surfaces from spackle and dust.
Apply trim protection with painter’s tape and foam guards.
Secure fixture safety by wrapping or removing items.
Plan dust management and cleaning strategies as part of your protective measures during spackle application.
Tape and Mud Seams on New Drywall
Taping and mudding seams on new drywall is the step that turns a room of visible joints into a smooth, paint-ready surface. You’ll want to work methodically to get clean, flat results.
You’ll use proper taping techniques and consistent mud application, sanding between coats. Focus on joint placement, feathering, and avoiding ridges.
- embed tape smoothly
- apply thin coats
- sand and inspect
How to Mix and Thin Spackle for Techniques
After you’ve taped and mudded seams and the surface is smooth, you’ll need spackle mixed to the right consistency for the texture technique you plan to use.
Decide on mixing techniques: paddle or whisk for lump-free blend. For thinner glazes use measured thinning methods—add small water increments, stir, test on scrap, and adjust until the spackle holds shape yet spreads easily for your chosen texture.
Apply a Base Coat for Even Adhesion
Before you start texturing, make sure the surface is clean, dry, and free of loose paint or dust so the spackle will bond properly.
Apply a thin, even base coat with a wide knife or trowel, smoothing out tool marks while leaving enough texture for the topcoat to grip.
Work in consistent sections and feather the edges so the next layers adhere without creating visible seams.
Surface Preparation Steps
Because spackle bonds best to a consistent surface, apply a thin, even base coat to the entire wall so the texture will adhere uniformly.
Prepare by cleaning, repairing, and smoothing to eliminate surface imperfections and optimize wall adhesion.
Then:
- Remove dust and grease
- Fill gouges and holes
- Sand high spots smooth
Let the base coat dry fully before texturing.
Spackle Application Technique
Start by spreading a thin, even layer of spackle over the entire wall so the texture will stick uniformly. Use a wide drywall knife held at a shallow angle and work in overlapping passes to avoid ridges.
Let it set slightly, then choose spackle techniques that match your vision. You’ll float, drag, or dab to create consistent texture patterns before finishing and sanding.
Create a Smooth Skim Coat With Spackle
When you want perfectly smooth walls, apply a thin, even skim coat of spackle that fills minor imperfections and creates a uniform surface for paint or wallpaper.
Use proper skimming techniques to avoid ridges and address wall imperfections before sanding. Work quickly, feather edges, and sand lightly when dry.
- Feather edges
- Sand smooth
- Check for flaws
Make a Knockdown Texture With Spackle
Create a knockdown texture by applying a slightly thicker layer of spackle, then flattening the peaks with a wet knife to reveal a mottled, stucco-like finish.
You’ll work in small sections, misting lightly before dragging the knife to create blended patterns.
The knockdown technique gives subtle depth without heavy buildup, letting you achieve durable, attractive texture finishes with minimal sanding and quick drying times.
Create a Skip-Trowel Texture Step by Step
For a classic skip-trowel finish, you’ll apply medium-thick spackle in irregular, overlapping strokes with a taping knife, leaving thin ridges and shallow valleys that catch the light.
Use the skip trowel technique for subtle contrast and varied texture finishes. Work in small sections, feather edges, then sand lightly when dry.
Use skip-trowel strokes for subtle, varied texture; work small, feather edges, then sand lightly when dry.
- Practice pressure
- Vary stroke angle
- Blend seams
Make an Orange‑Peel Texture Using Spackle
Start by thinning spackle to a mayonnaise-like consistency so it sprays or rolls on in tiny droplets that form the characteristic dimpled surface.
Practice the orange peel technique on scrap drywall, adjusting viscosity and spray distance.
Apply evenly with a hopper gun or roller, keeping motion steady.
Let dry, lightly sand high spots, then prime and paint.
Proper spackle application guarantees uniform texture.
Do a Heavy Splatter/Popcorn Texture With Spackle
If you liked the subtle dimples of orange‑peel, try a heavier splatter or popcorn finish for more pronounced texture and sound‑dampening properties.
You’ll thin spackle to a splatterable consistency, load a hopper or brush, and apply quick flicks for volume. Focus on coverage, drying time, and spot blending.
Thin spackle to a splatterable consistency, load your hopper or brush, and flick quickly for volume — mind coverage, drying, and blending.
- prep surface
- adjust viscosity
- test spray patterns
Use heavy splatter techniques and popcorn texture methods.
Create Combed or Swirl Texture Patterns
When you want a decorative, tactile finish, combed and swirl textures give you controlled patterning by dragging tools through wet spackle to form repeating ridges or circular motions.
You’ll load a hawk or trowel, apply an even skim, then use a comb or brush to create combed patterns or a rounded brush or sponge to form swirl patterns.
Work steadily for uniformity.
Feather and Blend Texture at Edges and Corners
After you’ve laid in your combed or swirl patterns, you’ll need to feather and blend the texture where it meets corners, trim, and adjoining walls so the finish reads as one continuous surface.
Feather and blend texture at corners and trim so patterns flow seamlessly into one continuous surface.
You’ll use feathering techniques and careful corner blending to avoid ridges. Work outward, soften tool marks, and match pattern direction.
- lighten pressure
- overlap strokes
- check continuity
Drying Times: Between Layers and Before Painting
Because spackle’s drying rate depends on coat thickness, temperature, and humidity, you should let each layer dry fully before adding more or painting.
Check drying conditions—warm, low-humidity rooms speed cure. Thin coats typically feel dry in 1–2 hours; thicker ones may need 24.
Plan texture timing accordingly, testing a small area before priming or topcoating to avoid trapping moisture.
Sand Textured Walls Without Damaging the Pattern
When you sand textured walls, work gently along the raised edges to preserve the pattern.
Use a fine-grit sandpaper and light pressure to smooth high spots without flattening the texture.
Check your progress frequently so you can stop before the pattern gets damaged.
Preserve Pattern Edges
If you want to sand textured walls without blurring the pattern, work deliberately and use tools that let you control pressure and reach—small, focused strokes with a sanding sponge or fine-grit sanding block will remove high spots while leaving edges intact.
Use pattern preservation techniques and edge finishing tips to keep definition.
- Light, targeted passes
- Hold tool at shallow angle
- Inspect frequently
Use Fine-Grit Sandpaper
Choose a fine-grit sandpaper—220 to 320 grit—to gently smooth high spots without flattening the texture; hold it lightly and use short, controlled strokes so you remove only the peaks while preserving the pattern’s valleys and edges.
Use a light sanding technique, check surface smoothness frequently, and back off where texture reads flat.
Finish with a soft brush to clear dust before painting.
Repair Mistakes and Patch Small Texture Flaws
Small, fixable mistakes are normal—don’t panic; you can blend them into the surrounding texture quickly.
Small, fixable mistakes happen—stay calm and gently blend them into the surrounding texture.
Use quick repair techniques: feather edges, press spackle into low spots, and let it dry fully. Lightly sand and reapply tiny amounts until smooth.
Tips:
- Work small areas
- Match your tool motion
- Blend seams gently for texture matching
Match Existing Texture on a Patch or New Wall
Start by closely inspecting the existing texture pattern so you can replicate its size, rhythm, and depth.
Pick a spackle or joint compound that matches the texture type and drying time you need.
Then use the same application technique—trowel, brush, or spray—to blend the patch into the surrounding wall.
Assess Texture Pattern
Inspect the existing wall carefully to identify the texture pattern you need to match—note the scale (fine, medium, heavy), directionality (stipple, knockdown, swirl), and finish (smooth vs. peaked).
You’ll compare texture types and pattern options, then select tools and strokes to replicate them.
Consider:
- Tool shape
- Application speed
- Pressure and angle
Choose Spackle Type
When matching an existing texture or finishing a new wall, pick a spackle formulated for the job—lightweight, ready-mix spackles work well for fine textures and small patches, while heavier, topping compounds or setting-type spackles suit medium to heavy textures and larger repairs.
You’ll choose based on texture variety, desired spackle finishes, drying time, sanding ease, and paintability to guarantee a seamless patch.
Match Application Technique
To match an existing texture on a patch or create the correct finish on a new wall, first identify the texture pattern and pick an application method that duplicates its rhythm and depth.
You’ll use a knife or trowel for smooth or light knockdown, a brush or roller for stipple, and a hopper or brush combo for heavier orange-peel or popcorn styles.
Choose application tools, practice, then execute:
- Replicate pattern scale
- Match material thickness
- Blend edges seamlessly
Prime Textured Walls for Even Paint Coverage
Because textured walls absorb paint unevenly, you’ll want to prime them before you paint so the finish goes on smooth and consistent. You’ll improve paint adhesion and simplify surface preparation by using a stain-blocking or bonding primer, rolling into recesses, and allowing full dry time.
| Primer Type | Coverage | Dry Time |
|---|---|---|
| Bonding | High | 1–2 hrs |
| Stain-blocking | Medium | 2–4 hrs |
| Acrylic | High | 1–3 hrs |
Choose Paint Sheen for Textured Surfaces
Pick the right sheen for textured walls by balancing light reflection and surface concealment: flatter sheens hide imperfections and soften texture, while glossier sheens highlight raised patterns and are easier to clean.
You’ll consider paint finishes and texture compatibility when choosing sheen. Think about room use, maintenance, and desired visual depth.
Consider finish and texture together: match sheen to room use, maintenance needs, and the depth you want.
- durability
- cleanability
- visual contrast
Paint Textured Walls for Best Visual Results
Start by evaluating how light hits the texture and choose a painting approach that emphasizes the pattern without exaggerating flaws.
You’ll make color selection to complement room lighting, manage texture contrast by selecting matte or low-sheen finishes, and plan paint application—brush for crevices, roller for flats.
Aim for visual harmony across surfaces, blending edges and keeping coats even for a clean, consistent look.
Add Color Effects and Highlights to Textures
You can tint spackle with concentrated pigments or layer translucent glazes to give textured walls richer, more complex color.
Try subtle glaze washes to deepen crevices and make textures pop without hiding the relief.
For sharp highlights, use a drybrush with a lighter shade to catch raised areas and enhance contrast.
Choosing Pigments And Glazes
When you want your textured walls to pop, choosing the right pigments and glazes lets you add depth, color variation, and highlights without repainting the whole room.
You’ll consider pigment selection for tone control and test glaze application for translucence.
Use small test patches, match undertones, and adjust ratios.
- test patches
- match undertones
- tweak translucence
Highlighting With Drybrushing
Bring out your texture’s peaks and ridges with drybrushing, a quick way to add subtle color shifts and crisp highlights without covering the base coat.
You’ll load a dry brush sparingly, tap excess, then skim raised areas to catch edges.
Practice drybrush techniques on scrap, start light, and build contrast with careful color layering to enhance depth and natural wear.
Protect Textured Walls From Stains and Wear
Although textured walls add character, they also trap dirt and show wear more quickly than flat surfaces. Protecting them early will save time and touch-ups later. You’ll focus on texture maintenance and stain prevention: clean gently, seal properly, and avoid abrasive contact.
- Apply a clear sealer
- Use mild cleaners and soft brushes
- Add washable paint in high-traffic areas
Estimate Time and Cost for a DIY Spackle Job
Now that you know how to protect textured walls, plan how much time and money the spackle job will take so you don’t get caught off guard.
Calculate a cost breakdown: spackle, tools, sandpaper, and paint. Estimate labor per room and add contingency.
Use strict time management: schedule prep, drying, sanding, and touch-ups. Track receipts and adjust the budget as you go.
Adapting Techniques for Ceilings vs. Walls
When you move from walls to ceilings you’ll need to change how you prep surfaces, since ceilings often need more cleaning and stronger taping to prevent sagging.
Adjust your spackle angle and tool pressure so the compound adheres without dripping, and work in smaller sections to control application.
Expect longer drying times overhead and plan cleanup for falling crumbs and splatter.
Ceiling Preparation Differences
Because ceilings sit overhead and gravity works against you, preparing them for spackle-based texture takes a different approach than prepping walls.
You’ll need sturdier scaffolding, thicker spackle mixes, and attention to drips for consistent ceiling textures and durable ceiling finishes.
- secure solid overhead access
- use tack cloths to catch debris
- test small areas for drip control
Spackle Application Angle
Angle your knife deliberately: the tilt and pressure you use on ceilings must differ from walls to control gravity and prevent sagging. You’ll adjust angle and speed to suit spackle techniques and achieve consistent texture patterns. Practice shallow angles overhead; steeper angles work on walls. Compare motions below.
| Surface | Angle |
|---|---|
| Ceiling | Shallow |
| Wall | Steep |
| Corner | Vary |
| Edge | Light pressure |
Drying And Cleanup
After you’ve mastered knife tilt and motion, pay attention to how drying and cleanup differ between ceilings and walls.
You’ll use faster drying techniques on ceilings—heat and airflow—while walls tolerate slower cures. Adjust patience and tools, and choose safe cleanup methods for overhead work.
- Use fans and low heat
- Catch drips with drop cloths
- Clean tools immediately and upright
Adapting Spackle Textures for Plaster, Concrete, and Brick (Advanced)
When you move from drywall to plaster, concrete, or brick, you’ll need to adjust your spackle choice, surface prep, and application technique to match each material’s porosity and rigidity.
Plaster often needs a lighter skim coat and flexible compound. Concrete benefits from bonding primers and coarser mixes. Brick requires filling deeper voids and feathering carefully to preserve mortar lines.
Use spackle techniques emphasizing surface compatibility, choose primers, and test small areas before full application.
Safety: Ventilation, Masks, and Ladder Use
Working on plaster, concrete, or brick changes your technique, but it also raises safety concerns you can’t ignore—proper ventilation, respiratory protection, and stable ladder use keep you healthy and steady while you work.
Use ventilation tips, choose mask types for dust, and practice ladder safety. Keep workspace organization tight to prevent trips.
- Open windows and use fans
- N95 or P100 masks
- Secure ladder on level ground
Common Beginner Mistakes and How to Avoid Them
Don’t overwork the spackle or you’ll compact the texture and lose the effect you’re after.
Pay attention to consistent pressure on your knife or brush so the pattern stays even across the wall.
And let each layer fully dry before touching or recoating to avoid smudges and uneven finish.
Overworking The Spackle
Although you might think smoothing the spackle until it’s perfect will help, overworking it actually causes problems like visible ridges, air bubbles, and longer drying times.
You should stop once the spackle consistency is even and the desired texture patterns appear.
Tips:
- Apply lightly, avoid repeated passes
- Let initial layer set slightly
- Sand minimal areas only
Uneven Application Pressure
One common mistake is applying inconsistent pressure with your knife or trowel, which leaves some areas thin and others globbed with spackle.
You’ll create uneven surfaces if you push too hard in spots and barely skim others.
Practice steady pressure techniques: hold the blade at a consistent angle, use smooth, even strokes, and check frequently to blend changes for a uniform finish.
Ignoring Proper Drying
If you rush the drying process, you’ll trap moisture beneath the spackle and end up with cracks, peeling, or visible shrinkage once it cures.
You’re ignoring drying at your peril: common pitfalls reduce texture durability and surface adhesion.
Respect drying expectations and timing to avoid moisture effects and poor finish quality.
Tips:
- Wait fully between coats
- Control humidity
- Test hardness before sanding
Pro Tips to Speed Up the Job and Improve Finish
Work smarter, not harder: set up stations for mixing, application, and cleanup so you don’t waste time fetching tools. Use texture techniques that match your wall and prioritize application speed without sacrificing quality. Keep tools clean, use extension poles, and work in sections.
| Tools | Technique | Pace |
|---|---|---|
| Trowel | Knockdown | Steady |
| Sponge | Stipple | Fast |
When to Call a Pro Instead of DIYing
Speed and neat stations help, but some situations are better handled by a pro—especially when the job goes beyond routine patching or texture matching.
Speed and neat stations help, but some repairs truly call for a pro’s expertise beyond basic patching.
You should call a pro when you need a professional assessment of structural issues, when project complexity exceeds your skill level, or when budget considerations make a mistake costly.
- structural concerns
- intricate textures
- tight timelines
How Humidity and Temperature Affect Spackle Work
Temperature affects how fast spackle sets, so you’ll want to work in mild conditions to avoid cracking or overly rapid drying.
High humidity slows curing and can leave the surface soft, while very dry air speeds drying and may cause shrinkage.
For best results, aim for moderate temperature and humidity and avoid working during extreme conditions.
Temperature Effects On Drying
Because spackle is mostly water, humidity and air temperature control how quickly it sets and how well it bonds to the wall.
You’ll monitor drying time and keep spackle within a recommended temperature range to avoid cracking or poor adhesion. Aim for steady conditions and gentle airflow.
- Avoid extreme cold
- Avoid direct heat sources
- Maintain consistent ventilation
Humidity’s Impact On Cure
You’ll also want to pay close attention to humidity, since moisture in the air directly controls how spackle cures.
High humidity slows drying and can soften spackle consistency, causing sagging or longer wait times before sanding.
Low humidity speeds evaporation, risking cracks and poor adhesion.
Monitor humidity levels and adjust your timing; don’t rush sanding or painting until the spackle is fully firm.
Best Conditions For Application
Aim to work when conditions are steady: moderate temperatures (around 60–75°F or 16–24°C) and relative humidity between 40–60% give spackle the best chance to set evenly without cracking or sagging.
You’ll control ideal temperature and humidity levels; focus on surface conditions, application timing, and room preparation.
- Promote airflow, avoid drafts
- Keep consistent heat
- Monitor moisture for peak drying
Maintain and Clean Textured Walls Long Term
Keep textured walls looking fresh by establishing a simple, regular care routine: dust them weekly with a soft brush or vacuum brush attachment, spot-clean stains promptly with a damp sponge and mild detergent, and schedule a deeper clean every few months to remove buildup in crevices.
You’ll use proven cleaning techniques, maintenance tips, product recommendations for wall protection, stain removal methods, regular inspections, and practical long term care for surface preservation.
Room Checklist: Plan Before You Start
After you’ve settled on a cleaning routine, take a moment to map out the room before you start texturing so you don’t run into surprises.
Before texturing, map the room: confirm inspiration, traffic flow, furniture placement, outlets, lighting, and test a sample patch.
You’ll want to confirm room inspiration, traffic flow, and which design styles suit furniture. Sketch placements, note outlets, and plan protection.
Check lighting and test a sample patch.
- furniture layout
- outlet/switch locations
- lighting and sample patch
Frequently Asked Questions
Can Spackle Textures Hide Mold or Do I Need Remediation First?
No, you shouldn’t; you need mold remediation first. You shouldn’t cover active mold with spackle application because spores remain, health risks persist, and treatments (removal, drying, and sometimes professional remediation) must precede cosmetic repairs like spackle.
Will Spackle Work Outdoors on Exterior Siding or Stucco?
No — you shouldn’t use standard spackle for exterior applications; it’ll fail. You’ll need products formulated for weather exposure because spackle durability outdoors is poor. Choose exterior-grade patching compounds for siding or stucco repairs.
Can I Use Colored Spackle to Avoid Painting Afterward?
Yes — you can, but think of it like seasoning a dish: colored spackle options give instant hue, yet sunlight and wear will fade tones; for durable, consistent textured finishes you’ll likely need a protective tint or paint afterward.
How Do Pets Affect Drying or Damage to Fresh Spackle Textures?
Pets can smudge wet textures and slow drying with hair, pawing, or rubbing; you’ll monitor pet behavior, restrict access, and use non-toxic spackle for spackle safety to prevent ingestion and guarantee durable, undamaged finishes.
Are There Eco-Friendly or Low-Voc Spackle Brands Available?
Yes — you’ll find eco friendly options and low voc alternatives from brands like AFM Safecoat, DAP Green, and Sherwin-Williams Harmony; check labels, certifications, and datasheets to verify low emissions and safe DIY use.
Conclusion
You’ve got this — spackle texturing is an achievable DIY that can transform a room without hiring pros. About 60% of homeowners tackle at least one interior project themselves each year, so you’re in good company. Pick the right product, practice on scrap drywall, and work in controlled humidity for best results. If a repair feels beyond your skill or the wall’s extensive, hire a pro, but start small and build confidence.