
How to Paint a Curved Wall Smoothly and Evenly
You can get a smooth, even finish on a curved wall by prepping well, sanding to the contour, and using flexible tools that follow the curve. Clean and repair damage, prime if needed, then use a quality roller (mini or flexible nap) and an angled sash brush for tight areas. Maintain a wet edge with overlapping passes, feather edges, and lightly sand between coats for smoothness. Keep tools clean and work steadily, and keep going for tips on materials, measurements, and tricks.
Quick How-To: Paint a Curved Wall in 5 Steps
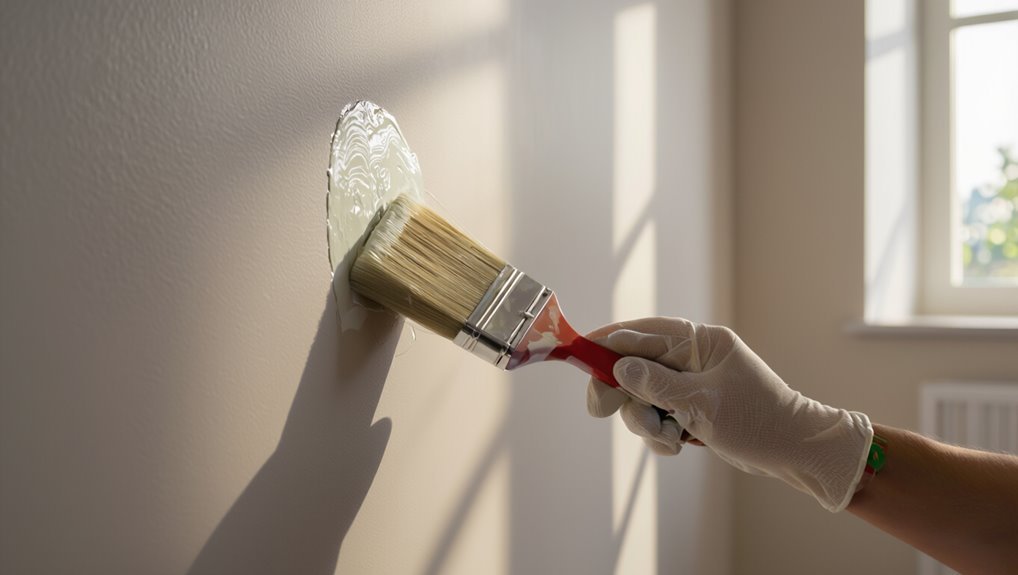
Before you start, gather your tools and prep the surface so you won’t have interruptions: remove fixtures, clean and sand the wall, tape edges, and lay drop cloths.
Next, prime if needed, mark top and bottom guides, and use a good roller for curved wall techniques.
Work in small sections, feather edges, maintain wet edges, and control paint application for an even finish.
DIY or Hire a Pro for Curved Walls?
Wondering whether you should tackle a curved wall yourself or hire a pro? Weigh DIY considerations like time, steady hands, special tools, and your patience.
If the curve’s complex or you want a flawless finish, professional expertise brings speed, proper equipment, and guaranteed results.
Budget, confidence, and tolerance for mistakes guide your choice—pick DIY for practice and savings, pro for precision and peace of mind.
Identify Your Curve: Convex, Concave, or Partial
Whether you go DIY or hire a pro, the next step is to identify what kind of curve you’re dealing with: convex (bulging toward you), concave (curving inward), or a partial curve that only arcs for a section of the wall. Knowing curve types guides your painting techniques and tool choices.
| Curve | Best focus |
|---|---|
| Convex | Brush control |
| Concave | Roller fit |
| Partial | Blend edges |
Measure Your Curve to Estimate Paint and Materials
Start by measuring the length of the curve and its height so you can calculate surface area and estimate paint, primer, and supplies.
Use simple curve measurement techniques and basic paint material calculations to avoid surprises. Measure twice, add waste, and note edges.
Use straightforward curve measurements and paint math — measure twice, account for waste, and mark edges.
- Measure length along curve.
- Measure average height.
- Calculate surface area.
- Add 10–15% for waste.
Know Your Surface: Drywall, Plaster, Brick, or Wood
Before you pull out brushes, identify the material under the paint—drywall, plaster, brick, or wood—because each one soaks up, holds, and accepts coatings differently and that changes prep, primer choice, and technique.
For drywall preparation use light sanding and high-quality primer.
For plaster application use a bonding primer.
Respect brick texture with masonry primer and consider porosity.
For wood finishing, sand and seal grain before painting.
Spot Damage That Needs Repair Before Painting
Before you start painting a curved wall, check carefully for cracks that could spread under a new coat.
Also look for bubbles in the surface or paint film, which signal trapped moisture or poor adhesion.
Fix those issues first so your finish stays smooth and durable.
Check For Cracks
Although a curved wall can look smooth from across the room, you’ll need to inspect it closely for cracks and other spot damage that will show through paint.
Do a crack assessment, then choose repair techniques suited to hairline or wider gaps. Fix, sand, and prime before painting.
- Probe cracks
- Clean debris
- Apply filler
- Sand smooth
Look For Bubbles
1. Inspect the curved surface closely for paint bubbles or blistering before you prime. Small lifts signal trapped moisture or adhesion issues; address them for bubble prevention.
Scrape loose paint, sand smooth, and dry the area fully. For stubborn blisters, cut and fill, then sand.
Proper bubble removal and surface prep guarantee your final coat lays down evenly and lasts.
Best Cleaners and Prep Products for Curved Walls
To get a smooth, lasting finish on a curved wall, start by choosing cleaners and prep products designed to remove grease, dust, and old loose paint without damaging the curve’s contours.
To achieve a smooth, lasting finish on a curved wall, use cleaners that remove grease and loose paint gently.
You’ll want effective cleaning solutions and clear surface preparation steps. Pick pH-neutral degreasers, mild TSP alternatives, a soft-bristle brush, and a lint-free microfiber cloth.
- pH-neutral degreaser
- TSP substitute
- Soft brush
- Microfiber cloth
Sand Curved Walls Without Creating Flat Spots
You’ll want to use flexible sanding tools that follow the wall’s curve so you don’t grind in flat spots.
Keep the tool’s pressure and angle consistent as you work to maintain the contour.
Check your progress frequently by eye and with your hand so you catch any low or high areas early.
Use Flexible Sanding Tools
Sanding a curved wall calls for flexible tools that follow contours instead of flattening them, so pick sanding pads, sponges, or sandpaper wrapped around a foam block that bend with the surface.
Use proper sanding techniques and flexible materials to keep curves intact. Practice light pressure, short strokes, and check frequently.
- Foam-wrapped sandpaper
- Flexible sanding sponges
- Contour pads
- Handheld sanding blocks
Maintain Consistent Contour
When you sand a curved wall, keep your movements gliding along the contour instead of back-and-forth in broad strokes; that way you avoid flattening the curve and creating visible flat spots. Use flexible pads, light pressure, and frequent checks with your eye. Apply curved wall techniques and contour painting strategies to preserve shape.
| Tool | Tip |
|---|---|
| Sanding pad | Follow curve |
| Light pressure | Check often |
Fill Cracks and Holes on Convex and Concave Areas
Cracks and holes on curved walls need a different approach than flat surfaces because compound shapes change how filler adheres and shrinks.
Cracks and holes on curved walls demand a different repair approach—compound shapes affect filler adhesion and shrinkage.
You’ll do crack repair and hole filling with care: sand edges, apply flexible filler, shape to contour, and feather edges for paint.
Follow steps:
- Clean and widen cracks.
- Apply flexible filler.
- Shape to curve.
- Sand smooth.
Choose Primer for Adhesion on Curved Walls
Because curved surfaces change how paint and filler bond, you’ll want a primer formulated for flexible adhesion and good coverage on convex and concave areas.
Choose primer types like elastomeric, bonding, or high-build acrylics.
Test adhesion methods—tack cloth, light sanding, and adhesion promoter—on a small area.
Apply thin, even coats, letting each dry fully before sanding or topcoating for lasting, uniform results.
Pick Paint Sheens That Hide Curve Imperfections
If you want curved walls to look smooth, pick a paint sheen that minimizes light reflection and conceals small surface imperfections. Flatter sheens like matte or eggshell hide bumps and texture better than satin or semi-gloss, which spotlight irregularities with specular highlights.
For curved walls, choose a flatter sheen—matte or eggshell—to reduce reflections and hide surface imperfections.
- Test samples for paint sheen selection.
- Choose matte or eggshell for curve imperfection concealment.
- Inspect under different lighting.
- Recoat thinly to avoid drips.
Brushes for Tight Concave Corners
1 good angled sash brush can make tight concave corners manageable when painting a curved wall.
You’ll focus on brush selection and brush angles for precise edge control, using corner techniques that suit paint types you chose.
Practice careful paint application and curve finishing strokes, wipe excess, and follow tool maintenance routines to keep bristles sharp and flexible for consistent, clean results.
Roller Types and Nap for Curved Walls (Convex)
Choose the right roller and nap length to get smooth, even coverage on a convex wall—too short and you’ll miss texture, too long and the roller will bunch and skip on the curve.
- Choose roller materials suited to your paint (synthetic for latex).
- Use medium nap length for slight curvature.
- Opt for shorter nap on tight convex arcs.
- Test on scrap to confirm even finish and soak.
When to Use a Mini Roller vs. a Full-Size Roller
Choose a mini roller when you need to reach tight curves and corners or when the wall’s curvature makes a full-size roller awkward.
Use a full-size roller on long, gently curved sections to cover more area faster and keep the finish even.
Match roller size to how much surface access you have and the length of continuous strokes you can make.
Roller Size Effects
Picking the right roller size makes a big difference on a curved wall: mini rollers give you control in tight bends and along edges, while full-size rollers cover large, gently curved sections faster and with fewer lap marks.
Choose based on roller types, nap length, paint application, roller technique, and desired finish options.
- Mini for precision
- Full for speed
- Match nap to texture
- Blend with overlapping strokes
Surface Access Needs
When access is limited by tight corners, alcoves, or obstacles, reach and maneuverability determine whether you grab a mini roller or a full-size one; a mini lets you work close to trim and inside curves without knocking into fixtures, while a full-size roller is better when you can move freely along long, sweeping sections and want to finish faster with smoother coverage.
Choose based on surface accessibility, keep tool organization tidy, and switch rollers as needed.
Trim Tools and Angled Brushes for Crisp Curved Edges
A slim, angled brush and a good trim tool can make the difference between a wobbly line and a razor-sharp curve, so gather them before you start cutting in.
Use angled brush techniques and smart trim tool selection to steady your hand, follow the curve, and load minimal paint.
- Choose the right angle
- Test stroke pressure
- Maintain light loads
- Clean edges often
Budget Kit: Essential Tools for Painting a Curved Wall
Start with a compact kit that covers the basics: a small angled brush, a mini roller with a sleeve that follows contours, a flexible trim guide for steadying your hand, painter’s tape, and a tray.
Add a small sanding block, a putty knife, and a multi-surface primer.
Choose supplies suited to paint colors and varying wall textures so you’ll get even coverage without overspending.
Set Up Drop Cloths and Protect Nearby Surfaces
Start by laying down heavy-duty drop cloths that won’t shift or let paint soak through.
Tape off trim, baseboards, and any adjacent walls to keep clean, crisp edges along the curve.
Move or cover floors and furniture so splatters won’t ruin them.
Choose Appropriate Drop Cloths
Before you lay down any paint, pick drop cloths that match the job—lightweight canvas or cotton for frequent foot traffic and thicker plastic or rosin paper for messy, infrequent jobs—so you protect floors and furniture without creating tripping hazards.
Consider drop cloth types and drop cloth materials to suit surface and cleanup.
- Canvas: durable, non-slip.
- Plastic: waterproof, cheap.
- Rosin paper: thin, disposable.
- Felt: cushioned, reusable.
Tape Off Adjacent Areas
Now that your drop cloths are in place, tape off moldings, adjoining walls, baseboards, and ceiling edges to keep paint off surfaces you want to preserve.
Use quality painter’s tape, press edges firmly for edge precision, and peel slowly at a 45° angle.
Apply small overlapping strips around curves, employ tape techniques for smooth shifts, and check seams before painting.
Protect Floors And Furniture
1. Lay out drop cloths for floor protection, taping seams to prevent paint seepage. Move or cover furniture with plastic or canvas for secure furniture covering.
Keep a small tarp for wet paint drips. Clean the floor first so cloths lie flat.
- Tape edges
- Overlap seams
- Weigh corners
- Protect vents and trim
Establish a Comfortable Working Line and Reach
Because curved walls change how far you can comfortably reach, set a working line that keeps your arm relaxed and your wrist neutral; stand where you can move the brush or roller along the curve without stretching, twisting, or overreaching.
Position yourself to maintain an ergonomic reach, shift your stance as the curve progresses, and use extension handles only when they preserve control and a steady working line.
Apply Primer on Curved Walls: Order and Technique
Start by laying out your priming sequence so you can work steadily along the curve: plan sections, set staging, and prep tools for consistent primer techniques and proper wall preparation.
Then follow this order:
- Clean and sand each section.
- Mask edges and adjacent surfaces.
- Apply primer in overlapping passes.
- Inspect for coverage and touch up seams.
Brushing Technique for Smooth Rounded Surfaces
Pick a high-quality angled or sash brush that fits the curve so you can control paint without overloading.
Keep your strokes consistent in direction along the curve and blend each pass into the last.
Feather the edges gently to erase brush marks and maintain a smooth, rounded finish.
Proper Brush Selection
A good brush makes the difference between streaks and a seamless finish, so choose one that matches both your paint type and the curve’s radius.
Pick brush types with proper bristle quality and brush width for paint application, and prefer ergonomic handles for precision control.
Follow cleaning techniques and maintenance tips to prolong life.
- Natural vs synthetic
- Width matches radius
- Quality bristles
- Care steps
Consistent Stroke Direction
When you work on a curved wall, keep your brush strokes moving in a single, consistent direction to avoid lap marks and uneven texture; this means brushing along the curve rather than back-and-forth across it so each stroke lays paint smoothly into the contour.
You’ll maintain even coverage by using steady stroke techniques and adjusting brush pressure to follow the shape, minimizing visible joins and ridges.
Feathering At Edges
Although you’ll be working along a curve, feather your brush strokes at the edges so the paint thins out gradually and blends seamlessly with adjacent areas; hold the brush at a low angle and ease up pressure as you finish each stroke to avoid hard lines.
- Use light wrist motion for feathering techniques.
- Work wet-to-wet for smooth edge blending.
- Vary pressure when ending strokes.
- Step back to check shifts.
Rolling Technique to Avoid Lap Marks on Curves
Since curves catch paint unevenly, roll in consistent, overlapping strokes and keep a wet edge to prevent lap marks.
You should use short, controlled passes with a high-quality roller, pausing to reload often.
Focus on even pressure and follow the curve’s contour.
These rolling techniques guarantee lap mark prevention without overworking the surface, giving a uniform finish.
Feathered Strokes Where Flat Meets Curve
1. You’ll soften the shift where flat meets curve using feathering techniques and light pressure.
Work from flat toward curve, lifting the brush to avoid ridges, and use short overlapping strokes for gentle blending colors.
Keep paint thin, reload often, and check from different angles.
Practice on scrapboard to refine rhythm and pressure before tackling the actual wall.
1. You’ll soften the shift where flat meets curve using feathering techniques and light pressure.
Work from flat toward curve, lifting the brush to avoid ridges, and use short overlapping strokes for gentle blending colors.
Keep paint thin, reload often, and check from different angles.
Practice on scrapboard to refine rhythm and pressure before tackling the actual wall.
Maintain a Wet Edge Around a Full Curve
When you’re working around a full curve, keep a continuous wet edge so the paint blends smoothly without lap marks. Work in manageable sections, overlap each pass slightly, and maintain consistent pressure.
Use wet edge techniques like rolling toward previously painted areas and soft-bristled brushes for edge blending. Watch drying times, rehydrate edges if needed, and avoid stopping mid-curve to prevent visible seams.
Cut In Concave Corners Without Drips
Pick a high-quality angled brush that holds paint without dripping, and position it so the bristles rest against the concave edge for control.
Support the corner with your other hand or a fingertip to steady the brush as you cut in.
Feather any excess paint outward with light, smooth strokes to blend into the curve and prevent runs.
Choose The Right Brush
Choose a 2–2.5 inch angled sash brush with firm, tapered bristles so you can lay paint into concave corners cleanly without drips.
You’ll pick based on brush types and bristle materials, matching paint (latex vs oil) and curvature. Use steady pressure, load sparingly, and work top-to-bottom to avoid runs.
- Natural bristles
- Synthetic nylon
- Firm taper
- Angled edge
Support The Corner Edge
With the right brush in hand, support becomes the next step for a clean cut-in along concave corners.
You’ll press a steady thumb or fingertip beneath the bristles to stabilize the stroke, adding temporary corner protection like painter’s tape if needed.
Apply even pressure for edge reinforcement, moving slowly to prevent drips and keeping a narrow paint bead for crisp, controlled lines.
Feather Out Excess Paint
After you’ve laid a narrow bead along the concave corner, feather the paint outward by angling the brush slightly and using light, successive strokes that taper the edge—this thins excess paint and prevents drips while keeping a smooth shift to the rest of the wall.
- Use proper feathering techniques with a soft-bristled brush.
- Check paint consistency—too thick will puddle.
- Wipe brush tip between passes.
- Blend into adjacent area with long, light strokes.
Paint Large Convex Walls in Consistent Sections
Start by breaking the curved expanse into consistent vertical sections so you can work methodically and keep the finish even.
Tape lightly at edges, mark start and stop points, and tackle one section at a time.
Match brush and roller strokes across seams, considering color selection and texture techniques to maintain uniform appearance as you move around the convex surface.
How Many Coats You’ll Likely Need on a Curved Wall
Most curved walls will need at least two coats of paint to achieve even coverage and hide roller or brush marks. You’ll often find a third coat necessary for deep colors or high-traffic areas.
- Assess coat coverage after the first coat to spot thin areas.
- Consider color selection—lighter colors usually need fewer coats.
- Use thin, even coats on curves to avoid drips.
- Plan for touch-ups where curvature causes shadowing or wear.
Drying Times and When to Recoat to Avoid Texture Issues
1–2 hours of tack-free drying might feel quick, but you’ll need to wait longer before recoating to prevent texture problems like lap marks or raised brush strokes.
Use proper drying techniques: control humidity, airflow, and temperature.
Test a small patch before full recoat.
Follow manufacturer recoat timing—usually 4–24 hours—so your curved wall stays smooth and uniform without visible texture flaws.
Painting Around Fixed Features: Windows, Railings, Trim
When you paint around fixed features like windows, railings, and trim, plan your approach so you protect those elements and keep crisp lines—mask with high-quality tape, cut in carefully with an angled brush, and use small rollers or foam brushes for tight curves.
Follow these steps:
Follow these steps to protect fixed features and achieve crisp lines when painting around windows, railings, and trim.
- Remove or cover window treatments.
- Tape edges tightly.
- Use angled brush for trim.
- Test railing colors on scrap.
Working Safely on Tall or High Curved Surfaces
When you’re working high on a curved wall, pick proper fall protection like harnesses or guardrails that meet local codes.
Set up a stable platform—scaffolding or a rated mobile tower—and secure it to prevent shifting along the curve.
Also plan clear emergency access and communication so you can get help quickly if something goes wrong.
Choose Proper Fall Protection
Tall curved walls raise fall risks in ways flat surfaces don’t, so you need the right fall protection before you climb.
Use appropriate safety gear and assess fall hazards, then pick protective measures that suit the curve. Don’t rely solely on ladder stability.
- Wear harness and anchor points.
- Inspect anchors and ropes.
- Use guardrails or temporary barriers.
- Keep tools tethered.
Secure Stable Working Platform
After you’ve picked fall protection and anchors, focus on creating a stable working platform that matches the curve’s radius and height.
Choose a stable ladder or scaffold that guarantees platform stability and correct surface alignment. Adjust for working height, lock supports, and spread weight evenly.
Use ergonomic tools to reduce strain, follow safety precautions, and inspect connections before you start painting.
Plan For Emergency Access
Planning emergency access is essential before you start painting high or curved surfaces: identify clear escape routes, keep a communications plan and rescue kit within reach, and make sure someone on the ground knows your exact work zone and schedule.
You’ll follow safety planning and emergency access procedures so you can work confidently.
- Check ladder/scaffold stability
- Test communication devices
- Position rescue kit nearby
- Brief spotter and schedule
Clean Brushes and Rollers After Primer vs. Paint
One clear rule: clean your tools right after you use primer or paint, but treat them differently—primer often needs more aggressive cleaning or even a solvent, while most latex paint rinses out with warm water and soap.
You’ll use cleaning techniques like flushing, combing bristles, and spinning rollers.
Remember primer importance: hardened primer ruins brushes, so act fast and store cleaned tools properly.
Fix Common Problems: Drips, Roller Texture, Streaks
Now that your brushes and rollers are clean and stored, you’ll want to address common finish issues that can ruin a curved wall’s look: drips, uneven roller texture, and visible streaks.
- Check paint consistency to avoid sagging — thin or thick mixes cause drips.
- Use correct roller technique for texture control.
- Feather edges to aid streak elimination.
- Inspect under good light; catch drips before they set.
Repair Brush Marks and Sand Between Coats
After the paint dries, check the curve carefully for any raised brush marks or uneven spots.
If you spot marks, lightly sand the area with fine-grit paper until smooth, then wipe away dust.
Between each coat, give the whole surface a light sanding to promote adhesion and a flawless finish.
Inspect For Brush Marks
While the paint’s still tacky, walk the length of the curved wall and scan for brush marks, drips, or uneven texture that will show once it’s fully dry.
Use proper brush techniques to lift tiny ridges and preserve finish quality. Then:
- Highlight visible strokes.
- Blot small drips.
- Feather edges gently.
- Note areas needing touch-up.
Light Sand Between Coats
Lightly sand the wall between coats to knock down raised brush marks and create a tooth for the next layer of paint.
Use fine-grit sandpaper and light pressure, focusing on flaws without cutting through the finish.
Wipe dust before recoating.
These sanding techniques improve paint adhesion and help you achieve a smooth, even curved surface with minimal visible touch-ups.
Touch-Up Strategies for Seamless Blends on Curves
Because curved surfaces reveal even small inconsistencies, you’ll want touch-up techniques that match texture, sheen, and color exactly; use careful blending techniques and precise color matching.
Follow these steps:
- Feather edges with a damp sponge.
- Apply thin coats with a small roller.
- Use the same paint batch and sheen.
- Blend strokes along the curve, checking in varied light.
When to Repaint the Entire Curve vs. Spot-Fix
If the damage covers a large portion of the curve or the surface is uneven, you’ll usually need to repaint the entire section for a consistent look.
For small chips or scuffs, spot-fixing can work—unless the paint is old or has faded, which makes matching the color and sheen difficult.
Check the paint age and test a small patch to decide whether a full repaint is the safer choice.
Extent Of Surface Damage
Start by evaluating the damage: small scuffs and isolated chips usually call for spot-fixing, but widespread peeling, water stains, or texture inconsistency means you should repaint the entire curve to get a uniform finish.
- Inspect for surface imperfections across the curve.
- Decide if localized repair techniques will blend.
- Spot-fix when damage is minimal and isolated.
- Repaint fully when inconsistencies affect appearance.
Paint Age And Matching
Paint age and color fading determine whether you can blend a touch-up or need to repaint the entire curve: old paint that’s yellowed, chalked, or unevenly faded won’t match new swatches even with careful feathering.
So plan on a full repaint when the existing finish shows age-related color shift or loss of sheen across the surface.
Check paint longevity, test patches, and prioritize full repaint for consistent color matching.
Special Finishes for Curved Walls: Faux, Metallic, Gloss
Special finishes—like faux textures, metallics, and high gloss—can turn a curved wall into a focal point that plays with light and depth in ways flat paint can’t.
You’ll choose faux finishes, metallic sheens, gloss techniques, and texture options to suit mood and light.
Prep smoothly, test samples, and work in sections for even coverage.
- Feathers
- Glaze
- Buff
- Layer
Cost and Time Estimate Template for a Curved-Wall Job
After choosing your finish—feathers, glaze, buff, or layered metallics—you’ll need a clear cost and time estimate template to guide quoting and scheduling for a curved-wall job.
After selecting feathers, glaze, buff, or layered metallics, use a clear cost-and-time estimate template for curved-wall jobs.
List materials, labor, tools, and contingencies for a transparent cost breakdown.
Specify time allocation per prep, priming, finishing coats, drying, and touch-ups.
Use hourly rates and unit costs to produce a firm, editable quote.
Final Checklist to Finish a Curved Wall Painting Job
1 clear checklist keeps you from missing critical steps when finishing a curved-wall painting job—verify surface integrity, confirm edges and seams are crisp, check for uniform coverage and texture, guarantee all trim and adjacent surfaces are protected, and walk the entire curve for touch-ups and final cleanup.
- Inspect for missed spots and texture consistency.
- Repaint thin areas and feather edges.
- Clean and protect trim, remove masking.
- Photograph results and note painting tips for final touches.
Frequently Asked Questions
How Do I Match Paint Color Across Multiple Curved Walls?
You match paint color by testing small sections, using color mixing techniques and consistent wall preparation; you’ll take samples to a pro for match, keep batch numbers or remix formulas, and touch up wet edges for seamless changes.
Can Wallpaper Be Applied to a Curved Wall Instead of Painting?
Yes — you can wallpaper a curved wall. You’ll choose wallpaper types (pre-pasted, non-woven, vinyl) and adhesive options (starch, acrylic, or removable adhesives), and you’ll wet, stretch, and smooth panels carefully to avoid bubbles.
How to Prevent Paint From Pooling in Concave Moldings?
Like a steady stream, you’ll control flow: use slow paint application techniques, thin coats, and a sash brush to feather edges; follow moldings preparation tips—clean, sand, prime—and wipe excess to avoid pooling in concave moldings.
Are Spray Cabinets or HVLP Sprayers Appropriate Indoors?
Yes — you can use spray cabinets or HVLP sprayers indoors, but you’ve got to prioritize indoor safety: choose proper sprayer types, ventilate well, wear respirators, seal the area, and use low-VOC finishes to minimize hazards.
What Ventilation Is Required When Painting Tight Curved Stairwells?
You’ll need strong ventilation methods: exhaust fans and window fans to pull fumes out, plus portable air purifiers to boost air circulation; seal off floors, vent outdoors, and run fans continuously while you’re painting and drying.
Conclusion
You’ve got this—curved walls don’t have to be a beast to tame. Follow the steps, measure carefully, choose the right tools and finish, and decide whether to DIY or call a pro. Like a compass guiding a ship, your prep and technique keep lines steady and paint even. Finish with the checklist, admire the sweep of your wall, and touch up where needed so the curve reads as one confident, seamless surface.
