How to Fix Peeling Latex Paint and Prevent It Returning
You can stop peeling latex paint by diagnosing the cause, prepping properly, and using the right primer and paint. Scrape loose paint, sand edges smooth, clean the surface, and fix any moisture or substrate problems first. Apply a bonding primer designed for latex over tricky surfaces, then repaint with quality latex paint. For small spots you can spot-repair; widespread failure needs a full repaint. Follow preventive steps for moisture control and primer choice, and keep going to learn specific techniques.
Quick Fix: Repair a Small Peeling Patch Fast
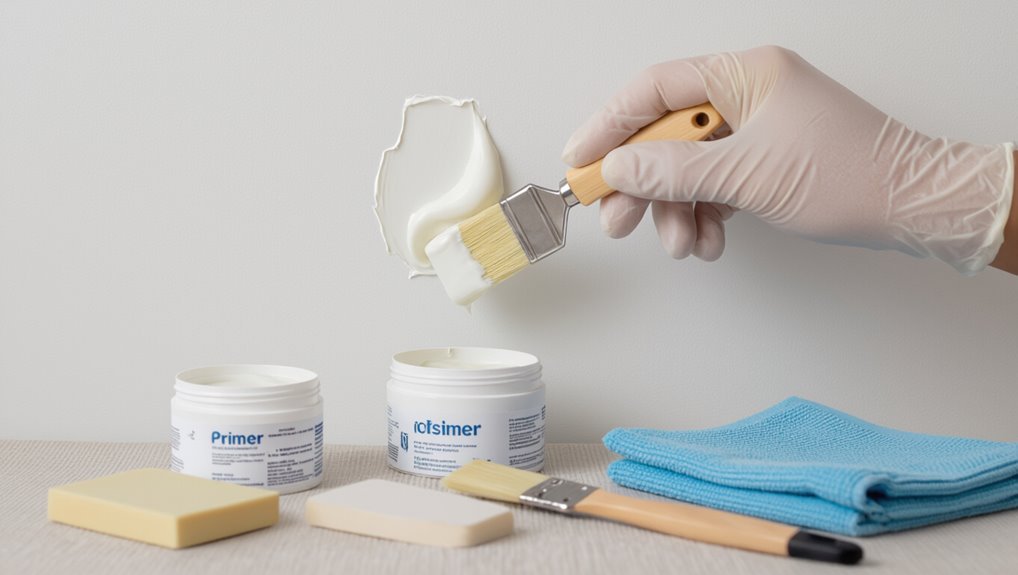
Start by scraping away any loose paint with a putty knife or a stiff brush until the edges are solid; this lets you see the full size of the damaged area.
Scrape away loose paint with a putty knife or stiff brush until edges are solid to reveal the damage size
Sand lightly, clean the surface, and apply a primer formulated to restore paint adhesion.
Once dry, repaint with matching latex.
Address peeling causes like moisture or poor prep to prevent recurrence.
Decide: Spot Repair or Full Repaint?
If the peeling is small and isolated, you can spot repair and save time and money.
But if you see widespread bubbling, multiple flakes, or failing adhesion, you’ll need a full repaint for a lasting fix.
Weigh the upfront cost of repainting against how long a patch will hold up to decide which route makes sense.
When To Choose Spot Repair
How do you decide whether to spot repair peeling latex paint or repaint the whole surface? You’ll choose spot repair when damage is isolated, substrate is sound, and time or budget’s limited. Spot repair benefits include speed and lower cost; spot repair techniques focus on sanding, priming, and blending.
| Condition | Action |
|---|---|
| Small area | Spot repair |
| Intact substrate | Spot repair |
| Multiple spots | Consider repaint |
| Visible sheen mismatch | Blend carefully |
| Budget low | Spot repair |
Signs You Need Repainting
Look for clear, repeatable signs that painting, not patching, will save you time and headaches: widespread cracking, large areas of flaking, multiple discolored patches, or a chalky surface that won’t hold paint indicate you should plan a full repaint rather than spot repairs.
If the paint condition is poor across surfaces and repaint frequency would otherwise be high, choose a full repaint to restore protection and uniform appearance.
Cost Versus Longevity
When weighing cost versus longevity, you’ll balance upfront expense against how long the repair will last: spot repairs cost less now but often need redoing sooner, while a full repaint costs more up front but can extend protection and appearance for years. Do a cost analysis and longevity assessment to decide.
| Option | Outcome |
|---|---|
| Spot repair | Quick, cheaper |
| Full repaint | Durable, pricier |
Tools and Materials You Need
Before you start scraping and sanding, gather the essential tools and materials so the job goes smoothly: a putty knife or paint scraper, medium- and fine-grit sandpaper (or a sanding block), a wire brush for stubborn flakes, a quality primer suitable for latex over problem surfaces, matching latex paint, a patching compound for holes or delamination, painter’s tape, drop cloths, a paint tray and roller or brushes, and safety gear like goggles and a dust mask.
You’ll improve paint adhesion through proper surface preparation, use the primer for adhesion, and have patching, sanding, and painting tools ready.
Safety Gear and Ventilation Tips
At least wear eye protection and a fitted dust mask or respirator while you scrape and sand, and put on gloves to protect your hands from sharp edges and chemicals.
Use proper safety equipment—long sleeves, knee pads, and a respirator for lead-era paint.
Open windows, run fans, and isolate the area with plastic sheeting; adopt ventilation methods that direct dust outside and keep bystanders safe.
Quick Answer: Step-by-Step Repair Summary
1. You’ll inspect surfaces, address peeling causes, clean and dry the area, sand rough edges, prime bare spots, and choose compatible latex products to restore paint adhesion.
Repair small imperfections with patching compound, sand smooth, then apply thin, even coats. Let each coat fully cure, monitor humidity, and use proper ventilation to prevent recurrence and guarantee a durable finish.
Step 1: Remove Loose and Flaking Paint
Start by scraping away all loose, blistered, or flaking latex paint until you reach firmly adhered edges.
Use a sturdy scraper and wire brush to expose sound substrate, removing contaminants that harm paint adhesion.
Dispose of dust and chips, then clean the area with a mild detergent or TSP substitute.
Proper surface preparation guarantees primers and new finish coat will bond and resist future peeling.
Step 2: Feather Edges and Sand Smooth
Once you’ve removed loose paint, you’ll need to feather the hard edges so new paint blends smoothly with the old.
Use a 120–220 grit sandpaper to knock down ridges and create an even surface. Work lightly and check frequently so you don’t sand through the remaining good paint.
Feathering The Paint Edges
After scraping away loose paint, you’ll want to feather the remaining edges so the repair blends smoothly with the surrounding finish.
Use a sharp putty knife or a multi-tool to thin the paint film at the perimeter until it tapers into the intact surface.
Work gently with feathering techniques to avoid gouging.
Check for a gradual shift and repeat thinning where edge blending isn’t seamless.
Sanding For A Smooth Finish
Begin by smoothing the feathered edges with fine-grit sandpaper (120–220 grit) to remove high spots and create a gradual change between old paint and bare substrate.
Use consistent, light pressure and circular strokes to blend alterations. Try sanding blocks or a palm sander for control.
Clean dust, inspect for ridges, and repeat selective sanding until you achieve smooth finishes using proper sanding techniques.
Step 3: Fix Substrate Damage Before Painting
Inspect the damaged substrate carefully and repair any rot, loose plaster, or soft drywall before you paint, because paint won’t stick to unstable surfaces.
You should perform a substrate assessment and moisture evaluation to find hidden damage. Remove deteriorated material, replace or patch as needed, treat mold or damp sources, and let areas dry fully.
Only then proceed with surface prep and painting.
How to Choose the Right Primer for Latex
Now that you’ve repaired and dried the substrate, pick a primer that matches both the surface and the problem you’re fixing so the latex will bond and last.
Consider primer types for masonry, wood, or previously glossy finishes, and choose one compatible with your topcoat.
Prioritize thorough surface prep—cleaning, sanding, and sealing edges—so the primer adheres and prevents future peeling.
Bonding vs. Stain-Blocking vs. Oil Primers
When you’re repairing peeling latex, a bonding primer can give flaky or glossy surfaces a strong, lasting grip so new paint won’t lift again.
If you’re covering stains—like water, smoke, or tannin—you’ll want a stain-blocking primer (or an oil-based one in stubborn cases) because they seal contaminants that latex primers might not.
Consider substrate, stain severity, and drying time to pick the right type for the job.
Bonding Primer Benefits
Think of a bonding primer as the glue between old latex and your new coat: it adheres to glossy, chalky, or slightly compromised surfaces where regular primers can’t, giving your paint something solid to grip.
You’ll use targeted adhesion techniques and smart primer selection to restore grip, reduce future peeling, and skip extensive sanding—saving time while ensuring a durable base for your topcoat.
Stain-Blocking vs. Oil
After you’ve decided whether a bonding primer is the right move for adhesion, you’ll need to pick the right primer type for stains, tannin bleed, or stubborn oil-based finishes. You’ll choose stain-blocking benefits for water stains or tannins; use oil primer applications for glossy or nicotine-stained surfaces. Compare quickly:
| Issue | Primer |
|---|---|
| Water/tannin | Stain-blocking |
| Glossy/oily | Oil primer |
Prepping Glossy or Oil-Painted Surfaces
Most glossy or oil-painted surfaces need thorough sanding and deglossing before you apply new latex paint, so you’ll remove the slick finish that prevents adhesion.
Sand with fine-grit paper, clean dust, then use a liquid deglosser or primer labeled for oil paint.
Tackcloth and a bonding primer guarantee the new latex will stick and resist future peeling.
How to Test If Moisture Causes Peeling
If you’ve prepped glossy or oil-painted areas properly and paint still flakes, check for moisture before repainting—wet substrates will keep latex from sticking no matter how well you sand or prime.
Use a moisture meter and perform simple moisture testing at several spots.
Combine readings with an adhesion assessment (tape or cross-hatch test) to confirm dampness is the root cause before proceeding.
Diagnose: Active Peel vs. Old, Stable Failure
When you inspect peeling paint, determine whether it’s actively spreading or a long-settled failure—this matters because active peel needs different preparation and often moisture or ongoing movement must be fixed before repainting.
Check edges: curling, blistering, and fresh debris show active peel causes. Stable failures have hard, dry edges.
Your repairs and strategies to restore paint adhesion depend on that diagnosis.
How Incompatible Coatings Cause Failure
After you’ve decided whether a peel is active or settled, look at the paint history — incompatible coatings are a common hidden cause of failure.
You’ll often find latex over oil, glossy undercoat, or coatings on incompatible surfaces that resist bonding. These combinations create adhesion issues so new paint won’t grip.
Strip or sand to sound substrate, then use proper primer before repainting.
When Poor Surface Prep Causes Peeling
Because paint can only stick to a clean, stable surface, skipping proper prep almost guarantees peeling later on.
You must remove dirt, loose paint and grease, sand surface imperfections, and use correct painting techniques to guarantee adhesion.
Follow these steps:
- Clean thoroughly
- Scrape and sand
- Repair and prime
- Use proper painting techniques
How Substrate (Plaster, Drywall, Wood) Affects Adhesion
Although each substrate looks similar once painted, plaster, drywall, and wood bond to latex differently, so you’ll need to treat them according to their characteristics.
You’ll assess adhesion factors: porosity, surface dust, and previous coatings.
Plaster often needs keying; drywall requires joint compound smoothing and priming; wood demands sanding and sealing.
Match primer and technique to substrate types to prevent peeling.
How to Repair and Replace Rotten Wood Trim
First check how far the rot goes by probing and removing loose paint or wood so you can see if damage is superficial or structural.
If the decay is limited, you’ll cut out the soft areas and patch with epoxy or a dutchman repair; for widespread rot you’ll remove and replace the trim to restore strength and a solid paint surface.
Before finishing, treat surrounding wood and seal joints to prevent the problem from coming back.
Assess Wood Rot Extent
When you start evaluating wood trim for rot, focus on both visible signs—soft, crumbly wood, dark stains, or bubbling paint—and hidden damage that can extend beneath sound-looking surfaces.
Probe suspect areas with a screwdriver or awl, tap along the trim to find hollow spots, and check adjoining materials (like siding and flashing) for moisture paths that spread decay.
- Check wood moisture with a meter.
- Perform substrate analysis.
- Map decay extent.
- Note fastener and joint failures.
Replace Or Repair Trim
Decide whether you’ll repair or replace each trim piece based on the rot’s depth and location: you can patch shallow, localized decay with epoxy or wood filler, but you should cut out and replace sections that compromise structural integrity, joints, or fastener holding. Choose trim styles and trim materials to match existing profiles; splice, sister, or full replacement as needed.
| Action | When to use |
|---|---|
| Repair | Shallow rot, cosmetic |
| Splice | Localized end damage |
| Replace | Structural or widespread rot |
How to Address High-Moisture Areas First
Since moisture is the main culprit behind peeling latex paint, tackle damp areas before anything else so repairs hold up.
Identify moisture sources, then prioritize fixes and ventilation solutions to stop recurrence. Focus on drying, repairing leaks, and improving airflow.
Identify moisture sources, prioritize repairs and ventilation, and focus on drying, fixing leaks, and improving airflow.
Steps to follow:
- Locate leaks and wet spots.
- Fix plumbing or roof issues.
- Install or upgrade vents.
- Use dehumidifiers where needed.
How to Use Caulk and Sealants at Joints
1 good bead of caulk applied correctly will keep out moisture and give your new paint something solid to grip, so prep the joint first by cleaning away old caulk, dirt, and loose paint.
Choose sealant types suitable for the substrate—silicone for wet areas, acrylic-latex for paintability.
Practice proper caulk application: steady bead, smooth with a wet finger or tool, tool excess, allow full cure before painting.
How to Apply Primer : Tips and When to Recoat
Wondering when to prime and how many coats you’ll need? You should match primer types to the surface, use proper application techniques, and inspect coverage.
Apply one coat to sealed, sound areas; use two coats for patched or porous spots. Sand between coats for adhesion. Recoat when the primer looks uniform and dry to the touch; avoid excessive buildup that hides defects.
Apply one coat on sound areas, two on patched or porous spots; sand between coats and avoid buildup.
- Choose primer types
- Prep surface
- Use correct application techniques
- Inspect coverage
How Long to Wait Between Primer and Paint
When you’re ready to topcoat, wait until the primer feels dry to the touch and has fully cured for the manufacturer’s recommended time—typically 24 hours for water-based primers and 24–48 hours for oil-based formulations—so paint bonds properly and won’t lift.
After primer application, check cure times, temperature, and humidity. Following instructions guarantees ideal paint adhesion and avoids rework or peeling later.
Choose Latex Paint: Durability, Sheen, and Formula
Pick a latex paint that matches the room’s use and your durability needs: high-traffic areas benefit from tougher formulations (like acrylic latex or paints labeled “scrubbable”), while low-traffic rooms can use standard interior latex.
You’ll focus on paint selection and finish types for longevity. Consider:
- Acrylic-latex for durability
- “Scrubbable” formulas
- Low-VOC options
- Match primer compatibility
How Sheen Affects Hiding and Peel Resistance
Because sheen changes how light hits a wall, it also affects both hiding power and the chance that paint will peel. Glossy finishes reflect more light and reveal imperfections, while flatter sheens hide flaws but can be less washable.
When you pick between sheen types, balance hiding, durability, and peel resistance—higher gloss boosts scrub ability and adhesion, while matte masks texture yet risks scuffing.
Apply Latex Paint: Technique for Adhesion and Finish
Sheen choices affect how the paint behaves, but proper application makes the biggest difference in adhesion and final appearance.
You’ll prep, prime, and use steady strokes to improve adhesion techniques and finish quality.
- Clean and sand surfaces.
- Apply bonding primer thinly.
- Cut edges, then roll evenly.
- Allow proper dry time between coats.
How to Blend Patched Areas Invisibly
Start by feathering the patch edges so the repaired area slopes smoothly into the surrounding surface; you’ll sand the filler until it’s level and then key the surrounding paint lightly so new paint will marry with the old.
Use subtle blending techniques: thin glazes, soft brush strokes, and stippling. Test color matching on scrap, adjust tint, then finish with light, overlapping passes for an invisible repair.
How to Spot-Check for Hidden Adhesion Problems
After you’ve blended the patched area, don’t assume surrounding paint is sound—hidden adhesion failures can cause new peeling later on.
Check edges, feel for looseness, and perform simple adhesion testing before repainting. Good surface preparation prevents rework.
Steps:
- Press and scrape suspect areas gently.
- Tap to detect hollow sounds.
- Use a tape pull test.
- Note blistering or soggy spots.
Prevent Future Peeling From Moisture Infiltration
To prevent future peeling you’ll want to control indoor humidity and stop water entry at the source.
Use dehumidifiers or exhaust fans in damp areas and fix leaks, flashing, or clogged gutters promptly.
Addressing both humidity and water intrusion keeps paint adhered and prolongs your finish.
Control Indoor Humidity
When you keep indoor humidity within a healthy range, you’ll prevent moisture from softening paint film and causing future peeling; aim for 30–50% relative humidity in living areas and slightly lower in basements.
Use humidity control and moisture management to protect finishes.
- Run exhaust fans during showers and cooking.
- Use dehumidifiers in damp rooms.
- Vent appliances properly.
- Monitor with hygrometers.
Stop Water Entry
Humidity control helps, but if water’s getting into walls, ceilings, or trim you’ll keep seeing paint failure.
Find leaks, repair flashing, and seal gaps around windows and doors so water can’t breach siding or roof.
Install or restore waterproof barriers and improve drainage.
Use proper moisture management in crawlspaces and basements.
Dry and prep surfaces fully before repainting to prevent new peeling.
Control Indoor Humidity to Protect Paint
Because moisture affects adhesion and drying, you should keep indoor humidity in the recommended range (30–50%) to prevent latex paint from peeling.
Keep indoor humidity between 30–50%—moisture weakens adhesion and can cause latex paint to peel.
You’ll improve paint preservation and humidity control by managing moisture sources and ventilation.
Follow these steps:
- Use exhaust fans in bathrooms and kitchens.
- Run dehumidifiers in damp rooms.
- Fix indoor leaks promptly.
- Ventilate during drying and cleanup.
Exterior Fixes: Flashing, Gutters, and Siding Tips
1 simple step you can’t skip is inspecting and fixing exterior water-management systems — flashing, gutters, and siding — because they’re the most common sources of moisture that make latex paint peel.
Check flashing techniques for gaps, keep gutters clear with regular gutter maintenance, choose durable siding materials, and install proper moisture barriers.
Fix issues promptly to prevent recurring peeling and water damage.
How to Repair Peeling on Cabinets, Furniture, and Trim
Exterior moisture often causes peeling, but indoor surfaces like cabinets, furniture, and trim face different triggers and need a different approach.
You’ll clean, sand glossy surfaces, feather edges, and use bonding primer to protect cabinet finishes and boost furniture durability. Then topcoat with durable latex or polyurethane.
- Clean
- Sand
- Prime
- Topcoat
When to Strip and Repaint vs. Patch Repairs
You’ll need to decide whether to strip and repaint or just patch based on how much paint is failing, what’s causing the peel, and whether the substrate is sound.
If the damage is widespread, the paint’s losing adhesion across large areas, or moisture or adhesion problems are the root cause, you’ll likely strip and start fresh.
For small, localized flakes with a solid surface underneath, spot repair and repainting will save time and effort.
When To Strip
If the peeling covers large areas, shows multiple layers of failing paint, or the underlying wood or substrate is damaged, you’ll need to strip and repaint rather than just patch.
Stripping helps address peeling causes and guarantees paint compatibility for a durable finish.
Consider these triggers before starting:
- Widespread flaking across surfaces
- Multiple incompatible layers
- Rot or substrate failure
- Repeated past repairs
Extent Of Damage
After you’ve checked for widespread flaking, multiple failing layers, or rot, the next step is to judge how much work the job really needs.
Do an extent evaluation: map affected areas, note substrate condition, and test adhesion.
Your damage assessment tells you whether to spot-scrape and patch small zones or strip and repaint when failures are extensive, layered, or the substrate is compromised.
Underlying Causes
When underlying causes like moisture, poor adhesion, or incompatible previous coatings are driving the failure, you’ll need to strip and repaint rather than just patch; patching only masks symptoms and won’t stop recurrence if the substrate or conditions remain problematic.
- Check for moisture intrusion and substrate issues.
- Assess paint compatibility and paint layering.
- Improve surface preparation and fix inadequate ventilation.
- Consider environmental factors and temperature fluctuations.
Common Mistakes That Make Peeling Return
Because peeling often comes back for the same avoidable reasons, you’ve got to recognize the common mistakes that restart the cycle.
You skip surface preparation, ignore substrate assessment, neglect moisture control, or choose incompatible paint—paint compatibility matters.
Using wrong tools and poor application techniques and overlooking environmental factors during painting all invite failure.
Skip long term maintenance and the peel will return.
Troubleshooting: Peeling Returns-What to Try Next
If peeling comes back despite your best efforts, don’t assume the last fix was the problem—systematically check the basics first:
- Re-examine surface prep for missed contaminants; peeling causes often start here.
- Verify moisture levels; unseen damp ruins adhesion.
- Confirm compatibility between old and new coatings.
- Reinforce preventative measures: proper primer, correct cure times, and routine inspections to catch issues early.
Cost and Time Estimates for Typical Repairs
Now that you’ve checked prep, moisture, and compatibility, you’ll want to weigh the likely cost and time for repairs so you can plan properly.
Consider repair costs with clear time estimates: material pricing, labor rates, and project timelines.
Do an expense analysis to compare DIY options versus professional help.
Match repair strategies to budget considerations so you avoid surprises and meet deadlines.
Quick Checklist: Prep, Prime, Paint, Prevent
Start with a clear checklist so you don’t miss any essential steps: prep the surface thoroughly, choose the right primer, apply paint correctly, and take simple measures to prevent future peeling.
- Inspect and sand for proper surface preparation.
- Clean and dry completely.
- Use primer matched for paint compatibility.
- Apply thin coats, cure, and control moisture to prevent return.
Frequently Asked Questions
Can You Paint Latex Over Oil-Based Trim Without Sanding First?
You can’t reliably paint latex over oil based trim without sanding first; you’ll harm latex paint adhesion. You should sand or degloss, then use a bonding primer so latex adheres properly to oil based trim.
Will Humidity Sensors or Smart Vents Prevent Future Peeling Indoors?
Absolutely — you’ll help prevent peeling: like a steady heartbeat, humidity control and improved air circulation from sensors or smart vents stabilize moisture, so paint adheres better and you’ll reduce recurrence by managing indoor dampness proactively.
Can Leftover Latex Paint Be Used to Spot-Repair Color-Matched Patches?
Yes — you can use leftover latex to spot-repair color-matched patches if you test on inconspicuous area, thin as needed, and blend edges. Use color matching techniques, and follow paint storage tips to keep leftovers usable.
Is Mildew the Same as Moisture-Related Peeling and Treated the Same Way?
Not exactly — mildew’s a cosmetic, moisture-related peeling’s structural; you’ll want mildew prevention for surface cleanliness, and moisture management to stop underlying damage. You’ll clean, treat spores, seal leaks, and improve ventilation to prevent recurrence.
How Do Temperature Extremes During Curing Affect Long-Term Adhesion?
Temperature extremes during the curing process weaken adhesion: rapid temperature fluctuations can cause cracking, poor film formation, and reduced durability, so you should cure paint within recommended temperature ranges to guarantee long-term bond and flexibility.
Conclusion
You’ve got the know-how to fix that peeling patch and stop it coming back, so why live with flaky walls when a little prep can make them fresh again? Tackle loose paint, sand, clean, prime, and paint with the right products—don’t rush drying or skip primer. With proper ventilation, quality materials, and a bit of patience, your repaired spot will blend in and stay put. Ready to enjoy smooth, lasting walls?