How to Spray Orange Peel Texture on Walls Like a Pro
You’ll get a pro orange-peel finish by mixing a sprayable joint compound to a thin, droplet-friendly consistency, testing patterns on scrap, and setting your sprayer with the right nozzle and pressure. Hold the gun 12–18 inches from the wall, use smooth parallel strokes with about 50% overlap, and feather seams and corners for a seamless look. Monitor drying and clean equipment promptly. Keep practicing technique adjustments and you’ll pick up pro tips as you go.
What Orange Peel Texture Is and When to Use It
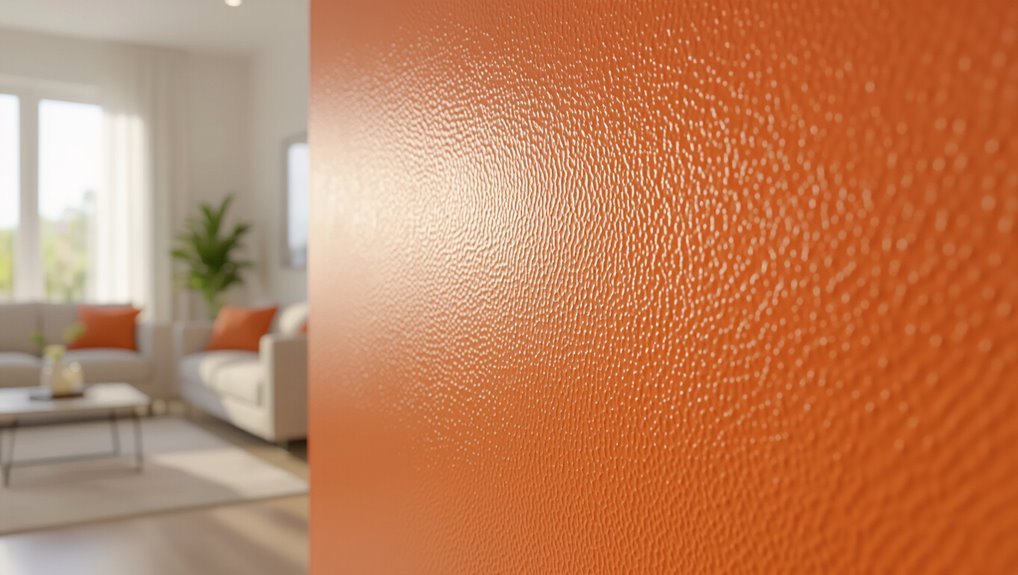
Orange peel texture is a fine, dimpled finish that looks like the skin of an orange and hides minor wall imperfections; you’ll often find it on ceilings and drywall in newer homes.
You’ll choose textured finishes when you want durability, easier touch-ups, and subtle masking of flaws.
Use it to support specific design aesthetics—modern, casual, or changeable—without overpowering a room’s style.
Quick Orange-Peel How-To: The 5-Step Overview
Start by gathering your tools and prepping the room so you’ll move smoothly through five clear steps: protect and mask surfaces, mix the sprayable texture, load and adjust your hopper or sprayer, apply test sprays and then the walls, and finally let it dry before any touch-ups or paint.
Start by prepping the room and tools, then follow five clear steps for smooth, consistent spray texture results.
Follow these concise steps to control spray patterns and achieve consistent texture finishes:
- Test spray for pattern and density
- Adjust nozzle and air pressure
- Work in overlapping passes
Choose the Right Joint Compound and Texture Mix
You’ll want to pick the right joint compound—lightweight, all-purpose, or topping—based on ease of sanding and final durability.
Mix to the manufacturer’s recommended ratios and thin slightly for a sprayable orange-peel texture, adding a bit of water or a latex additive if needed.
Test the blend on scrap drywall to fine-tune consistency before you start.
Compound Types Guide
Choosing the right joint compound and texture mix makes spraying an orange peel finish much easier and improves the final look.
You’ll pick based on surface, drying time, and tool compatibility. Know the common compound types and suitable texture applications so you get consistent results.
- Premixed all-purpose compound
- Setting-type powder (fast/slow)
- Lightweight or topping compound
Mixing Ratios & Additives
When you’re mixing for an orange peel texture, getting the water-to-compound ratio right is essential because it controls sprayability, droplet size, and how the texture levels on the wall.
You’ll choose premixed or powdered joint compound, test small batches, and use proper mixing techniques to achieve consistent viscosity.
Consider additive benefits like retarders or bonding agents to improve work time and adhesion.
Thin and Mix Compound for Consistent Droplets
You’ll need the compound thin enough to form uniform droplets but not so runny that it splatters.
Measure your water-to-compound ratio precisely — small changes affect droplet size and spray behavior.
Test and adjust on cardboard until you get a consistent pattern before spraying the wall.
Proper Compound Viscosity
Because droplet size and pattern hinge on how your compound flows, getting the viscosity right is essential before you load the hopper.
You’ll aim for a pumpable mix that holds droplets, balancing compound consistency with tried application techniques. Test and adjust until droplets form predictably.
- Stir thoroughly for uniform texture
- Check flow with a small spray
- Re-mix after resting
Accurate Water-To-Compound
Aim to match water to compound precisely so droplets form consistently instead of running or clumping; start with the manufacturer’s suggested ratio, add water in small increments, and test-spray after each adjustment to reach a pumpable, droplet-holding mix.
You’ll monitor compound consistency and note water ratios for repeatable results, thinning just enough to pump without losing texture or causing splatter.
Test Spray Patterns and Dial in Droplet Size
Before you start on the actual wall, test the sprayer on a scrap board or cardboard to dial in the spray pattern and droplet size.
You’ll adjust the spray nozzle and pressure so the texture consistency matches your sample. Make small tweaks, note settings, then proceed confidently.
- Aim for even coverage
- Check droplet size visually
- Keep records of settings
Hopper Gun vs. Aerosol Sprayer: Pros and Use Cases
When you need heavy coverage and adjustable texture, a hopper gun gives you power and control for larger jobs.
If you’re working small or want quick spot repairs, aerosol sprayers are convenient and mess-free.
Consider job size, budget, and finish consistency to pick the right tool.
Hopper Gun Benefits
A hopper gun gives you fast, consistent coverage for orange peel textures, making it the go-to for larger jobs or when you need uniform results.
You’ll appreciate hopper gun advantages when using professional techniques to control pattern, thickness, and speed. It’s efficient, repeatable, and reduces touch-ups.
- Faster coverage
- Consistent texture
- Scales for big projects
Aerosol Sprayer Strengths
If you’re tackling small repairs or tight spots, an aerosol sprayer gives you precise, mess-free orange peel that a hopper gun can’t match.
It’s portable, simple to use, and great for touch-ups or DIY jobs where setup time and cleanup matter.
You’ll appreciate aerosol advantages like controlled spray and minimal overspray, and you’ll learn compact application techniques to match texture, adjust distance, and blend edges efficiently.
Best Use Scenarios
You’ve seen how aerosol sprayers excel at small repairs and tight spots; now let’s compare where each tool really shines so you can pick the right one for the job.
You’ll weigh application benefits and texture variations to match scale, speed, and finish.
- Hopper gun: large areas, consistent texture
- Aerosol: touch-ups, confined spaces
- Hybrid approach: best of both worlds
Pick the Right Compressor and Nozzle for Orange Peel
When you’re aiming for a consistent orange peel finish, choosing the right compressor and nozzle is essential because they control atomization, pattern size, and material flow. Pick a compressor with steady PSI and match nozzle sizes to texture thickness. Test sprays on cardboard, adjust pressure, and tweak tip size for desired speckle.
| Compressor types | Nozzle sizes | Recommended PSI |
|---|---|---|
| HVLP | 1.8–2.5 mm | 20–35 |
| Airless | 0.017–0.021 | 800–1200 psi |
| Turbine | 1.5–2.0 mm | 15–30 |
Masking and Wall Prep for Even Orange-Peel Coverage
Before you spray, tape and cover everything you don’t want textured: trim around windows and doors, baseboards, light switches, and floors.
Then lay drop cloths and overlap seams to stop dust and overspray. You’ll use masking techniques and thorough wall preparation: clean, repair cracks, and sand glossy spots.
Guarantee even moisture and temperature.
- Clean and degrease
- Patch and sand
- Tape edges tightly
Spraying Technique: Motion, Distance, and Overlap
Start by holding the sprayer about 12–18 inches from the wall and move in smooth, parallel strokes so each pass overlaps the last by roughly 50%; this keeps the texture even and prevents heavy spots or bare streaks.
Vary spray patterns slightly to match nozzle output, maintain steady speed, and keep consistent distance.
Check texture consistency frequently and adjust pressure for uniform coverage.
Blend Seams, Corners, and Tricky Spots
After you’ve covered the main wall area with even passes, focus on blending seams, corners, and tight spots so the texture reads as continuous.
Use seam blending techniques to feather overlap, adjust spray distance near edges, and employ corner finishing tips for crisp shifts.
Work wet-on-wet, test on scrap, and keep motion steady.
- Feather overlaps
- Taper at corners
- Use scrap tests
Cleanup, Maintenance, and Storage Tips
1 simple routine will save you hours: rinse spray tips and hoses immediately, wipe down the gun body, and flush the pump with water (or manufacturer-recommended solvent) until it runs clear.
Use proven cleanup techniques, follow a maintenance schedule for seals and filters, choose airtight storage solutions for leftover texture, and practice safe compound disposal per local regs.
Inspect gear before each job.
Troubleshooting Common Orange-Peel Problems and Fixes
Even experienced sprayers hit snags, but you can diagnose most orange-peel issues quickly by checking spray pressure, nozzle size, and material consistency first.
Even seasoned sprayers run into orange‑peel—start troubleshooting with spray pressure, nozzle size, and material consistency.
Identify causes: poor surface preparation, wrong material compatibility, or inconsistent application pressure affecting texture consistency and droplet pattern.
Adjust spray technique and drying time to restore pattern uniformity.
- Check pressure and nozzle
- Thin or swap material
- Prep and rehab surfaces
Frequently Asked Questions
Can Orange Peel Texture Hide Wall Imperfections Long-Term?
Yes — orange peel texture can hide imperfections long-term if you prioritize texture longevity and regular wall maintenance; you’ll need proper prep, durable materials, and occasional touch-ups to keep flaws concealed and the finish looking consistent.
Can I Paint Orange Peel With a Roller After Spraying?
Yes — you can paint orange peel with a roller after spraying. Use a nap roller for even coverage, maintain light roller technique to preserve the texture finish, and avoid heavy pressure that flattens the bumps.
Is Orange Peel Suitable for Exterior Walls?
Yes — you can use orange peel on exterior walls; it offers good exterior durability if properly sealed and painted, and you’ll need regular texture maintenance to inspect for cracking, wash grime, and touch up protective coatings as needed.
How Long Before Sanding or Repainting Orange Peel?
Like a knight’s quill, you’ll wait 24–48 hours for curing time before light sanding; full repainting waits 7–14 days for the texture finish to fully cure, ensuring adhesion and an even, professional result.
Can I Add Paint Color Directly to the Texture Mix?
Yes — you can add paint to the texture mixing, but you’ll limit color options and may change drying, adhesion, and spray consistency. Test small batches first, adjust viscosity, and use compatible paint for reliable results.
Conclusion
You’ve practiced proper prep, picked perfect paste, and practiced your pattern, so you’re poised to produce professional-looking orange peel. Keep compound consistency consistent, control your coverage with careful cadence and correct distance, and coat seams cleverly to create a continuous, clean canvas. With routine rinsing of your sprayer, respectful storage, and ready remedies for runs or clogs, you’ll reliably reproduce this refined, resilient resurface—confident, calm, and consistently competent.