Can You Spray Paint Finished Wood for a Smooth, Even Coat?
Yes — you can spray paint finished wood and get a smooth, even coat if you prep and use the right products. Clean the surface, scuff-sand glossy or oil-based finishes, and fill flaws first. Use a bonding primer that matches the existing finish, spray multiple thin, overlapping coats from 8–12 inches away, and sand lightly between coats for the best result. Keep humidity and temperature controlled, wear proper PPE, and continue for tips on troubleshooting and alternatives.
Can You Spray Paint Finished Wood for a Smooth, Even Coat? Quick Answer
Yes — you can spray paint finished wood and get a smooth, even coat if you prepare the surface properly.
You’ll want to clean, lightly sand or scuff the finish, and use the right primer and paint for adhesion.
This approach works best on pieces that aren’t heavily worn or sealed with oil-based finishes that resist new coatings.
Direct short answer
You can spray paint finished wood for a smooth, even coat, but you’ll need to prep the surface first—clean, lightly sand or scuff, and use a compatible primer or adhesion promoter—so the paint bonds and lays down uniformly.
Yes, can you spray paint finished wood successfully? With proper prep, compatible products, and thin, even passes, you’ll get a durable, professional-looking finish.
When spray painting finished wood is appropriate
Spray painting finished wood makes sense when the piece only needs surface-level updates—like changing color, revitalizing worn spots, or covering minor blemishes—rather than full restoration.
You should spray when the finish is intact, adhesion is likely, and you don’t need grain detail.
Avoid spray if the surface is heavily damaged, needs structural repair, or you want a natural wood look; prep and test first.
Understanding Finished Wood and Paint Adhesion
Finished wood means surfaces already sealed with products like varnish, lacquer, polyurethane, or shellac. Each finish changes how paint will stick.
You’ll need to assess the existing coating—its sheen, condition, and type—because that determines whether you should scuff, prime, or strip before spraying.
Different spray paints (acrylic, enamel, lacquer) interact differently with those finishes, so pick a compatible paint and prep method for a lasting result.
What “finished wood” means (varnish, lacquer, polyurethane, shellac)
Think of “finished wood” as any wood surface that’s been sealed with a coating—varnish, lacquer, polyurethane, or shellac—that’s meant to protect and alter the surface’s look.
Those coatings change how paint will stick, dry, and look, so you’ll need to identify the existing finish before you prep and paint.
Varnish and polyurethane form hard films, lacquer dries fast and smooth, shellac is delicate and alcohol-soluble.
How existing finishes affect paint adhesion and finish quality
Because the existing coating determines how well new paint will bond and how the final surface will look, you should always identify the finish before you start prepping.
Glossy or oil-based finishes repel primers and need sanding or deglossing; shellac and lacquer dissolve with certain solvents; polyurethane may need abrading.
Match prep to finish so adhesion, durability, and smoothness aren’t compromised.
Types of spray paints and their compatibility with finishes
Now that you’ve identified the existing finish and prepped it appropriately, you’ll choose a spray paint type that actually bonds and performs on that surface. Pick enamel for durability, lacquer for fast drying over sealed wood, acrylic for flexibility, and oil-based for strong adhesion to previously painted pieces.
| Paint Type | Best With |
|---|---|
| Enamel | Varnish, primer |
| Lacquer | Sealed wood |
| Acrylic | Water-based finishes |
| Oil-based | Existing paint |
Preparation: The Critical Steps Before Spray Painting
Before you spray paint finished wood, you’ll want to assess the existing finish and overall surface condition to decide your approach.
Clean thoroughly with the right cleaners or degreasers, then choose scuff sanding or full stripping.
Fill any cracks or flaws, and sand progressively to the correct grits for a smooth base.
Doing these steps in order makes sure the new paint bonds well and looks professional.
Step 1 Assess the existing finish and surface condition

Start by examining the piece closely to determine what finish is on it, how well it’s adhered, and where any damage or imperfections are—this assessment tells you whether you can spray over the current finish, need to strip it, or simply sand and repair.
Check for peeling, blistering, or sticky areas, old varnish or lacquer, and water or heat damage to plan appropriate next steps.
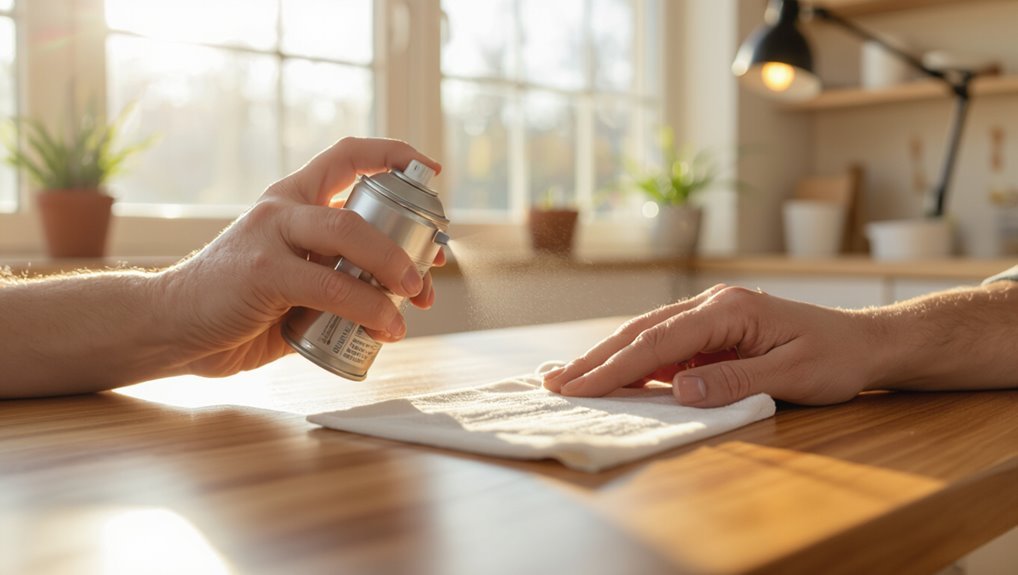
Step 2 Clean the surface: recommended cleaners and degreasers
After you’ve identified the finish and any damage, clean the wood thoroughly so coatings will adhere and flaws become visible.
Use a mild TSP substitute or dedicated wood cleaner to remove grease, nicotine, and residues; dilute per label.
For stubborn grime, use mineral spirits sparingly and ventilate.
Wipe with clean rags, let fully dry, and avoid oily or silicone-based products that repel finish.
Step 3 Scuff sanding vs. stripping: when to choose which
When the existing finish is intact and you just need better adhesion, scuff sanding is usually the faster, lower-risk choice; you’ll abrade the surface lightly with fine-grit sandpaper or a scuff pad to dull the gloss and give new paint something to bite into.
- Scuff sand for light wear
- Strip for peeling or multiple coats
- Consider odor and ventilation
- Test a small area first
- Clean residue before priming
Step 4 Fill cracks and repair flaws
If scuff sanding or stripping has left you with bare spots or rough edges, you’ll want to address any cracks, gouges, or nail holes before pulling out the spray gun.
Use wood filler or epoxy for deeper damage, pressing it into gaps, then let it cure fully.
Trim, level, and feather edges so repairs sit flush and won’t telegraph through the finish.
Step 5 Sanding grits and technique for a smooth base
Start with 120‑ or 150‑grit to level repairs and smooth rough spots. Then progress through 180‑ to 220‑grit for a consistent, feathered surface that’ll accept primer and paint without show-through.
Sand with the grain, use even pressure, and keep the sander moving to avoid dips.
Check edges and contours by touch, and reblend patched areas until the shift is invisible.
Step 6 Tacking and dust removal methods
Although you’ve smoothed the surface, removing every speck of dust is essential before you spray; tack cloths and careful cleaning prevent tiny particles from wrecking the finish.
Wipe with a lint-free cloth dampened with mineral spirits, then tack the surface with a slightly sticky cloth in overlapping strokes.
Check under bright light, blow with compressed air, and avoid recontaminating the area.
Step 7 Choosing and applying the right primer for finished wood
With the surface dust-free and tack-checked, it’s time to pick a primer that bonds to finished wood and supports the paint you’ll spray.
Choose a stain-blocking, adhesion-promoting primer; apply thin, even coats; sand light between coats; let each coat dry fully; and mask surrounding areas.
Recommended steps:
- Use a bonding primer
- Thin per label
- Spray multiple light passes
- Sand with fine grit
- Follow full cure times
Spray Painting Process
Before you start spraying, check your equipment and materials—mask, respirator, chosen paint, and whether you’ll use aerosol, HVLP, or airless.
Set ideal spray settings and environmental conditions (temperature, humidity, ventilation), then practice consistent technique: correct distance, overlap, speed, and favor multiple thin, wet coats over one heavy coat.
Between coats follow recommended drying times and do light sanding as needed to guarantee a smooth finish.
Equipment and materials checklist
Checklist time: gather the right tools and materials so your spray-painted finish looks professional and goes on smoothly.
You’ll need basics and safety gear, plus prep and cleanup supplies. Assemble everything before starting to avoid interruptions.
- respirator and gloves
- tack cloths and fine-grit sandpaper
- primer and compatible paint
- spray gun or can and extension
- drop cloths and masking tape
Choosing the spray method: aerosol vs. HVLP vs. airless
You’ve gathered your respirator, tack cloths, primer and paint—now pick the spray method that matches the job.
Use aerosols for small touch-ups and tight budgets; they’re simple but offer less control.
Choose HVLP for furniture and fine finishes—low overspray, smooth application.
Go airless for large surfaces and fast coverage, though it’s heavier and needs thinning and practice.
Optimal spray settings and environmental conditions (temp, humidity, ventilation)
Although spray settings and shop conditions might seem like fine points, they make or break a finish—get temperature, humidity, air movement, and atomization right, and the paint will flow, level, and cure predictably.
Keep ambient temperature 65–75°F, relative humidity under 60%, and steady cross-ventilation to remove overspray and fumes.
Adjust pressure/nozzle to produce a fine, consistent mist for even coverage without runs.
Technique: distance, overlap, speed, and wet coats vs. multiple thin coats
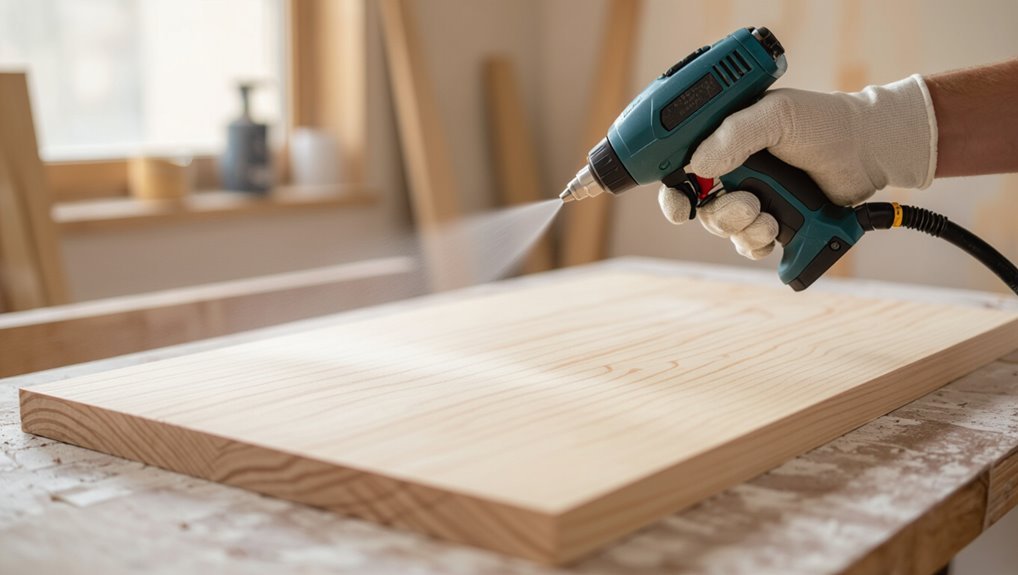
When you spray, keep the gun moving at a steady pace about 8–12 inches from the surface, overlapping each pass by roughly 50% so you build even coverage without puddles; faster strokes give thinner films, slower strokes lay more material and raise the risk of runs, so dial your speed to the nozzle, pressure, and the coating’s viscosity.
Use multiple thin coats rather than wet heavy passes; thin layers level better and reduce sagging.
Drying times and between-coat sanding
Because drying varies with temperature, humidity, film thickness, and the type of finish, plan your schedule around the manufacturer’s recommended tack, dry-to-handle, and recoat times rather than guessing; check the can or tech sheet for specific windows.
Wait until the surface is no longer tacky and the solvent smell has mostly dissipated, and sand only when the finish is firm enough to cut without gumminess—usually after the full dry-to-recoat time or a light overnight for most lacquers and polyurethanes.
Sand lightly with fine-grit (320–400) between coats to remove dust nibs and promote adhesion. Clean thoroughly, and dust off before recoating to keep layers smooth and even.
Applying protective topcoats for durability
Seal the work with a durable topcoat that matches the wear your piece will face: choose the right product (water- or oil-based polyurethane, conversion varnish, lacquer, or a specialized clear exterior finish).
Follow the manufacturer’s dry and recoat windows, and apply thin, even passes to build consistent protection without runs or excessive film thickness.
Let each coat cure fully, sand lightly between coats, and inspect for coverage before final curing.
Common Problems When Spray Painting Finished Wood and How to Fix Them
You’ll encounter a handful of recurring problems when spray painting finished wood—peeling or flaking, orange peel or uneven texture, runs and drips, visible brush marks or show-through, and stubborn adhesion failures.
For each issue I’ll explain what causes it, how to prevent it, and the quickest reliable fixes, including corrective sanding and a simple diagnostic checklist for adhesion.
Read on so you can spot the problem fast and apply the right repair.
Peeling or flaking paint causes and fixes
When paint peels or flakes off finished wood, it usually signals a bonding failure between the new coating and the surface beneath—often from contamination, incompatible products, or insufficient surface prep.
You should strip loose paint, clean with deglosser or solvent, sand to key the surface, and use a compatible primer before repainting.
Guarantee full cure between coats and avoid painting over glossy finishes without proper prep.
Orange peel and uneven texture prevention and corrective sanding
If your sprayed finish looks bumpy or pebbled instead of smooth, that “orange peel” texture usually comes from incorrect spray settings, thinned paint, or spraying from too far away.
You can prevent it by adjusting atomization, thinning to the manufacturer’s recommendations, and keeping a consistent gun-to-surface distance while using even, overlapping passes.
If texture persists, let coats cure, wet-sand with 400–600 grit, then polish and recoat.
Runs, sags, and drips how to avoid and repair
One common mistake that causes runs, sags, and drips is applying too much paint in one pass, so keep your strokes light and overlap by about 50% to build even coverage.
If a drip appears, let the paint tack slightly, sand the imperfection smooth with fine grit, clean dust, then respray thin, even coats.
Maintain proper distance and motion.
Brush marks and show-through troubleshooting
Although spray painting usually hides brushwork, brush marks and show-through still show up when the surface beneath isn’t properly prepared or the spray technique is off.
Sand glossy finishes lightly, fill deep scratches with wood filler, and clean off dust or oils.
Use thin, even coats, proper distance, and cross-hatch passes.
If stains bleed through, seal with a shellac or stain-blocking primer before repainting.
Adhesion failures despite preparation diagnostic checklist
When paint peels, flakes, or chips away even after you’ve prepped the wood, you’re dealing with an adhesion failure—and diagnosing it quickly will save you time and materials.
Check finish compatibility, solvent residue, and sheen level.
Perform a tape pull and solvent rub test, inspect for contamination or moisture, confirm proper primer and dry times, and sand to mechanical keying before recoating.
Best Practices and Professional Tips for a Smooth, Even Finish
When you’re aiming for a smooth, even finish, start by choosing the right primer for the existing coating—shellac or solvent-based primers for tannin-heavy or glossy finishes, and adhesion primers for slick surfaces.
Apply thin, even layers with proper flash times and full cure intervals to prevent runs and guarantee durability, and consider tinting primers to improve color coverage.
Always work in a well-ventilated area, use appropriate respirators, and follow disposal and environmental guidelines for solvents and overspray.
Priming strategies for different existing finishes
Because different finishes absorb and bond with primers differently, you’ll need to match your priming approach to the existing surface to get a smooth, even topcoat.
For bare wood use a sealing primer; for glossy lacquer or polyurethane scuff-sand and use a bonding primer; for previously painted surfaces spot-prime bare areas and use a high-adhesion primer overall.
Always test adhesion before full application.
Layering and curing practices for long-lasting results
After matching your primer to the existing finish and confirming adhesion, focus on how you build and cure each layer to secure durability and a flawless look.
Apply thin, even coats with light overlap, allowing tack-free times between passes.
Sand very lightly between coats with fine grit, clean dust, then follow manufacturer cure times—longer in cool or humid conditions—to guarantee hardness and adhesion.
Color uniformity and tinting primers
Although often overlooked, getting color uniformity starts at the primer: tinting your primer to approximate the final topcoat and matching underlying tones cuts the number of finish coats you need and prevents blotchy or faded spots.
You should test tinted primer patches, adjust percent tint for transparency, and spray thin, even primer layers so the topcoat lays down uniformly and color corrects with fewer passes.
Safety, ventilation, and environmental considerations
When you spray paint finished wood, prioritize safety and ventilation from the first setup—open windows, run a cross‑flow of fresh air with a fan, and wear an appropriate respirator (not just a dust mask) to keep solvent vapors and fine aerosols out of your lungs.
- Use P100/NIOSH respirator
- Protect skin and eyes with PPE
- Avoid open flames; solvents are flammable
- Contain overspray with drop cloths
- Dispose of rags and cans per local hazardous-waste rules
When Not to Spray Paint Finished Wood Alternatives
If the existing finish is failing or the wood has deep stains or damage, you’ll need to strip it rather than spray over it.
Consider refinishing, re-staining, using gel stains, or veneering as better alternatives that preserve the wood’s character.
And for complex jobs or valuable pieces, hire a professional who can assess and execute the safest option.
Situations where stripping is necessary
Sometimes you’ll need to strip old finish before spraying, because certain conditions make painting over it a bad idea.
Strip when the finish is lifting, peeling, or blistering, or if multiple incompatible coats (shellac over polyurethane) exist.
Also remove finishes with heavy dirt, wax buildup, or solvent-sensitive contaminants.
Stripping guarantees adhesion and prevents bubbling, fish-eyeing, or premature failure of your new paint.
Alternatives: refinishing, re-staining, using gel stains, or veneering
Stripping isn’t always the only or best route—you may find gentler options that preserve the wood and save time.
You can recoat with compatible finish, lightly sand and re-stain, or apply gel stain to even color without full stripping.
For damaged veneer or badly worn surfaces, consider replacing or adding new veneer.
These alternatives often beat spray painting over poor adhesion or uneven results.
When to hire a professional
When the piece has structural damage, intricate moldings, or valuable finishes you want preserved, call a pro rather than risk a DIY spray job.
You should hire a professional if the job requires stripping delicate finishes, matching historic colors, repairing joints, or working with hazardous coatings.
Pros have tools, controlled environments, and expertise to avoid costly mistakes and preserve value.
Tools, Products, and Cost Considerations
You’ll want to pick the right tools—from HVLP or gravity-feed spray guns to reliable consumer aerosol cans—so you get even coverage without runs.
Choose primers and paint formulated for existing finishes (bonding primers, acrylic or enamel spray paints) to guarantee adhesion and durability.
Compare DIY material/time costs versus hiring a pro to decide if the savings are worth the extra prep, equipment, and potential touch-ups.
Recommended spray guns and consumer aerosols
Although choosing the right spray gun or aerosol can feel overwhelming, picking tools that match your project size, finish type, and budget will save time and improve results.
You’ll want reliable, user-friendly options:
- HVLP handheld gun for small to medium pieces
- Gravity-feed HVLP for finer control
- Touch-up aerosol cans for detail
- High-quality enamel aerosols for durability
- Budget starter kits for practice
Best primers and paint types for finished wood
Selecting the right primer and paint determines how durable and attractive your finished wood will be, so match product type to the wood species, existing finish, and spray method.
You’ll want adhesion, flexibility, and sprayability. Consider:
- Shellac primer for tannin bleed and adhesion
- Acrylic/latex for water cleanup
- Alkyd for durability
- Spray-grade lacquer for fast build
- Oil-based primer under enamel
Rough cost and time estimate for DIY vs. professional job
Whether you tackle the spray-painting yourself or hire a pro, expect a wide range of costs and time commitments depending on tools, prep, and finish quality. You can DIY for $50–$250 and 4–12 hours; pros charge $200–$1,200 and 2–6 hours. Choose based on skill, access to equipment, and desired durability.
| Option | Typical Range |
|---|---|
| DIY | $50–$250 |
| Professional | $200–$1,200 |
| Time | 2–12 hours |
Mistakes to Avoid (Top Pitfalls)
Don’t skip primer or skimp on sanding—poor adhesion starts there and ruins the finish.
Avoid painting in high humidity, extreme temperatures, or windy conditions, and don’t try to hide flaws by spraying thick coats instead of several thin ones.
Also check product compatibility so your paint, primer, and topcoat won’t react or peel.
Skipping primer or inadequate sanding
Skip primer or skimp on sanding and you’ll undermine the entire finish before a single coat goes on. You’ll get poor adhesion, visible flaws, and peeling later.
Take time to clean, scuff or sand to the right grit, then remove dust. Use a proper primer for the surface—especially glossy or sealed wood—to guarantee uniform coverage and lasting durability from your spray paint.
Painting in poor environmental conditions
If you paint in high humidity, extreme heat, wind, or cold, you’ll compromise drying, adhesion, and the final look of your work.
You should wait for mild, stable conditions—ideally 50–75°F and low humidity. Wind blows debris and causes uneven spray; extreme temps alter viscosity and cure.
Use a controlled space or a ventilated shelter, and check the forecast before you start.
Applying thick coats instead of multiple thin coats
Working in the right conditions helps your finish, but how you apply paint matters just as much: laying on thick coats may seem faster, yet it creates runs, longer drying times, poor adhesion, and an uneven texture.
You should spray several light, even passes, keeping the nozzle moving and overlapping slightly. Thin layers dry uniformly, sand smoothly between coats, and reduce drips and orange peel.
Using incompatible products
Because different products cure and bond in different ways, mixing finishes or switching between incompatible brands can wreck your work.
Don’t assume a primer, sealer, or clear coat will play nice with your paint. Test on scrap, read labels for solvent and resin compatibility, and stick to recommended combinations.
Incompatible layers can lift, crack, or remain tacky, ruining the finish.
FAQ
You probably have a few quick questions, like whether you can spray over polyurethane without sanding and how many coats you’ll need for a durable finish.
You’ll also want to know if spray paint or chalk paint spray will hide the wood grain and how long to wait before using the furniture.
Let’s answer these so you can finish your project with confidence.
Can I spray paint over polyurethane without sanding?
Can you spray paint over polyurethane without sanding? You can, but adhesion risks remain.
Clean the surface thoroughly, degloss with a liquid sandpaper or chemical deglosser, and use a high-adhesion primer formulated for slick surfaces.
Lightly scuffing helps even more. Test a small area first.
Expect better durability when you prep properly rather than relying solely on paint to stick.
How many coats of spray paint do I need for a durable finish?
Wondering how many coats of spray paint you need for a durable finish?
You’ll usually apply two to three light, even coats—allowing recommended flash times between passes—to build coverage without runs.
For high-traffic surfaces or lighter colors, add a third coat.
Finish with a clear protective topcoat if extra durability is required; it seals and resists scratches, moisture, and wear.
Will spray paint hide wood grain on finished pieces?
How much of the wood grain shows through depends on the paint type and how you apply it.
If you use thin, translucent or spray-applied paint, grain may remain visible; opaque, high-build primers and multiple even coats reduce visibility.
Sanding and filling deep pores before painting helps.
Expect some texture unless you prime, build up opacity, or use a solid-color primer for full concealment.
Can I use chalk paint spray over finished wood?
Yes—you can spray chalk paint over finished wood, but surface preparation and product choice matter.
Scuff-sand glossy finishes, remove dust, and use a deglosser if needed. Test adhesion on a hidden area and choose a chalk spray formulated for sealed surfaces.
Apply thin, even coats, allow proper drying between passes, and seal with a compatible topcoat to protect the finish.
How long before I can use the painted furniture?
Cure time depends on the paint, number of coats, and topcoat—plan to wait at least 24–48 hours before light use, and 7–30 days for heavy use or frequent contact to allow full hardening.
Touch gently after 24–48 hours; avoid placing heavy items or dragging objects for weeks.
Room temperature and humidity affect curing, so keep the piece warm, dry, and protected until it’s fully set.
Conclusion and Next Steps
Wrap up your prep with a quick checklist—clean, sand, mask, and choose the right primer and paint.
Try the spray on a hidden spot when the finish or substrate is uncertain so you can confirm adhesion and color.
Once those checks pass, you’re ready to proceed with confidence.
Quick checklist to start your project
- Get ready with these quick steps before you spray:
- Clean and degloss the surface
- Sand lightly and remove dust
- Choose compatible primer and paint
- Set up ventilation and drop cloths
- Test spray pattern and distance
You’ll work safer, faster, and get smoother results by following this checklist before starting your project.
When to test a small area first
Now that you’ve prepped the surface and set up your workspace, test a small, inconspicuous area before spraying the whole piece.
Try your chosen paint and technique, let it cure fully, then check adhesion, texture, and color match.
If it sands, chips, or looks uneven, adjust primer, thinning, or spray distance.
Proceed only when results meet your standards.