How to Seal Chipped Paint and Protect Your Surfaces Long-Term
You can stop chipped paint from spreading and protect surfaces long-term by cleaning loose material, repairing the substrate, priming, and sealing before repainting. Scrape and sand edges, remove rust or rot, fill voids with a compatible filler, then feather and smooth. Use a high-adhesion primer and appropriate sealer or topcoat for the material (wood, metal, drywall, masonry). Do routine inspections and touch-ups to prevent recurrence, and keep reading to learn the specific steps and products.
Quick Answer Can You Seal Chipped Paint and Should You?
You can often seal small chips on wood and metal with a filler and a touch-up coat, but on drywall and masonry you’ll usually need patching before sealing.
Seal only when chips are isolated and substrate is sound; choose full repainting when damage is widespread, flaky, or the surface has moisture or rust.
Follow the right prep and products for each surface to make the repair last.
Direct, concise recommendation for different surface types (wood, metal, drywall, masonry)
Yes—you can seal chipped paint, and whether you should depends on the surface and the damage:
For wood, sand, prime, and use exterior-grade filler and sealant;
for metal, remove rust, prime with rust-inhibitor, then seal;
for drywall, clean, skim with joint compound, sand, prime, and seal;
for masonry, brush-clean, patch with mortar or patching compound, prime with masonry primer, then seal to protect.
When sealing is appropriate vs. when full repainting is required
Having covered the basic repair steps for wood, metal, drywall, and masonry, next decide whether sealing the chips will do or a full repaint’s needed.
Seal when damage is isolated, substrate sound, and color match is acceptable.
Repaint when peeling is widespread, rust or moisture has compromised the substrate, or color/finish mismatch is obvious.
Prioritize substrate integrity and long-term protection.
Basic Understanding What Causes Paint to Chip and Why Sealing Helps
Paint chips because moisture, poor adhesion, aging, or physical impact breaks the bond between paint and surface.
Sealing stops moisture and contaminants from getting under the paint, slowing further flaking and extending the life of the finish.
If you see rust, rot, or mold beneath the chips, you’ll need to fix those issues before sealing so the repair lasts.
Common causes of paint chipping (moisture, adhesion failure, aging, impact)
When moisture gets behind a finish, it lifts the film and breaks the bond with the substrate. Inadequate adhesion, age-related embrittlement, and physical impacts all speed that deterioration.
Understanding these causes helps you know why sealing stops further loss by blocking water, re-establishing a sound surface, and adding a protective layer against wear.
You should inspect for leaks, poor prep, UV degradation, and knocks.
How sealing prevents further damage and extends surface life
Now that you’ve checked for leaks, poor prep, UV damage, and impacts, it helps to see exactly how sealing stops further loss and prolongs a finish.
Sealing fills microcracks, blocks moisture and oxygen, and restores adhesion between paint and substrate. You’ll prevent peeling, slow UV breakdown, and reduce dirt intrusion, so the surface stays intact longer and needs fewer repairs.
When underlying damage (rust, rot, mold) must be addressed first
Before you seal chipped paint, deal with any rust, rot, or mold beneath the surface—those problems will keep breaking the finish no matter how well you seal it.
You should inspect, remove, and repair before priming. Visualize the hazard, then act:
- Flaky brown rust eating metal
- Soft, crumbling wood decay
- Dark, spreading mold patches
Treat, dry, and stabilize before sealing.
Materials, Tools, and Products You Need
Before you start sealing, gather the right tools—scrapers, sandpaper, a wire brush, putty knife, and brushes or rollers—to prep the surface efficiently.
Pick the proper sealants and fillers for the substrate, like wood filler, epoxy or polyester filler, latex caulk, rust converters, or masonry sealer.
Finally, choose compatible paint and primer—know when to use oil vs. latex, a bonding primer, or a rust-inhibiting primer—so your repair holds up.
Essential tools (scrapers, sandpaper, wire brush, putty knife, brushes/rollers)
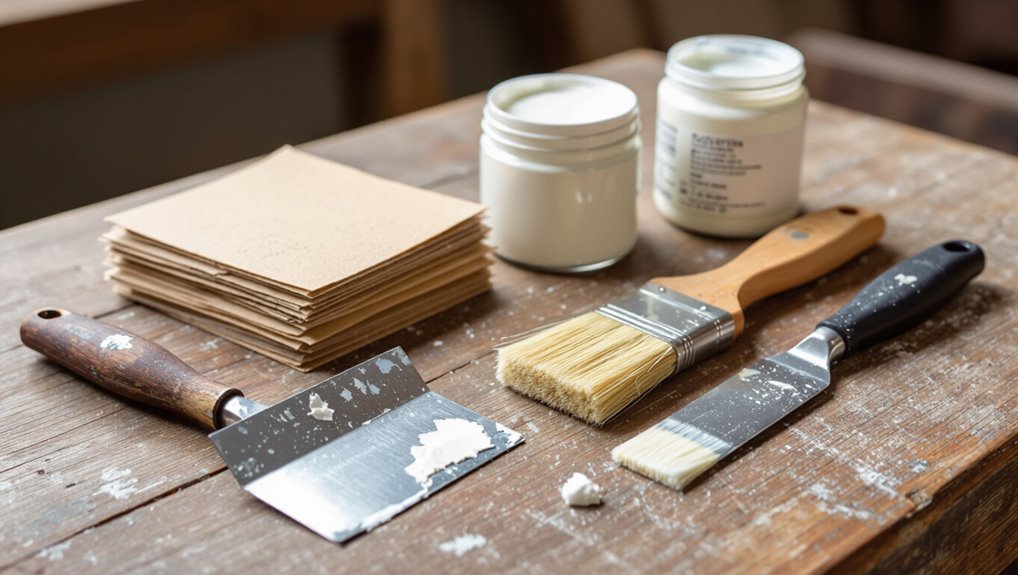
You’ll need a handful of basic tools to prep and repair chipped paint properly: scrapers and a wire brush to remove loose flakes, sandpaper to feather and smooth edges, a putty knife for applying filler, and quality brushes or a small roller for finish coats.
- Metal scraper glinting as it peels flakes away
- Coarse sandpaper dusting edges smooth
- Sturdy putty knife spreading compound evenly
Sealants and fillers by substrate (wood filler, epoxy, polyester filler, latex caulk, rust converters, masonry sealers)
Once you’ve removed loose paint and smoothed the surface, pick the right filler or sealer for the material you’re repairing—wood, metal, or masonry each need different products. Use wood filler for gouges, epoxy for structural metal repairs, polyester for auto/body chips, latex caulk for joints, rust converters for corrosion, and masonry sealer for porous stone.
| Substrate | Recommended product |
|---|---|
| Wood | Wood filler |
| Metal | Epoxy |
| Auto/body | Polyester filler |
| Joints | Latex caulk |
| Masonry | Masonry sealer |
Paint types and primers to use after sealing (oil vs. latex, bonding primer, rust-inhibiting primer)
Choose the right paint and primer to match the sealer and substrate so your repair lasts—oil-based paints pair well with oil-based primers for greasy or previously oil-painted surfaces, while latex paints work with water-based primers for most interior and exterior wood or masonry.
Use a bonding primer when adhesion is poor and a rust-inhibiting primer on bare or treated metal to prevent corrosion under the finish.
Use compatible topcoats, follow dry times, and spot-test sheen and color.
Step-by-Step Process to Seal Chipped Paint (Surface-by-Surface)
Before you start, you’ll follow a clear workflow and use basic safety gear to protect yourself and the surface.
First assess the chips and pick a strategy, then clean, degrease, and strip loose paint so repairs will bond.
Next treat any rust or rot, patch as needed, and fill and level chips with the right filler and technique.
Overview: general workflow and safety precautions
When you’re ready to seal chipped paint, start with a clear workflow and the right safety steps so the job goes smoothly and safely.
You’ll prep, protect, and work methodically while keeping safety front and center.
Picture these essentials:
- Clean, dry surface ready for repair
- Proper ventilation, eye and respiratory protection
- Drop cloths and tape to protect surrounding areas
Step 1 Assess the damage and choose strategy
Now that you’ve prepped the area and put safety measures in place, inspect the chips closely to decide how to proceed.
Determine chip size, depth, and surrounding adhesion; tiny surface flakes need sealing only. Larger or rusted areas require filler and rust treatment.
Match repair method to substrate—wood, metal, drywall—and note paint type and finish so you choose compatible products and techniques.
Step 2 Prepare the surface (cleaning, degreasing, removing loose paint)
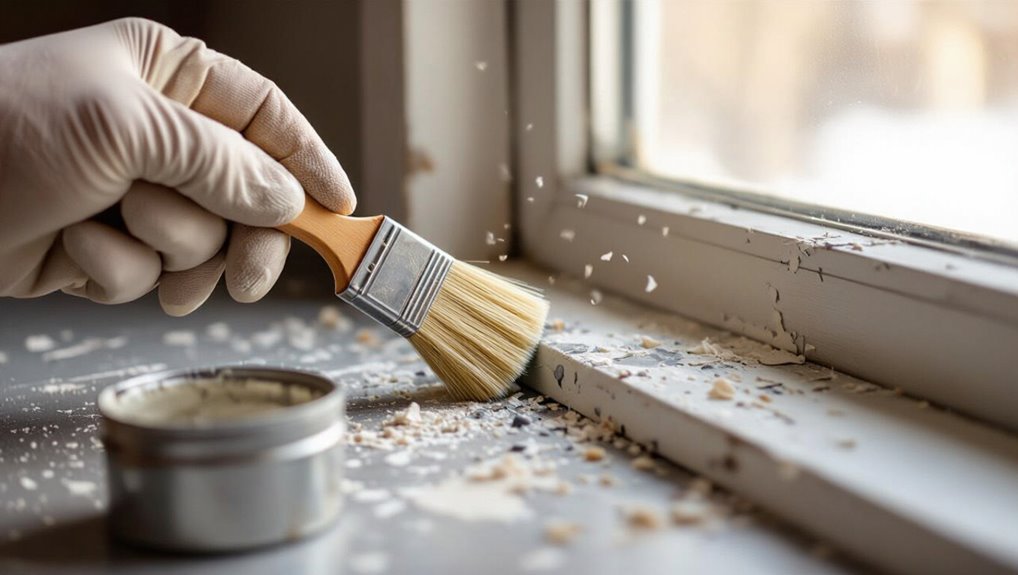
Start by stripping away anything that could keep a new seal from bonding: clean dirt and grease with a mild detergent or degreaser, rinse and dry thoroughly, then scrape or sand loose, flaking paint back to a firmly adhered edge.
Wipe dust with a tack cloth, vacuum crevices, and wipe again. Confirm the surface is completely dry and free of residue before sealing.
Step 3 Repair underlying issues (rust treatment, rot repair, patching drywall)
Address any underlying damage before you seal the chip so the repair lasts instead of failing again.
Inspect for rust, rot, or structural cracks. Remove rust to bare metal, apply a rust converter and primer.
Excise soft wood, treat with preservative, and install a patch or epoxy wood filler.
For drywall, cut out damaged paper, replace backing if needed, and secure a new patch before finishing.
Step 4 Fill and level chips and gouges (filler selection and application techniques)
Choose the right filler and apply it carefully so chips and gouges sit flush with the surrounding surface before priming and painting.
Match filler type to substrate—wood putty for timber, epoxy for deep voids, spackling for drywall.
Work in thin layers, press firmly, remove excess with a putty knife, and let each layer cure fully.
Use solvent-cleaned edges for best adhesion.
Step 5 Sanding and feathering to blend repairs
Sand the filled area and feather the edges so the repair disappears into the surrounding paint; you’ll want a smooth, gently tapered change that prevents noticeable ridges once primed and painted.
Use progressively finer grit (start ~120, finish ~220–320), keep sanding light and even, and check contours frequently.
Wipe dust away, confirm a seamless shift, and stop when the surface matches the original profile.
Step 6 Prime sealed areas and spot-prime surrounding edges
Brush or spray a thin coat of primer over the repaired area and feather it slightly onto the surrounding paint so the new topcoat will adhere evenly.
Let primer dry per manufacturer instructions.
Spot-prime any exposed substrate or edges you sanded to prevent bleed-through and guarantee uniform absorption.
Lightly scuff the primed zone for adhesion if needed, then clean dust before moving to final painting.
Step 7 Repaint and finish coat application (feathering methods for invisible repair)
With the primer dry and edges feathered, you’re ready to apply the finish coat so the repair blends invisibly with the surrounding paint.
Use thin, even layers—light brush or foam roller strokes—letting each dry before the next.
Blend outward slightly beyond the feathered edge, match sheen and color, and inspect under natural light.
Touch up sparingly until seamless.
Step 8 Apply clear sealers or topcoats for long-term protection (polyurethane, spar varnish, masonry sealer)
Apply a clear sealer or topcoat to lock in your repair and protect it from moisture, UV, and abrasion—choosing the right product (polyurethane, spar varnish, or masonry sealer) depends on the surface and exposure.
Apply thin, even coats with a brush or roller, sanding lightly between coats. Follow manufacturer dry times and temperature limits so the finish cures hard and durable for long-term protection.
Subsections: Specific adjustments for
You’ll need to tweak your approach depending on the surface: wood trim and furniture need different prep and sealers than metal fixtures that can rust.
For drywall and plaster, pay attention to texture and feathering, while masonry and concrete require masonry-specific primers and flexible sealants.
Follow surface-by-surface steps to get a durable, invisible repair.
Wood surfaces (exterior trim, furniture)
Wood trim and wooden furniture need a gentler touch than metal or masonry when you’re sealing chipped paint because wood absorbs solvents and swells.
You’ll want to control moisture, choose compatible fillers and primers, and sand with the grain to avoid creating visible scratches.
Work in stable humidity, remove loose fibers, use oil- or latex-compatible wood filler, prime with a bonding primer, and topcoat with flexible exterior paint.
Metal surfaces (rust-prone areas, outdoor fixtures)
Whereas wood wants gentle moisture control and grain‑aligned sanding, metal needs more aggressive rust removal and corrosion protection before you seal chipped paint.
Scrape loose rust, wire‑brush to bright metal, and sand feathered edges. Apply rust converter where needed, then a metal primer designed for outdoor use.
Finish with a compatible topcoat; tighten fasteners and seal joints to prevent water intrusion.
Drywall and plaster (interior walls, textured finishes)
When repairing chipped paint on drywall or plaster, start by cleaning loose dust and knocking out any soft, crumbling paper so you can see the true edge of the damage.
Scrape flaking paint, sand feathered edges, and apply joint compound for deep gouges.
Match texture with a sponge or brush, sand smooth, prime patched areas, then repaint with appropriate interior paint for even sheen and adhesion.
Masonry and concrete (brick, stucco, foundations)
After you’ve handled drywall and plaster, switch focus to masonry and concrete, where chipped paint behaves differently because surfaces are harder, more porous, and often textured.
Clean with a stiff brush and mild detergent, remove loose paint with a chisel, fill gaps with masonry patch, prime with a masonry primer, then use elastomeric or masonry-grade paint for flexible, breathable protection that resists moisture and freeze-thaw cycles.
Comparison Best Sealant and Filler Options by Scenario
Next, you’ll get a quick comparison that lines up each product’s strengths, drying time, durability, and cost so you can pick faster.
The table will show when a flexible caulk is better for movement-prone joints, when a rigid filler suits small, stable chips, and when epoxy is worth it for high-strength repairs.
Use that guidance to match the sealant or filler to your specific scenario.
Quick comparison table of product strengths, drying time, durability, and cost
A concise comparison table helps you quickly pick the right sealant or filler by showing strengths, drying time, durability, and cost side-by-side so you can match product performance to your repair scenario. Use this quick guide to choose based on speed, longevity, and budget.
| Product | Quick notes |
|---|---|
| Acrylic | Fast dry, low cost |
| Epoxy | Very durable, higher cost |
When to choose a flexible caulk vs. rigid filler vs. epoxy
Now that you’ve compared basic product traits like drying time and cost, you’ll need to match the material to the repair conditions: choose a flexible caulk when the chip sits on a movable joint, trim, or substrate that expands and contracts;
pick a rigid filler for static surfaces where you’ll sand and repaint a smooth finish; and use epoxy when you need maximum strength, gap-filling ability, or water resistance for structural chips.
Use caulk for joints, filler for cosmetic patches, epoxy for load-bearing or wet areas.
Common Mistakes and How to Avoid Them
Don’t skip proper surface prep—you’ll get poor adhesion and flaky repairs if you do.
Make sure you’re using compatible primer, paint, and sealant, and avoid overfilling or under-sanding repairs so the finish stays smooth.
Also watch temperature and humidity, since environmental conditions can ruin curing and adhesion.
Skipping surface prep and the consequences
If you skip surface prep, you’ll save time up front but invite peeling, poor adhesion, and visible imperfections that force redo work later.
You’ll also trap dirt, oils, and loose flakes that prevent sealants from bonding.
Take time to clean, sand, and remove loose paint. That prep guarantees even coverage, longer-lasting protection, and fewer touch-ups down the road.
Using incompatible products (incompatible primer/paint/sealant)
Because different primers, paints, and sealants are formulated for specific substrates and chemistries, using mismatched products will undermine adhesion and durability.
Check labels for compatibility (oil vs. latex, solvent vs. waterborne), follow manufacturer recommendations, and test on a small area.
Use primers designed for your substrate and match paint chemistry to your sealant.
Incompatible combos cause peeling, discoloration, and failed protection.
Overfilling or under-sanding repairs
After you’ve confirmed product compatibility, pay close attention to how you fill and sand chips—mistakes here make even the best primer and paint fail.
Don’t overfill with putty; excess shrinks or cracks. Sand until the patch’s edges blend smoothly with surrounding surface, using progressively finer grits.
Test for levelness by touch and sight, then clean dust before priming and painting for lasting adhesion.
Ignoring environmental conditions (temperature, humidity)
When you ignore temperature and humidity, paint and primer won’t cure or adhere properly, leading to blistering, sagging, or delayed drying.
Check product labels for recommended ranges, avoid painting in extreme heat, cold, or high humidity, and use heaters or dehumidifiers when needed.
Allow extra drying time between coats and test a small patch before finishing to guarantee proper adhesion and cure.
Prevention and Long-Term Protection Strategies
To keep chips from coming back, you should set a routine inspection and maintenance schedule and know when a quick patch will do versus when a permanent repair is needed.
For exterior work focus on drainage, flashing, and ventilation while interior surfaces need humidity and wear considerations.
Plan protective coatings and repainting intervals now so you stay ahead of future damage.
Routine inspection and maintenance schedule
Because small chips grow fast if left unchecked, set a routine inspection and maintenance schedule so you catch damage early and prevent bigger repairs.
Check monthly for new chips, clean and touch up as needed, and log repairs.
Visualize areas to watch:
- Corners and edges where paint peels first
- High-traffic zones with scuffs
- Moisture-prone spots after rain or cleaning
Best practices for exterior vs. interior surfaces (drainage, flashing, ventilation)
Although interior and exterior paint chips both need prompt attention, you’ll tackle them differently:
Exterior work focuses on controlling water and airflow with proper drainage, flashing, and ventilation, while interior repairs emphasize moisture management and consistent indoor climate.
For exteriors, slope surfaces, seal joints, and maintain vents and flashings.
Indoors, control humidity, ventilate baths and kitchens, and repair leaks promptly.
Protective coatings and repainting intervals
Once you’ve controlled water and airflow, plan for longer-term protection with the right coatings and a sensible repaint schedule.
Choose high-quality exterior or interior-grade paints and primers suited to substrate and climate. Apply corrosion- or mold-resistant formulations where needed.
Repaint at manufacturer-recommended intervals—typically 5–10 years outside, 7–10 inside—inspecting annually and addressing wear promptly to extend life.
Quick temporary fixes vs. permanent solutions
When you spot chipped paint, decide quickly whether you need a stopgap or a lasting repair: use touch-up paint or clear sealant to stop moisture and rust fast, but remember these are temporary.
For durable protection, sand, prime, and repaint with compatible coatings, and address underlying causes.
Permanent fixes cost more time but prevent recurring damage and save money long-term.
Tools, Materials, and Product Recommendations (Buyer’s Guide)
You’ll want to weigh pro-grade versus DIY fillers, primers, and sealers based on the job size and your skill level.
Consider cost versus performance—sometimes a pricier product saves time and prevents repeat work.
If the damage is extensive or on a valuable surface, hire a professional.
Pro-grade vs. DIY product picks for fillers, primers, sealers
Although pros and DIYers tackle chipped paint with the same goal — a smooth, lasting finish — the products you pick will shape how easy and durable the repair is; pro-grade fillers, primers, and sealers offer faster cure times and greater adhesion, while consumer options prioritize ease of use and lower cost.
You’ll choose by task:
- dense epoxy filler for structural chips
- high-adhesion primer for tricky substrates
- durable sealer with UV resistance
Cost vs. performance guidance
Choosing pro-grade or consumer products is about balancing budget with how long and how well the repair needs to last.
If you need durability and frequent wear resistance, invest in higher-quality fillers, primers, and sealers.
For low-traffic areas, mid-range consumer options save money.
Compare coverage, cure time, VOCs, and warranty to match cost with real performance and lifespan.
When to hire a professional
When should you call a pro? If damage is extensive, involves lead or structural issues, or affects complex surfaces (stucco, metal, trim), hire a specialist.
Call a pro if you lack tools, time, or confidence to prep, sand, and seal correctly.
Professionals guarantee proper surface treatment, color matching, and durable finishes—worth the cost for long-term protection and warranty-backed results.
Troubleshooting If Sealed Area Fails Later
If the patched area starts peeling, bubbling, or changing color, you’ll want to inspect the surface and surrounding paint to find the root cause.
Check for trapped moisture, poor adhesion, or incompatible products, then remove failed material back to sound substrate.
Once you’ve identified the issue, reapply the correct prep and sealant and take steps—like improving ventilation or using a primer— to prevent it from happening again.
Diagnosing recurring peeling, bubbling, or discoloration
Noticing paint peeling, bubbling, or discoloration reappear after you’ve sealed a chip is frustrating, but it also gives clear clues about what went wrong.
Inspect adhesion, underlying moisture, and surface contamination. Check for incompatible coatings, rust, or leftover loose paint.
Note patterns: bubbling often signals trapped moisture or solvents; discoloration can indicate chemical reaction or UV damage.
Record conditions and timeline for diagnosis.
Steps to remediate and prevent recurrence
Use your inspection notes to guide a targeted repair plan that fixes the immediate failure and removes the root cause so the problem won’t return.
Clean and strip damaged areas to sound substrate, treat rust or mold, apply compatible primer and sealant, and repaint with proper drying between coats.
Address moisture, ventilation, or structural issues causing damage, then monitor periodically and touch up at first signs of recurrence.
FAQ
You probably have a few practical questions about sealing chipped paint, like how long a repair will last and whether you can seal over lead-based paint.
You’ll also want to know if sealing fully hides damage, whether one sealer works for both indoors and outdoors, and how soon you can repaint after filler and primer.
I’ll answer each point clearly so you can pick the right approach for your project.
How long does a sealed repair typically last?
How long a sealed repair lasts depends on where the chip is, how well you prepared the surface, and what products you used.
Typically, indoor touch-ups with proper prep and quality primer/paint last years; high-traffic or exterior areas may need rework within 1–5 years.
Regular cleaning and avoiding impact extends life.
Inspect annually and spot-repair small failures promptly to prevent bigger problems.
Can I seal over lead-based paint?
Can you seal over lead-based paint safely?
You shouldn’t DIY seal over suspect lead paint. Disturbing it can release hazardous dust.
Test first with a certified lab or hire a lead-safe professional to assess and apply encapsulants or removal per regulations.
Use contractors certified in lead-safe work practices, follow local laws, and get documentation to protect occupants and future buyers.
Will sealing chips hide the damage completely?
Will sealing chips make the damage disappear entirely? No — sealing stabilizes and protects exposed areas but usually won’t fully hide chips’ depth, texture, or color contrast.
You can improve appearance with filler and matching touch-up paint before sealing. For minor chips a clear sealer reduces visibility; for larger ones, repair and repainting are necessary to restore a seamless finish.
Can I use the same sealer for indoor and outdoor projects?
Often you can, but not always—indoor and outdoor sealers are formulated for different conditions, so pick one that matches the environment.
Choose exterior sealers for UV, moisture, and temperature resistance; they often contain stronger mildewcides and flexible binders.
Use indoor formulas to minimize fumes and VOCs.
If a single product fits both ratings, confirm compatibility with the substrate and follow ventilation and cure instructions precisely.
How soon can I repaint after applying filler/primer?
If you chose a sealer that suits the environment, the next question is how long to wait before repainting after applying filler or primer.
Generally, wait until filler is fully cured and primer is dry to the touch—typically 24–48 hours.
Humidity, temperature, and product specs can extend this.
Always check manufacturer cure times and lightly sand primer before topcoating for best adhesion and a smooth finish.