How to Peel Paint Off a Door Without Damaging the Wood Underneath
You can remove paint from a door without harming the wood by working slowly, using the gentlest effective method, and protecting the grain. Start by testing for lead, removing hardware, and masking surrounding areas. Use a compatible chemical stripper or a low-heat gun on small sections, lift softened paint with plastic scrapers and nylon brushes, then rinse, neutralize, and let dry. Sand lightly with the grain and repair any nicks. Follow careful prep and technique for best results, and keep going for more tips.
How to Peel Paint Off a Door Without Damaging the Wood Beneath
You want a quick answer: use gentle methods like heat or chemical strippers with a plastic scraper to lift paint without gouging the wood.
At a glance, test a small area first, work slowly, and stop if the wood shows stress—then switch to sanding or a less aggressive stripper.
If paint is thick, heavily bonded, or the door is badly weathered, you may be better off repainting or replacing the door than risking damage.
Quick Answer Best Approach at a Glance
When you’re stripping paint from a door and want to protect the wood beneath, start by testing a small hidden area and choose the gentlest method that removes paint without gouging—chemical stripper for delicate or carved panels, heat gun or infrared for flatter surfaces, and careful sanding only where the grain is sturdy.
For quick guidance on how to peel paint off door: prioritize gentle methods, protect surrounding hardware, and work patiently.
When to Peel vs. Repaint or Replace
If the paint’s failing in spots, flaking heavily, or hiding serious damage, it’s worth peeling back layers to inspect and restore the original wood.
But if the finish is mostly intact, repainting or swapping the door will save time and reduce risk to delicate surfaces.
You should peel when rot, lead, or historic detail exist; repaint for minor wear; replace if structural issues or cost outweigh restoration.
Understanding Paint Layers and Door Materials
Before you start stripping, know that different paints (latex, oil, enamel) bond differently and that adhesion affects which methods will work.
Check what your door is made of—solid wood, veneer, or MDF—as each substrate tolerates heat, chemicals, and scraping in different ways.
Also identify old layers, multiple coats, or possible lead paint, since age and lead presence change how carefully and what legally you must remove.
Types of Paint and Their Adhesion Properties
Although paint chemistry varies, knowing the common types and how they stick to different door materials makes stripping much easier.
You’ll encounter latex, oil-based, alkyd, and enamel finishes; each bonds differently. Latex forms flexible films that peel in sheets, oil and alkyd penetrate and harden, and enamel creates brittle, durable layers.
Match your removal method to the paint’s adhesion for safer stripping.
Common Door Substrates (Solid Wood, Veneer, MDF) and How They React to Stripping
Knowing paint types helps you pick a stripping method, but the door’s material often dictates how the paint behaves and what you can safely remove.
Solid wood tolerates scraping and heat if you watch grain; veneer lifts or delaminates under heavy sanding or heat—use gentler chemical strippers and light sanding.
MDF swells with moisture and softens with heat, so use solvent-based strippers and minimal abrasion.
How Old Paint, Lead, and Multiple Coats Affect Removal
When you’re tackling an old door, expect layers that hide surprises: brittle, chalky topcoats can flake off while hard, decades-old enamel underneath resists scraping.
Each additional layer increases drying time and adhesion, making removal harder and riskier—especially if lead paint is present, which calls for containment and testing before you strip.
Test for lead, work wet or with HEPA containment, and proceed slowly.
Safety and Preparation
Before you start peeling, make sure you’ve got proper PPE and good ventilation to keep dust and fumes away from your face and lungs.
Test the paint for lead and follow strict containment and cleanup steps if the test is positive.
Finally, remove or mask hardware and cover floors and nearby surfaces to protect them from chips and chemicals.
Personal Protective Equipment and Ventilation
One essential step is equipping yourself with the right personal protective equipment and ensuring good ventilation so you can work safely while stripping paint.
Wear a respirator rated for dust and fumes, safety goggles, chemical-resistant gloves, and long sleeves.
Open windows, run fans to vent air outward, and use a HEPA air scrubber if available to reduce airborne particles.
How to Test for Lead Paint
Curious whether the old paint contains lead? You should test before disturbing it. Use a certified lab or a reliable home test kit, and follow instructions precisely. If positive, stop and consult professionals.
- Buy EPA-recognized test kits or hire certified inspectors
- Take multiple samples from different layers
- Label and document sample locations for results and remediation decisions
Protecting Surrounding Areas and Hardware
Start by clearing and covering the area around the door so dust and paint chips don’t spread—lay down drop cloths or plastic sheeting that extend several feet, tape seams, and seal vents and doorways to contain debris.
Protect hardware and nearby surfaces:
- Remove or tape hinges, knobs, and locks.
- Cover trim, floors, and walls with cardboard.
- Use painter’s tape for tight seals.
Methods Overview Pros and Cons Comparison
You’ll weigh chemical strippers, thermal methods like heat guns or infrared, mechanical options such as scraping and sanding, and gentler eco-friendly choices like citrus, steam, or soda blasting.
Each method has trade-offs in speed, safety, cleanup, and risk of damaging the door.
We’ll compare those pros and cons so you can pick the best approach for your door and situation.
Chemical Strippers
Chemical strippers dissolve or loosen paint so you can scrape or wipe it away, and they come in several types—caustic (lye-based), solvent-based, and newer biodegradable or gel formulas—each with different effectiveness, safety needs, and cleanup steps. You’ll choose by paint type, wood sensitivity, ventilation, and disposal rules.
| Type | Strength | Safety |
|---|---|---|
| Caustic | High | Corrosive |
| Solvent | Medium | Fumes |
| Biodegradable | Low–Medium | Gentler |
Thermal Methods (Heat Gun, Infrared)
If solvents or caustics aren’t right for the job—or you want a faster, less messy option—thermal methods use controlled heat to soften paint so you can scrape it away. You’ll control heat, avoid charring, and work faster than with strippers. Use proper PPE and ventilation.
| Benefit | Drawback |
|---|---|
| Fast | Risk of scorching |
| No chemicals | Lead paint fumes |
Mechanical Methods (Scraping, Sanding, Scrubbing)
Start with your hands and a few tools: scraping, sanding, and scrubbing remove paint mechanically by breaking adhesion rather than altering its chemistry. You’ll choose based on paint thickness, wood fragility, and finish goals. Scraping’s fast but risky; sanding’s controlled yet dusty; scrubbing’s gentle but slow.
| Tool | Character |
|---|---|
| Scraper | Fast |
| Sandpaper | Controlled |
| Brush | Gentle |
| Steel wool | Abrasive |
Eco-Friendly and Low-Damage Options (Citrus, Steam, Soda Blasting)
Consider eco-friendly, low-damage methods like citrus-based strippers, steam, and soda blasting when you want to remove paint without harsh solvents or heavy abrasion. You’ll choose by balancing effectiveness, surface risk, and cleanup: citrus is gentle but slow, steam softens paint for scraping, and soda blasts remove stubborn layers with minimal denting.
| Method | Best use |
|---|---|
| Citrus | Gentle, indoor |
| Steam | Detail work |
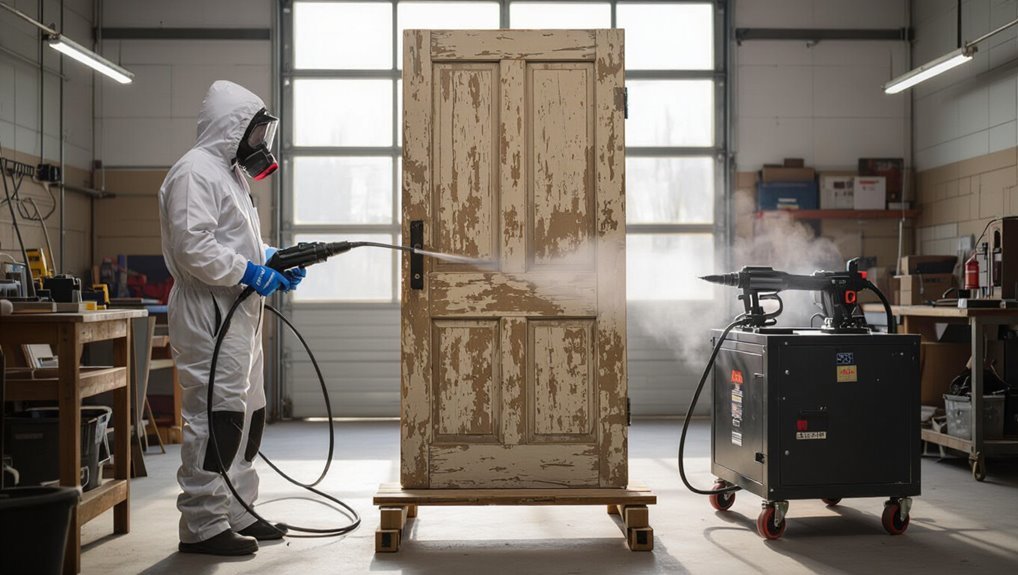
Step-by-Step Process Safe Paint Removal (Primary Method: Chemical + Manual for Minimal Wood Damage)
Start by taking the door off its hinges, removing all hardware, and labeling screws so reassembly’s simple.
Set up a well-ventilated workspace with drop cloths and tape to protect floors and walls, then apply the recommended chemical stripper in a thin, even coat and wait the manufacturer’s suggested time.
Use soft plastic scrapers and nylon brushes to lift softened paint without gouging, then neutralize and clean residue with the appropriate cleaner (typically mineral spirits or a mild alkaline neutralizer) before sanding or refinishing.
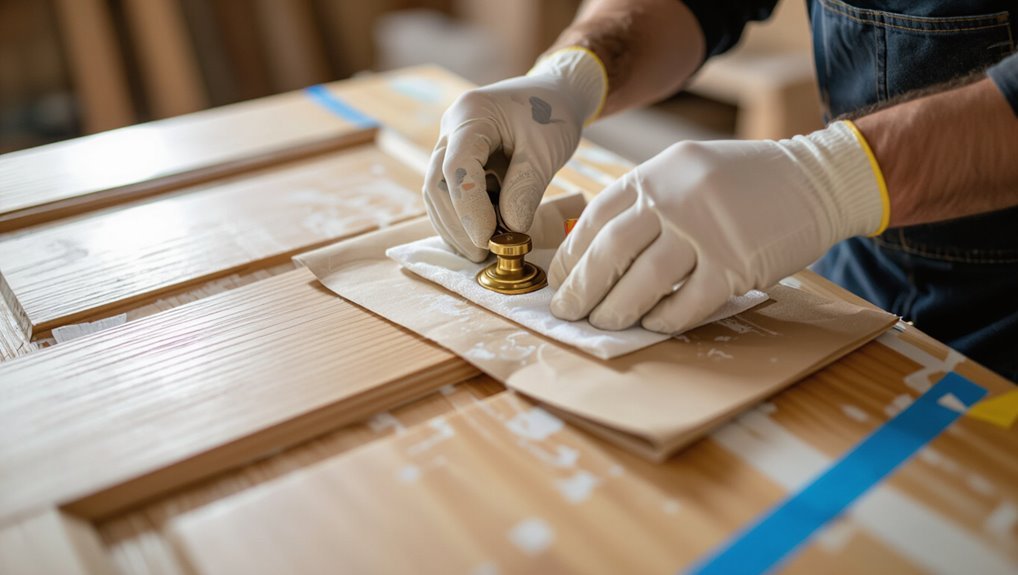
Step 1 Remove Door Hardware and Label Parts
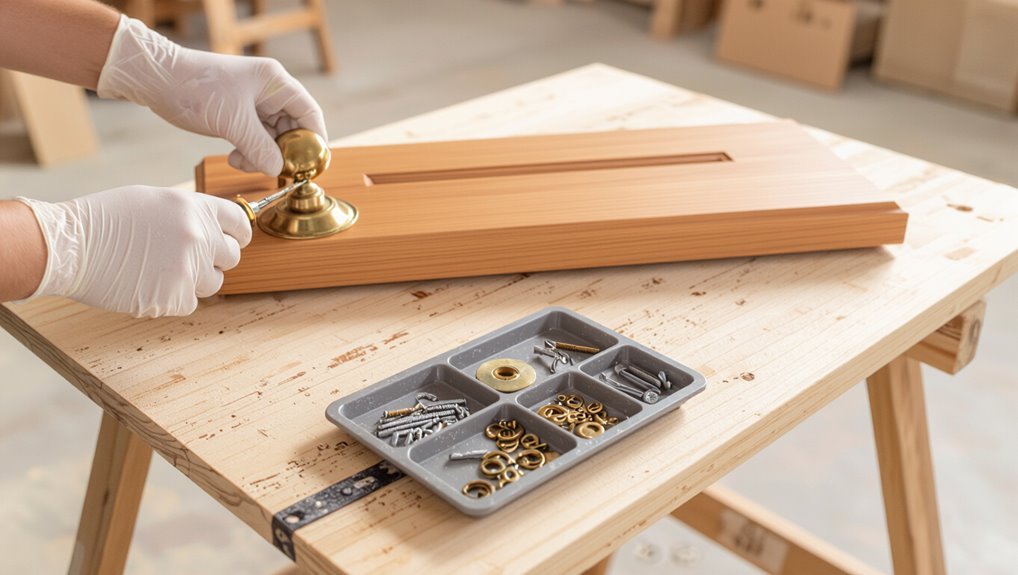
Before you apply chemicals, remove all hardware and clearly label each part so reassembly is fast and accurate.
Take photos, keep screws grouped, and protect finishes. You’ll work more efficiently and avoid lost pieces.
- Unscrew knobs, locks, hinges carefully.
- Bag and label screws, pins, plates.
- Photograph placement and orientation for reference.
Step 2 Set Up Workspace and Protect Floor/Walls
With the hardware removed and labeled, clear a well-ventilated workspace near where you’ll work on the door—ideally outdoors or in a garage with the door laid flat on sawhorses.
Lay protective drop cloths, tape plastic to nearby walls, and block vents. Prepare PPE and waste containers.
- Heavy-duty drop cloths or plastic
- Painter’s tape for edges
- Disposable container for stripper residue
Step 3 Apply Appropriate Chemical Stripper Safely (how long to wait, thickness)
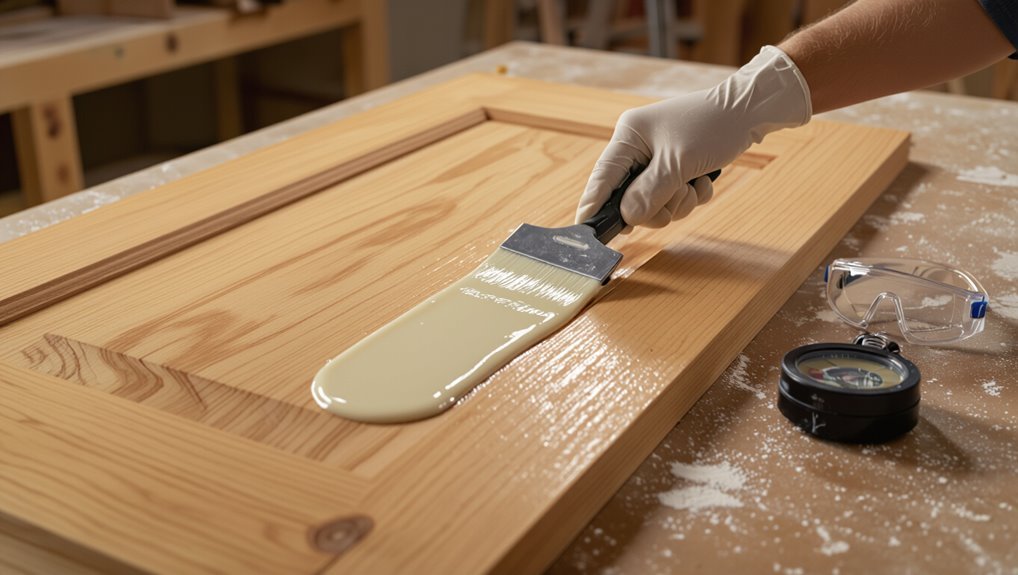
Choose a chemical stripper formulated for your paint type (water-based, oil-based, or lead-containing) and apply it in an even, generous coat so it penetrates the layers without pooling.
Follow manufacturer wait times—typically 15–45 minutes for modern strippers, longer for thick or multiple coats.
Apply 1/16–1/8 inch wet thickness, cover with plastic where recommended, then check for lifting before proceeding.
Step 4 Use Soft Scrapers and Nylon Brushes to Lift Paint (technique to avoid gouging)
Start gently: use a plastic or flexible metal scraper held at a shallow angle to lift softened paint.
Then switch to nylon-bristled brushes or a wooden spatula for tight spots so you don’t gouge the wood.
Work with the grain, apply light pressure, and peel away loosened flakes.
Frequently clear tools, reapply stripper to stubborn areas, and avoid metal blades on delicate moldings.
Step 5 Neutralize and Clean Residue (recommended cleaners)
After you’ve lifted most of the softened paint, you’ll need to neutralize the stripper and remove residue so the wood won’t be damaged or interfere with new finishes.
Rinse thoroughly with warm water, then apply a diluted vinegar solution or a commercial paint-stripper neutralizer per instructions.
Wipe with clean cloths, repeat rinsing until no residue remains, and let the door dry completely before proceeding.
Step 6 Fine Detail Work with Steel Wool or Fine Abrasive Pads (grain direction rules)
Work carefully with fine steel wool or abrasive pads to remove remaining paint without scratching the wood—always rub gently and move with the grain, not across it.
Use 0000 steel wool or 320–400 grit pads for delicate areas.
Keep the surface slightly damp from your neutralizing rinse, inspect progress often, and change pads when clogged to avoid uneven abrasion and staining.
Step 7 Repair Minor Damage and Fill Gouges (wood filler types, application)
With the surface clean and grain-guided sanding finished, you’ll next address nicks, gouges, and any thin spots left by paint removal so the door sits smooth before finishing.
Choose wood filler suited to species and use: water-based for easy cleanup, epoxy for deep repairs, or solvent-based for durability.
Apply, overfill slightly, let cure fully, then level with a sharp scraper before final sanding.
Step 8 Sanding for Smoothness Without Removing Veneer (sanding grits and technique)
Start sanding gently to blend repairs and smooth paint edges without chewing into the veneer; you’ll rely on progressively finer grits and light pressure to preserve the wood layer.
Begin with 120–150 grit to level filler and feather edges, then move to 220–320 grit for finish smoothing.
Sand with the grain, use a sanding block, check frequently, and stop when surfaces feel uniformly smooth.
Step 9 Final Clean and Prep for Refinish or Repaint
Finish the job by thoroughly cleaning and prepping the door so your new finish will adhere and look professional.
Wipe residue with mineral spirits, let dry, and inspect for missed flakes.
Repair dents or gouges with wood filler, sand smooth, and tack cloth before priming or staining.
Follow these final steps:
- Clean: mineral spirits, rinse, dry
- Repair: filler, sand
- Prime or stain promptly
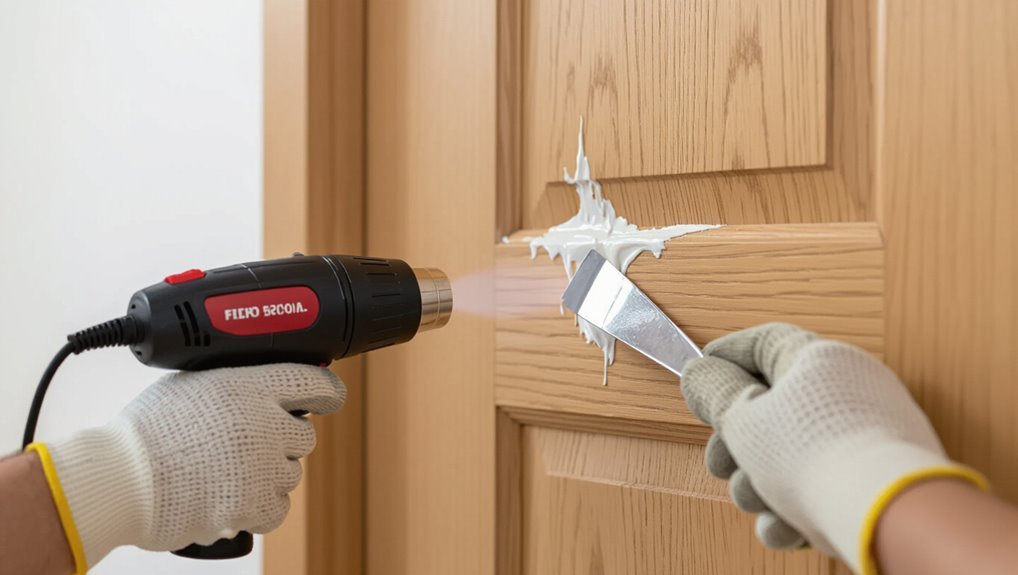
Alternative Method: Heat Gun Technique
If the paint is stubborn or contains lead and you want to avoid heavy chemicals, you can use a heat gun with care.
Set the gun to a moderate temperature, hold it several inches from the surface, and work in small sections while scraping gently to protect the wood.
Watch for charring, keep a fire extinguisher nearby, and never rush—avoid burns, blisters, and ignition.
When to Use Heat Instead of Chemicals
When chemical strippers are impractical or you need faster, localized removal, reach for a heat gun instead; it’s ideal for thick, multiple paint layers, oil-based finishes, or spots where masking and cleanup would be messy.
Use heat when ventilation is limited but fumes from solvents are a concern, when intricate trim needs targeted treatment, or when you want quicker progress without mixing and disposing of chemicals.
Heat Gun Settings and Safe Distance
Set your heat gun to a moderate temperature—typically 350–550°F (175–290°C)—and hold it about 2–4 inches from the surface so paint softens without scorching the wood.
Move the gun steadily in short passes, watch for bubbling, and stop if smoke appears.
Use a heat-resistant glove, keep a fire extinguisher nearby, ventilate the area, and never point the gun at one spot too long.
Proper Scraping Sequence to Preserve Wood
Begin by working in small, manageable sections so the softened paint stays controllable and you can monitor the wood beneath.
Hold the heat gun steady, heat until paint bubbles, then scrape gently at a low angle with a putty knife.
Remove loosened strips, reheat stubborn spots, and switch to a flexible scraper for contours.
Clean residue with a soft brush.
Avoiding Burns, Blisters, and Fire Hazards
After you’ve loosened paint with the heat gun, take immediate steps to avoid burns, blisters, and fire hazards:
keep the gun moving to prevent overheating one spot, hold it at the manufacturer’s recommended distance, and wear heat-resistant gloves and eye protection.
Stay near a fire extinguisher, work in a ventilated area, clear flammable materials, let heated surfaces cool before touching, and keep children and pets away.
Low-Impact and Eco-Friendly Options
If you want gentler, eco-friendly ways to strip paint, try steaming or softening paint with hot water and a scraper to minimize chemicals.
You can also use citrus- or other bio-based strippers—apply per instructions, wait the recommended time, then wipe or scrape residue and rinse.
For tougher jobs, consider mechanical options like soda or dry ice blasting, but hire a pro when you lack the right equipment or containment.
Using Steam or Hot Water and Scrapers
Steam and hot water soften old paint so you can lift it with a scraper or putty knife without harsh chemicals.
Hold a steam cleaner or cloth-wrapped kettle near the paint until it blisters, then scrape gently along the grain with a flexible scraper.
Work in small areas, keep the wood damp but not soaked, and sand lightly to smooth any residue.
Citrus or Bio-Based Strippers: Application and Removal
When steam or hot water won’t do the job or you want a gentler option, citrus- and other bio-based paint strippers offer low-toxicity alternatives that still work well on doors.
You’ll brush on per manufacturer instructions, wait the recommended dwell time, then gently lift softened paint with a plastic scraper.
Rinse residue, neutralize if required, and sand lightly to prep the wood for refinishing.
Mechanical Soda or Dry Ice Blasting (when to hire a pro)
Although they sound industrial, soda and dry ice blasting are surprisingly gentle, low-toxicity methods that strip paint without abrasive sanding; you’ll want a pro for large doors, intricate mouldings, or jobs where substrate damage must be avoided.
Hire an experienced operator for consistent pressure control, containment, and disposal.
Professionals minimize moisture, thermal shock, and residue, preserving delicate veneers and historic profiles while meeting safety and environmental rules.
Common Problems and How to Fix Them
You’ll run into a few common problems—gouged or torn veneer, stain bleeding or tannin rise, stubborn paint ghosting, and the special rules around lead paint—and you’ll need different fixes for each.
For veneer, you’ll learn simple patching and sanding techniques; for stains, how to block tannins and re-seal; and for ghosting, careful stripping or sanding without harming the wood.
If the door has lead paint, follow legal remediation steps and use proper PPE or hire a certified contractor.
Gouged or Torn Veneer Repair Techniques
Spot repairs can save a door with gouged or torn veneer if you act carefully and use the right materials.
Clean debris, sand lightly around the damage, and glue loose edges with wood adhesive.
Fill gaps with tinted wood filler or a veneer patch, clamp until set, then sand flush.
Finish by sealing and matching stain or paint for a seamless repair.
Stain Bleeding and Tannin Rise Prevention and Fixes
When you strip or sand a door, tannins and old finish residues can bleed through new stain or paint, causing dark streaks and uneven color; you can prevent this by sealing the wood and by treating tannin-heavy species before finishing.
Clean thoroughly, rinse and dry.
Apply a tannin-blocking sealer or shellac primer, sand lightly, then stain or paint.
Recoat only after full cure.
Residual Paint or Ghosting How to Remove Without Further Damage
Tackle residual paint and ghosting carefully to avoid sanding through wood or spreading stains—start by identifying whether the ghosting is a thin film of old paint, stain bleed, or solvent-tack residue, because each needs a different approach.
Use gentle solvent wipes for tack, diluted mineral spirits for paint film, and spot-prime stain bleed before refinishing.
Test first and work slowly to protect grain.
Dealing with Lead Paint Remediation Requirements
Before you start scraping or sanding, understand that lead-based paint requires special handling under federal and often state rules—because improper removal can spread toxic dust and create health hazards.
If your door might’ve lead, test first.
Follow EPA/RRP protocols: contain area, use HEPA filtration, wear respirator and disposable coveralls, avoid dry sanding, and hire a certified contractor when required to protect yourself and occupants.
Prevention and Best Practices for Long-Term Results
Before you repaint, make sure you thoroughly clean, sand, and repair the door so new coatings bond properly.
Pick a primer and paint formulated for wood and compatible with each other to prevent adhesion failures.
Keep up with simple maintenance like cleaning, touch-ups, and checking weatherstripping to stop peeling before it starts.
Proper Surface Prep Before Repainting
While you might be enthusiastic to start repainting, prepping the door properly is what prevents peeling and gives you long-lasting results; clean, sand, and prime systematically so new paint adheres and withstands wear.
Remove dust and grease, strip loose paint, fill gouges, sand to smooth edges, and dust thoroughly.
Use tack cloths and allow full drying time before applying coats.
Choosing Compatible Primer and Paint for Wood Doors
Anyone tackling a repaint should pick a primer and paint that chemically match the existing finish and the wood’s needs so the new coat bonds and resists peeling.
Test whether the current finish is oil or latex, then use a bonding primer for oil-over-latex or a stain-blocking acrylic primer for raw or tannin-rich woods.
Match sheen and flexible enamel for durability.
Routine Maintenance to Avoid Future Peeling
If you want your newly stripped and repainted door to stay looking good, establish a simple maintenance routine: clean it gently every few months with a mild detergent, check and tighten hardware, and touch up chips or exposed wood immediately with primer and paint to prevent moisture and UV damage.
Inspect seals and weatherstripping yearly, sand rough spots lightly, repaint before finish fails, and control humidity.
Tools, Materials, and Cost Estimates
You’ll need a clear list of essential tools and consumables—scrapers, heat gun or chemical stripper, sandpaper, filler, drop cloths, and safety gear—so you can plan properly.
I’ll recommend specific products and approaches for different scenarios (fragile trim, multiple coats, or lead concerns).
Finally, we’ll compare estimated time and costs for a DIY job versus hiring a professional so you can choose the right route.
Essential Tools and Consumables
Before you start, gather the right tools and consumables so the job goes faster and safer: a heat gun or chemical stripper, scrapers and sanding blocks, protective gear (gloves, goggles, respirator), drop cloths and painter’s tape, solvent rags, and replacement paint or finish—each item affects time, safety, and cost.
- Essential hand tools: scrapers, putty knives, sanding blocks
- Safety: respirator, gloves, goggles
- Consumables: tape, cloths, finish, disposable blades
Recommended Products by Scenario (chemicals, scrapers, fillers)
Pick products that match the paint type and the door’s condition so you don’t waste time or create extra work. Choose solvent or gel stripper for multiple layers, a heat gun for brittle paint, scraper sizes for profiles, and wood filler for gouges. Match VOC safety to indoor use.
| Scenario | Chemical | Tool |
|---|---|---|
| Thick oil | Gel stripper | Metal scraper |
| Flaking latex | Heat gun | Plastic scraper |
| Small repairs | Low-VOC filler | Sanding block |
Estimated Time and Cost for DIY vs. Hiring a Professional
While a DIY strip can save money, it usually takes more time and effort than hiring a pro, so weigh your schedule and skill level before committing.
DIY tools and materials (chemical stripper, scrapers, brushes, sandpaper, fillers) cost $30–$120 and take 4–12 hours.
A professional charges $150–$400 and finishes in 1–3 hours, plus cleanup and warranty.
FAQ
You’ll find quick answers here to common questions like whether you can strip a hung door, how to tell veneer from solid wood, and if stripping will alter the wood color or need staining.
You’ll also learn typical chemical stripper times and when a pro should handle the job.
Use these FAQs to decide the safest, fastest approach for your door.
Can I strip paint from a door while it is still hung?
Can you strip paint from a door while it’s still hung? Yes—you can, but it’s trickier.
You’ll need drop cloths, ventilation, and careful masking to protect hinges and frames. Use chemical strippers or a heat gun cautiously to avoid warping or blistering.
Work in sections, scrape lightly, and sand minimally. Consider removing the door if access or finish control becomes difficult.
How do I know if the door has a veneer or solid wood under the paint?
Wondering whether the door hides a veneer or solid wood beneath the paint? Tap edges and listen: a solid core sounds dense and dull; veneer over hollow or engineered core can sound hollow or have a thin, higher-pitched ring.
Check exposed edges at hinge mortises, the top or bottom (remove hardware if needed) for visible ply layers or a thin face layer—that indicates veneer.
Will stripping paint damage the wood grain color or require staining?
Although stripping paint can change how the wood looks, it usually won’t permanently harm the grain color if you use the right method and follow up properly.
You might see temporary lightening or raised grain; sand lightly and apply conditioning oil or stain to even tone.
Test a small area first, choose gentler strippers, and skip aggressive sanding to preserve natural color.
How long does it take for chemical strippers to work?
How long a chemical stripper takes to work depends on its formulation, the number of paint layers, and the surface temperature — expect anywhere from 15 minutes for fast-acting gel strippers on thin latex to several hours for solvent-based or thick oil-based coatings.
You’ll test a small area, follow manufacturer timing, and reapply if residue remains.
Work in ventilated space and wear proper PPE.
When should I call a professional for paint removal?
If a stripper’s timing or technique isn’t getting you clean results—or you’re facing thick lead-based layers, extensive damage, intricate trim, or limited ventilation—you should consider hiring a pro.
Call a professional when safety, testing, or restoration skills exceed your comfort or tools, when the door is antique, or when deadlines and finish quality matter.
They’ll manage containment, disposal, and repair correctly.