Can You Paint Over a Popcorn Ceiling That Contains Asbestos?
You can paint over an intact popcorn ceiling that contains asbestos to encapsulate it and reduce fiber release, but first confirm the material with testing and avoid disturbing the surface. Seal vents and furniture, wear proper PPE (P100 respirator, coveralls), and use a low-penetration primer or specialized encapsulant applied gently without scraping or sanding. If the ceiling’s damaged or you’ll renovate, hire a licensed asbestos contractor. Keep going to learn detailed safety steps, options, and legal considerations.
Can You Paint Over a Popcorn Ceiling That Contains Asbestos? Quick Answer
If your popcorn ceiling contains asbestos, you generally shouldn’t sand or scrape it — but you can sometimes paint over it to seal the fibers if it’s in good condition.
You’d only consider painting when the textured surface is intact and undisturbed, using a low-penetration, high-quality primer and paint.
If the ceiling is damaged, crumbling, or will be disturbed by renovations, don’t paint it — call a licensed abatement pro.
Short direct answer for homeowners
Yes—you can paint over an asbestos-containing popcorn ceiling, but only if the surface is intact and you seal it carefully with a suitable encapsulating paint or primer; you should confirm the material first.
If you’re wondering “can you paint over popcorn ceiling with asbestos,” the short answer: yes, with proper encapsulation and minimal disturbance.
Hire a qualified pro if unsure.
When painting might be considered and when it’s not safe
When the popcorn ceiling is intact and you know it contains asbestos, painting can be a safe, cost-effective way to encapsulate fibers and refresh the room; however, you shouldn’t attempt it if the surface is crumbling, damaged, or if the material’s composition is unknown.
If damaged, hire a licensed abatement pro.
If intact and confirmed, use encapsulating primer, avoid scraping, and follow respirator and containment guidance.
Understanding Popcorn Ceilings and Asbestos
Popcorn ceilings are a textured, acoustic or stipple finish you probably recognize from mid-20th-century homes.
Asbestos is a fiber once added to those textures for fire resistance and durability, so you’ll want to know how to tell if your ceiling might contain it.
Don’t disturb suspected asbestos-containing plaster yourself—disturbing it can release hazardous fibers that pose serious health risks.
What is a popcorn ceiling (acoustic/stipple finish)?
A textured ceiling finish common in mid-20th-century homes, the “popcorn” or acoustic/stipple ceiling has a bumpy, spray-applied surface designed to hide imperfections and absorb sound.
You’ll find it installed over drywall or plaster; installers sprayed a mixture that created nodules and texture.
It’s durable but fragile when disturbed, and its uneven surface makes repairs and cleaning more challenging than smooth ceilings.
What is asbestos and why it was used in ceilings?
Fibers of asbestos are naturally occurring minerals that were mixed into ceiling textures because they resisted heat, fire, and moisture—and they helped dampen sound.
You should know asbestos added durability and fireproofing to older homes, bonding well with plaster and stucco. Builders favored it for inexpensive, long-lasting acoustic finishes.
Today its hazards limit use, but its historical benefit explains why it appears in many ceilings.
How to tell if your popcorn ceiling may contain asbestos
How can you tell whether your ceiling might contain asbestos?
Look at age—homes built before the 1980s are likelier to have asbestos in textured ceilings.
Check texture: coarse, sandy popcorn that crumbles easily raises suspicion.
Review records: renovation dates, original materials, or builder notes.
If you’re unsure, don’t assume—get a certified professional to inspect and test samples.
Health risks of disturbing asbestos-containing materials
If testing confirms or even suggests asbestos in your popcorn ceiling, you should know what happens when those materials are disturbed.
Fibers can become airborne, and you’ll inhale them without noticing. Repeated exposure raises your risk of lung diseases like asbestosis, lung cancer, and mesothelioma.
Avoid DIY disturbance, seal or isolate the area, and hire licensed professionals for removal or encapsulation.
Assessing Your Ceiling Before Any Work
Before you touch the ceiling, look for visual clues like a textured or popcorn finish and check the home’s age—materials used before the 1980s are more likely to contain asbestos.
If the texture looks suspicious, know when to use a DIY test kit and when to call a pro; disturbances of the material increase risk.
If you test, send samples to an accredited lab and use their report to decide whether encapsulation or professional abatement is needed.
Visual and age-based clues to asbestos presence
When you’re planning work on an older ceiling, start by looking for visual and age-related clues that might indicate asbestos. Many textured finishes, popcorn ceilings, and stucco-like coatings applied between the 1930s and 1980s are common suspects.
Check for friable, crumbly texture, off-white or grayish color, and multiple thin layers. Note renovations or original construction dates and avoid disturbing suspicious areas.
When to get professional testing vs. DIY test kits
How do you decide between a pro inspection and a DIY kit?
If your ceiling is old, damaged, or you’ll disturb material, hire a licensed inspector to avoid exposure and guarantee proper handling.
Use a DIY kit only for low-risk, intact surfaces when you’ll accept potential false negatives and must send samples to a lab yourself.
Choosing an accredited lab and interpreting results
If you want reliable asbestos results, pick a lab accredited by your country’s recognized program (like NIOSH/NVLAP in the U.S. or UKAS in the UK) and that uses polarized light microscopy (PLM) or transmission electron microscopy (TEM) per accepted protocols.
Then:
- Send multiple samples from different spots.
- Confirm reporting limits and fiber types.
- Ask for clear, dated reports.
- Follow recommended next steps if positive.
Options If Asbestos Is Confirmed
If testing shows asbestos, you’ve got two main paths: leave it undisturbed and encapsulate it with a sealant or paint, or hire a licensed crew to remove it.
Encapsulation is cheaper and less disruptive but can be inappropriate if the material is damaged, friable, or will be disturbed by renovations.
Removal eliminates the hazard but costs more and requires strict controls.
We’ll compare the pros and cons and explain when sealing is acceptable versus when removal is necessary.
Do nothing (encapsulation) overview
When you choose encapsulation, you’re not removing the asbestos — you’re sealing it in place with specialized coatings or barriers that prevent fibers from becoming airborne.
You’ll minimize disturbance, reduce exposure risk, and often comply with rules if done properly.
You should hire a certified contractor, guarantee surfaces are sound, and plan inspections; expect periodic monitoring and maintenance to keep the seal intact.
Painting/encapsulation vs. removal pros and cons
Although encapsulation keeps asbestos in place and removal eliminates it, choosing between them depends on your priorities for safety, cost, disruption, and long-term maintenance. You’ll weigh lower immediate cost and less disruption of encapsulation against the certainty and resale benefits of removal, plus higher expense and temporary displacement.
| Option | Pros | Cons |
|---|---|---|
| Encapsulation | Less costly, quick | Leaves hazard in place |
| Removal | Eliminates risk | Expensive, disruptive |
| Maintenance | Easier ongoing care | May require monitoring |
When encapsulation is appropriate and when removal is required
You’ve just weighed encapsulation vs. removal and now need to decide which path fits your situation.
Choose encapsulation if the popcorn is intact, undisturbed, and you’ll keep it covered and stable—it’s safer, cheaper, and quicker.
Opt for removal when damage, renovation, HVAC work, or high airflow risks fiber release, or when regulations or future plans require complete abatement by licensed professionals.
How to Safely Paint/Encapsulate an Asbestos-Containing Popcorn Ceiling
Before you do anything, confirm lab testing and check local regulations so you know whether encapsulation is allowed or if abatement is required.
Decide between hiring a licensed asbestos contractor or taking strict DIY precautions, then prepare the room with containment, ventilation, and appropriate PPE.
If encapsulation is permitted, use recommended primers and low-agitation application techniques to minimize disturbance of the popcorn texture.
Step 1 Confirm testing and regulatory considerations
Why test first? You must verify whether the popcorn texture contains asbestos before any work.
Hire an accredited lab or local health agency for sampling; follow their chain-of-custody and safety instructions.
Check federal, state, and local regulations on handling, encapsulation, and disposal.
Document results and required permits—this protects occupants, guides your method, and guarantees legal compliance.
Step 2 Hire a licensed asbestos abatement contractor vs. DIY considerations
If test results confirm asbestos, hire a licensed asbestos abatement contractor for encapsulation unless you’re trained, properly equipped, and comfortable following strict containment, work-practice, and disposal rules.
DIY attempts can release fibers and expose you and others to serious health risks. Contractors carry certifications, liability insurance, and proper waste handling.
If you still consider DIY, weigh legal limits, hidden costs, and long-term exposure risks carefully.
Step 3 Prepare the room: containment, ventilation, and PPE
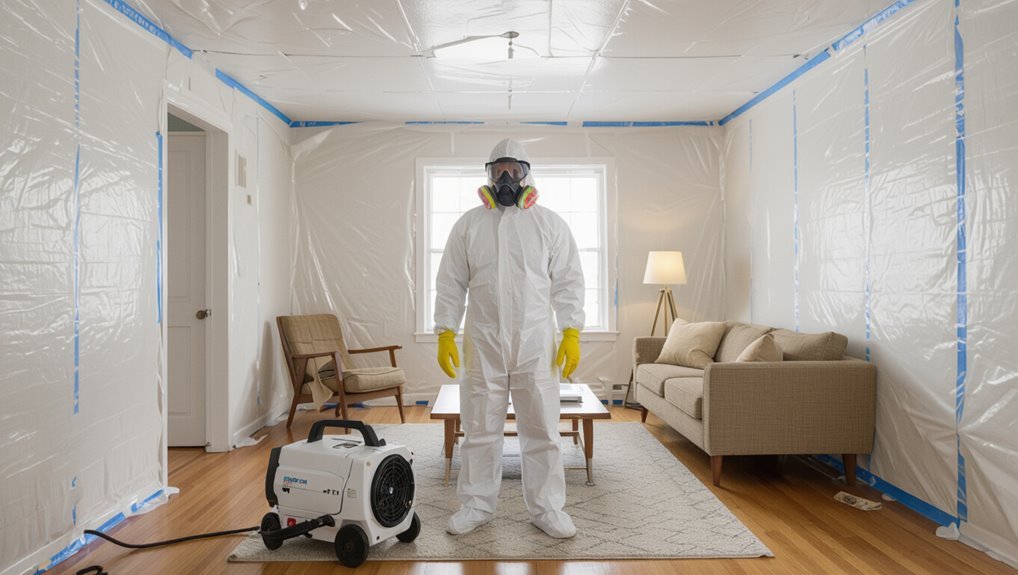
Step 3 pulls you into the practical setup: you’ll seal off the work area, control airflow, and suit up so asbestos fibers don’t spread or get inhaled.
Prepare by following key containment and PPE steps:
- Close vents, tape plastic sheeting over doors and windows.
- Use negative air or HEPA fan directed outside.
- Wear P100 respirator, disposable coveralls, gloves.
- Keep a decontamination area for exit.
Step 4 Recommended products and primers for encapsulation
Choosing the right encapsulant and primer is essential because they create a durable seal that binds asbestos fibers and prevents release during and after painting.
Use water-based encapsulants labeled for asbestos or high-build acrylic primers with strong adhesion.
Pick low-VOC, mold-resistant products.
Confirm manufacturer guidance and compatibility with textured surfaces.
Test a small area first and keep product data sheets on hand.
Step 5 Application techniques to minimize disturbance
When you’re ready to apply an encapsulant or paint, work slowly and deliberately to avoid disturbing the textured surface—move in smooth, overlapping strokes, keep pressure light, and never scrape or sand the popcorn texture.
Use a high-capacity roller with a thick nap, start at a corner, maintain wet edges, apply thin uniform coats, and avoid reworking areas to minimize vibration and fiber release.
Step 6 Cleanup, waste handling, and disposal rules
Before you remove any barriers or take down drop cloths, pause to plan a careful cleanup so you don’t re-aerosolize fibers; wear PPE (respirator, disposable coveralls, gloves) and keep the room sealed while you collect waste.
Wet-clean surfaces with HEPA-filtered vacuums and damp wipes, double-bag debris in labeled, leak-tight bags, follow local hazardous-waste disposal rules, and never discard asbestos in regular trash.
When Removal Is the Right Choice
If the ceiling is damaged, friable, or you’re planning major renovations, you’ll need professional asbestos removal rather than painting.
Expect licensed contractors to use containment, negative air systems, wet methods, and strict disposal protocols to keep fibers from spreading.
Be prepared for significant costs, permit requirements, and a timeline that can range from a day for small jobs to weeks for larger projects.
Situations that require professional asbestos removal
Because asbestos can release dangerous fibers when it’s damaged or disturbed, you should call a licensed abatement professional in certain clear-cut situations.
Hire them if the ceiling is crumbling, water-damaged, or being removed or remodeled.
Also call a pro if HVAC work, sanding, or drilling will disturb the material, or if you find visible debris after impact, to guarantee safe containment and disposal.
Overview of professional removal methods and safety protocols
When removal’s the right choice, licensed abatement crews follow strict, standardized methods to keep you and your home safe:
- isolate the work area with containment and negative air pressure
- use HEPA filtration and wet methods to suppress fibers
- wear PPE: respirators, disposable suits, and decontamination protocols
- package and label waste for certified disposal
You’ll get testing, clearance air sampling, and documentation before reoccupying.
Costs, timeframes, and permit considerations
Although removal’s often the safest long-term option, you’ll want to budget carefully: professional asbestos abatement typically runs from a few hundred to several thousand dollars depending on room size, material type, and local disposal fees. Expect 1–3 days for a single room, permits vary by locality, and inspections add costs.
| Cost range | Timeframe | Permit needed? |
|---|---|---|
| $300–$5,000+ | 1–3 days | Often |
| Inspection fees | Disposal fees | Variance by city |
Common Mistakes and Risks to Avoid
Don’t sand, scrape, or power-wash an asbestos ceiling yourself—you’ll release dangerous fibers into the air.
Using the wrong paint or prep methods can disturb the material and make the problem worse.
And if you remove or discard asbestos improperly, you could face health risks, fines, or legal liability.
DIY sanding, scraping, or power-washing hazards
If you start sanding, scraping, or power-washing a textured or popcorn ceiling that may contain asbestos, you can release dangerous respirable fibers into the air and contaminate the room, your clothes, and any tools you use.
Don’t sand or blast surfaces, avoid dry scraping, and don’t use power-washers. Those actions spread fibers widely, increasing inhalation and cleanup risks; hire a licensed abatement professional instead.
Using the wrong paint or prep methods that disturb fibers
When you pick the wrong paint or prep method for an asbestos-containing ceiling, you risk disturbing fibers and spreading contamination throughout the room.
Don’t use high-penetration primers, aggressive scrapers, or spray applicators that soak or abrade the texture. Instead, hire licensed asbestos professionals to encapsulate or remove safely.
Improper DIY products and techniques can increase airborne fiber counts and health risks.
Improper disposal and legal liabilities
Because asbestos waste is hazardous, how you discard removed materials can create legal and health consequences you’ll be liable for.
Don’t toss debris in regular trash, dump on property, or use unmarked bags. Follow local disposal rules, use licensed haulers, and keep records.
Improper disposal can trigger fines, cleanup orders, and personal liability for exposure—so handle waste correctly.
Tips and Best Practices for Homeowners
You’ll want to weigh short-term fixes like sealing or painting against long-term solutions such as professional encapsulation or removal based on risk and lifespan.
When hiring contractors, ask about asbestos certification, insurance, past projects, and a clear scope of work before you sign anything.
Budget for testing first, then for the chosen remedy—encapsulation is usually cheaper than removal, but removal eliminates the hazard.
Short-term fixes vs. long-term solutions
Although a fresh coat of paint can hide minor surface wear, it’s only a short-term fix for an asbestos ceiling and won’t address underlying hazards like damaged or crumbling material.
You can seal intact surfaces with specialized encapsulants to reduce fiber release temporarily, but plan for professional abatement or safe enclosure as a long-term solution to eliminate exposure and restore lasting safety and value.
Working with contractors: questions to ask and credentials to verify
If you’re planning more than a temporary paint job—especially when abatement or enclosure is on the table—you’ll want a contractor who knows asbestos protocols and local regulations.
Ask about these before hiring:
- Are you licensed for asbestos work and insured?
- Can you provide references for similar jobs?
- What containment and air-monitoring procedures do you use?
- Who’ll handle required permits and reports?
Budgeting for testing, encapsulation, or removal
When planning for asbestos testing, encapsulation, or removal, factor in inspection fees, contractor quotes, permit costs, and potential surprise expenses so you won’t be caught off guard.
Get multiple bids, ask for itemized estimates, and budget a 15–25% contingency for hidden damage or delays.
Verify whether contractors include disposal, air clearance, and insurance to avoid unexpected outlays.
Regulatory and Legal Considerations
You’ll need to check regional building codes and asbestos regulations before touching an asbestos ceiling, since rules differ by location.
When selling your home, you’re often required to disclose known asbestos issues to buyers.
Also consider how insurance and liability could be affected if work is done improperly or without proper permits.
Relevant building codes and asbestos regulations (overview by region)
Because asbestos regulations and building codes vary widely by country and even by municipality, you’ll need to check the rules that apply where you live before deciding to paint over an asbestos ceiling.
In many places Europe, North America, Australia and parts of Asia have strict removal or encapsulation standards, licensing for abatement contractors, and disposal rules.
Follow local agency guidance and permits.
Disclosure requirements when selling a home
Curious whether asbestos in your ceiling could complicate a sale?
You must disclose known asbestos presence when required by state or local law and answer buyer questionnaires honestly.
Provide inspection reports, test results, and remediation records if available.
Failing to disclose can trigger legal claims.
Consult a real estate attorney or your agent to guarantee disclosures meet jurisdictional requirements and protect you during the transaction.
Insurance and liability issues
After disclosing asbestos risks to a buyer, you should also check how insurance and liability will affect the sale and any remediation work.
Confirm your homeowner and seller policies cover asbestos-related claims, document inspections and abatement contracts, and get certificates from licensed contractors.
Clarify who bears cleanup costs and potential future claims in the sale contract, and consult an attorney or insurance agent for specific protections.
FAQ
You’ll probably have quick questions like whether you can safely paint over asbestos yourself or if painting will fully lock in fibers.
You’ll also want to know typical costs for testing and encapsulation, how long encapsulation lasts before re-treatment, and what to do if a popcorn ceiling gets accidentally disturbed.
Read on for concise answers and clear next steps.
Can I safely paint over asbestos without a professional?
Can you safely paint over an asbestos ceiling without a professional? You can’t assume safety.
Disturbing asbestos-containing material risks fiber release. If the surface is intact and you won’t sand or scrape, a specialized encapsulant applied carefully might be acceptable, but local regulations and testing often require professional assessment.
When in doubt, hire a licensed asbestos abatement contractor to evaluate and handle the job.
Will painting completely lock in asbestos fibers and eliminate risk?
Although painting can reduce the chance of asbestos fibers becoming airborne, it won’t completely lock them in or eliminate risk.
Paint and sealants can encapsulate loose fibers temporarily, but aging, impact, or renovations can disturb material later.
If you suspect asbestos, don’t rely solely on painting; get testing and follow professional guidance for safe encapsulation, repair, or removal to protect occupants.
How much does testing and encapsulation typically cost?
Curious what testing and encapsulation will cost?
You’ll pay about $50–$200 for a lab asbestos test, depending on samples and turnaround.
Encapsulation runs roughly $1–$3 per square foot for DIY products, while professional encapsulation/painting typically costs $2–$6 per square foot, influenced by ceiling condition, access, and local labor rates.
Get multiple quotes and verify contractor credentials.
How long does encapsulation/painting last before re-treatment is needed?
Because encapsulation stabilizes asbestos fibers rather than removing them, how long it lasts depends on the product, application quality, and wear: a well-applied commercial encapsulant or epoxy paint can protect a ceiling for 10–25 years under normal conditions, while DIY coatings on undisturbed ceilings might last 5–10 years before they need touch-ups or re-treatment.
Check periodically for cracking, peeling, or damage and plan repairs promptly.
What if I accidentally disturb a popcorn ceiling’ what should I do?
If you accidentally disturb a popcorn ceiling, stop work immediately, leave the area, and keep others and pets away to limit exposure.
Close off the room, turn off HVAC, and avoid sweeping or vacuuming.
Call a licensed asbestos abatement professional to assess and clean.
Follow their guidance for testing, disposal, and any medical advice.
Don’t re-enter until they declare it safe.