How to Paint Picture Frame Molding for a Polished Finished Look
You’ll get a polished look by prepping, priming, and applying thin, even coats with the right tools. Start by cleaning, filling holes, and sanding smooth; prime bare wood or patched areas for adhesion. Use an angled sash brush for edges, a foam roller for flats, and a sprayer for ornate profiles. Sand lightly between coats, remove tape at a 45° angle, and let paint cure fully before rehanging. Keep going for step-by-step tips and troubleshooting.
Quick Answer How to Paint Picture Frame Molding for a Polished Finished Look
You can get a smooth, polished look by sanding, priming, and applying two thin coats of paint to your picture frame molding.
It usually takes about 1–3 hours total depending on drying times and your skill level, and it’s a low- to moderate-difficulty project.
You’ll need sandpaper, primer, paint, a small brush or foam applicator, and tack cloths.
One-sentence summary of the process
Start by sanding, priming, and filling any gaps. Then apply two thin, even coats of paint—allowing proper drying and light sanding between coats.
Finish with a clear sealer for a smooth, durable, professional-looking frame molding. When you follow those steps for how to paint picture frame molding, you’ll get consistent coverage, crisp edges, and a polished finish that holds up over time.
Time, difficulty, and typical materials needed
After prepping and sealing, plan on about 2–4 hours of hands-on work for a single frame—sanding, priming, two thin paint coats with light sanding between, and a final sealer—plus overnight drying for full cure.
You’ll find the skill level easy to moderate; steady hands help.
Typical materials: primer, paint, sealer, sandpaper, brushes or foam, tack cloth.
- Quality acrylic or latex paint
- Sandpaper (120–220 grit) and tack cloth
- Foam brush or angled sash brush
Basic Understanding What Is Picture Frame Molding and Why Paint It
Picture frame molding is the narrow trim that surrounds panels or mirrors and usually comes in wood, MDF, or polyurethane.
You’ll paint it mainly for looks—to match other trim or update a room—but also to protect the material from moisture and wear.
If the molding is warped, rotted, or severely damaged you should replace it; otherwise a fresh coat will often do the job.
Definition and common materials (wood, MDF, polyurethane)
Think of picture frame molding as the trim that outlines and enhances a wall panel or mirror, creating the look of a framed picture without the bulk.
You’ll find it in solid wood (durable, can stain), MDF (smooth, affordable, primed easily), and polyurethane (lightweight, insect- and moisture-resistant).
Choose material based on budget, finish preference, and installation needs.
Reasons to paint (aesthetic, protection, matching trim)
Moving from material choices to finish decisions, you’ll find painting molding changes both how it looks and how long it lasts.
You can unify mismatched frames, highlight profiles, or create contrast with wall color.
Paint seals wood and MDF against moisture and stains, extending lifespan.
It also lets you match trim throughout a room for a cohesive, polished appearance.
When to repaint vs. replace
If your molding shows only minor chips, faded paint, or a few small cracks, repainting will usually refresh its look and protect the substrate without the time and cost of replacement.
You should replace molding when damage is structural, warped, rotten, or insect-ridden, or when profiles are missing.
Repainting suits cosmetic wear; replace for stability, fit, or when repairs cost nearly as much as new molding.
Materials, Tools, and Paint Selection
Before you start, gather the essential tools and supplies—sandpaper, caulk, tack cloth, brushes, rollers, and a sprayer if you’re using one.
Decide on primer and paint type (latex vs. oil, enamel options, and finish like satin or gloss) and pick brushes or rollers designed for smooth molding surfaces.
Don’t forget proper safety gear and ventilation so you can work cleanly and protect your lungs.
Required tools and supplies
You’ll need a few key tools and the right paint to get crisp, durable results: Gather quality sandpaper, a small angled brush, and painter’s tape.
Bring a clean cloth and tack rag for dust removal, plus a lightweight primer if surfaces need sealing. Work in a well-ventilated area with drop cloths to protect floors.
- Sandpaper (120–220 grit)
- Angled sash brush
- Painter’s tape
Recommended paints and primers (oil vs. latex, enamel, satin vs. gloss)
Choosing the right paint and primer will make the difference between a finish that lasts and one that chips within months. You’ll want a bonding primer and either oil or latex based on substrate; enamel provides durability. Satin hides flaws; gloss highlights details. Use interior-grade formulas for indoor molding.
| Type | Best use |
|---|---|
| Oil primer | Raw wood/adhesion |
| Latex enamel | Painted surfaces/durability |
Choosing brushes, rollers, and spray options
When you want a smooth, professional finish on picture frame molding, pick tools that match the paint and profile:
Use angled sash brushes (2–2.5 inches) for corners and detail, a small foam roller for flat faces to avoid texture, and a high-quality HVLP or airless sprayer for flawless sheen on large runs.
Clean and maintain brushes for best results.
Safety gear and ventilation
After picking the right brushes or sprayer, pay equal attention to safety gear and ventilation to protect yourself from fumes and airborne particles.
Wear a respirator rated for paint fumes, safety glasses, and gloves. Open windows, use fans to create cross-ventilation, and work outdoors if possible.
For oil-based products, consider a respirator with organic vapor cartridges and limit exposure time.
Preparation Inspecting and Preparing Molding for a Smooth Finish
Start by closely inspecting the molding for damage, gaps, or old finish so you know what cleaning and repairs are needed.
Clean the surface with mild soap or a TSP alternative, then fill dents, holes, and gouges with wood filler or putty and sand through progressively finer grits, feathering edges for a seamless shift.
Prime any bare wood, patched areas, or high-adhesion paints with the appropriate primer to guarantee an even, durable topcoat.
Inspecting for damage, gaps, and old finish
Before you apply primer, closely inspect the molding for cracks, dents, loose joints, old varnish, or areas where caulk has failed so you know exactly what needs repair.
Run your fingers along edges, press joints, and use a bright light to catch hairline gaps.
Mark spots for filling, sanding, reglueing, or stripping so your prep work’s targeted and efficient.
Cleaning methods (soap, TSP alternatives)
While you’re prepping molding for primer, clean surfaces thoroughly so paint will adhere and imperfections show—use mild dish soap and warm water for routine grime, and choose a TSP alternative (like trisodium phosphate substitute or a biodegradable, phosphate-free degreaser) for greasy or nicotine-stained molding.
Rinse well, dry completely, and wipe with a tack cloth to remove residues and lint before priming.
Repairing dents, holes, and gouges (wood filler, putty)
After cleaning and wiping the molding, inspect every length for dents, nail holes, and gouges so you know what needs filling.
Use a woodworking filler or paintable putty suited to your molding material. Apply with a small putty knife, press firmly, and remove excess.
Let cure per instructions, then check for low spots and reapply tiny amounts until the surface is level and ready for priming.
Sanding: grit progression and feathering edges
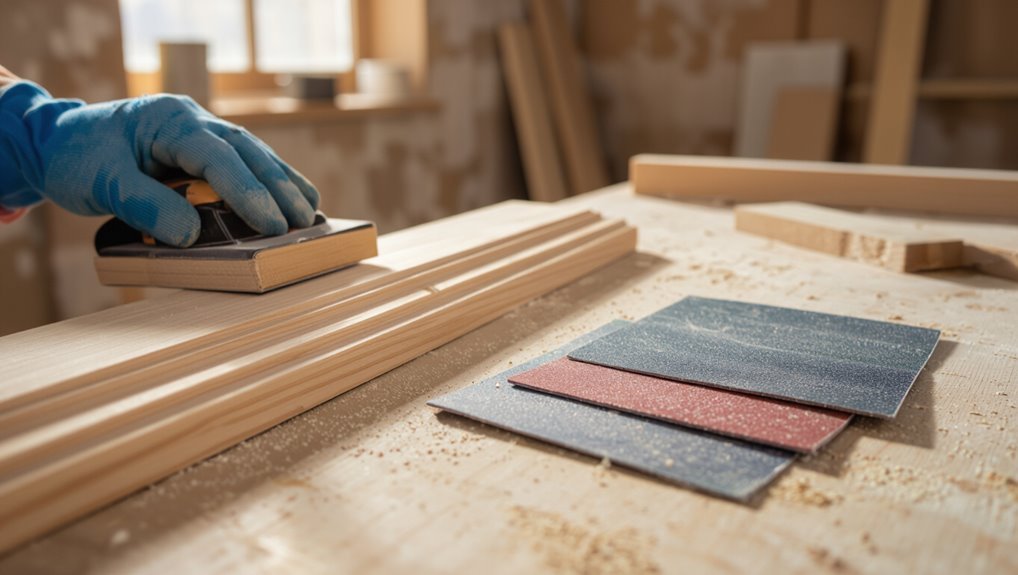
Start with a coarser grit and work toward finer grits so you get an even, smooth surface:
begin with 100–120 grit to knock down high spots and filled areas,
follow with 150–180 grit to blend the putty into the wood,
and finish with 220 grit (or 320 for ultra-smooth priming) to feather edges and remove micro-scratches.
Sand lightly along profiles, keep edges soft without rounding details.
Priming: when to use primer and types
Prime your molding whenever the substrate is porous, stained, repaired, or when you’re switching between paint types—primer seals, evens out absorption, and improves adhesion so your topcoat goes on smoothly and lasts.
Use oil-based primer for bare wood or tannin bleed, shellac for stubborn stains, and water-based primer for previously painted or MDF surfaces.
Apply thin, even coats and sand lightly between coats.
Step-by-Step Painting Process
Now you’ll move through the painting steps in order, starting by protecting surrounding areas and masking off surfaces.
You’ll prime for even coverage, tack between coats, and apply the first coat with the right tool—brush, roller, or sprayer—then sand where needed.
Finish with a second coat and targeted touch-ups for a clean, durable result.
Step 1 Protect surrounding areas and mask off surfaces
1. You’ll protect floors, walls, and artwork before painting picture frame molding. Tape carefully, cover surfaces, and create clean edges so paint stays only where you want it.
Work methodically from the center outward to avoid missed spots.
- Use high-quality painter’s tape for crisp lines
- Lay drop cloths and plastic sheeting
- Remove or mask hardware and nearby fixtures
Step 2 Apply primer: tips for even coverage
Once your surfaces are masked and protected, you’ll want to apply a primer to confirm the paint adheres evenly and the finish looks smooth.
Use a high-quality bonding primer, thin light coats, and work along the grain.
Keep a damp brush or small foam applicator for corners.
Sand lightly between coats with fine grit, remove dust, and verify full coverage before proceeding.
Step 3 First coat of paint: technique for brush, roller, and spray
Begin by choosing the right application method for each section of the molding: use a quality angled brush for corners and detailed profiles, a small foam roller for flat faces to prevent brush marks, and a sprayer for large runs if you want the smoothest finish.
Load thin, even coats, work with the grain, maintain a wet edge, and avoid overworking areas.
Step 4 Sanding between coats: when and how
After the first coat feels dry to the touch and no tackiness remains, sand lightly to smooth raised grain and dust nibs before applying the next coat.
Use fine 220–320 grit, a light touch, and consistent strokes along the profile.
Wipe with a tack cloth or damp microfiber to remove residue.
Inspect for imperfections and repeat only where necessary before recoating.
Step 5 Second coat and final touch-ups
Apply the second coat with the same careful technique you used for the first, maintaining even strokes along the profile and keeping a wet edge to avoid lap marks.
Focus on thin, consistent layers rather than heavy buildup so the finish levels smoothly.
Inspect for missed spots, use a small brush for crisp corners and crevices, feather edges, and remove stray drips or dust nibs before the paint fully skins.
Step 6 Removing tape and curing time
Once the paint feels dry to the touch but hasn’t fully cured, carefully peel the painter’s tape back at a 45-degree angle to protect your crisp lines and avoid lifting paint.
Let the molding cure undisturbed per paint manufacturer’s time—usually 24–72 hours. Avoid touching or rehanging until fully cured.
If edges need cleanup, use a tiny brush or razor after full cure.
Techniques for Different Molding Materials and Profiles
When you’re tackling different moldings, the prep and tools change: raw wood needs sealing, pre-primed pieces often just need light sanding, and factory-finished items may need a degrease before painting.
For ornate or detailed profiles use small brushes, thin glazes, or a toothbrush to work paint into crevices without blobbing.
If you’re repainting or refinishing stained molding, test adhesion and strip or scuff glossy surfaces so the new finish sticks.
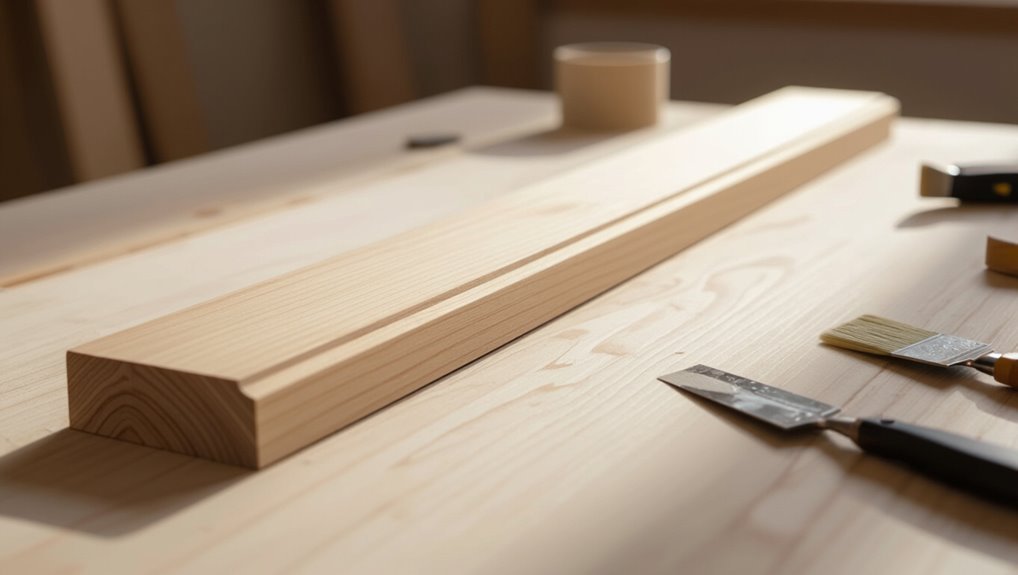
Painting raw wood molding
Start by identifying the wood species and profile so you can choose the right primer and brush: softwoods like pine and fir absorb more paint and often need a sealing primer, while hardwoods such as oak or maple may benefit from a sanding-sealer to close pores and reduce grain raise.
Sand smooth, remove dust, apply compatible primer, then two thin topcoats with light sanding between for a durable, even finish.
Painting pre-primed or factory-finished molding
Although pre-primed or factory-finished molding saves you prep time, you still need to inspect and lightly scuff the surface so new paint will adhere evenly.
Use a light sanding with fine-grit paper or a scuff pad, clean off dust, and spot-prime any bare edges or damaged areas before applying your finish coats.
Work with compatible paint types, avoid heavy buildup, and use thin, even coats for smooth results.
Painting ornate or detailed profiles (use of small brushes, glaze)
Factory-finished or pre-primed molding may be ready for paint, but ornate or highly detailed profiles need a different approach to preserve their lines and depth.
Use small, angled brushes to work paint into crevices, thin coats to avoid buildup, and a glaze or wash to accent shadows.
Wipe excess glaze quickly, then seal with a clear topcoat for protection.
Painting painted or stained existing molding
Refresh painted or stained existing molding by first identifying the material and profile—wood, MDF, PVC, and metal each take prep and paint differently—so you can choose the right cleaners, primers, and techniques.
Sand glossy paint lightly, strip or degloss stained wood, clean PVC with TSP, and scuff metal.
Prime as appropriate, fill gaps, then use thin, even coats with a brush or spray for a seamless finish.
Common Problems, Causes, and Fixes
You’ll run into a few common issues when painting frame molding, but you can prevent and fix most of them with the right prep and technique.
Watch for brush marks and uneven texture, drips or sagging, peeling or flaking paint, and visible seams or nail holes, then address each with sanding, proper thinning and layering, adhesion fixes, and seamless filling.
I’ll explain causes and straightforward remedies so you can get a smooth, durable finish.
Brush marks and uneven texture prevention and correction
Avoid brush marks and uneven texture by understanding what causes them and how to prevent or fix them before the paint dries.
Use high-quality, appropriate-bristle brushes or foam for your paint type, thin coats, and light, even strokes with the grain.
Sand between coats with fine grit, remove dust, and work quickly to level edges.
Touch up wet areas; recoat if texture persists.
Drips, runs, and sagging how to fix
Catch drips and runs early so they don’t dry into noticeable sags—these defects happen when paint’s applied too heavily, the surface is vertical, or the paint’s too thin or too thick for the brush.
Wipe excess with a damp cloth, level fresh runs with a fine brush, sand dried sags smooth, then feather in thin coats.
Use proper viscosity and light strokes to prevent recurrence.
Peeling or flaking paint causes and remediation
When paint peels or flakes off molding, it usually means adhesion failed somewhere—old finish, moisture, or poor prep—and you’ll need to diagnose the cause before repairing.
Scrape loose paint, sand to feather edges, clean with degreaser, and dry thoroughly.
Prime with a bonding primer suited to the substrate.
Repaint with proper temperature and humidity control to prevent recurrence.
Visible seams and nail holes concealment strategies
After you’ve addressed peeling paint and prepped the surface, seams between frame sections and nail holes become the next visible defects you’ll want to hide.
Fill gaps with wood filler or caulk, smooth with a putty knife, and sand flush.
Countersink nails slightly, fill, sand, and prime.
Use matching paint and thin coats to blend repairs for a seamless, professional finish.
Best Practices and Professional Tips for a Polished Look
To get a truly polished look, you’ll want crisp edges from careful cutting-in and proper paint film techniques.
Match sheen between trim and walls, respect ideal dry times and conditions, and use caulk sparingly to finish seams so they disappear.
Consider glazing or finishing wax to add depth where appropriate.
Edge crispness: cutting in and paint film techniques
Start by planning your cuts and paint flow so your edges stay razor-sharp: pick a high-quality angled sash brush for cutting in, load it lightly, and steady your wrist to guide a single, confident stroke along the molding profile.
Work wet-on-wet to feather paint film, maintain thin even coats, smooth brush marks with light, parallel strokes, and let proper drying time prevent ridge buildup.
Matching sheen across trim and walls
One clear rule: match the trim sheen to the wall finish in a way that balances durability and reflectance—use semi-gloss or satin on high-traffic trim for cleanability while keeping adjacent walls in eggshell or matte to hide imperfections and control glare.
Pick closely related sheens so shifts read intentional, test samples under your room lighting, and adjust sheen contrast to complement molding details without stealing focus.
Speed vs. quality: ideal dry times and environmental conditions
Matching sheens is only part of the equation; drying time and conditions will determine whether your picture frame molding actually looks professional or shows brush marks, laps, and dust nibs.
You’ll balance speed and quality by painting at 50–75°F with 40–60% humidity, using thin coats, and allowing manufacturer-recommended dry times.
Faster drying risks visible flaws; patience yields smooth, durable results.
When to use caulk and how to finish seams seamlessly
When seams, gaps, or nail holes threaten to break the clean lines of your frame molding, caulk is the quickest way to get a seamless finish.
Use paintable acrylic latex for indoor trim, apply thin bead, smooth with a wet finger or tool, then wipe excess.
Let it cure fully before sanding or priming.
Match texture; avoid overfilling joints.
Using glazing or finishing wax for depth
A thin layer of glaze or finishing wax can instantly add depth and definition to your picture frame molding, drawing out profiles and hiding minor imperfections without overpowering the paint.
Apply sparingly with a brush or cloth, work into crevices, then wipe excess.
Choose warm or neutral tones to complement paint, test first, and seal if needed for durability and easier cleaning.
Tools and Method Comparison
Now you’ll compare brushes, rollers, and sprayers so you can pick the best tool for your molding’s profile and finish.
Consider pros and cons: brushes give control for detail, rollers speed up flat sections, and sprayers deliver the most even coat but need masking.
Also weigh hand-painting against hiring a pro—factor in cost, time, and the quality you want.
Brush vs. roller vs. spray: pros, cons, and ideal use cases
If you’re deciding how to apply paint to frame molding, pick the method that matches your goals and workspace: brushes give control for detail and edges, rollers speed coverage on flat profiles, and sprayers deliver the smoothest finish for complex profiles or multiple pieces. Choose by profile, finish, and setup time:
| Tool | Best for | Trade-off |
|---|---|---|
| Brush | Detail, edges | Slower |
| Roller | Flats | Texture |
| Spray | Complex shapes | Masking needed |
Hand-painting vs. professional spray service cost/quality considerations
Weighing hand-painting against a professional spray service comes down to your budget, desired finish, and how much time you’ll spend prepping and masking.
DIY will save money but often costs you in time and a less uniformly smooth finish, while pros charge for labor and setup but deliver fast, consistent results on complex profiles.
If you value control and lower cost, paint by hand; if you want flawless speed, hire pros.
Maintenance and Long-Term Care
Once your molding’s painted, you’ll want to clean it gently with a soft cloth and mild cleaner to avoid wearing the finish.
Learn simple touch-up techniques for small chips and scuffs so they blend with the original paint.
I’ll also show how to decide whether a fresh coat or spot repairs will save you time and money.
Cleaning painted molding without damaging finish
Keep your painted molding looking fresh by cleaning it gently and regularly to avoid grime buildup that can dull or damage the finish.
Use a soft microfiber cloth or sponge with mild dish soap and warm water, wrung out well. Rinse with a damp cloth, dry immediately, and avoid abrasive pads, harsh chemicals, or soaking to prevent finish erosion or paint lifting.
Touch-up techniques for chips and scuffs
If a chip or scuff appears, act quickly to prevent moisture and dirt from worsening the damage; small repairs are usually simple and can be done with just a few tools.
Sand edges lightly, remove dust, and apply matching paint with a fine brush or touch-up pen.
For deeper gouges, use wood filler, sand smooth, prime, then repaint.
Blend edges for an invisible repair.
When to repaint vs. repair
Small touch-ups can keep molding looking fresh, but you’ll want to know when those fixes won’t do the job and a full repaint is smarter.
Repaint when multiple chips, widespread discoloration, peeling, or mismatched sheen appear.
Repair when damage is localized: fill dents, sand, and spot-prime.
Consider age, time since last paint, and cost—repaint if repairs multiply or the finish isn’t cohesive.
FAQ
You probably have a few quick questions before you start, like whether you can paint the molding on the wall or should remove it first and which paint sheen looks most professional.
We’ll also cover how many coats you really need, painting over stained molding, and how long to wait before rehanging items or touching the trim.
Read on for concise answers that’ll keep your finish looking sharp.
Can I paint picture frame molding without removing it from the wall?
Curious whether you can paint picture frame molding without taking it down? Yes — you can.
Tape edges, protect surrounding walls and floors, and remove hardware if possible. Lightly sand and clean the molding, then prime patched spots.
Use a steady brush or small roller, working in smooth strokes. Take your time for neat edges and even coverage; touch up as needed.
What paint sheen looks most professional on molding?
Which sheen looks most professional often depends on the room and how much wear the molding gets, but a satin or semi-gloss finish is usually the best choice.
You’ll get subtle sheen, easy cleaning, and enough durability for trim without the high shine of gloss.
Use satin for softer, modern looks and semi-gloss where moisture or scuffs are concerns.
How many coats of paint do I really need?
Satin and semi-gloss finishes clean up nicely, but you’ll still need to think about how many coats to apply for a truly durable, even result.
Generally, two coats suffice: a thin, even primer or first coat and a full topcoat. For high-traffic areas or darker colors, add a third coat.
Sand lightly between coats and let each dry fully for best adhesion.
Can I paint over stained molding without stripping it?
Yes—you can often paint over stained molding without stripping it first, but you’ll need to prepare the surface properly so the paint adheres and lasts.
Sand lightly to dull the finish, clean off dust and grease, then apply a high-quality bonding primer.
Use thin, even paint coats and allow recommended dry times.
This approach saves effort and gives a durable, smooth finish.
How long should I wait before rehanging items or touching the molding?
Wait at least 24 hours before rehanging lightweight items and touching the molding, but give painted surfaces more time if possible—48 to 72 hours is safer for full handling and heavy fixtures.
You’ll avoid smudges, dents, and tackiness by waiting. Test a hidden spot before mounting heavy pieces and use proper anchors when ready.
- Check dryness with fingertip pressure.
- Rehang light decor after 24–48 hours.
- Delay heavy fixtures 72 hours.
Visual References and Quick Checklists
You’ll find a simple prep-and-paint checklist for one-piece molding to follow step by step.
Keep a troubleshooting quick-reference chart handy so you can fix common issues like brush marks, drips, or adhesion problems fast.
Use these visual references to confirm each step and avoid costly mistakes.
Prep and painting checklist for one-piece jobs
Start by clearing and protecting the workspace so you can move straight through the checklist: lay drop cloths, remove nearby hardware or hangings, and mask adjacent surfaces; then gather grit sandpaper, tack cloth, primer, paint, a high-quality brush or mini-roller, and gloves so nothing stalls the job.
Follow this concise sequence, work steadily, and inspect between steps:
- Sand, clean, and tack to guarantee adhesion
- Apply thin primer coat, sand light after curing
- Paint two thin coats, inspect for touch-ups and remove tape
Troubleshooting quick-reference chart
Use this one-page troubleshooting chart to quickly diagnose common molding paint problems and pick the right fix without hunting through long instructions. Keep it handy while you work; follow the quick fixes to save time and get a smooth finish.
| Problem | Fix |
|---|---|
| Drips | Sand, thin coat |
| Brush marks | Light sand, recoat |