How to Fix Damaged Paint on Walls Like a Pro
Start by identifying the cause—moisture, impact, sun, or poor prep—then inspect the size, depth, and texture of the damage. Remove loose paint, sand smooth, and clean the area. Fill holes or cracks with spackle or joint compound, sand again, and prime with a stain-blocking primer if needed. Match paint sheen and apply thin, even coats, blending edges for a seamless finish. Follow drying times and prevention tips below to tackle tougher issues like mold or leaks.
Quick Answer Fix Damaged Paint Like a Pro
Start by cleaning the area, sanding any rough edges, and filling holes with spackle.
Prime the repaired spot, let it dry, then apply matching paint with thin, even coats.
Blend the edges and inspect in good light so the patch disappears.
Short, actionable summary of steps
Fix the problem fast: assess the damage, gather basic tools (sandpaper, spackle, putty knife, primer, matching paint, brush/roller), and prep the area by cleaning and protecting floors.
You’ll follow clear steps for how to fix damaged paint on walls:
- Sand, clean, and fill holes.
- Prime repaired spots.
- Paint and blend, feathering edges until seamless.
Understand the Problem What Causes Paint Damage
Start by looking at what’s causing the damage — moisture, impact, sun exposure, or poor surface preparation each leave different signs.
You’ll see peeling, bubbling, cracking, stains, scuffs, or flaking depending on the cause.
Identifying the damage type tells you whether you’ll need simple cleaning and touch-up, patching and sanding, or more extensive repairs.
Common causes (moisture, impact, sunlight, poor prep)
When paint starts failing, it usually traces back to one or more predictable causes: moisture that softens and peels coatings, impacts that chip or crack the surface, prolonged sun exposure that fades and chalks pigments, or poor surface preparation that keeps paint from adhering.
- Check leaks and ventilation to stop moisture.
- Repair dents and protect high-traffic areas.
- Use UV-resistant finishes and prep surfaces properly.
Types of paint damage (peeling, bubbling, cracking, stains, scuffs, flaking)
Paint problems come in a few recognizable forms, and knowing which one you’re facing makes finding the right solution much easier.
You’ll see peeling where paint separates in strips, bubbling from trapped moisture, hairline or spiderweb cracking, discoloring stains, surface scuffs from abrasion, and flaking where paint chips off in patches.
Identifying these helps you plan proper cleanup and restoration.
How damage type affects repair approach
Although many issues look similar at a glance, the repair method you choose should match the underlying cause of the damage.
Identify whether moisture, adhesion failure, impact, or dirt caused the defect. You’ll treat bubbling differently than scuffs: stop leaks, strip loose paint, sand, prime with appropriate sealer, then repaint.
Match prep and materials to cause to guarantee a durable fix.
Assess the Damage Inspect Before You Start
Before you start, gather a basic tools and materials checklist so you’ve got sandpaper, filler, primer, paint, a putty knife, and a moisture meter if possible.
Test the surface with a light tap, a scrape, and a moisture check to judge whether the damage is superficial, unstable, or caused by damp.
If the problem looks extensive, structural, or you’re unsure about mold or persistent moisture, call a professional rather than tackling it yourself.
Tools and materials checklist
Start by gathering the right tools and materials so you can assess damage efficiently and fix it cleanly: a bright work light, a drop cloth, putty knife, sanding block (coarse and fine grit), spackling or joint compound, primer, matching paint, brushes/rollers, painter’s tape, a utility knife, and safety gear like gloves and a dust mask.
- Prep: tape, cloth, light
- Repair: putty, knife, sandpaper
- Finish: primer, paint, brushes
How to evaluate severity (surface test, tap test, moisture check)
1 simple inspection can save you time and prevent bigger repairs later: walk the room with a bright light and check each damaged area up close.
Gently scrape loose paint (surface test), tap for hollow sounds to find delamination, and use a moisture meter or touch test for dampness.
Note size, depth, and texture so you can plan proper prep and materials.
When to call a professional vs DIY
After you’ve inspected each scuffed or peeling spot and noted size, depth, and moisture, decide whether the job fits your skills and schedule.
If damage is small, dry, and shallow, you can sand, patch, prime, and repaint.
Call a pro for structural cracks, ongoing moisture, widespread peeling, or if you lack time, tools, or confidence to achieve a seamless finish.
Step-by-Step Repair Guide
Now you’ll follow a clear step-by-step repair guide to get your walls ready for repainting.
Start by prepping the area, removing loose paint and contaminants, and fixing any underlying issues like drywall damage or leaks.
Finish by priming with the right product and matching the paint sheen and color before you topcoat.
Step 1 Prepare the area (furniture, drop cloths, ventilation)
Start by clearing the workspace so you have room to move and nothing gets ruined—move furniture out or to the room’s center and cover it with drop cloths or plastic sheeting.
Next, guarantee good ventilation: open windows and use fans.
Finally, keep tools handy and protect floors.
- Remove or cover furniture
- Lay drop cloths securely
- Ventilate the area well
Step 2 Remove loose paint and contaminants (scraping, sanding, cleaning)
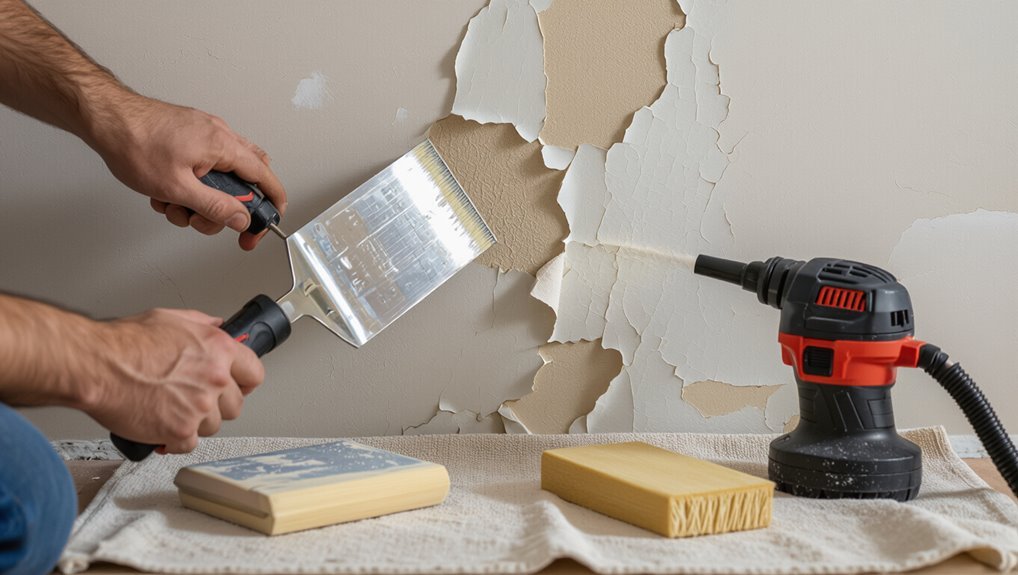
Scrape away flaking paint and rough spots, then sand and clean the surface so new paint will stick.
- Use a putty knife or scraper to remove loose paint, working gently to avoid gouges.
- Sand feathered edges with medium then fine grit to smooth edges.
- Wipe with a damp cloth or tack cloth, removing dust and grease so primer will adhere.
Step 3 Fix underlying issues (patch drywall, treat mold, fix leaks)
Address the root cause before you repaint: patch any damaged drywall, treat mold with the proper cleaner and protective gear, and repair leaks so moisture won’t ruin your work.
1. Remove soft or crumbling drywall, apply a patch kit, sand smooth.
2. Kill mold with an appropriate fungicide, wear respirator and gloves.
3. Find and fix plumbing or roof leaks, dry the area thoroughly before repairs.
Step 4 Prime appropriately (type of primer per damage)
4. You’ll prime based on damage type to guarantee adhesion and stain blocking. Choose:
- Oil-based primer for water stains and tannin bleed-through.
- Shellac primer for severe stains or smoke damage.
- Latex/acrylic primer for patched drywall and general areas.
Apply evenly, sand lightly between coats, and let dry fully before painting to prevent peel or show-through.
Step 5 Choose and match paint (sheen, color matching techniques)
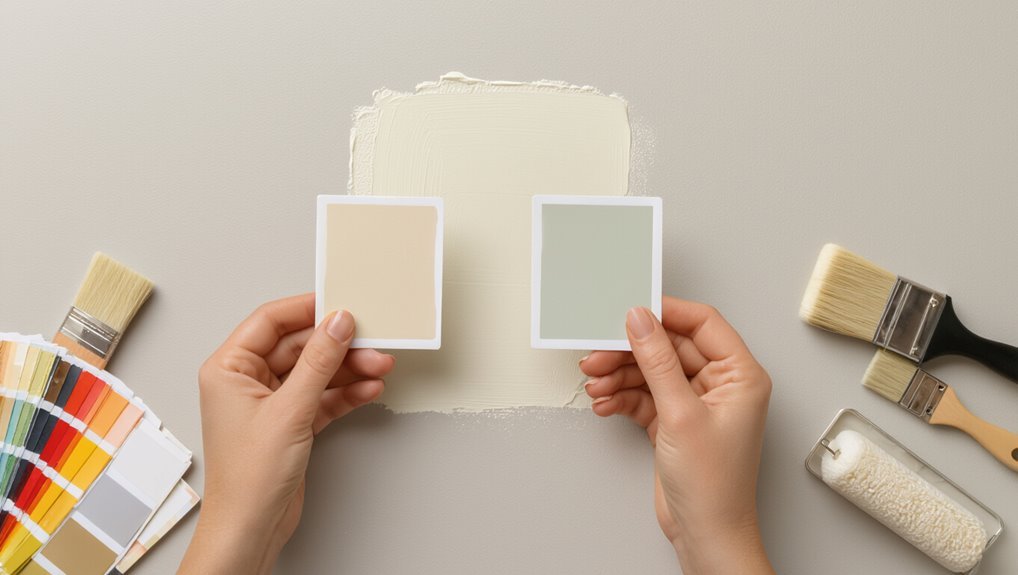
Once you’ve primed and smoothed the surface, pick a paint that matches both the color and sheen of the surrounding wall so the repair blends seamlessly.
- Use sample swatches under room lighting to compare hues.
- Match sheen (flat, eggshell, satin) — sheen affects appearance more than color.
- Consider a small tint from the store or a spectrophotometer match for tricky tones; test a patch before committing.
Step 6 Apply paint like a pro (tools, technique, coats, drying times)
Grab your best tools and plan each stroke before you start painting: use a high-quality angled brush for edges and a short-nap roller for the wall surface.
Load them properly (dip the brush a third of the way and roll evenly in the tray).
Apply thin, even coats rather than one heavy one, and allow the manufacturer’s recommended drying time between coats so the finish levels out and hides the repair.
- Start with light pressure and feather edges.
- Work top-to-bottom in small sections.
- Wait full dry time before additional coats.
Step 7 Finish and inspect (blend edges, touch-ups, cleanup)
Now that the paint’s dry, it’s time to blend, touch up, and clean so your repair disappears into the surrounding wall: check edges with good lighting to spot sheen or texture differences.
Feather any visible lines by lightly rolling or brushing into the surrounding area, and make small touch-ups with an angled brush where coverage isn’t perfect.
Clean tools, remove tape, and inspect from different angles; repeat tiny fixes.
Materials, Tools, and Products Guide
Before you start repairs, gather the essential tools—scrapers, sandpaper, putty knife, brushes, and a good roller—to make the job smoother.
Choose fillers and primers based on the damage (spackle for small holes, joint compound for larger gaps) and match paints to finish and durability needs.
Reserve specialty products like stain-blocking primer or mildew-resistant paint for water stains, smoke damage, or damp areas.
Essential tools for every repair
A few well-chosen tools will make every paint repair faster and produce a cleaner finish, so you’ll want to assemble a basic kit before you start.
Gather these essentials and keep them handy:
- Spackle, putty knife, sandpaper (various grits)
- Primer, matching paint, small brushes or mini roller
- Clean rags, painter’s tape, utility knife, bucket for cleanup
Recommended fillers, primers, paints by damage type
Because different types of wall damage call for specific products, matching the right filler, primer, and paint makes repairs durable and invisible. Use lightweight spackle for hairline cracks, patching compound for holes, latex primer for sealed repairs, and acrylic paint to finish. Match sheen and color; feather edges.
| Damage | Recommended product |
|---|---|
| Hairline cracks | Lightweight spackle |
| Small holes | Patching compound |
| Sanded repairs | Latex primer |
| Final finish | Acrylic paint |
| Texture match | Feathering/skim coat |
When to use specialty products (stain-blocking primer, mildew paint)
Matching fillers, primers, and paints covers most repairs, but some stains, moisture issues, or persistent mildew need specialty products to stop problems from coming back.
Use a stain-blocking primer for water, smoke, or tannin bleed-through. Choose mildew-resistant or antimicrobial paint where mold recurs.
For severe odors, pick odor-sealing primers. Always address the root moisture source before painting for lasting results.
Common Mistakes and How to Avoid Them
Don’t skip proper surface prep—you’ll get peeling or visible texture differences that mean redoing the job.
Use the correct primer and sheen, and don’t rush drying or slop on thick coats, or you’ll end up with drips, uneven finish, or poor adhesion.
For a seamless repair, take time to match color precisely so patches don’t stand out.
Mistake: Skipping surface prep consequences and fix
If you skip preparing the wall, paint won’t adhere properly and issues like peeling, blistering, and uneven texture will show sooner rather than later.
You should clean, sand, and remove loose paint, fill holes, then prime bare or repaired areas.
Skipping these steps wastes time and money; do prep thoroughly, let surfaces dry, then paint for a durable, smooth finish.
Mistake: Using wrong primer or paint sheen
When you pick the wrong primer or paint sheen, the finish can look off and wear out faster than you’d expect.
Choose primer based on surface (stain-blocking for repairs, adhesion for glossy areas).
Match sheen to function: flat hides flaws, satin/eggshell cleans easier, semi-gloss for trim.
Test a small patch, follow manufacturer recommendations, and always let primer cure before topcoating.
Mistake: Rushing drying times or applying too-thick coats
Because paint needs time to form a durable film, rushing drying times or slapping on too-thick coats causes drips, uneven texture, and poor adhesion.
So you’ll end up redoing the job sooner. Wait recommended drying times, apply thin even coats, and sand lightly between layers when needed.
Use proper ventilation and temperature control to guarantee each coat cures fully before adding the next.
Mistake: Poor color matching and visible patches
Although matching a paint color seems simple, getting it wrong leaves obvious, patchy spots that ruin the room’s finish.
You should sample colors on the wall, test in different light, and let swatches fully dry.
Blend new paint by tinting or feathering edges, or take a chip to the store for a precise match.
Step back and inspect before calling it done.
Prevention and Maintenance Best Practices
Keep up with routine inspections and tackle small chips or stains right away so they don’t turn into bigger repairs.
Control moisture and improve ventilation, and limit direct sunlight where possible to prevent peeling and fading.
For high-traffic areas, pick durable finishes that stand up to wear and make future maintenance easier.
Routine inspections and simple fixes
When you inspect your walls regularly, small chips and stains never get the chance to become larger problems; a quick monthly check catches peeling, bubbling, or dirt buildup before they worsen.
- Wipe away dirt, note spots, and touch up small chips with matching paint.
- Sand rough edges, prime bare areas, and repaint thinly.
- Keep a small repair kit so you can fix issues the moment you spot them.
Controlling moisture, ventilation, and sunlight exposure
If you control moisture, ventilation, and direct sunlight, you’ll prevent many common paint problems like peeling, blistering, and premature fading.
Inspect for leaks, fix flashing, and seal gaps. Use exhaust fans or dehumidifiers in bathrooms and kitchens, and guarantee attic and crawlspace ventilation.
Add UV-filtering window film or curtains to reduce sun damage without changing paint type or finish.
Choosing durable finishes for high-traffic areas
Controlling moisture, ventilation, and sunlight is a big part of paint longevity, but the finish you choose also determines how well walls will stand up to daily wear.
For kitchens, hallways, and playrooms, pick semi-gloss or satin for scrubbability.
Use high-quality acrylic or enamel for durability, test adhesion, and finish with a washable topcoat so you can clean scuffs without repainting too soon.
Quick Repairs for Specific Scenarios
Now you’ll handle quick fixes for common problems like small scuffs and chips under 2 inches with simple spot-patching, and you’ll use a moisture-focused approach when paint is peeling.
You’ll learn fast methods for hairline cracks and crazing, plus how to tackle larger damaged sections and textured walls so repairs blend in.
Follow the right prep and materials for each scenario to get lasting results.
Repairing small scuffs and chips (under 2 in) fast method
Reach for a small tub of spackling, a putty knife, and a matching touch-up paint to fix scuffs and chips under 2 inches quickly; you’ll clean the area, fill and smooth the dent, let it dry, then prime if needed and paint for an almost invisible repair.
- Clean and sand.
- Apply spackle, smooth.
- Prime (if needed) and paint.
Fixing peeling paint from moisture focused approach
Small scuffs and chips are quick fixes, but peeling paint from moisture needs a different, more targeted approach.
First, stop the moisture source—fix leaks, improve ventilation, or add a vapor barrier.
Scrape loose paint, dry the area thoroughly, and treat any mold.
Prime with a moisture-blocking primer, then repaint using a mildew-resistant finish for lasting protection.
Repairing hairline cracks and crazing
If you spot hairline cracks or a crazed, spiderweb pattern in your paint, you can usually repair them quickly without stripping the whole wall.
Scrape loose flakes, sand lightly, and clean dust.
Fill cracks with a thin layer of acrylic filler or spackling, sand smooth when dry, prime the spot, then blend matching paint.
Feather edges for an invisible repair.
Tackling large damaged sections or textured walls
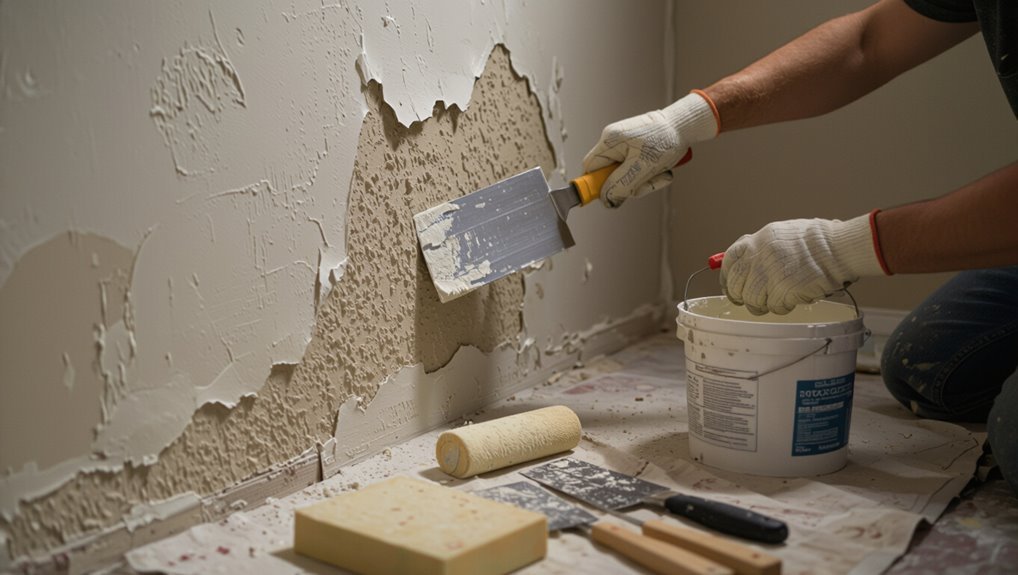
When larger patches of paint have peeled away or your wall has a textured finish, you’ll need a slightly different approach than for hairline cracks; you’ll be repairing both surface damage and, often, the texture so repairs blend seamlessly.
Remove loose paint, clean and sand edges, fill with joint compound or patching plaster, texture-match with a sponge or brush, prime, then repaint to blend color and sheen.
Estimated Time and Cost Breakdown
For each repair you’ll want to know roughly how long it takes—small touch-ups can be 15–45 minutes, moderate repairs an hour or two, and a full repaint several hours to a day or more.
You’ll also weigh DIY costs (usually minimal: paint and supplies) against professional rates, which can range from a few hundred to over a thousand dollars depending on scope.
Use these time and cost ranges to decide whether you’ll tackle the job yourself or hire a pro.
Time per repair type (small touch-up, moderate, full repaint)
Although the exact time and cost depend on surface condition and paint type, you can expect a small touch-up to take 15–45 minutes and cost under $20 in materials, a moderate repair to take 1–3 hours and cost $20–$75, and a full repaint to require several hours to a full day per room with labor and materials running from $150 to $1,000 or more.
| Repair type | Typical time |
|---|---|
| Small touch-up | 15–45 min |
| Moderate repair | 1–3 hrs |
| Full repaint (per room) | Several hrs–1 day |
| Notes | Materials vary by paint type |
Typical DIY vs professional cost ranges
1 clear way to compare DIY and professional repairs is to break costs and time into categories so you can decide what’s worth tackling yourself.
Small touch-ups: DIY $5–$30, 15–30 minutes; pro $50–$150.
Moderate patches: DIY $30–$100, 1–3 hours; pro $150–$400.
Full repaint: DIY $100–$500+, weekend project; pro $1,200–$4,000+, days.
Frequently Asked Questions
You probably have specific questions about matching colors, skipping scraping, choosing primers, drying times, or mold-related issues.
I’ll answer how to match touch-up paint, whether you can paint over peeling areas, which primer suits water or smoke damage, how long to wait between coats, and when painting won’t fix mold.
Read on for clear, practical guidance.
How do I match paint color for touch-ups?
Want a seamless touch-up that disappears into the surrounding wall? Match paint by using leftover cans or swatches, or take a chip to a paint store for color-matching.
Test samples on the wall and view them in different light. Use the same finish and stir thoroughly.
Feather new paint into old with a small brush or mini-roller for an invisible blend.
Can I paint over peeling paint without scraping?
Although it might seem quicker, don’t paint over peeling paint without scraping first; loose flakes prevent proper adhesion and cause the new coat to fail.
You should remove loose paint, sand edges smooth, clean the surface, and apply a suitable primer to exposed areas.
Skipping prep risks peeling recurrence and uneven finish. Proper prep saves time and gives a durable, professional result.
What primer should I use for water stains or smoke damage?
Which primer should you pick for water stains or smoke damage?
Use a stain-blocking, shellac-based primer for severe stains and odor—it’s fast, seals tannins, and prevents bleed-through.
For milder discoloration or latex-friendly walls, use a high-quality oil-based or stain-blocking latex primer.
Always clean and dry the surface first, then spot-prime stained areas before full priming and repainting.
How long should I wait between primer and paint coats?
After you’ve primed stained or smoke-damaged areas and the primer feels dry to the touch, you’ll want to know when it’s safe to paint over it.
Typically wait the primer’s recommended recoat time—usually 1–4 hours for latex primers, longer for oil-based or high-build products.
Verify surface is fully dry, tack-free, and smooth; longer drying in cool or humid conditions prevents peeling.
Will painting fix mold-related paint damage?
Can painting alone fix mold-related paint damage? No — painting only hides the problem.
You must remove mold, address moisture sources, and dry surfaces before priming with a mold-blocking primer.
After remediation, use mildew-resistant paint for prevention.
If mold’s extensive or keeps returning, call a professional.
Skipping these steps leads to recurring stains, peeling, and health risks.