How Long Does Duration Exterior Paint Last on Real Homes?
You can expect Sherwin‑Williams Duration to last about 8–12 years on siding and trim with proper prep and basic upkeep, though spot touch‑ups every 2–3 years and annual inspections will extend life. Lifespan shortens near coasts, in high‑UV or humid climates, and on poorly prepared or porous substrates. Different materials (wood, fiber cement, stucco, metal) and color choices also change longevity. Keep going to see how climate, prep, and maintenance change that timeline.
What This Guide Covers and How to Use It
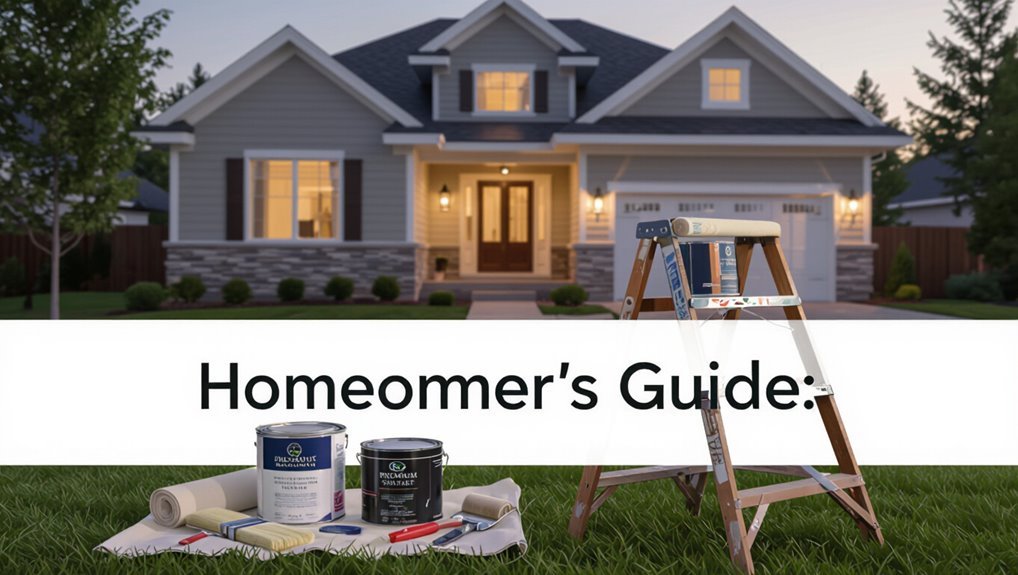
Before you jump in, know what this guide covers and how to use it: we’ll explain the factors that affect exterior paint lifespan, compare common paint types, offer maintenance tips to extend life, and show when to repaint.
You’ll get a concise using guide with reader tips to assess conditions, choose products, schedule upkeep, and decide if Duration is meeting expectations on your home.
Quick Answer: Typical Lifespan of Duration Exterior Paint
If you pick Sherwin-Williams Duration and keep up with basic maintenance, you can typically expect 8–12 years of good exterior performance on siding and trim.
Your actual lifespan benchmarks depend on climate, surface prep, and sun exposure. Plan simple maintenance intervals—annual inspections, spot touch-ups every 2–3 years, and full repainting near the 8–12 year mark for best results.
Is Duration Right for Your Home? Quick Decision Guide
Think about how Duration’s coverage and available sheens match your exterior surfaces and style. Consider whether its durability suits your local climate and how well it resists moisture, sun, and temperature swings.
Finally, weigh the application process and total cost against your timeline and budget to decide if it’s the right choice.
Coverage And Sheen
Compare coverage and sheen to decide if Duration is right for your home’s exterior. You should weigh sheen selection against desired appearance—flatter sheens hide imperfections, glosses boost trim contrast.
Evaluate coverage depth per coat: thicker hides previous color and reduces touch-ups. If you want fewer coats and crisp trim, Duration’s coverage and available sheens often fit, but confirm with a sample.
Durability And Climate
Because your local weather and the wear your exterior gets drive paint performance, check Duration’s durability against your climate before committing. Use climate resilience data and microclimate mapping to decide if it resists UV, moisture, salt, and freeze cycles where you live.
Consider these factors:
- UV exposure
- Humidity and rain
- Coastal salt spray
- Freeze-thaw cycles
Application And Cost
Now that you’ve matched Duration’s durability to your climate, consider how application and cost affect whether it’s right for your home.
You’ll want proper application techniques—cleaning, priming, correct spread rate—to get advertised longevity.
Factor labor, materials, and prep in a clear cost breakdown.
If DIY skills or budget align, Duration can be a smart investment; otherwise compare alternatives.
Key Factors That Determine Exterior Paint Life
While weather gets a lot of blame, several specific factors actually control how long your exterior paint lasts: surface prep and substrate condition, paint quality and formulation, application technique and thickness, local climate and sun exposure, and ongoing maintenance.
While weather gets blame, prep, paint quality, application, climate, and maintenance actually determine exterior paint longevity.
Consider these essentials—Climate effects and Surface porosity matter.
- Prep and adhesion
- Paint formulation
- Application quality
- Maintenance schedule
How Climate Zones Change Duration’s Durability
Where you live has a big impact on how long exterior paint will last. Coastal salt air speeds corrosion and fades coatings, humid tropical climates promote mildew and peeling, and freeze-thaw cycles in cold zones cause cracking and flaking.
You’ll need different prep, paint types, and maintenance for each of these conditions.
Coastal Salt Air
Coastal salt air eats away at exterior paint faster than most other climates, so you should expect shorter lifespans on homes near the ocean. You’ll face salt buildup and airborne corrosion that dulls finish and promotes peeling. Protect by regular washing, choose corrosion-resistant coatings, and inspect trims more often.
- Rinse salt quarterly
- Use marine-grade primers
- Inspect seams monthly
- Recoat sooner
Humid Tropical Effects
Frequently, humid tropical climates cut exterior paint lifespans markedly because constant heat and moisture accelerate mildew, blistering, and substrate breakdown.
You’ll see tropical mold colonize films quickly, staining and degrading binders.
High humidity plus occasional salt deposition near shores speeds corrosion on metal trims and undermines adhesion.
To preserve Duration’s performance, you should choose mildew-resistant formulations, prompt cleaning, and rigorous surface prep before repainting.
Cold Freeze-Thaw
While humid heat drives mildew and blistering, cold freeze-thaw cycles present a different set of stresses that can cut Duration’s lifespan by causing cracking, flaking, and loss of adhesion.
- You’ll see ice lensing force paint apart in porous substrates.
- Repeated thermal shock weakens film flexibility.
- Microcracks let moisture in, accelerating freeze damage.
- Use flexible primers and proper drainage to extend life.
Sun Exposure and Paint Fade on Homes
Sun exposure dramatically accelerates paint fade on homes, so you’ll notice color loss and chalking sooner on sun‑lit walls than on shaded ones.
You should monitor UV intensity and choose paints that passed rigorous colorfastness testing.
Bright, south‑facing facades need tougher formulas and more frequent touchups; reflective coatings and lighter hues reduce visible fading and prolong aesthetic life.
Humidity, Rain, and Duration Exterior Performance
When you consider humidity and rain, you’ll see how trapped moisture can lift and peel paint from siding and trim.
Heavy rain and recurring wet-dry cycles can leave a dull or patchy sheen that shortens how long the finish looks new.
High humidity also encourages mildew growth, which eats at coatings and speeds deterioration unless you clean and treat it promptly.
Moisture-Driven Peeling
If you leave exterior paint exposed to high humidity and frequent rain, it’ll start to peel sooner than you expect.
You’ll see moisture migration behind the film and paint delamination at edges.
To limit damage, you should:
- Improve ventilation.
- Fix leaks and flashing.
- Use breathable primers.
- Repaint only when surfaces are dry.
Rainwater Sheen Change
Moisture not only causes peeling; it also changes how rainwater alters a painted surface’s sheen over time.
You’ll notice rainwater sheen dulling or creating uneven patches as repeated wetting and drying abrades microscopic binder films.
Expect a gradual gloss shift where high-gloss finishes lose luster faster than satin.
Prompt cleaning and proper recoat timing minimize visible contrast and extend aesthetic life.
Humidity-Induced Mildew
Because humid conditions feed spores and keep surfaces damp, mildew can appear on exterior paint within weeks in some climates, especially on north-facing walls and shaded eaves.
- Inspect weekly for stains and musty odors.
- Use mildew-resistant Duration formulas and clean gently.
- Improve ventilation and trim vegetation for moisture monitoring.
- Repaint with proper prep and mildew prevention products to extend coverage and curb recurrence.
Freeze‑Thaw Cycles and Coating Damage
Experiencing repeated freeze‑thaw cycles can crack and lift exterior paint as trapped water expands in tiny pores and joints, so you’ll see damage sooner on surfaces that stay damp or aren’t well sealed.
You should prevent freeze damage by sealing gaps, maintaining drainage, and choosing flexible coatings.
Cycle testing predicts performance, but real‑world wetting and poor detailing accelerate failure, so inspect annually.
Coastal Salt Spray: What to Expect With Duration
If your home’s near the ocean, expect accelerated paint wear from salt spray corrosion that attacks metal fasteners and substrate edges. You’ll see film integrity break down faster—blistering, chalking, and loss of adhesion are common within years instead of decades.
Plan for more frequent maintenance and recoating on a 3–7 year cycle depending on exposure and coating quality.
Salt Spray Corrosion Risk
When you live near the coast, salt-laden spray speeds up corrosion by drawing moisture and ions to paint and metal surfaces, breaking down coatings far faster than inland conditions.
You’ll face saltwater intrusion and corrosion acceleration that shorten maintenance cycles. Consider these actions:
- Rinse surfaces regularly
- Use corrosion-resistant primers
- Inspect metal trim monthly
- Touch up chips promptly
Film Integrity Near Coast
Salt spray doesn’t just speed corrosion—it attacks the paint film itself, drawing moisture and salts into microscopic cracks and weakening adhesion over time. You’ll notice salt laden corrosion eats binder, causing chalking and beachfront fading faster than inland. Monitor exposed seams and trim; choose coatings rated for marine environments to resist film breakdown.
| Area | Risk |
|---|---|
| Seams | High |
| Trim | High |
| Siding | Moderate |
| Shutters | Moderate |
Maintenance And Recoating Timeline
Regularly inspect coastal paint every 1–3 years, because salt spray accelerates breakdown and hides early signs of adhesion loss; you’ll likely need touch-ups sooner than inland properties and full recoats on exposed surfaces every 5–8 years depending on product quality and exposure.
- Schedule preventive inspections after storms.
- Prioritize seasonal touchups on trim and soffits.
- Clean salt deposits twice yearly.
- Plan full recoats based on wear and adhesion tests.
How Surface Type Affects Duration Durability
Because different materials absorb, expand, and wear in unique ways, the surface you paint greatly determines how long the finish will hold up. You’ll consider surface porosity and texture compatibility when choosing primers and coatings. Proper prep matches porosity, while texture affects adhesion and sheen longevity. Repair and sealing extend life; improper matches cause peeling.
| Surface | Porosity | Texture |
|---|---|---|
| Masonry | High | Rough |
| Vinyl | Low | Smooth |
Duration on Wood Siding: Realistic Lifespan
On wood siding you can generally expect paint to last about 5 to 10 years depending on the product and climate.
Harsh sun, moisture, poor prep, and insect or rot damage will shorten that span greatly.
Knowing those risk factors helps you plan inspections and timely recoats.
Expected Lifespan Range
If you maintain and repaint wood siding on a typical home, expect a realistic lifespan of about 5 to 10 years for most modern exterior paints; high-quality coatings and ideal conditions can push that to 12–15 years, while poor prep, heavy sun, or persistent moisture can shorten it to 3–5 years.
- Consider climate variability.
- Note substrate porosity.
- Monitor finish integrity annually.
- Plan repainting on a schedule.
Factors That Shorten Life
Knowing the typical lifespan helps you set expectations, but several common factors can markedly shorten how long paint lasts on wood siding.
You’ll see diminished durability from Moisture Intrusion—leaks, poor drainage, or wet climates—plus UV Degradation that breaks binders and fades color.
Poor prep, incompatible coatings, nail pops, and heavy abrasion also accelerate failure, so address issues early to extend service life.
Duration on Fiber Cement (Hardie) Expectations
When you choose fiber cement siding like Hardie, expect top-quality paint systems to last longer than on many other substrates—typically 10 to 15 years before noticeable fading or chalking appears, and often 15 to 25 years for full-system coatings applied and maintained correctly.
- Fiber Cement accepts paint well when prep’s right.
- Use corrosion-resistant Fasteners to prevent staining.
- Check Coating Compatibility with primers and topcoats.
- Allow for Board Movement to avoid cracking and delamination.
Duration on Stucco and Cementitious Surfaces
Because stucco and cementitious coatings are porous and rigid, paint on these surfaces typically shows wear sooner than on smoother, less absorbent substrates—you can expect quality acrylic or elastomeric systems to last about 7 to 12 years before significant fading, chalking, or hairline cracking appears, though properly prepared and maintained jobs sometimes reach 12 to 15 years.
You should respect stucco breathability, monitor for cementitious cracking, and use flexible coatings and proper prep to extend life.
Duration on Brick, Masonry, and Mortar
When you paint brick, masonry, or mortar, thorough surface prep is critical — you’ll need to clean, repair cracks, and remove loose material so paint can adhere.
Pay close attention to moisture and breathability, because trapped water or non-breathable coatings cause peeling and damage.
Also control stains and efflorescence before painting, since salts and discoloration will reappear through fresh finishes if untreated.
Surface Preparation Importance
If you want paint to last on brick, masonry, or mortar, you need to start with clean, sound surfaces—loose paint, efflorescence, dirt, and crumbling mortar will force coating failure long before its expected life.
You should verify surface cleanliness and perform adhesion testing, then follow proper prep steps:
- Pressure wash and remove efflorescence.
- Rake and repoint crumbling mortar.
- Prime porous areas.
- Allow thorough drying before coating.
Moisture And Breathability
After you’ve cleaned, repaired, and primed masonry, moisture management becomes the next determinant of paint longevity on brick, masonry, and mortar.
You’ll want coatings with high vapor permeability so trapped moisture can escape, and avoid impermeable moisture barriers that seal water in.
Proper detailing at joints and flashing, plus breathable paints, prevents peeling and extends Duration’s performance on masonry surfaces.
Stain And Efflorescence Control
Stains and efflorescence can eat away at Duration’s appearance and adhesion on brick, masonry, and mortar, so you’ll want to tackle them before painting.
- Clean surfaces with masonry detergent for stain mitigation.
- Use a masonry sealer to block salt migration and aid efflorescence prevention.
- Repair leaks and improve drainage to stop recurring stains.
- Test a small area to confirm Duration bonds and looks uniform.
Duration on Metal Trim, Gutters, and Doors
When metal trim, gutters, and exterior doors get properly prepped and coated, their paint can hold up for a long time—often 7 to 15 years depending on the metal type, exposure, and coating quality.
You’ll want routine metal maintenance to spot chips, rust, or loose seams early. Proper touch-ups and gutter longevity measures—like cleaning and sealing fasteners—extend finish life and curb corrosion.
Why Surface Prep Is the Single Biggest Factor
You won’t get lasting results if you skip prep: start by thoroughly cleaning the surface to remove dirt, mildew, and loose paint.
Fix any damaged areas—cracks, rot, or rust—so the coating has a stable base.
Then apply the right primer to improve adhesion and seal the substrate before painting.
Clean Surface First
Cleaning the surface first gives your paint the foundation it needs to stick, look even, and last years longer. You’ll want thorough surface cleansing and contaminant removal so adhesion’s solid and finishes don’t fail.
- Pressure wash loose dirt and mildew.
- Use detergent for oily residues.
- Rinse completely; let dry.
- Inspect for remaining grime before priming.
Repair Damaged Areas
Start by fixing all damaged areas so the paint has a smooth, stable surface to bond to. You’ll remove loose material, select patch techniques that suit the damage, and make certain substrate matching for longevity. Proper repairs prevent peeling and water intrusion.
| Damage Type | Patch Techniques | Substrate Matching |
|---|---|---|
| Wood rot | Replace/epoxy | Wood grain/type |
| Stucco/crack | Cement patch | Texture/color |
Proper Primer Application
After repairing damaged areas, prepare the surface with a primer that matches the substrate so paint will adhere and last. You’ll reduce surface tension, seal porous spots, and make certain adhesion promoters work.
Follow these steps:
- Clean and dry thoroughly.
- Sand glossy areas lightly.
- Apply primer evenly, cover edges.
- Spot-prime stains before topcoat application.
Inspecting and Repairing Prior Paint Failures
When you’re evaluating a failing exterior paint job, look for the causes first—blistering, peeling, cracking, chalking, or adhesion loss all point to different problems and need different fixes.
You should remove failed coatings, repair substrate damage, and sand or strip loose paint. Perform adhesion testing to confirm readiness, spot-prime bare areas, and only repaint once surfaces are sound and dry.
The Right Cleaning Steps Before Painting
Before you paint, you’ll need to clean the surface thoroughly—pressure wash or scrub to remove dirt, mildew, and loose paint so the new coat can stick.
Address any damaged areas by sanding, filling cracks or rotten wood, and then apply an appropriate primer to promote adhesion and durability.
These steps cut the risk of early failure and help your paint last longer.
Surface Cleaning Methods
You’ll want to start by removing dirt, mildew, and loose paint so the new coat can stick and look even.
Use pressure washing for siding, but avoid overpressure.
Apply chemical cleaners on stubborn mildew, rinse thoroughly, and let dry.
Follow these steps:
- Pre-rinse loose debris
- Pressure wash at appropriate setting
- Treat stains with chemical cleaners
- Final rinse and dry before painting
Repairing And Priming
Although cleaning removes surface grime, repairing damaged areas and applying primer are what guarantee the new paint bonds and lasts—so inspect for loose caulk, rotten wood, holes, and nail pops, fix them with appropriate fillers or replacements, sand smooth, remove dust, and spot-prime bare or patchy surfaces before you paint.
Choose primer selection to improve surface bonding, use oil or latex primers as needed.
When to Sand, Scrape, or Power‑Wash for Adhesion
Start by evaluating the surface: loose, peeling, or flaking paint and glossy finishes need sanding or scraping for proper adhesion, while mildew, dirt, and chalky residues call for power‑washing.
Assess the surface first: sand or scrape glossy, loose paint; power‑wash away mildew, dirt, and chalky residue.
- Sand glossy spots to improve surface adhesion.
- Scrape loose paint until edges are sound.
- Power‑wash mildew and chalk away.
- Set cleaning frequency based on exposure and condition.
When and Which Primers to Use With Duration
When choosing a primer, think about the surface, the topcoat type, and how long you need the finish to last. You’ll do Adhesion Testing on suspect substrates and pick primers for Primer Compatibility with Duration—latex over latex, oil where needed. Use the table below to compare quick options.
| Surface | Recommended Primer |
|---|---|
| Bare wood | Oil-based |
| Previously painted | Latex |
| Metal | Rust-inhibitor |
How Primer Choice Affects Final Durability
Pick the right primer and you’ll dramatically extend the life of your exterior paint by improving adhesion, sealing porous substrates, and preventing common failure modes like blistering and peeling.
Pick the right primer to improve adhesion, seal surfaces, and prevent peeling, blistering, and premature paint failure.
- Choose primer selection based on substrate for best bond.
- Use stain-blocking primers to avoid tannin bleed-through.
- Match primer chemistry to topcoat to reduce failure risk.
- Consider Durability testing results when selecting products to predict real-world longevity.
Application Methods That Maximize Lifespan
Apply coatings with consistent technique and proper tools to make certain your exterior paint lasts as long as possible; using the right roller nap, brush quality, and spray settings helps you achieve uniform film thickness, full coverage, and good edge-to-edge adhesion that prevent premature wear and common failures like cracking and peeling.
Control sprayer technique, maintain recommended film thickness, work in ideal temperatures, and overlap passes for seamless coverage.
Brush, Roller, or Sprayer: Pros and Cons for Duration
When you choose a brush, you get precision and the ability to work paint into tight joints, but you’ll spend more time and risk visible brush marks if you don’t have the skill.
A sprayer gives the most even, thin film that can extend paint life if you control overspray and surface prep, while a roller strikes a balance between speed and coverage with fewer hidden thin spots.
We’ll compare when each method helps or hurts long-term durability so you can pick the best tool for your project.
Brush Application Pros/Cons
Choosing between a brush, roller, or sprayer affects how long your exterior paint will last because each method influences film thickness, adhesion, and coverage consistency.
- Use proper brush technique to avoid thin spots and runs.
- Match bristle selection to paint type for better laydown.
- You’ll get precise edges and touch-up control.
- Brushing is slower but improves adhesion in tight or detailed areas.
Sprayer Vs. Roller
Often you’ll find a sprayer covers large, flat surfaces far faster than a roller, but the choice between sprayer and roller directly affects film thickness, overspray, and long-term durability—sprayers lay down a thinner, more uniform coat that can save time yet may need extra passes or back-rolling to achieve the same protective thickness a roller provides.
You’ll weigh speed against roller texture, overspray control, and sprayer maintenance.
Ideal Temperature, Humidity, and Timing to Apply
Paint performs best in a narrow window of weather, so you should plan to apply it on dry days with moderate temperatures and stable humidity.
Paint best when weather’s right—choose dry days with moderate temperatures and steady humidity for proper drying and adhesion.
You’ll use the ideal humidity and respect the temperature window for consistent drying and adhesion.
Consider these tips for application timing:
- Avoid rain for 24–48 hours.
- Paint between 50–85°F.
- Aim for 40–60% humidity.
- Start mid-morning after dew evaporates.
Measuring Coverage and Film Thickness for Proper Coats
Once conditions are right, you’ll want to measure how much coating you’re actually laying down so each coat performs as planned.
Use coating calipers to check dry film thickness and portable wet filmetrics to verify wet mils immediately after application.
Record readings across elevations and adjust application rate to match manufacturer coverage specs, ensuring consistent protection without overbuild or gaps.
How Coat Thickness and Dry Time Affect Longevity
Balancing coat thickness and dry time determines how long your exterior finish will protect the substrate. You’ll want ideal film thickness to resist weathering and proper drying kinetics to avoid solvent entrapment and poor adhesion.
- Measure wet film to target dry film specs.
- Apply even coats; avoid heavy buildup.
- Allow full drying between coats per temp/humidity.
- Monitor drying kinetics for cure, not just tack.
How Color Choice Changes Fade and Lifespan
Your color choice directly affects how quickly paint fades and how long it lasts: lighter colors show less noticeable fading and reflect more heat, while darker hues absorb heat and can break down faster.
You’ll also want to weigh pigment quality, because higher-grade pigments resist UV damage and maintain color longer. Balancing shade and pigment quality helps you pick a color that both looks good and lasts.
Light Vs. Dark Colors
Frequently, color choice plays a big role in how quickly exterior paint fades: darker hues absorb more UV and heat, accelerating breakdown, while lighter shades reflect sunlight and generally hold their appearance longer.
- You’ll see faster fade with high thermal absorption.
- Lighter tones need less maintenance.
- Use color psychology to match aesthetics and durability.
- Contrast and trim colors affect perceived wear.
Pigment Quality Impact
Beyond color selection, the quality of pigments in your paint determines how well that shade resists fading and how long the finish lasts.
You should check pigment stability and Colorfast testing results before buying.
High-grade pigments with UV absorbers and proper binder compatibility maintain vibrancy longer.
Poor pigment choices, or mismatched binders, accelerate fade and shorten repaint cycles.
Heat Absorption Effects
Some colors soak up more solar heat than others, and that extra warmth speeds up binder breakdown and pigment fade—so choosing lighter, reflective shades can noticeably extend your exterior paint’s lifespan.
- Higher solar reflectance reduces surface temperature.
- Cooler surfaces slow pigment degradation.
- You’ll limit thermal bridging into substrate.
- Pick UV-stable pigments and reflective coatings for longer color retention.
Why Dark Pigments Fade Faster
Because darker pigments absorb more sunlight, they heat up and break down faster than lighter colors. You’ll notice accelerated pigment degradation because heat and UV force chemical changes, while reduced light scattering in dark shades means less reflected energy to lessen damage. Choose coatings and maintenance accordingly.
| Factor | Impact |
|---|---|
| UV | High |
| Heat | High |
| Scattering | Low |
| Fade rate | Faster |
| Maintenance | Increased |
Sheen Level: Dirt Hiding and Wear Trade‑Offs
Sheen level plays a big role in how your exterior paint hides dirt and resists wear: flatter sheens mask surface grime and imperfections better, while glossier finishes shed dirt, resist abrasion, and show scuffs more readily.
- You’ll weigh Sheen tradeoffs: appearance vs. durability.
- Flatter sheens boost Dirt resistance visually.
- Glossy sheens improve cleanability.
- Choose based on exposure, color, and touch-up ease.
Routine Maintenance to Extend Duration’s Life
You should inspect your exterior at least twice a year and after severe weather to catch cracking, peeling, or blistering early.
When you spot small chips or worn spots, make timely touch-ups with compatible paint and proper surface prep to prevent moisture damage.
Regular checks and prompt spot repairs will keep your finish protective and extend its life.
Regular Exterior Inspections
Regularly inspect your home’s exterior at least twice a year and after severe storms to catch small problems before they damage the paint.
You should perform an annual inspection including gutter checks, siding, trim, and caulking to spot moisture, peeling, or mildew.
Prioritize accessible areas and document issues for repair scheduling.
- Siding
- Trim
- Gutters
- Caulking
Timely Spot Repairs
When you catch small chips, cracks, or peeling areas early and repair them promptly, you’ll prevent moisture and UV exposure from spreading damage and shortening the paint’s life.
You should perform timely touchups with matching Duration paint, sand and prime exposed substrate, and blend edges. Localized repainting keeps broader surfaces intact, saves time and money, and preserves overall finish longevity without a full repaint.
Annual Chores That Protect Exterior Paint
Although annual chores might seem minor, they play a big role in keeping exterior paint durable and attractive.
- Do seasonal inspections to spot peeling, mildew, or caulk failures.
- Schedule gutter cleaning so water doesn’t stain or rot siding.
- Power-wash gently to remove dirt and pollen without stripping paint.
- Trim vegetation away from walls to prevent abrasion and moisture retention.
Spot Repairs vs Full Repaint: How to Decide
Start by checking the overall paint film for cracking, peeling, or widespread chalking to see if the finish is still cohesive.
Then inspect the areas beneath the paint—rot, rust, or water damage often mean you’ll need more than a touch-up.
If the coating is mostly sound and damage is localized, spot repairs will usually suffice; extensive substrate issues point to a full repaint.
Assess Paint Film Condition
Inspect your exterior paint carefully to decide whether spot repairs will hold or if a full repaint’s required.
- Check paint adhesion—scrape small areas; loose flakes mean larger work.
- Test film flexibility by bending trim or siding; cracking indicates failure.
- Look for extensive chalking or color change across surfaces.
- Prioritize areas where moisture or sun caused the most breakdown for honest scope assessment.
Evaluate Underlying Damage
Once you’ve assessed the paint film, next determine whether damage is surface-only or extends into the substrate—this decides if spot repairs will hold or a full repaint’s needed. You’ll check for hidden rot, loose siding, and perform a structural assessment; spot fixes suit isolated failures, while pervasive decay or moisture intrusion means full repaint plus repairs.
| Issue | Action |
|---|---|
| Surface peeling | Spot repair |
| Hidden rot | Replace/repair |
Case Study A: Sunny, High‑UV Climate
Because intense sun and high UV levels accelerate fading and breakdown, homes in sunny climates need paint systems chosen for durability rather than just color.
You should address sunlight degradation and use UV inhibitors to slow loss.
Thermal cycling and expansion stress also matter.
Consider these actions:
- Select high‑UV resistance coatings
- Prioritize elastomeric flexibility
- Prep and prime thoroughly
- Schedule regular inspections
Case Study B: Humid, Inland Climate
Shifting from sun‑driven problems, humid inland climates bring different threats: persistent moisture, blistering, mold growth, and faster substrate deterioration. You’ll need vigilant maintenance to counter mold prevalence and manage roof runoff that soaks siding and trim.
| Issue | Impact |
|---|---|
| Moisture | Accelerates wear |
| Mold prevalence | Affects appearance and health |
| Roof runoff | Localized decay risk |
Case Study C: Coastal Salt‑Exposure Home
If you live near the coast, salt spray and corrosive air will be your paint’s biggest enemies, so you’ll need coatings and fasteners that resist both salt and moisture. You should prioritize coastal corrosion protection and active salt mitigation strategies to extend duration paint life.
- Choose marine-grade primers
- Seal seams and fasteners
- Rinse surfaces regularly
- Inspect and touch up annually
How Contractor Quality Changes Long‑Term Results
Hire carefully: the contractor you pick has a huge effect on how long exterior paint lasts. Your contractor selection determines prep, product handling, and schedule.
When workmanship consistency is high, coatings adhere, seal seams, and resist peeling for years. If crews cut corners or vary techniques, premature failure follows. Prioritize clear contracts and documented procedures to protect your paint investment and longevity.
How to Evaluate Pro Painters: Questions and Red Flags
Now that you know how contractor quality affects longevity, you’ll want a clear method for vetting painters before signing a contract. Ask direct questions, check references, and watch for red flags like vague timelines or hidden fees.
Before signing, vet painters: ask direct questions, check references, and watch for vague timelines or hidden fees.
Note contractor vetting steps to prevent payment disputes and guarantee warranty clarity.
- Verify license and insurance
- Request references
- Get detailed written estimate
- Confirm warranty terms
DIY Pitfalls That Cut Paint Life Short
Don’t underestimate how small mistakes can shave years off your exterior paint job: skipping proper surface prep, using the wrong primer or paint, and painting in poor weather are common DIY missteps that lead to peeling, blistering, and premature fading.
You’ll compromise finish and durability with Poor prep, Wrong tools, improper application thickness, or ignoring manufacturer drying times—each cuts lifespan and forces earlier repaints.
Cost vs Lifespan: Is Duration Cost‑Effective?
Those DIY missteps not only shorten your paint’s life but can also erase any savings you hoped to gain by doing the job yourself — so it pays to weigh cost against longevity.
- Compare upfront price to expected lifespan for long‑term cost.
- Factor maintenance, touchups, and climate.
- Project a realistic break‑even timeline versus cheaper options.
- Decide if fewer repaints justify higher initial spend.
Comparing Duration to Other Premium Exterior Paints
When you compare top-tier brands, focus on measurable lifespan factors—warranty years, scrub and fade resistance ratings, and real-world performance in climates like yours—rather than marketing claims; this lets you see which “premium” paints truly deliver longer protection and which only cost more up front.
You’ll evaluate comparative longevity and Brand performance by checking independent tests, user reviews, and local installer experience to pick wisely.
When a Lower‑Cost Paint Makes Sense
Comparing premium paints helps you see where performance pays off, but there are plenty of situations where a lower-cost exterior paint is the smarter choice. You’ll pick budget coatings when short-term appearance, rental turnover, or limited exposure justify lower longevity.
Consider these value tradeoffs:
- Rentals with frequent repaint cycles
- Low-sun, sheltered walls
- Tight renovation budgets
- Short-term resale projects
How Warranties Map to Real‑Life Durability
Because warranties promise durability but don’t guarantee it in every setting, you should read the fine print and match coverage to your home’s conditions. You’ll weigh warranty nuances against real world durability, considering climate, prep, and maintenance. Compare claims, exclusions, and transferability so you’re not surprised.
| Hope | Reality |
|---|---|
| Promise | Limits |
| Comfort | Cost |
Signs: When You’ll See Fading, Chalking, or Peeling
Warranties tell you what a paint maker promises, but your walls will honestly show how well that paint’s holding up.
- You’ll notice color degradation on sun‑exposed siding.
- Chalky residue means pigment migration and binder breakdown.
- Peeling starts at seams where adhesion fails.
- Flaky patches and uneven gloss signal moisture or substrate issues — watch for spreading.
Signs You Need an Earlier Repaint Than Expected
If your paint starts failing faster than the labeled lifespan, you’ll want to act sooner—look for accelerated signs like rapid color loss, widespread chalking, bubbling near trim, or persistent mildew that won’t scrub away, since these indicate problems that won’t wait for the scheduled repaint. Watch for early flaking, hidden moisture, soft siding, nail pops, and stain recurrence.
| Sign | Action |
|---|---|
| Early flaking | Spot-prime & repaint |
| Hidden moisture | Diagnose & dry |
| Bubbling | Remove & reseal |
| Chalking | Clean & assess |
| Mildew | Treat & repaint |
Duration Exterior: VOCs, Disposal, and Health Notes
When you’re choosing a duration exterior paint, pay close attention to VOC content, recommended disposal, and any health advisories—low-VOC formulations reduce indoor and outdoor air impacts, but you still should follow label guidance for application, cleanup, and disposal to protect yourself and the environment.
- Check VOC emissions on the label.
- Use approved Disposal methods.
- Wear PPE during application.
- Store and discard leftovers per local rules.
How to Document Condition for Warranty or Insurance Claims
Start by creating a clear baseline record of your painted surfaces as soon as the job’s done so you can prove preexisting condition and spot later changes.
Take high-resolution photos from multiple angles, label files, and keep photographic evidence organized.
Maintain timestamped logs of inspections, repairs, and communications.
Store backups offsite or in cloud storage so you can support warranty or insurance claims quickly and credibly.
Pre‑Paint Checklist to Maximize Duration Lifespan
Get your surfaces ready right away: a thorough pre‑paint checklist prevents common failures and extends the life of exterior paint.
You’ll do surface testing, repair damage, and confirm substrate compatibility before painting.
Prioritize contractor selection and clear scope to avoid mistakes.
- Wash and remove loose paint
- Repair rot and fill cracks
- Primer and adhesion test
- Verify contractor licensing and warranty
Frequently Asked Questions
Can Duration Paint Be Tinted In-Store to Match Historic Colors?
Yes — you can have Duration tinted in-store to historic colors; you’ll get accurate color matching but be aware of tint limits that might prevent exact matches for extremely deep or vivid hues, so discuss alternatives with staff.
Does Duration Resist Mold and Mildew Without Biocides?
No—you shouldn’t expect Duration to resist mold and mildew without biocides; it offers mildew resistance but relies on biocide additives. You can use biocide alternatives like improved ventilation, cleaning, or moisture control to help prevent growth.
Can Duration Be Applied Over Existing Elastomeric Coatings?
Yes — but you’ll need proper prep. For example, a contractor sanded and primed a cured elastomeric roof, improving surface adhesion; you’ll check coating compatibility, clean, sand, prime, then apply Duration per label instructions.
How Long After Application Is It Safe to Touch or Hang Decor?
You can touch light areas after about 2–4 hours, but full cure takes days; use dry time guidelines and perform tackiness testing before hanging decor—if paint’s non-tacky and resists gentle pressure, you’re safe to proceed.
Will Duration Void Homeowner Insurance for Wind or Hail Damage?
No, Duration paint won’t void your homeowner insurance for wind or hail damage; you shouldn’t expect warranty exclusions to affect insurance implications, but you should document application and check both your paint warranty and insurance policy for specific terms.