
Can You Spray Paint Ceiling Fan Blades? Tips for a Clean Finish
Yes — you can spray paint ceiling fan blades safely and get a clean, durable finish if you prep and protect properly. Turn off power, remove and clean blades, sand lightly, and choose primer and paint matched to the material (use a plastic-etching primer on poly). Spray thin, even coats 8–12 inches away, let coats dry and lightly sand between them, then rebalance blades before reinstalling. Follow these steps and you’ll avoid common issues and learn pro tips for a flawless result.
Can You Safely Spray Paint Ceiling Fan Blades?
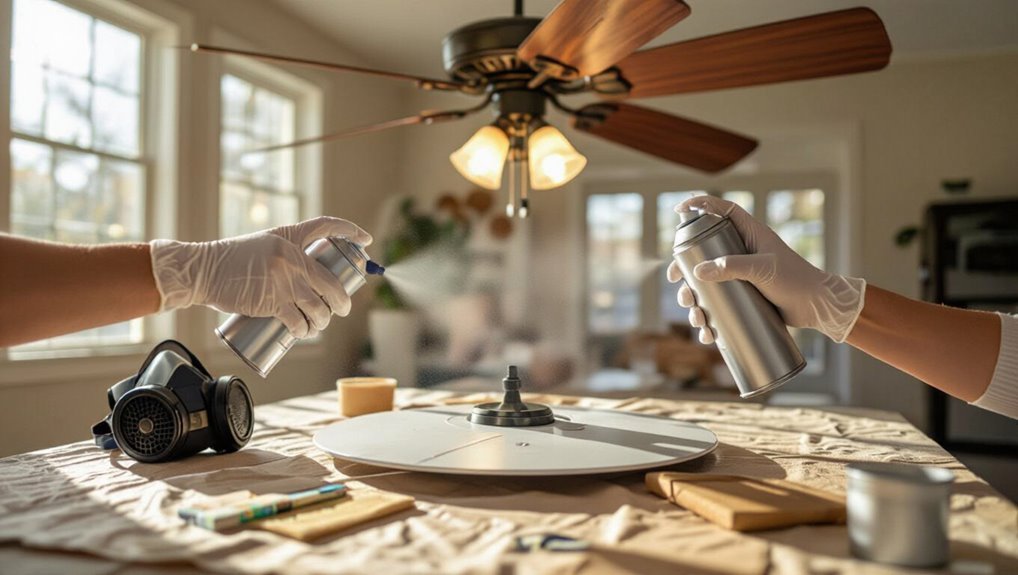
Yes—you can safely spray paint ceiling fan blades if you take the right precautions.
Yes—you can spray-paint ceiling fan blades safely by taking proper precautions: mask up, ventilate, and prep first.
You’ll wear a mask, ventilate the area, and remove or mask electrical parts to prevent overspray.
Clean and sand blades first, choose compatible primer and paint, and allow full curing.
These safety precautions protect finish and function, and proper fan maintenance guarantees balanced, long-lasting results.
Paint or Replace? When to Keep Your Fan
Wondering whether to paint or replace your ceiling fan? You’ll keep it if the motor runs quietly, blades aren’t warped, and wiring’s sound.
Use fan longevity tips: tighten screws, lubricate bearings, and follow a maintenance checklist to confirm condition.
Paint only cosmetic issues; replace if wobble persists, motor overheating occurs, or repairs cost near a new fan.
Which Blade Materials Take Spray Paint Best
When you’re deciding whether to paint fan blades, the material matters—wood and veneer generally accept primer and paint well, while metal and plastic need different prep.
You’ll want to sand and prime wood or veneer for good adhesion, whereas metal benefits from a metal-specific primer and plastic often needs a plastic-etching primer.
Next, we’ll compare the steps and best products for each material so you can choose the right approach.
Wood And Veneer
Wood and veneer blades take spray paint differently: solid wood soaks up primer and can be sanded smooth for an even finish, while veneered blades need gentler prep to avoid peeling the thin surface.
You’ll choose primers and paints compatible with wood finishes, sand and seal solid blades, and use light scuffing, edge sealing, and delicate veneer care to prevent cracking or lifting during painting.
Metal And Plastic
Metal and plastic blades respond differently to spray paint, so you’ll want to match prep and products to the material.
For metal blade types (aluminum, steel), sand, degrease, and use primer for adhesion and rust prevention.
For plastics, scuff with fine sandpaper, apply a plastic adhesion primer, then choose durable plastic coating options formulated to flex without cracking.
Dry fully between coats.
Paint’s Effect on Blade Weight and Balance
Even a thin coat of paint can shift a fan blade’s balance, so you’ll want to contemplate how added weight and uneven coverage affect vibration and motor strain. You’ll check blade stability and minimize paint weight by applying thin, even coats and sanding between layers.
| Issue | Mitigation |
|---|---|
| Imbalance | Thin coats |
| Motor strain | Even coverage |
| Vibration | Sanding |
Tools and Supplies for Painting Ceiling Fan Blades
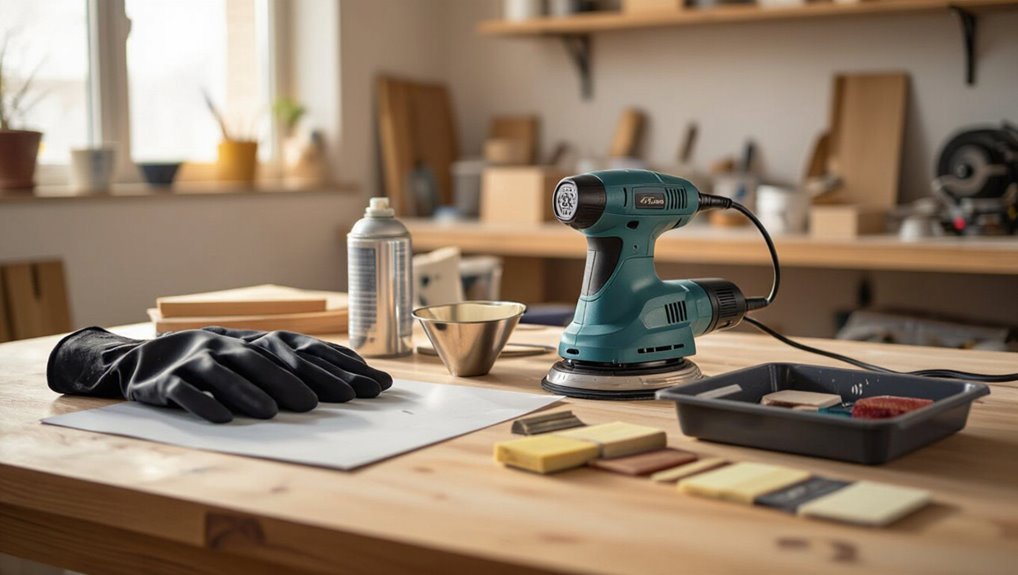
Now that you’ve addressed balance and finish, gather the right tools and supplies to keep added weight minimal and coverage uniform.
You’ll need sandpaper (120–220), tack cloths, painter’s tape, primer suitable for your blade material, quality spray paint, disposable gloves, respirator, drop cloth, and a lightweight clamp or hanging setup.
Focus on blade preparation and proper painting techniques for even, thin coats.
Choosing the Right Spray Paint Finish
You’ll want to understand different sheen levels—matte, satin, and gloss—so you can balance appearance and light reflection.
Consider how durable the finish needs to be versus how it looks, especially if blades get wiped often.
Finally, match the finish to existing fixtures so the fan blends with the room’s style.
Sheen Levels Explained
Finish choice matters: the sheen you pick changes durability, cleanup, and how flaws show on your ceiling fan blades.
You’ll choose from matte, satin, semi-gloss, or gloss sheen levels—each alters reflection and cleaning ease. Matte hides imperfections; gloss highlights them but cleans easily. Satin balances look and maintenance.
Match paint finishes to your room’s lighting and how often you’ll dust or wipe the blades.
Durability Versus Appearance
While appearance often drives your initial choice, consider how the finish will stand up to dust, oils, and repeated cleaning over time.
You’ll weigh durability factors like hardness, scratch resistance, and UV protection against appearance enhancement such as sheen and color depth.
Choose a finish that balances maintenance needs and visual goals, and prioritize longevity for high-use rooms to avoid frequent repainting.
Matching Existing Fixtures
Match the fan blades to nearby fixtures by comparing sheens and undertones before you buy paint, since even slight differences in gloss or color temperature will stand out once the blades are installed.
You’ll preserve color harmony and design continuity by choosing finish and temperature that match.
Consider:
- Matte vs satin
- Gloss level
- Warm vs cool tones
- Sample test panels
Primers That Bond to Wood, MDF, and Plastic
Because ceiling fan blades are often made from different materials—wood, MDF, or plastic, you’ll need a primer that actually bonds to the substrate rather than just sitting on top. Choose bonding agents rated for each material and check surface compatibility. Use a primer table below to compare options quickly.
| Primer | Best for | Notes |
|---|---|---|
| Shellac | Wood | Fast-dry |
| Bonding | MDF | Seals edges |
| Plastic primer | Plastic | Promotes adhesion |
| Universal | Mixed | Versatile |
How to Test Paint Adhesion on a Hidden Spot
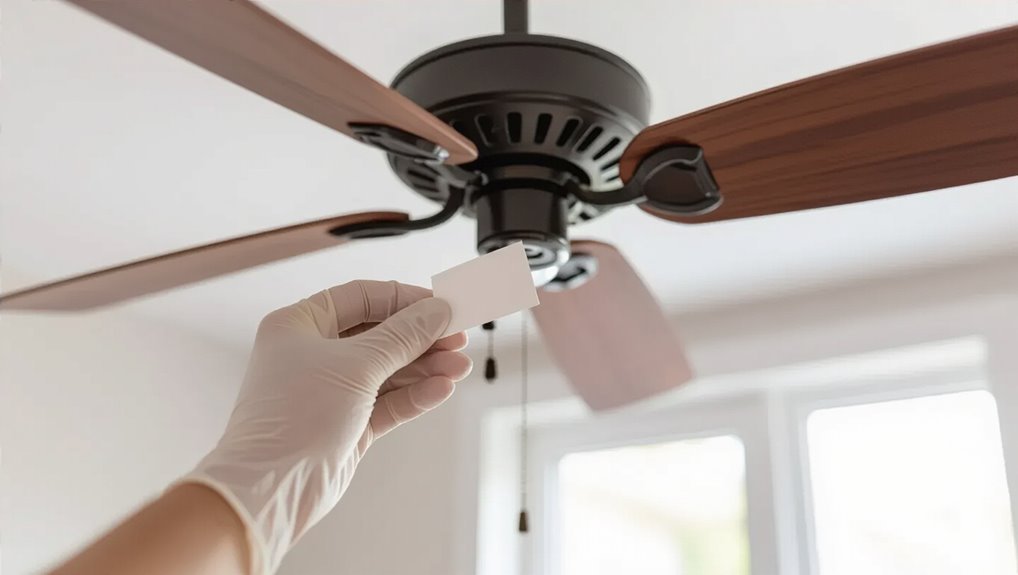
Pick an inconspicuous spot on the blade, like the underside near the hub, so any issues won’t show.
Clean and sand that area just as you’d the rest of the blade to remove grease and create a keyed surface.
Spray a small test coat, let it cure, and check for adhesion or lifting before committing to the whole fan.
Choose An Inconspicuous Area
Before you start spraying, find a tucked-away spot on a blade or the motor housing where a test patch won’t be seen from below, and clean it so the paint can bond properly.
- Pick a hidden corner to test adhesion.
- Try small samples of different paint types.
- Let each patch cure fully.
- Inspect for peeling, cracking, or discoloration before proceeding.
Prepare Surface Properly
Now that you’ve confirmed the paint behaves well in an out-of-sight spot, get the surface ready for a proper adhesion test: clean the area thoroughly with a degreaser or mild detergent, rinse and dry it, then lightly scuff the test patch with fine-grit sandpaper or a scuff pad to remove gloss and give the paint something to bite into.
Use proven surface cleaning techniques and gentle sanding methods.
Perform A Small Test Coat
Choose a small, inconspicuous area—behind the motor housing or the inner edge of a blade—and apply one thin, even test coat of your chosen spray paint from about the recommended distance.
Hold the can steady, move smoothly, and avoid heavy buildup that can drip or hide adhesion issues.
- Wait full cure time.
- Inspect for tackiness.
- Lightly scuff if needed.
- Repeat test coat techniques for confidence in paint adhesion.
Clean, Sand, and Degrease Fan Blades Before Painting
Start by removing dust, grime, and old finish so the paint will adhere evenly and last longer.
Begin by removing dust, grime, and old finish so paint adheres evenly and lasts longer.
Use targeted cleaning techniques—microfiber cloths and mild detergent—then apply appropriate sanding methods like fine-grit sandpaper to scuff surfaces.
Follow with degreasing solutions to eliminate oils.
For reliable blade preparation, wipe dry, inspect for damage, and guarantee a smooth, contaminant-free surface before priming and painting.
Remove Fan Blades Safely
With the blades cleaned, sanded, and degreased, you’re ready to remove them safely so you can paint without risking damage or injury.
- Turn power off at breaker and test switch—follow safety precautions.
- Support each blade with one hand while loosening screws.
- Place removed blades on a padded surface to prevent nicks.
- Label blades and hardware for correct reassembly; handle with care—good blade handling matters.
Protect Hardware, Motor, and Ceiling While Painting
Before you spray, cover the motor and hardware with plastic wrap or painter’s tape to keep paint out of moving parts.
Lay drop cloths or a tarp over the ceiling and any nearby furniture to catch overspray.
Take your time positioning shields so you won’t have to touch wet paint later.
Shield The Motor
Although the blades are the focus, you’ll need to fully shield the motor, hardware, and surrounding ceiling to prevent overspray and drips from causing damage.
Protect motor with tape and plastic; guarantee motor protection before you spray paint. Work methodically and let coats dry.
- Mask motor housing tightly
- Cover mounting hardware
- Suspend a drop cloth over ceiling
- Use low-pressure, even sprays
Protect Surrounding Surfaces
Once you’re ready to spray, take time to shield every surface near the fan so paint only lands where you want it.
Use surface preparation to remove dust and grease, then apply protective coverings: plastic drop cloths, painter’s tape, and paper shields for the motor, hardware, and ceiling.
Secure edges and check for gaps before you start to guarantee clean, contained spraying.
Set Up a Dust-Free Spray Area
When you’re ready to spray, clear and seal a dedicated area so dust won’t ruin the finish:
- Choose an ideal spray location—garage or well-ventilated shed, away from traffic.
- Lay drop cloths and tape seams to block drafts.
- Use a box fan with filter and run it downwind to pull particles away.
- Wipe blades, wear lint-free clothing, and limit movement to dust prevention methods.
Step-by-Step: Priming the Blades
With your spray area sealed and the blades fully cleaned, you’re ready to prime to guarantee paint adhesion and an even finish.
Hang or lay blades flat, mask hardware, and use a high-quality primer suited to the material.
Hang or lay blades flat, mask hardware, and apply a high-quality primer matched to the material.
Apply thin, even coats with steady spray technique, keeping 8–12 inches distance.
Let each coat dry fully per label before light sanding for proper blade preparation.
Step-by-Step: Spray Painting Smooth Coats
Now that the primer’s cured, you’ll prep the surface by wiping away dust and lightly scuffing any rough spots.
Hold the can 8–12 inches away and apply several thin, even passes instead of one heavy coat.
Overlap each stroke slightly to blend seams and keep the finish smooth.
Prep The Surface
1. Prep the Surface: You’ll prep blades with proper cleaning techniques and sanding methods so paint adheres. Work in a ventilated area, remove dust, grease, and old finish.
- Degrease with mild detergent
- Sand with fine-grit paper
- Wipe with tack cloth
- Mask edges and hardware
Now the surface’s ready for paint.
Apply Thin Coats
Start by shaking the spray can or mixing your paint to thoroughly combine the pigments and propellant so every pass lays down even coverage; keep sprays light, 10–12 inches away, and let each thin coat dry before the next. Focus on spray technique and color selection to avoid drips and reveal true hue.
| Calm | Confidence | Pride |
|---|---|---|
| Soft | Bold | Joy |
| Clean | Skilled | Finished |
Blend Overlapping Strokes
Although you’ve applied thin coats, you’ll want to overlap each pass by about 30–50% so the edges feather together and avoid hard lines;
- Hold can 8–12 inches away, using consistent speed for stroke blending.
- Start and finish each pass off the blade to prevent blobs.
- Use overlapping techniques—slight angle changes smooth shifts.
- Let each thin layer tack before the next to maintain an even finish.
Stop Drips and Runs When Spray Painting
When you spray fan blades, keep the can moving and apply thin, even coats so paint doesn’t pool and run; pause between passes only long enough for the surface to tack before adding another layer.
For drip control and run prevention, hold the can 8–12 inches away, use short overlapping strokes, inspect edges after each pass, and immediately smooth any tiny beads with a light follow-up mist.
Drying Times and When to Add Coats
Before you add another coat, let the paint dry to the tack level recommended on the can so each layer bonds without sagging or trapping solvents.
Use proper drying techniques and respect coat timing to avoid runs or poor adhesion.
Tips:
- Wait tack-free before recoating.
- Thin, even coats dry faster.
- Maintain recommended temperature/humidity.
- Allow full cure before reinstalling.
Getting Even Color on Veneered or Laminated Blades
If your fan blades have a veneer or laminate, you’ll need to prep and prime carefully so the paint lays down evenly instead of beading or soaking into patches.
Sand lightly, clean dust, and use a high-adhesion primer formulated for slick surfaces.
Test a small area for color consistency, apply thin even coats, and allow full cure between coats to avoid mottling and uneven sheen.
Prevent Paint Warping on Thin or Composite Blades
When you’re working with thin or composite blades, pick a flexible paint or coating that moves with the material to avoid cracking.
Apply thin, even coats rather than heavy layers, letting each coat dry fully before the next. That combo minimizes stress and helps the blade keep its shape.
Choose Flexible Paint Types
Pick a flexible paint formulated for plastics or composites so the finish bends with thin fan blades instead of cracking or peeling.
You’ll want spray paint types labeled “flexible” or “for vinyl/plastic,” and test flexible application on a scrap.
Choose low-solvent formulas to avoid warping.
- Plastic-specific spray paint types
- Flexible application test
- Low-solvent options
- Light adhesion promoter
Use Thin, Even Coats
Because thin or composite blades heat and flex differently than solid wood, you’ll want to spray several light, even coats instead of one heavy one to prevent warping or runs.
Work in thin layers, holding the can 8–12 inches away and using steady passes. Let each coat dry per instructions.
These spray paint techniques protect the substrate and preserve color selection tips for consistent, smooth coverage.
When to Use a Clear Protective Topcoat
If your newly painted fan blades will face moisture, heavy use, or frequent cleaning, add a clear protective topcoat to lock in durability and resist scuffs.
Choose topcoat types based on sheen and toughness, and learn application techniques for even coverage. You’ll protect paint and make cleaning easier.
Select a topcoat by sheen and durability, using proper application for even coverage to protect paint and simplify cleaning.
- Spray polyurethane for thin, even coats
- Water-based clear for low odor
- Satin for hide-and-go
- Light sanding between coats
How Humidity and Temperature Affect Paint Results
Before you seal the blades with a topcoat, consider how humidity and temperature will affect drying and adhesion.
You should monitor humidity levels and temperature fluctuations because they change drying times and paint adhesion.
Poor weather conditions or extreme seasonal considerations can thin or thicken paint consistency.
Wait for ideal conditions—stable warmth and moderate humidity—to guarantee even cure and lasting finish.
Ventilation & Respirators: Staying Safe While Spray Painting
When you spray paint fan blades indoors, set up cross-ventilation with a box fan blowing fumes out and open windows to pull fresh air through.
You’ll also need the right respirator—choose a NIOSH-rated mask with organic vapor cartridges rather than a disposable dust mask.
We’ll cover how to position airflow and pick the correct respirator for safety and comfort.
Proper Ventilation Setup
How will you keep fumes and overspray from building up while you spray paint ceiling fan blades?
Set up ventilation fans and guarantee steady air circulation toward an open window or door.
Position barriers to direct spray and keep pets away.
Wear proper PPE (see respirator section).
- Exhaust fan toward outdoors
- Cross-ventilation path
- Cardboard spray shields
- Seal off adjacent rooms
Respirator Selection Guide
Because spray paint releases solvents and fine particulates that can harm your lungs, choosing the right respirator is essential.
You should match respirator types to the job: NIOSH-rated N95 for particulates, P100 for fine dust, and respirators with organic vapor cartridges for solvents.
Check safety ratings, fit-test seals, and replace filters regularly. Always follow manufacturer instructions and work in ventilated areas.
Dispose of Paint Waste and Empty Cans Responsibly
Although paint cans and rags might seem harmless once you’re done, they can pose real environmental and safety risks if you toss them in the trash.
Dispose of leftover paint, solvents, and empty cans following local hazardous-waste rules, letting water-based paint dry or solidify before discarding and taking oil-based products to a designated collection facility.
- Seek eco friendly disposal sites.
- Use municipal recycling options.
- Label stored waste clearly.
- Never pour solvents down drains.
Reattach Blades Without Stripping Screws or Holes
When you reattach the blades, line the mounting holes up precisely so the screws go in straight and won’t wobble.
Use a drop of thread locker sparingly on metal-to-metal fasteners to keep them secure without making future removal impossible.
Protect screw heads with the correct screwdriver and a steady hand to avoid stripping.
Align Mounting Holes Precisely
Start by lining each blade up with its bracket so the screw holes match exactly before you apply any pressure; doing this prevents cross-threading and reduces the risk of stripping the screws or the wood.
- Use mounting alignment techniques like visual guides.
- Finger-thread screws to feel alignment.
- Make small fan blade adjustments before tightening.
- Tighten evenly in a star pattern to avoid stress.
Use Thread Locker Sparingly
Apply thread locker sparingly to the fan blade screws so they stay secure without damaging the threads or wood; a drop or two of low-strength (blue) thread locker is usually enough, while high-strength (red) types can seize screws and make future removal risky.
For proper thread locker application, wipe threads, apply minimal bead, and choose thread locker types appropriate for removable hardware to avoid stripping.
Protect Screw Heads Carefully
Protect the screw heads before reattaching the blades so you won’t strip them or damage the mounting holes: cover each screw with a piece of painter’s tape or a small dab of removable silicone.
Align the blade, and thread the screw in gently by hand to guarantee proper engagement before tightening with a screwdriver.
- Use painter’s tape for screw head protection.
- Try removable silicone for snug fit.
- Thread screws by hand first.
- Follow painting techniques to avoid overspray on hardware.
Balance Painted Blades to Reduce Wobble
Once the paint’s dry, you’ll want to balance each blade so the fan doesn’t wobble and wear out prematurely. Check blade weight and adjust with small adhesive weights near the heavy edge. Test at low speed, then fine-tune. Use the table below to track adjustments.
| Blade | Adjustment |
|---|---|
| 1 | +2g |
| 2 | -1g |
Quick Fixes for Nicks, Chips, and Edge Wear
If a blade has small nicks, chips, or worn edges, you can usually repair them yourself with a few simple tools and materials.
Use basic touch up techniques for blade restoration: fill, sand, prime, and paint.
Steps:
- Clean and sand the damaged area.
- Apply wood filler or epoxy.
- Sand smooth, then prime.
- Spray match paint and seal.
Paint Two-Tone or Reversible Blades for a Custom Look
After fixing chips and matching the base color, you can give your fan a custom edge by painting two-tone or reversible blades that show a different finish on each side.
Decide bold custom color combinations, mask crisp lines, and spray in thin layers for even coverage.
Rotate blades to check alignment, seal with a clear coat, and consider creative design ideas like stripes or subtle gradients.
Match Painted Blades to Trim and Décor
Think about matching your painted blades to existing trim for a cohesive look, or choose a contrasting tone to add visual interest.
Try swatches on a blade and view them under different lighting to see how color shifts throughout the day. That quick test will help you pick a finish that complements your décor.
Coordinate With Existing Trim
One simple rule will keep your painted fan blades from looking out of place: match their tone and finish to nearby trim and décor so the fan reads as part of the room, not an island.
Use color schemes and design harmony to guide choices.
- Sample swatches next to trim.
- Match sheen for continuity.
- Coordinate with flooring.
- Repeat accents elsewhere.
Contrast For Visual Interest
When you want the fan to pop, use contrast to draw the eye while still tying blades into the room’s palette. Pick a color that stands apart from the trim but echoes a secondary accent in curtains, pillows, or a rug so the fan reads as intentional, not jarring.
You’ll use color contrast thoughtfully, matching painted blades to nearby accents and overall design styles for cohesion.
Test Swatches Under Light
How will the painted finish read in your room’s light?
You’ll need to place test swatches on a blade and near trim, then check at different times.
Observe lighting effects and color shifts to match décor.
- Morning natural light
- Midday bright light
- Evening warm light
- Artificial lamp and overhead light
Use Stencils and Masking for Blade Patterns
Stencils and masking let you add crisp, repeatable patterns to fan blades without freehand mistakes. So plan your design, test the stencil on scrap material, and mask carefully to protect areas you want to keep paint-free.
Use reliable stencil techniques: secure edges with low-tack tape, spray in light passes, and peel stencils while paint is tacky.
Explore masking options like painter’s film or frisket for clean lines.
Replicate Factory Gloss or Faux Wood Grain Finishes
If you want a factory-like gloss or convincing faux wood grain, start by matching the original sheen and base tone—gloss level, undertone, and surface texture determine how authentic the finish will read.
- Sand, prime, and test gloss techniques on scrap.
- Layer translucent stains for faux wood depth.
- Use graining tools or brushes for wood alternatives.
- Seal with matching sheen clearcoat for durability.
When Not to Paint: Signs to Replace Blades Instead
Matching sheen and faux grain can make old blades look new, but paint won’t fix every problem.
If blades warp, crack, have delaminated layers, or wobble despite balancing, don’t paint—those are replacement indicators.
Also skip painting if rusted hardware or persistent motor noise suggests deeper issues.
For blade maintenance tips, document damage, check mounting integrity, and replace rather than mask structural or safety faults.
Time and Cost Estimate for a DIY Spray-Paint Job
Gather your tools and set aside a clear block of time: a straightforward DIY spray-paint job for four fan blades typically takes 2–4 hours start to finish, including prep, drying, and reassembly, though actual hands-on work is closer to 60–90 minutes.
Plan cost comparison and time management; expect budget-friendly supplies and shorter active work.
- Primer and paint
- Sanding supplies
- Drop cloths and tape
- Labor time (yours)
Common Beginner Mistakes and How to Avoid Them
When you rush into spray-painting fan blades without proper prep, you’ll likely end up with runs, uneven coverage, or flakes that peel later—so take the time to clean, sand, and prime each blade.
Don’t skip thin, even coats; practice painting techniques on scrap. Pick color choices that suit lighting and room scale.
Protect motor and fixtures, and allow full curing between coats.
Troubleshoot Peeling, Flaking, and Poor Adhesion
If your paint is peeling, flaking, or not sticking, start by checking the surface prep—you probably missed degreasing, sanding, or using the right primer.
Diagnose and fix peeling paint, flaking issues, and adhesion problems with targeted steps:
Diagnose and fix peeling, flaking, and adhesion problems with targeted surface prep and proper priming.
- Clean blades thoroughly (degrease).
- Sand to dull glossy surfaces.
- Use a compatible primer.
- Apply thin, even coats and allow proper drying.
Maintain Painted Blades for Long-Lasting Finish
Protect your newly painted blades by keeping up a simple maintenance routine that prevents chips, dirt buildup, and finish breakdown. Wipe weekly with a soft cloth, avoid harsh cleaners, inspect edges, touch up small nicks, and reapply clear sealer every few years for blade maintenance and long lasting protection.
| Task | Frequency |
|---|---|
| Dust wipe | Weekly |
| Inspection | Monthly |
| Touch-ups | As needed |
| Seal coat | Every 2–3 yrs |
| Deep clean | Biannually |
Alternatives to Painting: Vinyl Wraps and Blade Covers
Keeping up your painted blades helps them last, but you might want a less permanent route that still looks great. You can try vinyl wrap options or snap-on blade cover styles to refresh color, add texture, or protect surfaces.
Choose durable adhesive wraps for curved blades, peel-and-stick for quick swaps, or lightweight covers for rentals. Consider patterns, grain, and installation ease.
- Vinyl wrap options
- Peel-and-stick
- Snap-on blade cover styles
- Lightweight covers
Product Picks: Primers, Spray Paints, and Topcoats
When you’re ready to paint, choosing the right primer, spray paint, and topcoat makes the job easier and the finish last.
Pick a bonding primer for laminate or glossy blades, then test spray paint varieties—lacquer for fast drying, enamel for durability.
Select blade color options that match room tones.
Finish with a clear polyurethane or satin topcoat for protection and easy cleaning.
Frequently Asked Questions
Can I Paint Ceiling Fan Blades While the Fan Remains Mounted and Assembled?
You can, but you shouldn’t; you’ll get better results if you remove blades. Use preparation steps like cleaning and sanding, and painting techniques such as priming, light coats, and masking to avoid overspray and guarantee an even finish.
Will Spray Paint Affect Blade Noise or Motor Strain Over Time?
Like adding a bandage, you’ll usually avoid extra noise or motor strain if you match blade material and guarantee proper paint adhesion; keep coatings thin and balanced, and you’ll prevent imbalance, warping, or added motor stress over time.
Can I Safely Paint Blades With Leather or Fabric Coverings?
You can, but you shouldn’t unless coverings are removed; fabric paint options work on textiles only, and leather treatment techniques suit hides. You’ll risk imbalance, adhesive failure, and motor strain if you paint fixed leather or fabric blades.
How Do I Match Factory Color Codes or Paint Chips for Exact Color?
You can match factory color codes by getting fan model info, comparing paint chips, and using professional color matching; you’ll choose compatible paint types (spray enamel or acrylic) and test samples under similar lighting before final application.
Are There Fire-Retardant Paints Safe for Ceiling Fan Blades?
Like a shielded knight, you can use fire retardant options on fan blades, but you’ll check labels for electrical safety and ventilation. Test compatibility and paint application methods, ensuring balanced, thin coats to avoid warping or imbalance.
