
How to Waterproof Painted Walls in Bathrooms and Wet Areas
You can confidently waterproof painted bathroom walls by prepping surfaces, repairing soft or blistered areas, and sanding glossy finishes for good adhesion. Apply a compatible stain‑blocking primer, then a liquid or peel‑and‑stick membrane at seams, corners, and around fixtures. After membranes cure, repaint with a waterproof, low‑VOC topcoat and seal edges with silicone. Guarantee good ventilation while curing and monitor humidity. Keep following for step‑by‑step tips, material choices, and troubleshooting advice.
Why Waterproof Painted Walls in Bathrooms
Because bathrooms stay damp and see lots of direct water exposure, you should waterproof painted walls to prevent moisture damage and mold growth.
You’ll reduce staining and rot, improving moisture prevention while keeping surfaces hygienic.
Waterproofing also preserves paint adhesion and structural integrity, boosting wall longevity and lowering repair costs.
Waterproofing preserves paint adhesion and structural integrity, extending wall lifespan and cutting future repair costs.
You’ll protect finishes and extend usable life with minimal upkeep.
Quick Step-by-Step Waterproofing Checklist
Start by prepping the surface—clean, sand, and repair any cracks so the membrane can bond properly.
Then apply the waterproofing membrane according to the product instructions, paying close attention to seams and corners.
Finish by painting with a compatible waterproof paint and sealing edges to lock out moisture.
Surface Preparation Steps
1 essential step before applying any waterproofing product is thorough surface preparation; you’ll save time and guarantee a durable finish by cleaning, repairing, and priming the painted wall first.
Use surface cleaning techniques—degreasing, mildew removal, and gentle abrasion—then follow wall inspection methods to spot cracks, loose paint, or soft spots.
Repair, sand, and prime; let each layer cure before proceeding.
Waterproofing Membrane Application
Once you’ve prepped and primed the wall, apply the waterproofing membrane in even, overlapping passes so you get full coverage without gaps. Choose membrane types suited to wet areas and follow recommended application techniques. Work from bottom up, reinforcing corners and joints. Cure fully before proceeding.
| Step | Action |
|---|---|
| 1 | Select membrane |
| 2 | Mix/apply |
| 3 | Reinforce corners |
| 4 | Cure/check coverage |
Paint And Seal Finishes
After the membrane’s cured and you’ve checked for full coverage, paint and seal the surface with products rated for waterproofed walls to lock in protection and finish the job.
Choose high-quality paint for paint durability, apply two thin coats, and let each dry fully.
Select compatible sealant types—silicone, polyurethane, or acrylic—apply as directed, and inspect seams for gaps.
How to Spot Existing Moisture Damage
Wondering whether that paint problem is cosmetic or a sign of water damage? You’ll do quick moisture detection: look for blistering, stains, musty smell and soft drywall. Perform a basic damage assessment before repairs. Use this simple guide:
| Clue | What it means | Action |
|---|---|---|
| Stain | Past leak | Inspect |
| Softness | Active moisture | Dry/test |
| Smell | Hidden mold | Remediate |
Best Paints and Primers for Wet Areas
When you’re preparing wet areas, start with a high-quality water-resistant primer to seal porous surfaces and block moisture.
Choose mold- and mildew-resistant bathroom paints formulated for constant humidity.
For durability and easy cleaning, go with satin or semi-gloss finishes on trim and walls.
High-Quality Water-Resistant Primers
Because wet areas demand durable protection, choosing a high-quality water-resistant primer is the single smartest step you can take before painting. You’ll want high performance options that seal, repel moisture, and enhance adhesion—primer benefits that extend paint life and reduce touch-ups. Pick acrylic or epoxy-based primers suited to substrate and humidity for confident, long-lasting results.
| Calm | Confidence |
|---|---|
| Seal | Shield |
| Trust | Relief |
| Last | Secure |
Mold-Resistant Bathroom Paints
If you want bathroom walls that stay clean and odor-free, choose mold-resistant paints and primers designed for high humidity and frequent splashes.
You’ll prioritize products with antimicrobial additives and durable binders to aid mold prevention.
In paint selection, pick labeled bathroom or mildew-resistant formulas, verify compatibility with your primer, and follow proper surface prep and ventilation to maximize effectiveness.
Durable Satin And Semi-Gloss
Mold-resistant paints help prevent growth, but for areas that get regular splashes you’ll want finishes that stand up to frequent cleaning and moisture—satin and semi-gloss are the best choices. You’ll get durable finishes with improved moisture resistance and easy wiping. Choose quality primers and proper prep.
| Finish | Maintenance | Best Use |
|---|---|---|
| Satin | Wipeable | Showers |
| Semi-gloss | Scrubbable | Trim & wet walls |
Choosing a Waterproofing Method for Painted Walls
When you’re deciding how to waterproof painted walls, weigh the wall’s location, paint type, and the level of moisture exposure to pick a method that actually works.
Consider waterproofing techniques suited to your wall materials—porous plaster needs sealers, painted tile may accept coatings, and drywall often requires membrane systems.
Match durability, ventilation, and maintenance needs to prevent failure.
Tools and Materials Checklist
Before you start waterproofing, make a clear list of the essential tools—rollers, brushes, scrapers, and a good caulk gun—so you won’t be interrupted mid-job.
Gather the waterproofing materials you’ll need, like primers, sealants, and patching compounds, and check compatibility with painted surfaces.
Don’t forget safety gear and prep items—gloves, goggles, drop cloths, and proper ventilation—to protect yourself and the work area.
Essential Tools Overview
Tools make waterproofing painted walls achievable and efficient, and you’ll want a compact, well-organized checklist before you start.
Gather essentials: utility knife, sanding block, scraper, primer roller, angled brushes, caulking gun, masking tape, measuring tape, spirit level, cleaning cloths, and PPE.
These support effective waterproofing techniques and thorough wall preparation, helping you work cleanly, safely, and with consistent results.
Waterproofing Materials Needed
Now that you’ve stocked the basic toolkit, you’ll need specific materials to make painted walls waterproof and long-lasting.
Gather water resistant coatings (elastomeric or acrylic), primer sealer, liquid-applied moisture barriers, waterproofing tape for joints, flexible sealant, corner patches, quality brushes and rollers, mixing paddle, and clean containers.
Keep product labels handy for coverage and application instructions.
Safety Gear And Prep
Although you’ve gathered the coatings and sealers, you’ll also need the right safety gear and prep items to protect yourself and guarantee a smooth application. Follow a concise prep checklist and observe safety precautions: gloves, goggles, respirator; drop cloths, sandpaper, tape.
| Personal Gear | Prep Tools | Consumables |
|---|---|---|
| Gloves | Sandpaper | Tape |
| Goggles | Scraper | Drop cloth |
Preparing Painted Walls for Waterproofing
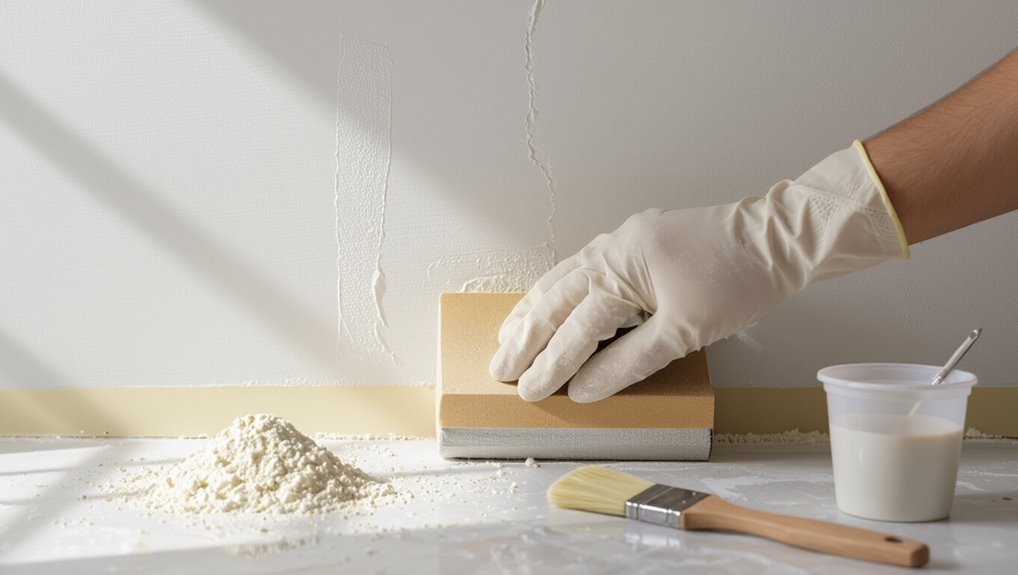
Before you apply any waterproofing product, inspect the painted surface for peeling, bubbling, or loose paint and scrape or sand those areas until you reach a sound, well-adhered layer.
Next, perform a thorough wall inspection and surface cleaning: remove dust, grease, mildew, and soap residue with appropriate cleaners, rinse well, let dry, and repair small cracks or holes with suitable filler before priming.
When to Strip Paint vs. Encapsulate It
When should you strip paint instead of encapsulating it?
Strip paint when coatings are flaking, contaminated with mold, or multiple incompatible layers prevent adhesion; use proper stripping techniques to remove compromised finishes safely.
Encapsulate when the substrate is sound, contamination-free, and you want a quicker, less invasive option—highlighting encapsulation benefits like reduced dust, time savings, and preserved substrate integrity.
Repairing Cracks, Holes, and Damaged Drywall
Start by evaluating the damage: run your hand over cracks and press around holes to gauge softness, length, and any loose paper or joint compound.
For minor cracks, widen, clean, and use appropriate crack repair compound and fiberglass tape.
Patch holes with joint compound or backing.
If studs or large sections are compromised, plan drywall replacement to guarantee a stable, waterproof substrate before finishing.
Priming Painted Walls for Waterproofing
Although the surface looks sound, you’ll need a proper primer that bonds to paint and blocks moisture to guarantee waterproofing works. Choose a high-quality bonding or stain-blocking primer compatible with your existing finish (latex over latex, oil/alkyd primer for problematic surfaces) and apply it to clean, dry walls following the manufacturer’s instructions.
For wall preparation, remove contaminants, sand glossy areas, mask trim, then make careful primer selection to secure adhesion.
Applying Liquid Waterproofing Membranes
With primer in place and the surface clean and dry, you’ll be ready to apply the liquid waterproofing membrane that provides the actual moisture barrier.
You’ll choose products for liquid membrane benefits like flexibility and seamless coverage.
Use recommended application techniques: brush corners, roll broad areas, maintain wet edge, apply specified thickness and cure time.
Brush corners, roll broad areas, keep a wet edge, and apply the specified thickness—then allow proper cure time.
Inspect for uniform film before tiling or painting.
Using Sheet and Peel‑and‑Stick Membranes
Sheet and peel‑and‑stick membranes give you a fast, reliable waterproof layer that’s especially handy on flat walls, shower surrounds, and behind tile.
You’ll choose membrane types based on flexibility, adhesive strength, and vapor resistance.
Follow precise installation techniques: clean and prime surfaces, align sheets, smooth air pockets, and overlap seams per manufacturer instructions.
Test adhesion before finishing.
Sealing Grout, Tile Edges, and Penetrations
3 key areas demand careful sealing: grout lines, tile edges, and any wall penetrations like faucets or showerheads.
You should apply grout sealing to porous joints, then smooth bead silicone at tile maintenance points and edges.
Around penetrations, use flexible sealant and backer where needed, tightening fixtures to compress seals.
Inspect and reseal annually to prevent leaks and paint damage.
Sealing Corners, Transitions, and Wall-to-Floor Joints
Seal corners, changes, and wall-to-floor joints carefully, because these junctions concentrate movement and moisture and are where paint failures usually start.
You’ll focus on corner sealing and junction treatment to keep water out.
Follow steps:
- Clean and prime joints.
- Apply flexible waterproof sealant and embed tape.
- Smooth, cure, then paint with waterproof coating.
Sealing Around Fixtures, Plumbing, and Electrical Boxes
After you’ve handled corners and joints, turn your attention to fixtures, plumbing, and electrical boxes, since they’re frequent leak points where moving parts and penetrations meet the wall surface. You’ll focus on fixture sealing, plumbing protection, electrical sealing, and extending moisture barriers. Protect connections, back boxes, and pipe flanges; inspect after installation and maintain access where required.
| Item | Action |
|---|---|
| Faucet | Seal and test |
| Shower valve | Protect flange |
| Outlet box | Waterproof cover |
| Pipe penetration | Wrap barrier |
| Trim | Check tightness |
Choosing and Applying Caulk for Wet Walls
You’ll want to pick a caulk formulated for wet areas—silicone or polyurethane are usually best for bathrooms and basements.
Read labels for adhesion, mold resistance, and paintability so you’re using the right product for your painted wall.
Apply it with a steady bead, smooth it within the manufacturer’s working time, and wipe away excess for a watertight seal.
Choosing The Right Caulk
Picking the right caulk for wet walls makes the difference between a temporary patch and a long-lasting seal. You’ll choose based on surface, movement, and finish—understand caulk types and plan caulk application accordingly.
Consider:
- Silicone for durability and flexibility.
- Acrylic-latex for paintability.
- Polyurethane for heavy-duty adhesion.
Match choice to wet-area demands to prevent leaks and mold.
Proper Caulk Application
1 clear, well-executed bead of caulk can mean the difference between a watertight joint and recurring leaks, so choose the right product and apply it with care.
You’ll prep surfaces, cut the nozzle to size, and use steady pressure for smooth beads.
Match caulk types to substrates, tool joints within the skin time, and follow application techniques to guarantee lasting seals in wet walls.
Painting Over Waterproofed Surfaces (Compatible Products)
When painting over waterproofed surfaces, pick products that bond to nonporous coatings and won’t trap moisture—use primers and paints specifically labeled for use on waterproofing membranes, elastomeric coatings, or silicone treatments.
You should test for compatible coatings and guarantee surface adhesion before full application.
- Clean and scuff.
- Use compatible primer.
- Apply recommended topcoat.
Ventilation and Humidity Control Best Practices
You should guarantee adequate airflow in rooms being waterproofed to help coatings cure and to prevent trapped moisture.
Keep indoor humidity in check with dehumidifiers or HVAC settings so paint and sealants last longer.
Also maintain vents, fans, and filters regularly to support consistent ventilation performance.
Ensure Adequate Airflow
Because moisture will undermine even the best waterproofing, keep airflow steady and controlled to prevent condensation on painted walls.
Use targeted airflow techniques to promote moisture circulation and dry surfaces quickly. Apply these steps:
- Run exhaust fans during and after showers.
- Open windows briefly to exchange humid air.
- Position vents to avoid stagnant pockets and direct flow away from painted surfaces.
Control Indoor Humidity
Keeping airflow steady helps, but controlling indoor humidity levels takes that protection further by preventing mold, peeling paint, and condensation from forming in the first place.
You should monitor humidity with a gauge, aim for 40–60% RH, use dehumidifiers when needed, and promote consistent air circulation during and after showers.
Quick drying preserves paint and waterproofing effectiveness.
Maintain Ventilation Systems
When ventilation systems are maintained regularly, they keep humidity in check and prevent moisture-related damage to painted walls.
You should schedule ventilation maintenance to protect finishes and improve humidity control.
Follow these steps:
- Clean fans and vents monthly.
- Inspect ducts and replace filters quarterly.
- Verify exhaust runs and timers after heavy use.
Do these and you’ll reduce mold, peeling, and paint failure.
Maintenance Checklist to Keep Walls Waterproof
A simple monthly checklist helps you catch small issues before they become leaks: inspect caulking and sealant lines, look for peeling or blistering paint, check for damp spots or efflorescence, and test any exterior drainage that directs water away from walls.
Note waterproofing techniques used, document repairs, reapply sealant where needed, clean vents and grout, and schedule professional inspections annually to sustain effective wall maintenance.
Troubleshooting: Peeling, Bubbling, and Mold
If paint is peeling, bubbling, or you spot mold, act quickly to diagnose the cause—moisture intrusion, poor surface prep, or ventilation issues are usually to blame.
Check these steps for mold prevention and moisture detection:
- Inspect seals, caulk, and grout for leaks.
- Test humidity and ventilation; run fans.
- Remove affected paint, dry, treat mold, then recoat with waterproof primer and paint.
When to Call a Professional Waterproofing Contractor
If you’re facing a leak that won’t reveal its source after basic checks, it’s time to call a pro who can perform a thorough diagnostic.
You should also hire a contractor when the waterproofing scope is large—like whole basements, exterior walls, or multiple rooms.
A professional will give a definitive plan and prevent costly repeat repairs.
Complex Leak Diagnosis
When leaks keep showing up despite your fixes, it’s time to contemplate a professional waterproofing contractor. They’ll spot hidden sources like capillary action, hydrostatic pressure, or roof-to-wall connections that DIY checks often miss.
You’ll benefit from leak detection and moisture mapping plus expert repair plans:
- Pinpoint source
- Measure spread
- Recommend targeted repair
Call early to avoid structural damage.
Large-Scale Waterproofing
Persistent or complex leaks are a clear sign you should bring in a professional waterproofing contractor for large-scale solutions.
You’ll want expert assessment when leaks persist, mold returns, or structural elements are affected. Contractors apply advanced waterproofing techniques, install continuous moisture barriers, and coordinate repairs to plumbing and substrates.
Hiring pros minimizes repeat damage and guarantees long-term protection for bathrooms and wet areas.
Budget: DIY vs. Professional Waterproofing Costs
Although tackling waterproofing yourself can save money upfront, you’ll need to weigh material costs, your time, and the risk of missed leaks against professional rates.
You’ll balance DIY savings with professional reliability.
Consider priorities:
- Cost: materials vs. contractor quote
- Skill: your experience vs. guaranteed work
- Risk: potential repairs vs. warranty benefits
Choose based on budget, timeline, and tolerance for risk.
Drying, Cure Times, and Recoat Windows
After weighing DIY savings against professional reliability, you’ll need to plan around drying and cure times before you call a job finished.
Follow recommended drying techniques: control temperature, humidity, and airflow with fans and dehumidifiers.
Respect manufacturer curing times between coats and before water exposure.
Use touch and tack tests, and extend recoat windows if conditions are cool or humid to guarantee a durable, watertight finish.
Eco-Friendly Waterproofing and Low‑VOC Options
If you want a watertight finish without harming indoor air quality or the planet, choose low‑VOC paints and eco‑friendly waterproofing products designed for minimal emissions and safer disposal.
You’ll protect surfaces using eco friendly materials and sustainable practices. Follow these steps:
Protect surfaces with eco-friendly materials and sustainable practices—simple steps for safer, longer-lasting results.
- Select certified low‑VOC sealants.
- Use recyclable packaging products.
- Maintain ventilation and dispose responsibly.
Waterproofing for Different Wall Substrates
Because each wall material absorbs and reacts to moisture differently, you’ll need to choose products and prep methods that match the substrate—drywall, plaster, concrete, brick, or wood—to get a durable, watertight finish.
Identify substrate types, inspect and repair surfaces, then apply appropriate primers, sealants, or membrane waterproofing techniques.
Follow manufacturer instructions and allow proper curing for long-lasting protection.
How Local Codes Affect Bathroom Waterproofing Choices
When local building codes dictate specific waterproofing methods and materials, you’ll need to follow them to pass inspections and protect your bathroom from moisture damage.
Check local regulations before choosing coatings or membranes.
Follow three priorities:
- Compliance: meet specified materials and installation.
- Documentation: keep permits and product data.
- Inspections: schedule and correct issues promptly to guarantee durability and approval.
Frequently Asked Questions
Can Waterproofing Painted Bathroom Walls Affect Indoor Air Quality Long-Term?
Imagine a condo where a new sealant reduced leaks but raised VOC emissions; you’ll notice short-term odors, and if humidity stays high long-term, VOCs can persist and slightly worsen indoor air quality unless ventilation’s improved.
Can Waterproofing Solutions Interfere With Existing Wall-Mounted Shelving or Cabinets?
Yes — waterproofing can interfere with shelving adjustments and cabinet considerations; you’ll need to remove or protect fixtures, adjust fasteners, and guarantee mounting surfaces stay flat and solid so shelves and cabinets remain secure after treatments are applied.
Are There Warranty Implications for Painted Walls After DIY Waterproofing?
Yes — DIY waterproofing can affect warranty coverage; manufacturers or contractors may void guarantees if DIY risks cause failures. You should check existing warranties, document work, and consider professional application to preserve coverage.
Can Pets or Children Be Safely Present During Waterproofing Application?
Cautionary clamor: you shouldn’t keep pets or kids nearby during wet-work; wear ventilation, seal areas, and follow product instructions—pet safety and child supervision are essential, and you’ll wait full cure times before allowing them back inside.
How Does Waterproofing Impact Future Repainting or Wallpaper Installation?
Waterproofing can change surface texture and adhesion, so you’ll need primer or sanding for repainting and specific adhesives for wallpaper; plan for future maintenance and aesthetic considerations to guarantee coatings don’t trap moisture or ruin finishes.
