
How to Paint a Wall to Look Like Marble: A Beginner-Friendly Guide
You can create a convincing marble wall in a weekend with basic tools and simple glazing techniques. Start with a smooth, primed surface, roll on a quality base coat, then mix glaze and paint for veins. Use brushes, a sea sponge, and soft rags to layer veins, blend edges, and add texture. Finish with a clear sealer for protection and sheen. Keep strokes varied and subtle, and if you keep going you’ll find step‑by‑step tips and troubleshooting.
Who This Tutorial Is For and the Fast Result

If you want a high-end marble look without hiring a pro or ripping out walls, this tutorial’s for you.
You’ll get beginner tips and quick techniques that save time and money. It’s aimed at DIYers comfortable with basic painting tools who want striking results fast.
You’ll follow clear steps, use minimal supplies, and finish a realistic marble effect in a single weekend.
Can You Really Fake Marble With Paint?
Wondering whether paint can really mimic marble? You can achieve convincing results with practiced marble painting techniques, attention to veining, and layered glazes. Faux marble styles vary—soft Carrara to bold Calacatta—so pick one to match your space. Practice on a board, refine texture and contrast, then apply confidently to your wall for an elegant, durable finish.
| Style | Texture | Difficulty |
|---|---|---|
| Carrara | Subtle | Low |
| Calacatta | Bold | Medium |
| Travertine | Pitted | High |
Quick 5‑Step Marble Wall Roadmap
Now that you know which marble look you want and have practiced the techniques, here’s a tight five‑step roadmap to take you from bare wall to convincing marble finish.
Now that you’ve picked a marble look and practiced, follow this tight five‑step roadmap to a convincing finish.
1) Prep and prime.
2) Base coat.
3) Use color mixing to create veins.
4) Apply veins with varied brush techniques.
5) Glaze and seal.
Follow drying times and step back to adjust.
Which Wall Surfaces Work Best
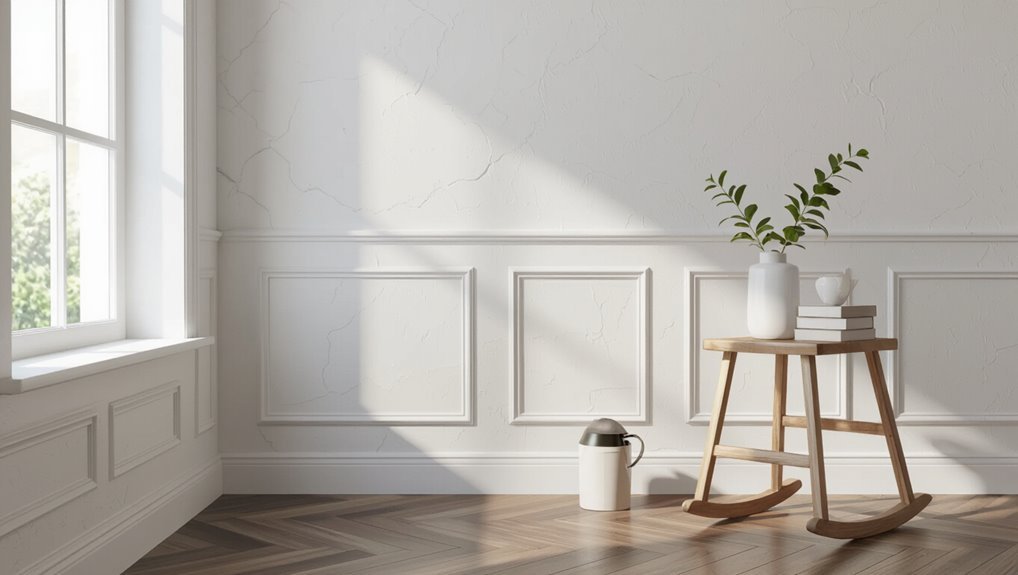
For the best marble effect, you’ll want a smooth painted drywall surface that’s clean and free of texture.
Primed or sealed plaster also takes the glazes well and gives a durable finish.
If your wall is rough or unsealed, you’ll need to prep it first so the veins and washes apply evenly.
Smooth Painted Drywall
Smooth, well-sealed painted drywall gives you the best canvas for a faux marble finish because it lets your glaze and veining techniques read clearly without texture interference.
You’ll avoid textured finishes that mask delicate veins, and you can focus on precise color blending and subtle translucency.
Repair dents, sand smooth, and use a quality base coat so your marble effects look crisp and realistic.
Primed Or Sealed Plaster
Plastered walls take paint and glaze differently than drywall, so you’ll want to prime or seal them before you start a faux marble finish.
You should use primed plaster for even absorption and smoother glaze work; sealed plaster prevents blotching and reduces porosity.
Test a small area, sand lightly if needed, and apply base coats only after the primed plaster or sealed plaster feels uniform and dry.
Must‑Have Tools for a Marble Finish
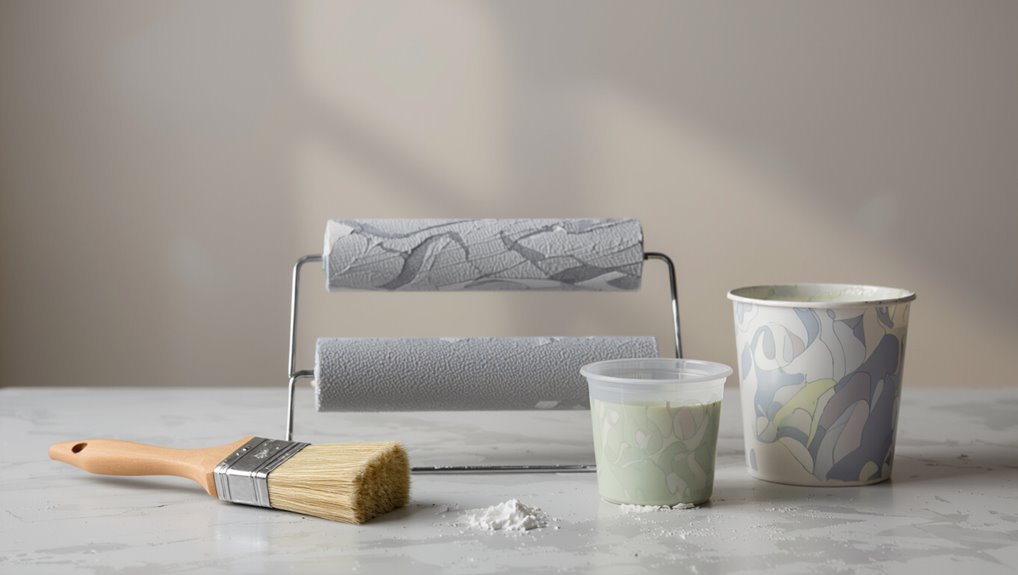
You’ll want a compact, well-chosen kit before you glaze your wall—these tools make the marble effect achievable and repeatable.
For marble painting techniques, gather: quality rollers, varied brushes (fan, round, liner), sea sponge, soft rags, a feather or veining tool, mixing trays, and painter’s tape.
Include gloves, drop cloths, and a spray bottle for misting—essential tools for control and texture.
Choosing Paints and Glazes for Veins
Now that you’ve got the right tools ready, pick paints and glazes that’ll give your veins depth and realism. Focus on vein color selection—mix shades for contrast—and test glaze consistency to control translucence. Use a fine brush, feather strokes, and rag blending to mimic natural lines.
| Sample | Note |
|---|---|
| Grey | Base vein |
| Gold | Accent |
| White | Highlights |
| Brown | Shadow |
Estimate Paint and Materials Needed
Before you buy anything, measure the wall area and calculate paint coverage so you know how many quarts or gallons you’ll need for both base coats and multiple glaze layers.
Estimate paint quantity, brushes, rollers, glazes, and drop cloths, and tally material costs so budgeting’s clear.
- Base and glaze paint amounts
- Tools and consumables
- Contingency for touch-ups
Prep the Wall: Clean, Sand, Patch
Start by clearing the area and giving the wall a thorough clean so paint and glaze will adhere properly. You’ll remove dust, grease, and loose flakes, then sand rough spots to match surrounding wall texture and patch holes. Choose patching compound compatible with your paint types. Finish smooth and dry before moving on.
| Step | Action |
|---|---|
| 1 | Clear area |
| 2 | Clean wall |
| 3 | Sand spots |
| 4 | Patch holes |
| 5 | Let dry |
Prime the Wall for a Smooth Base
Before you roll on primer, wipe the wall with a damp cloth to remove dust and any sanding residue so the primer bonds properly.
Sand any rough spots smooth and tack-cloth them again to pick up stray particles. A high-quality primer will fill minor imperfections and create an even base for your marble glaze.
Surface Cleaning
1 clear, sealed surface makes faux marble look convincing, so clean and prime the wall thoroughly before you paint.
Use surface preparation tips and practical cleaning techniques to remove dust, grease, and stains.
Follow these steps to prep like a pro:
- Wash with mild detergent, rinse, dry.
- Degrease stubborn spots with trisodium phosphate.
- Prime with stain-blocking primer and let cure.
Smooth Sanding
Now that the wall is clean and primed for stains, you’ll focus on creating an ultra-smooth base by sanding and applying a high-build primer if needed.
Use progressive sanding techniques, starting with 120 grit then 220 grit, to remove imperfections.
Wipe dust with a tack cloth, inspect for flaws, and spot-prime low areas.
Proper wall preparation guarantees flawless faux-marble glazing and reduces visible texture.
Best Sheen for a Marble Look
When you’re aiming for a convincing marble finish, choosing the right sheen matters because it affects depth, realism, and how light reads the veins. A satin to semi-gloss sheen usually offers the best balance, giving enough sheen to mimic marble’s subtle luster without looking plastic.
- Explore sheen types to pick subtle glow.
- Test finish options on a sample.
- Match sheen to room lighting for realism.
Plan Your Vein Layout and Focal Points
Start by mapping out how the veins will flow across the wall so they lead the eye naturally.
Pick a few visual anchors—areas where veins converge or a bold streak will draw attention.
Keep the layout balanced so your focal points feel intentional, not accidental.
Map Out Vein Flow
A light sketch of your veins will save time and keep the pattern cohesive—so stand back, study the wall’s natural lines, and decide where your main veins and focal knots will sit.
Map out vein flow using vein patterns and color variations, then refine connections.
- Draw primary routes.
- Add secondary branches.
- Mark soft shifts.
Identify Visual Anchors
Think of visual anchors as the magnets for your marble veins—you’ll place them where the eye naturally rests and build your patterns around those points.
Pick a few anchor spots—corners, a fireplace, or a mirror—guided by visual inspiration and room use.
Tie anchors to your color palette, vary vein intensity outward, and keep spacing balanced so focal points feel intentional, not crowded.
Mix Glaze and Paint for Workable Veins
One part glaze to two parts paint usually gives you a smooth, workable mixture for creating marble veins, but you may tweak the ratio slightly to match your paint’s viscosity.
Adjust glaze consistency so veins flow without running. Practice vein techniques on cardboard, then tweak mix and brush pressure.
- Test ratio
- Thin as needed
- Refine strokes
Apply the Base Coat Smoothly
Now that you’ve got a workable glaze-and-paint mix and practiced your veins, prepare the wall with a smooth, even base coat that’ll make those veins pop.
Choose quality primer and paint, roll in long, overlapping strokes, and tip off to remove roller texture.
Maintain wet edges, sand lightly between coats if needed, and follow base coat techniques for an even, smooth application before veining.
Create Soft Veins With a Round Brush
Start with a clean, dampened round brush and load it with a thin, translucent glaze so you can control opacity and feather delicate edges.
Use gentle pressure and wrist motion to sketch natural, irregular lines. Practice round brush techniques to build soft vein patterns, then blend lightly with a clean brush.
- Vary pressure
- Layer subtly
- Keep edges soft
Use a Feather or Fan Brush for Wispy Veins
Reach for a feather or fan brush to lay down thin, wispy veins that mimic marble’s delicate streaks.
You’ll use feather brush techniques to lift pigment lightly, dragging soft, broken lines.
Fan brush effects let you feather edges and blend veins into the base.
Use a fan brush to feather edges and softly blend veins into the base for natural marble effects.
Work sparingly, vary pressure and angle, and step back frequently to keep veins subtle and natural.
Paint Bold Veins With a Liner Brush
Pick a fine, long-haired liner brush that holds enough paint for smooth, continuous strokes.
Mix two or three vein shades on your palette so you can vary intensity and keep the paint fluid enough to glide without dragging.
Use confident, natural strokes that mimic marble’s organic flow, letting some lines fade or intersect for realism.
Choose The Right Brush
A liner brush is what you want for painting bold marble veins because its thin, long bristles give you control and crisp lines without dragging excess paint.
You’ll compare brush types and practice brush techniques to get varying stroke weight and taper.
- Choose synthetic liners for smooth, durable strokes.
- Match size to vein scale.
- Keep a steady wrist and light pressure.
Mix Vein Paint Shades
Start by mixing three vein shades: a dominant mid-tone, a darker accent, and a light highlight—this trio gives your marble depth and realism.
With color mixing tools, test small amounts on a palette. For shade selection, choose contrasts that read natural.
Load a liner brush lightly, vary pressure for line weight, and keep mixes accessible for quick touch-ups as you work.
Paint Fluid, Natural Strokes
Move your wrist confidently and let the liner brush sing—you’re aiming for fluid, hairline strokes that read like natural marble veins.
Keep lines varied, slightly broken, and fading at ends for a realistic look. Use gentle pressure and quick lifts to achieve fluid brushwork and a convincing natural effect.
- Vary pressure
- Layer subtly
- Soften intersections
Add Texture With Sponges and Rags
Use sponges and rags to build the subtle veins and mottled depth that make faux marble convincing.
You’ll dab diluted glaze with sponge techniques for soft, irregular texture, then lift and blot with rag methods to break edges and create natural-looking pores.
Work in layers, letting each dry partially, and step back often to adjust contrast and avoid overworking the surface.
Blend Veins and Clouds for Depth
Now you’ll blend the stronger veins into softer clouded areas so the pattern reads like real marble:
Now blend the strong veins into soft, clouded areas so the pattern reads like real marble.
You’ll soften harsh lines with a damp brush or sponge, creating natural vein blending and subtle cloud textures.
Work in short passes, lift pigment, and rotate tools for variation.
- Soften edges
- Add translucent washes
- Vary pressure and direction
Paint Tiny Fissures and Hairline Details
Start with a fine-tipped tool—like a liner brush or a sharpened sable—and draw hair-thin lines that mimic the natural fractures in marble; keep your hand light and steady so the marks read as delicate fissures rather than bold veins.
Use subtle fissure techniques and hairline detailing, soften edges with vein blending, and add minimal texture effects for believable, refined realism without overpowering the base veining.
Use Veining Tools: Combs, Feathers, Plastic Wrap
A few simple tools—combs, feathers, and even crumpled plastic wrap—give you repeatable, natural-looking veining faster than freehand alone.
Use veining techniques with these artistic tools to vary line weight and texture. Try each to see effects:
- Comb — drag for parallel veins.
- Feather — soft, wispy lines.
- Plastic wrap — blotchy, organic patterns.
Fix Mistakes: Blending, Lifting, Scuffing
Those texture tools will speed up veining, but you’re bound to make marks you don’t like—blotches too bold, lines too sharp, or areas that look flat.
Use subtle blending techniques with a damp brush or sponge to soften edges, lift mistakes by gently dabbing with mineral spirits or glaze, and employ scuffing solutions for texture.
Make precise color adjustments to unify the surface.
Layering Strategy and Drying Times
Start by getting your base coat perfectly even and fully cured so subsequent glazes sit correctly.
Follow a planned glaze layering sequence—work from broad, translucent washes to finer veining—so each layer builds depth without muddiness.
Wait the recommended drying times between coats (usually several hours to overnight depending on humidity) to avoid lifting or tackiness.
Base Coat Preparation
Begin by planning your layers so each coat builds color and depth without trapping moisture; apply a thin, even base coat, let it dry fully to the touch, then sand lightly before the next coat to improve adhesion and remove imperfections.
Choose base coat types and refine application techniques to suit surface porosity and sheen.
- Test compatibility
- Monitor drying times
- Light sanding between coats
Glaze Layering Sequence
Because each glaze layer changes the depth and veining, plan a sequence that builds from the lightest, most transparent washes to progressively richer, more detailed glazes, letting each coat dry to the recommended tack-free stage before adding the next; this prevents lifting and guarantees you can blend edges or add veins without muddiness.
| Step | Purpose | Tip |
|---|---|---|
| 1 | Establish tone | thin glaze consistency |
| 2 | Add depth | soft layering technique |
| 3 | Define veins | richer, controlled glaze |
Drying Time Guidelines
Now that your glaze sequence is planned, you need to time each coat so colors settle and layers bond without lifting or haze.
Monitor drying stages and maintain ideal conditions—temperature, humidity, airflow—for predictable results.
Follow this concise schedule:
- Base coat: 2–4 hours touch dry.
- First glaze: 8–12 hours before soft blending.
- Final veining: 24 hours full cure before sealing.
Match Veins to Real Marble Types
When you’re matching veins to a specific marble type, study photos and samples closely so your lines mimic the real stone’s rhythm and density.
Compare marble texture and color variations; note vein thickness, direction, and clustering.
Compare textures and tones; observe vein thickness, direction, and clustering for authentic marble replication.
Practice thin, irregular strokes with a feathered brush or veining tool.
Blend edges subtly, vary opacity, and step back often to guarantee authentic, balanced veining across the wall.
Faux Carrara Marble: Soft Gray Tips
If you’ve studied Carrara photos and practiced vein work, you’re ready to aim for its soft, gray look.
Work subtly: blend cool grays with warm off-whites for realistic color variations. Use thin, feathery veins and softened edges to mimic natural depth.
Remember faux marble is about restraint.
- Layer washes
- Feather veins
- Soften contrasts
Faux Calacatta Marble: Bold Gold‑Gray Veins
To tackle Calacatta’s bold gold-gray veins, you’ll need specific tools and materials — high-quality glaze, a range of brushes, soft feathering cloths, and metallic pigment for the gold accents.
Start with a clean, primed base and plan your vein placement with light pencil lines or a thin wash.
Use layered glazing and controlled feathering to build crisp, natural-looking veins that blend gold and gray without harsh edges.
Tools And Materials
You’ll need a concise kit of quality tools and materials to pull off bold Calacatta-style veins—high-adhesion primer, a satin or semi-gloss base paint in warm white, metallic gold and cool gray tints for veins, several soft natural-bristle brushes (including a 1–1.5″ angled brush), a few fine liner brushes, a variety of natural sea sponges, a feather or fan brush for veining texture, a slow-drying glazing medium, clear water-based sealer, painter’s tape, drop cloths, mixing trays, and clean rags.
- Select brush types for precise veining and soft blending.
- Choose paint finishes wisely: satin or semi-gloss for sheen and durability.
- Keep glazing medium and sealer handy for depth and protection.
Painting Technique Overview
Start by laying out your work—prime, base-coat, and glazing supplies in easy reach—and plan the vein paths before the paint hits the wall.
You’ll layer a neutral base, use controlled glazing for depth, and apply bold gold-gray veins with a feathering brush.
Focus on color mixing for subtle shifts and employ texture techniques—soft sponging and veining—to mimic Calacatta’s dramatic, elegant look.
Faux Nero Marquina: Dramatic Black Marble
When you want a bold, luxurious statement, faux Nero Marquina gives a dramatic black marble look that anchors a room with deep contrast and striking white veining.
For a bold, luxurious touch, faux Nero Marquina brings dramatic black marble with striking white veining.
You’ll use simple faux techniques and mindful color variations to mimic depth.
Try these steps:
- Prime and lay a deep black base.
- Layer soft gray veins with a fan brush.
- Highlight veins in crisp white for realism.
Adding Subtle Color Accent Veins
After you’ve established the bold Nero Marquina base and crisp white veins, introduce subtle color accents to lift the drama without overpowering the black-and-white scheme. You’ll use muted tones sparingly, focusing on strategic vein placement to enhance color contrast and depth. Blend gently, glaze thinly, and step back often to adjust intensity.
| Tool | Purpose |
|---|---|
| Brush | Fine veins |
| Glaze | Tinting |
| Sponge | Soft blends |
| Rag | Soften edges |
Seal Your Faux‑Marble Wall for Shine and Durability
Now you’ll pick a sealer that matches the look and traffic of the room—water‑based poly for low odor and clarity, or a solvent‑based or epoxy finish for tougher wear.
Apply thin, even coats with a high‑quality brush or roller, sanding lightly between coats for a glassy result.
Finish with the sheen you want (satin, semi‑gloss, or gloss) and let curing time fully set before use.
Choose The Right Sealer
Because the right sealer both protects and enhances your faux‑marble finish, pick one that matches the look and traffic level of the room.
Consider sealer types and application techniques to balance sheen, durability, and ease of maintenance.
Choose water‑based for low odor, solvent for high traffic, or satin for subtle shine.
- Water‑based
- Solvent‑based
- Satin
Apply Proper Finishing Techniques
Seal the surface with purpose: pick the right finish, mix and apply it correctly, and work in controlled passes so your faux‑marble keeps its depth and resists wear.
After drying, evaluate sheen and add a second coat if needed. Use light sanding between coats, preserve subtle texture techniques, and apply finishing touches carefully so the wall glows evenly and stands up to cleaning and daily use.
Recreate Matching Corners, Trim, and Transitions
Corners, trim, and junction areas demand the same marble look as your flat walls, so match vein direction, scale, and sheen before you call a section finished.
Use corner techniques and trim alignment to keep visual continuity; focus on junction blending, precise edge detailing, and consistent sheen.
- Feather veins into corners.
- Wrap trim with matching scale.
- Blend seams for seamless joints.
Troubleshooting Common Problems and Fixes
Once you’ve matched veins and sheen on corners and trim, you’ll likely run into a few common issues as the finish cures or when viewing under different light. You can diagnose problems quickly and apply quick fixes: feather edges, retouch veins, or lightly sand glossy spots.
| Problem | Fix |
|---|---|
| Blotchy tone | Glaze blend |
| Harsh veins | Soften with sponge |
| Drips | Sand and repaint |
| Shine variance | Uniform topcoat |
Care and Cleaning for Painted Marble Walls
Keep a regular dusting routine so grit doesn’t abrade the finish.
When you need more than dusting, use gentle, pH-neutral cleaners and soft cloths to avoid stripping the paint.
And take simple preventive steps—like using bumpers, avoiding harsh chemicals, and wiping spills quickly—to prevent long-term damage.
Regular Dusting Routine
A simple weekly dusting routine will keep your painted marble finish looking fresh and prevent grit from dulling the glaze.
Use proper dusting techniques and follow maintenance tips so you don’t abrade the surface.
- Soft microfiber wipe: work top-down.
- Feather duster for crevices: light strokes.
- Inspect edges and touch spots: note wear for future care.
Gentle Cleaning Solutions
For routine cleaning, you’ll want gentle, pH-neutral solutions that lift dirt without dulling the glaze or etching the paint.
Use diluted gentle soaps or mild dish soap mixed with water, apply with a soft cloth, then blot dry.
For eco-friendly options, try diluted natural cleaners like vinegar-water sparingly on stubborn spots, testing first in an inconspicuous area.
Preventing Long-Term Damage
After you’ve handled routine spots with gentle cleaners, plan a long-term care routine that protects the glaze and paint finish. You’ll extend wall longevity by using proper tools and schedules.
Implement these preventative measures:
- Dust weekly with a soft microfiber to avoid abrasive buildup.
- Reapply a compatible clear sealer every 2–4 years.
- Address chips or moisture promptly to prevent deeper damage.
Budget Shortcuts and Time‑Saving Hacks
If you want to cut costs and shave hours off the project, focus on a few strategic shortcuts that preserve the marble look without skimping on quality.
Use cost effective alternatives like sample-size paints, faux-finish rollers, and painter’s glaze mixes.
Choose time efficient techniques: work in sections, use stencils for veins, dry-brush blending, and a sealant spray to skip long curing steps while keeping a realistic marble finish.
Where to Practice and Find Inspiration
Now that you’ve seen budget and time-saving tactics, start practicing and gathering ideas in places that mirror real-world conditions.
You’ll find inspiration sources and refine practice techniques by working on small boards, thrifted frames, or spare wall sections.
Try these:
- Sample boards in natural light.
- Thrift frames for texture studies.
- Spare wall corners for full-scale trials.
Frequently Asked Questions
Can Faux Marble Be Applied Over Wallpaper Safely?
Yes — you can, but you’ll need careful wall preparation first. You’ll remove loose paper, clean and sand, apply primer/sealer, then choose compatible paint types (adhesion-promoting primer plus faux finish paints) to guarantee durability and avoid peeling.
Will Painted Marble Withstand Exterior Weather Conditions?
I’ve seen a porch faux-marble survive a winter storm—yes, it can, but durability factors like primer, topcoat, substrate and UV resistance matter; follow maintenance tips yearly, reseal chips, and clean gently to prolong life.
Can I Use a Paint Sprayer for Marble Effects?
Yes — you can use a paint sprayer for marble effects, but you’ll need varied paint sprayer techniques, multiple passes, and tools to add veins and achieving texture; you’ll combine spraying with brushing, sponging, and glazes for realism.
Do I Need a Permit for Painted Marble in Historic Homes?
About 70% of U.S. localities require approvals for exterior changes, so you’ll likely need a permit. You’ll work with historic preservation officers, who’ll review proposed painting techniques and materials to guarantee period-appropriate results.
How Long Before Moving Furniture Back Against the Wall?
You should wait at least 24–48 hours for basic drying times, but ideally 7 days before furniture placement to avoid scuffs or sticking; if using low-VOC or fast-dry paint, you can cautiously move lightweight items sooner.
