
How to Fix Knockdown Wall Texture Like a Seasoned Contractor
You can fix knockdown texture like a pro by cleaning the area, matching joint compound consistency, and choosing spot repair or full retexture based on damage size. Tape and protect surfaces, apply a thin base coat, then spray or trowel texture and gently knock it down with a wide knife while it’s wet. Sand feathered edges, prime, and paint to blend. Keep tools clean and practice technique, and if you keep going you’ll pick up contractor tricks.
Which Knockdown Problems This Guide Fixes
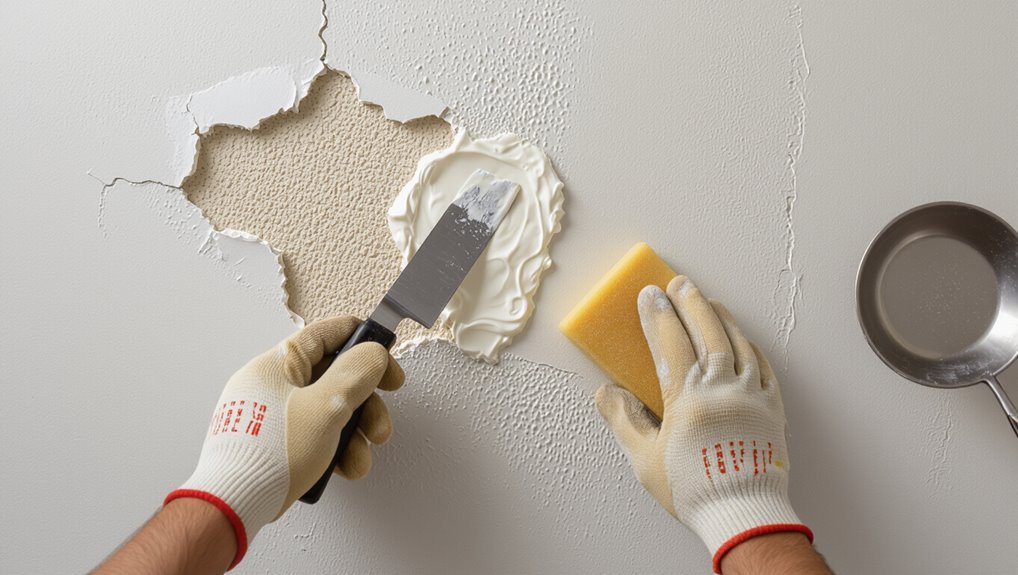
If your knockdown texture looks uneven, has visible seams, or shows flaking and dents, this guide will walk you through the fixes that work.
You’ll learn fixing cracks, repairing stains, addressing peeling, and smoothing bumps while evaluating impact on structure.
You’ll also focus on enhancing durability, preventing damage, improving aesthetics, maintaining texture, and matching finishes for consistent, long-lasting results.
Quick 5-Step Knockdown Repair Workflow
Now that you know what can go wrong with knockdown texture and how those issues affect longevity and appearance, you can follow a focused repair routine.
With common knockdown texture issues identified, follow a focused, step-by-step repair routine for lasting results
Step 1: clean and prep.
Step 2: mix compound to match texture.
Step 3: apply using texture application techniques.
Step 4: knock down and dry.
Step 5: sand and choose repair finish options, then paint to blend.
Spot Repair vs. Full Retexture: How to Decide
Decide whether to spot repair or retexture by weighing how big the damage is and whether you can match the existing knockdown pattern.
If the affected area is small and the texture match is reliable, you’ll save time and money with a spot repair.
But if patches will stand out or the damage is extensive, a full retexture is usually the better investment.
Damage Size Threshold
When you’re weighing spot repair against a full retexture, consider the size and concentration of damage first: do a quick damage assessment to map clusters and isolated spots.
If damage is confined to a few small areas under a certain square footage, choose focused repair strategies.
If lesions cover large, contiguous zones, plan for full retexture to guarantee uniformity and efficiency.
Texture Match Feasibility
Texture match feasibility comes down to whether you can blend repairs invisibly or need a full retexture; assess the size of the damaged area, the age and color of the existing finish, and how distinct the knockdown pattern is.
You’ll weigh texture matching difficulty, test patches, and chosen repair techniques. If patches read obvious despite careful blending, plan on retexturing the whole wall for a seamless result.
Time And Cost Tradeoffs
Although a spot repair can save you time and money up front, weigh that against the risk of a visible patch that may force a full retexture later.
Consider:
- time investment vs. project scope.
- budget considerations: labor costs and material expenses.
- skill level required and repair frequency.
- long term value—sometimes full retexture lowers future costs.
Must-Have Tools for Knockdown Repair
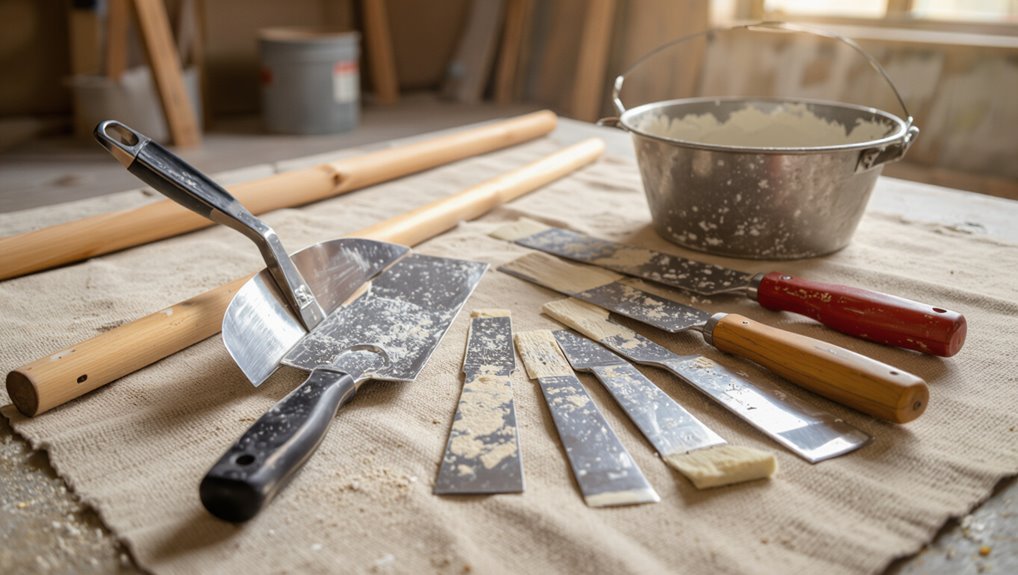
Before you start, gather the essential hand tools—putty knives, hawk, sanding block, and a good taping knife—to prep and smooth the repair area.
You’ll also want specialty spray equipment, like an HVLP or texture gun, to match the original knockdown finish.
Having both on hand will keep the job quick and consistent.
Essential Hand Tools
When you’re tackling knockdown repair, having the right hand tools makes the job faster and yields a cleaner finish. You’ll want a few specific items like a good drywall knife, a hawk or mud pan, a taping knife in several widths, and a sanding block.
- Drywall knives
- Hawk/mud pan
- Sanding block
- Corner trowel
Essential tools guide your repair techniques, surface prep, tool maintenance, material selection, project planning, texture types, and cost estimation.
Specialty Spray Equipment
You’ve mastered the hand tools, now add specialty spray gear to speed application and match factory knockdown texture.
Choose a texture sprayer with adjustable spray nozzle types to mimic droplets, and pair it with an air compressor rated for continuous use.
Keep spare tips, hoses, and seals on hand.
Follow a strict equipment maintenance schedule to prevent clogs and guarantee consistent, professional results.
Materials and Compounds That Work Best
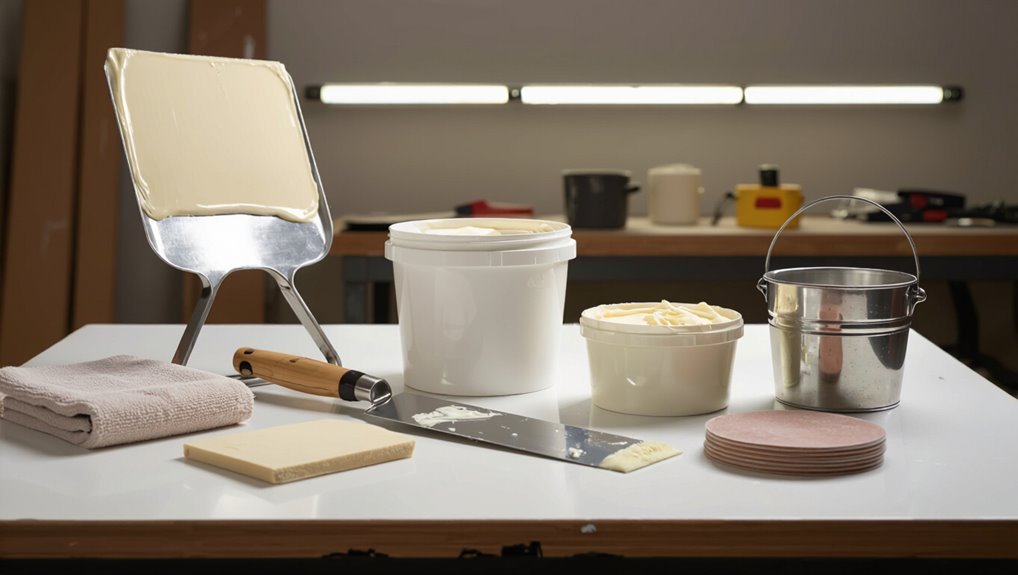
Start with a lightweight joint compound—often labeled “topping” or “all-purpose”—since it mixes smoothly, sprays evenly, and sands without much effort.
You’ll compare knockdown materials and compound types, balancing texture consistency with repair compounds. Choose professional products or DIY alternatives based on project scope.
- Topping/all-purpose
- Setting compounds
- Ready-mix repair compounds
- Lightweight blends
Choosing the Right Drywall Compound
Although picking the right drywall compound can feel technical, focus on three practical factors: work time, finishability, and compatibility with your knockdown technique.
You’ll choose between setting, all-purpose, or lightweight drywall types; setting compounds dry fast, all-purpose are forgiving, lightweight sand easy.
Test small samples and compare compound brands for texture match and pot life so your knockdown blends seamlessly.
Safety Gear and Prep Checklist
Before you start fixing the knockdown texture, put on proper personal protective equipment like goggles, a dust mask, and work gloves to protect your eyes, lungs, and hands.
Clear and cover the work area by removing furniture, laying down drop cloths, and taping off vents and trim to keep dust and compound contained.
Taking these steps now will make the job safer and cleaner as you go.
Personal Protective Equipment
You’ll want the right personal protective equipment to keep yourself safe and make the job cleaner and faster.
Follow safety standards and use protective gear:
- Dust masks and eye protection for airborne debris.
- Gloves usage—protect hands, grip tools.
- Hearing protection when sanding or using compressors.
- Maintain worksite hygiene and equipment maintenance to prevent hazards.
Work Area Preparation
1. You’ll gear up, clear the area, and focus on workspace organization before starting. Use gloves, goggles, a respirator, and knee pads. Tape and drop cloths protect floors; vacuums and brushes handle surface cleaning.
| Item | Purpose | Checklist |
|---|---|---|
| Gloves | Hand protection | Yes |
| Respirator | Dust control | Yes |
| Drop cloth | Floor cover | Yes |
| Tape | Seam sealing | Yes |
Protecting Floors, Trim, and Furniture
When you’re ready to start knocking down texture, protect floors, trim, and furniture with heavy-duty coverings and secure them so dust and debris can’t sneak underneath.
Use floor protection and furniture covering, trim safeguarding, dust barriers, and maintain workspace organization plus proper ventilation.
Protect floors, cover furniture, shield trim, set dust barriers, and keep the workspace organized with good ventilation.
- Tape edges tight
- Layer drop cloths
- Wrap furniture
- Seal vents and doors
How to Inspect Knockdown Damage
Before you start repairs, thoroughly inspect the knockdown texture to identify areas that were over-sanded, missed, or damaged during removal. You’ll do a quick damage assessment, note high spots, gouges, and thin coverage, then plan repair techniques for each. Use this visual guide:
| Issue | Action |
|---|---|
| Over-sanded | Feather edges |
| Gouge | Fill and texture |
| Thin area | Recoat and blend |
Measuring and Marking the Repair Area
Start by measuring the damaged section with a tape measure and marking its boundaries so you know exactly what to repair. Use proper measuring tools and simple marking techniques to avoid mistakes.
Begin by measuring the damaged area carefully and marking its boundaries to ensure precise repairs.
Follow these steps:
- Measure height and width precisely.
- Note irregular edges.
- Mark corners with pencil lines.
- Double-check dimensions before proceeding.
Cutting Out Damaged Texture Cleanly
Cut out the damaged knockdown texture by scoring a clean outline and removing only the loose material so you don’t widen the repair unnecessarily.
After wall assessment, use clean tools for precise cuts and surface prep.
Follow your repair strategy: match texture types, practice pattern creation, and use proper repair techniques when applying compound.
Finish with smooth finishing touches to guarantee texture consistency.
When to Remove Loose Drywall vs. Patch Over It
If the drywall around the damage feels soft, crumbles, or has been weakened by moisture, you should remove the loose material down to solid board before patching; assess drywall integrity, then choose appropriate repair methods.
Follow steps:
- Cut back to firm drywall.
- Clean debris and dry the area.
- Reinforce with backing if needed.
- Apply patch and finish to match texture.
Patching Small Holes: Quick Fixes
When you’ve got small dents or nail holes in a knockdown-textured wall, you can fix them quickly with minimal tools and still blend the repair into the surrounding texture.
Use basic repair tools, focus on surface preparation, choose compound selection suited to texture types, apply with proper application angles, follow drying times, employ blending methods, observe safety precautions, and finish with precise finishing touches.
Backing Support for Medium and Large Patches
When you’re tackling medium or large patches, you’ll need secure backing to hold the joint compound in place while it cures.
Consider options like wood strips, drywall clips, or adhesive mesh depending on the hole size and access.
Pick a support material that’s strong, easy to install, and won’t interfere with matching the knockdown texture.
Secure Backing Methods
For medium and large knockdown patches you’ll need a firm backing to hold joint compound and prevent sagging; common options include metal corner bead, wooden battens, or adhesive-backed mesh tape over a small plywood or drywall backing.
You’ll choose backing types by weighing structural integrity, installation methods, reinforcement options, durability concerns, material selection, load bearing, support techniques, wall compatibility, repair strategies.
- Install battens.
- Fit plywood.
- Anchor metal bead.
- Apply mesh.
Choosing Support Materials
Because a patch’s backing determines strength and finish quality, you’ll want to pick materials that match the patch size, wall type, and expected load.
For medium and large patches, consider support material types like plywood, cement board, or metal lath.
When selecting substrates, choose rigid, compatible pieces secured to studs or backing strips so the joint compound adheres and the knockdown texture blends seamlessly.
Taping and Mudding Seams Before Knockdown
Start by cleanly taping and mudding all drywall seams so your knockdown texture sits on a smooth, reinforced surface.
You’ll control tape application and mud consistency to prevent ridges and failures.
- Apply tape tightly into joint.
- Cover with thin first coat.
- Sand lightly between coats.
- Finish with a flat, uniform layer before texturing.
Feathering Compound Edges for a Smooth Blend
Match the compound thickness to the surrounding texture so the repair sits flush and doesn’t read as a ridge.
Feather the edges outward toward the existing texture, using progressively lighter pressure to blend the new mud into the old.
Smooth connecting seams with a clean, damp tool so the knockdown will read continuous when you re-texture.
Match Compound Thickness
To get an invisible repair, you’ll need to feather the compound so its thickness mirrors the surrounding texture; that means tapering the edges thin enough that the knife or trowel barely lifts off the wall.
You’ll match compound consistency to existing texture application and follow steps:
- Apply thin tapers outward.
- Scrape excess smooth.
- Blend with light passes.
- Let dry, sand lightly.
Feather Toward Existing Texture
When you feather the compound toward the existing knockdown texture, work from the repaired area outward with light, angled strokes so the edge tapers gradually into the surrounding finish; keep the knife’s pressure low near the perimeter so the compound thins to almost nothing and the shift reads seamless. Use the feather technique for blending edges; sand lightly once dry.
| Tool | Action |
|---|---|
| Knife | Thin edge |
| Brush | Light sweep |
| Sandpaper | Fine grit |
| Sponge | Blend damp |
| Rag | Clean up |
Smooth Transitional Seams
Although it takes a steady hand, you’ll get smooth seamless shifts by feathering the compound so each edge tapers invisibly into the existing texture;
- Use wide knife for smoothing techniques.
- Thin layers prevent ridges.
- Light, consistent pressure aids in blending.
- Sand lightly between coats for invisible seams.
You’ll step back, inspect, and touch up until the repair disappears into the wall.
Mixing Texture Mud to Contractor Consistency
Start by scooping the powdered joint compound into a clean bucket, then add water gradually until the mix reaches a thick, creamy salsa-like texture that holds peaks without being stiff. You’ll test texture mud consistency with a hawk, using straightforward mixing techniques and short pulses. Table grabs attention:
| Step | Tool | Goal |
|---|---|---|
| 1 | Bucket | Combine |
| 2 | Drill | Smooth |
| 3 | Hawk | Peak |
Thinning and Thickening Texture for Effects
When you need different surface effects, adjusting the mix ratio is your best tool to thin or thicken texture.
You’ll learn simple mix ratio guidance and a few texture consistency tricks to get smoother knockdowns or heavier peaks.
Start by testing small batches so you can fine-tune water or mud additions without wasting material.
Mix Ratio Guidance
If you want a finer, more subtle knockdown texture, thin the joint compound slightly; for a bolder, more pronounced pattern, thicken it to slow the spread and hold peaks better.
- Measure water slowly to test mix ratios.
- Aim for workable texture consistency, not runny or clumpy.
- Adjust in small increments and test on scrap drywall.
- Record proportions so you can replicate results.
Texture Consistency Tricks
Now that you’ve got your basic mix dialed in and recorded, tweak the compound’s body to get the exact look you want.
Thin with water for smoother knockdowns or add powdered joint compound to thicken for pronounced peaks.
Use simple consistency assessment methods—drop test, trowel drag—and adjust incrementally.
Practice texture application techniques on scrapboard until you replicate wall results confidently.
Applying a Base Coat Before Knockdown
Start by covering the drywall with a thin, even base coat of joint compound to give the knockdown texture something solid to bond to.
You’ll see base coat benefits immediately: better texture adhesion and easier feathering.
Follow these steps:
- Apply thin, uniform coat.
- Smooth edges and seams.
- Let it dry fully.
- Lightly sand before texturing.
Creating the Knockdown Pattern With a Knife
Now you’ll form the knockdown pattern by holding a wide drywall knife at a shallow angle to the wet mud.
Use short, staggered drag strokes across the surface so the raised peaks flatten unevenly and create that signature mottled look.
Keep your wrist light and vary the pressure to avoid repeating a visible pattern.
Knife Angle Technique
Hold the knife at a low, consistent angle—typically 20–30 degrees—to shear the wet texture without gouging the drywall; this angle gives you the characteristic flattened peaks of knockdown while letting the blade skim smoothly over the mud.
Follow these steps:
- Check knife positioning for even contact.
- Apply steady texture pressure.
- Keep wrist relaxed.
- Finish with light, continuous pulls.
Staggered Drag Strokes
When you drag the knife in staggered strokes, you create the random, flattened peaks that make knockdown texture look natural; keep your pulls uneven in length and spacing so the pattern doesn’t repeat.
Use a staggered technique, varying pressure and angle as you glide to avoid ridges.
Check texture consistency by stepping back often, blending edges to match surrounding walls.
When to Use a Spray Gun (And How)
If you’re covering a large area or want a more consistent finish, reach for a texture spray gun instead of a hopper or hand-trowel—spray guns cut application time and produce even patterns on ceilings and walls.
Choose spray gun types, set ideal pressure, and practice.
Steps:
- Mix to spec.
- Test spray.
- Adjust pressure.
- Knock down promptly.
No Spray Gun? DIY Knockdown Spray Alternatives
If you don’t own a spray gun, you can still get a knockdown finish using handheld HVLP alternatives like turbine sprayers or siphon-feed units.
You can also rig simple DIY texture sprayers from garden sprayers or modified hopper guns for small patches.
We’ll compare pros, limitations, and setup tips so you can pick the right option for your repair.
Handheld HVLP Alternatives
You don’t need a full-size spray rig to get an even knockdown texture—handheld HVLP (high-volume, low-pressure) sprayers and a few DIY alternatives can deliver good results for small jobs.
Use handheld sprayers and other HVLP alternatives alongside simple DIY tools for controlled texture application.
- HVLP handheld units
- Pump sprayers with tip swaps
- Hopper alternatives
- Brush-and-knock technique
DIY Texture Sprayers
Want to knock down texture without a spray gun? You can mimic pros with simple tools, mastering DIY Texture Techniques and basic Texture Sprayer Maintenance even on improvised rigs. Practice on scrap drywall, control pressure, and thin compound for consistency.
| Tool | Use | Tip |
|---|---|---|
| Hopper | Broad coverage | Thin mix |
| Brush | Spot blending | Light touch |
| Sponge | Texture knockdown | Work wet |
Timing Knockdown: Wait Time Before Scraping
Because the compound needs to set enough to hold peaks but still be soft enough to flatten, you’ll wait for the knockdown mix to lose its wet sheen before scraping.
Apply timing considerations and choose scraping techniques accordingly:
- Test a small area.
- Note temperature and humidity.
- Wait 8–20 minutes, adjust as needed.
- Use a clean, sharp blade and steady strokes.
How Hard to Press During Knockdown
You’ll want to understand basic tool pressure so you don’t gouge the surface or leave the skim too thin.
Aim for a light, even contact that flattens peaks into a skim layer about 1/16 to 1/8 inch thick.
Adjust pressure slightly for conditions—hot, dry surfaces need a gentler touch while cooler, wetter walls can take a firmer pass.
Tool Pressure Basics
When you press too hard with your knife or trowel, the texture will flatten and lose its characteristic peaks; press too lightly and the knockdown won’t spread evenly, leaving sharp ridges and gaps.
- Learn tool pressure adjustments early.
- Use consistent, light-to-medium force.
- Practice ideal application techniques on scrap.
- Adjust grip and angle for uniform spread; trust feel, not force.
Ideal Skim Thickness
Now that you’ve got tool pressure under control, focus on how thick the skim coat should be for a proper knockdown.
Aim for an ideal thickness of about 1/16 to 1/8 inch—thin enough to feather but thick enough to texture.
Use a steady application technique, dragging evenly and avoiding overwork.
Let it set slightly before the knockdown pass.
Adjusting For Conditions
Because surface conditions and compound set time vary, you’ll adjust the pressure on your knife to match the job—light, even strokes for soft, wet compound and firmer, quicker passes for stiffer mixes.
- Note environmental factors and humidity effects before you start.
- Use temperature considerations to time your knockdown.
- Test pressure on scrap for consistent texture.
- Prioritize surface preparation to avoid tearing or gaps.
Matching Texture Scale and Direction
Although the patch technique matters, matching the texture’s scale and direction determines whether the repair blends or sticks out. You’ll need to observe the surrounding knockdown pattern closely, measure the size of the “peaks” and the sweep direction, and mimic those properties with your spray pressure, nozzle size, and trowel angle.
Match texture style by testing application techniques on scrap, adjusting rhythm, distance, and knockdown timing.
Blending Repaired Areas Into the Surrounding Wall
When you blend a repaired patch into the surrounding knockdown texture, work from the outside in so edges disappear and the pattern reads as continuous; feather the joint with thin, overlapping trowel strokes, lightly re-spray texture beyond the repair, and knock down the outermost ridges a touch longer to soften the changeover.
- Match spray distance.
- Feather edges.
- Mirror knockdown pressure.
- Blend finish coats.
Use texture blending techniques and visual consistency tips to hide the repair.
Fixing Texture at Seams, Corners, and Trim
If seams, corners, or trim edges still show after you’ve matched the main texture, tackle them with targeted pressure and careful masking so the shift reads as intentional rather than patched.
Do a quick damage assessment, pick compound selection for texture consistency, use precise tool handling, apply seam alignment and corner blending repair techniques, and follow patching methods for visual matching to guarantee uniform finish quality.
Handling Textured Ceilings vs. Walls
Ceiling texture brings different challenges than walls because gravity, height, and lighting change how the knockdown settles and shows.
You’ll need to match your spray pattern and pressure carefully, and plan safe access like scaffolding or a sturdy ladder so you can work steadily.
Take extra precautions for dust and overhead mess to protect yourself and the room.
Ceiling Texture Challenges
Although textured ceilings use the same knockdown technique as walls, they demand different tools, timing, and safety precautions because they’re overhead and often larger.
You’ll watch for ceiling moisture and test texture adhesion before starting.
- Use scaffolding and stable platforms.
- Adjust compound thickness overhead.
- Work in sections to control drying.
- Wear eye and respiratory protection.
Matching Spray Patterns
You’ll need to match spray patterns carefully when moving between ceilings and walls because air flow, gravity, and nozzle angle change how the compound lands and spreads. Use consistent spray technique, control spray distance, make nozzle adjustment and pressure control tweaks, and employ blend techniques for pattern replication while watching drying times and texture consistency.
| Area | Tip | Focus |
|---|---|---|
| Ceiling | Aim up | Gravity |
| Wall | Aim across | Distance |
| Edge | Feather | Blend |
| Overlap | Maintain | Consistency |
| Drying | Monitor | Timing |
Safety And Access
Because working above your head increases fatigue and fall risk, take extra precautions when accessing textured ceilings compared with walls.
You should perform a site assessment, note hazard identification, and set protective measures.
- Verify access points and workspace organization.
- Use proper equipment handling and fall-rated gear.
- Review safety precautions and emergency procedures.
- Keep tools secured and maintain clear escape routes.
Repairing Knockdown Over Painted Surfaces
Start by evaluating the painted knockdown surface to see how well the existing paint is adhering and whether the texture has been sealed; this tells you whether you can skim and re-texture directly or need to strip loose paint first. Use proper repair techniques and thorough surface preparation.
| Step | Action |
|---|---|
| 1 | Clean and tape |
| 2 | Prime and skim |
Drying Times and When to Sand
Once your primer and skim coat are applied, let them dry fully before any sanding; wet or tacky compound will clog sandpaper and tear the repair.
Follow recommended drying times, watch humidity, and feel for firmness. Use gentle sanding techniques and light passes.
- Check manufacturer times
- Wait extra in cold/humid conditions
- Test with fingertip
- Use fine-grit sandpaper
How to Sand Without Ruining the Effect
When you sand knockdown texture, work light and slow so you preserve the peaks and valleys that give the finish its character.
Use fine-grit sanders and hand-sanding for delicate areas, applying consistent pressure control and short passes.
Focus on texture preservation by removing high spots only.
Combine gentle sanding techniques with careful blending methods at edges to maintain a natural, uniform appearance.
Spot-Sanding Techniques for Seamless Blends
After you’ve lightly sanded high spots and blended edges, spot-sanding lets you target small imperfections without flattening the surrounding texture.
After light sanding, spot-sanding targets small imperfections without flattening the surrounding texture.
You’ll use precise sanding techniques and subtle blending methods to match peaks and valleys. Follow these steps:
- Feather edges gently.
- Use fine-grit sponge.
- Inspect with angled light.
- Rework tiny ridges until seamless.
When to Prime: Best Primer Choices
Before you paint, check the surface type—bare drywall, patched areas, and glossy spots each need different primers.
Decide between oil-based for stain blocking and adhesion or latex for easier cleanup and faster drying.
Also weigh coverage and drying time so you pick a primer that seals repairs without slowing your project.
Surface Type Matters
Surface type dictates whether you need a primer and which one will perform best.
You’ll adjust based on substrate, porosity, and texture aging effects, using proper surface preparation techniques before priming.
Decide quickly:
- Fresh drywall — high-absorption drywall primer.
- Previously painted — bonding primer.
- Stained or patched areas — stain-blocking primer.
- Smooth plaster — leveling primer for even sheen.
Oil Vs. Latex
Once you’ve matched primer type to your substrate, you’ll next choose between oil- and latex-based primers for bonding, stain blocking, and sheen control.
You’ll weigh oil based advantages like superior stain blocking and finish durability against latex benefits such as faster drying time comparison, lower environmental impact, easier cleanup differences, and better cost analysis.
Apply with recommended application techniques for best results.
Coverage And Drying
When you’re deciding when to prime, consider how much coverage you need and how long the primer takes to dry—these two factors determine how quickly you can apply finish coats and whether you’ll need multiple primer passes.
- Choose high-hide primer for fewer coats.
- Use quick-dry formulas to speed the job.
- Apply coverage tips: thin, even coats.
- Combine drying techniques—heat, ventilation—for reliable results.
Painting Repaired Knockdown for a Uniform Finish
Before you start rolling paint over the repaired knockdown, make certain the patched areas are properly primed so the finish blends evenly with the surrounding texture.
Then use the same sheen and high-quality paint, feathering edges and working wet‑into‑wet to avoid lap marks.
Check color matching under real light, and apply consistent strokes to guarantee finish uniformity across repaired and original surfaces.
Hiding Color Differences on Patched Areas
If patched spots still stand out after texturing, tackle the color difference with targeted steps:
- Feather edges and sand gently using patching strategies to avoid hard lines.
- Prime patched areas with stain-blocking primer for consistent absorbency.
- Use color blending techniques—mix small amounts of wall paint to match tones.
- Apply thin, blended coats and inspect under different light to verify uniformity.
Common Mistakes That Make Repairs Obvious
Although you want the repair to be invisible, a few common missteps will make it stick out like a sore thumb: overbuilding the patch, leaving hard edges, mismatching texture or paint sheen, and skipping proper priming.
Avoid common pitfalls by following repair techniques that emphasize texture consistency, pattern matching, and visual blending.
Use efficient methods, focus on repair aesthetics, and nail the finishing touches.
Troubleshooting Runs, Clumps, and Flat Spots
Runs, clumps, and flat spots are the most common texture glitches you’ll see after spraying knockdown—each has a clear cause and an equally clear fix, so don’t panic.
- Check texture consistency and adjust application methods.
- Use targeted repair techniques for clumps and runs.
- Employ pattern matching as finishing touches.
- Follow troubleshooting strategies, common issues, and maintenance tips.
Fixing Texture That Shrank or Cracked
When knockdown texture shrinks or develops hairline cracks, you’ll want to identify whether the issue came from a too-thin mix, rapid drying, or movement in the substrate so you can choose the right repair. Inspect, patch with joint compound, feather, retexture, and prime. Focus on shrinkage causes, crack prevention, and substrate stabilization.
| Cause | Fix | Tip |
|---|---|---|
| Thin mix | Reapply | Match consistency |
| Rapid dry | Mist and slow | Control environment |
| Movement | Tape/repair | Reinforce seams |
| Surface dust | Clean | Guarantee adhesion |
When a Second Pass or Full Retexture Is Needed
If the original knockdown doesn’t hide repairs or looks uneven after blending, you’ll need a second pass or a full retexture to get a consistent finish.
Consider:
- Evaluate repair techniques and texture variations.
- Avoid common mistakes; follow contractor insights.
- Balance aesthetic considerations with long term durability.
- Choose DIY methods or pros and plan maintenance strategies for lasting results.
Cost Comparison: DIY vs. Hiring a Pro
After you’ve decided whether a second pass or full retexture will give you the consistent finish you want, weigh the costs: assess DIY advantages like lower immediate spend and learning curve against Professional expertise that boosts Quality outcomes.
Consider Cost factors, Time commitments, Skill level required, Project scope, and potential Long term savings from a durable job.
Pick what matches your budget and confidence.
Time Estimates for Small, Medium, and Large Jobs
Because job size drives how long retexturing takes, you’ll want realistic time windows before you start.
Because job size sets the timeline, lock in realistic time windows before you begin retexturing.
Plan time management and job scheduling around prep, application, and drying. Estimate:
- Small: 1–3 hours total.
- Medium: half to full day.
- Large: 1–3 days.
- Complex: multiple days with staggered schedules.
Adjust for drying, repairs, and unexpected delays.
How to Practice Knockdown Before You Start
Start by practicing on a scrap of drywall or a piece of 1/2-inch gypsum board so you can dial in your spray pressure, tip size, and knockdown timing without risking the wall. You’ll try practice techniques, adjust timing, and create texture samples. Visualize results with this quick reference:
| Pressure | Tip | Timing |
|---|---|---|
| Low | 4mm | Fast |
| Med | 6mm | Medium |
| High | 8mm | Slow |
Signs You Should Call a Pro
Once you’ve tried a few practice panels and can repeat a decent knockdown, know when to call in professional help.
You should call a pro when:
- Signs of damage are extensive and beyond DIY repair.
- A Professional assessment is needed to determine Damage source.
- Repair urgency or Repair timing affects structure or finishes.
- Warranty concerns and Cost implications make hiring smarter.
Maintenance Tips to Keep Knockdown Fresh
1 simple routine will keep your knockdown texture looking sharp: inspect, clean, and touch up as needed.
Check for hairline cracks, scuffs, or moisture weekly.
Use gentle wall cleaning methods—soft sponge, mild detergent, avoid abrasive scrubbers.
Spot-prime and repaint repairs to match texture.
These texture longevity tips help prevent larger jobs and preserve appearance so you won’t need frequent repairs.
Final Checklist to Finish Your Knockdown Repair
You’ve kept the surface clean and handled small repairs, so now wrap up the job with a concise final checklist to guarantee your knockdown texture looks seamless and lasts.
- Clean area and remove dust before sealing.
- Blend edges; apply final touches to texture.
- Prime and paint matching sheen.
- Do inspection tips: check adhesion, feel for ridges, and touch up any flaws.
Frequently Asked Questions
Can Knockdown Texture Hide Previous Water Stains Permanently?
No, knockdown texture won’t permanently hide water damage unless you first neutralize stains and fix the leak; you’ll prep, prime with a stain-blocking sealer, then texture, ensuring texture longevity and preventing stain reappearance.
Will Knockdown Repair Affect Home Insurance Claims or Coverage?
Generally no, but you should check your insurance policy first: repairing knockdown texture usually won’t hurt the claim process if you document damage, keep receipts, and avoid altering evidence insurers need for assessment.
How Do Humidity and Season Affect Long-Term Texture Adhesion?
Think of texture adhesion as a garden: humidity effects are rain that weakens roots, seasonal changes shift sun and frost, so you’ll protect long term durability by timing work and controlling moisture to keep finishes firmly rooted.
Can Pets or Vibrations Cause Repaired Texture to Fail Later?
Yes — pets and vibrations can compromise texture durability; you’ll see chips or delamination if pets scratch or if constant vibration impact loosens adhesive bonds. Prevent damage with durable coatings, reinforcement, and limiting repeated vibration exposure.
Are There Voc-Free Texture Compounds Safe for Sensitive Occupants?
You can find VOC-free texture compounds, though true zero-VOC claims vary; investigate labels and third-party tests. Choose certified eco friendly options, consider health considerations like chemical sensitivities, and ventilate during and after application.
