
How to Touch Up Matte Paint on Walls Without Leaving Visible Patches
To touch up matte paint without visible patches, match color and true matte sheen, clean and sand the spot lightly, prime bare or stained areas, then apply very thin coats with a small brush or microfiber roller, feathering edges and keeping a wet edge to blend. Check the patch under different lights and add more thin layers if needed, matching texture as you go. Follow these steps and you’ll see how to make repairs vanish with confidence.
How to Touch Up Matte Paint So Repairs Disappear
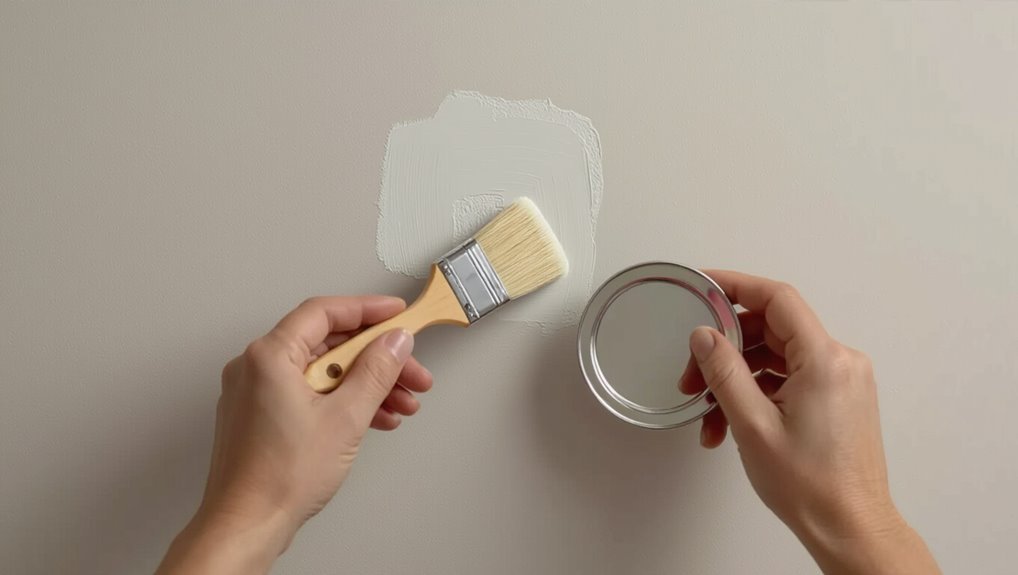
When you want repairs to vanish on matte-painted walls, start by matching texture and sheen before you touch up color.
Match texture and sheen first so touch-ups vanish—only then blend color for seamless repairs.
You’ll clean and sand lightly, feather primer into edges, then apply matching matte finish with thin layers.
Use small brushes or a sponge for careful paint blending, patting to merge edges.
Let each coat dry fully to avoid lap marks.
Why Matte Shows Touch-Up Patches More Than Eggshell or Satin
Because matte finishes scatter light instead of reflecting it, touch-ups stand out more easily than on eggshell or satin. You’ll notice matte durability varies; lower sheen hides flaws worse. Greater paint absorption and texture differences make new spots look different. Match sheen, prep surface, and thin coats to blend.
| Factor | Effect |
|---|---|
| Sheen | Contrast reveals patches |
| Absorption | Uneven soak-in |
| Texture | Scatters light differently |
| Durability | Wear shows repairs |
When to Touch Up vs. Repaint the Whole Wall
If a few small scuffs or nail holes mark the wall, you can usually touch up just those spots; but if the paint is faded, the sheen varies across the surface, or damage is widespread, a full repaint will give a far more consistent result.
Assess touch up timing by spot size, age, and color match.
Factor repaint considerations: cost, time, and visual uniformity.
Confirm the Original Finish Really Is Matte
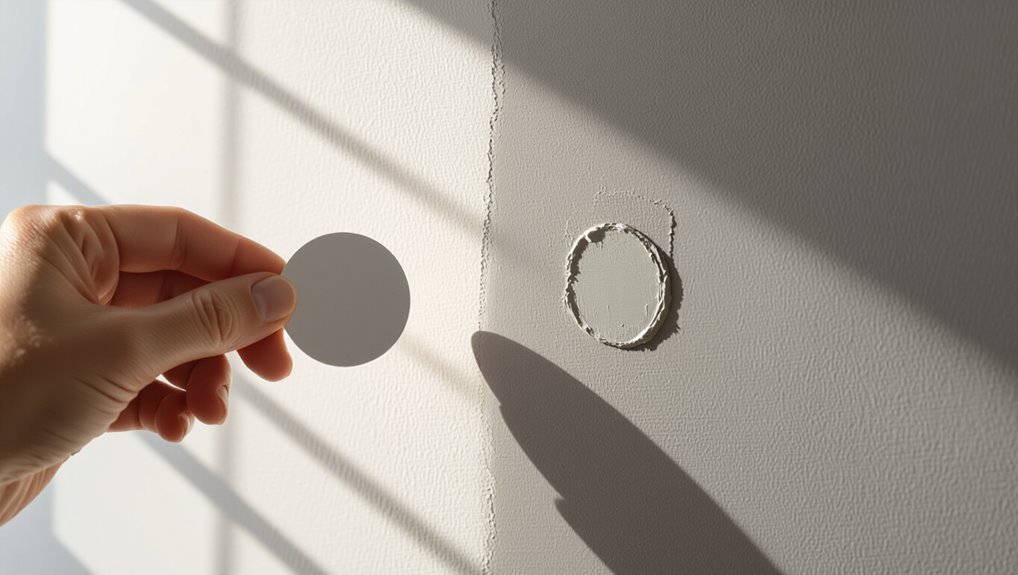
Before you touch up, make sure the finish really is matte by angling a light across the wall to spot any sheen.
Compare the surface to a paint swatch or sample to confirm the match.
If you’re still unsure, test a small hidden area to see how the paint dries and reflects light.
Check Sheen With Light
Want to be sure the wall is truly matte? Hold a bright light at different angles and use simple lighting techniques to reveal sheen variations.
Move the light slowly across the surface; glossy or eggshell areas will catch and reflect. Inspect from low and high viewpoints, noting any subtle glow.
This confirms the original finish before you start touching up.
Compare Against Swatch
Grab the paint swatch or sample card that matches your wall and hold it next to the surface under the same lighting to confirm the finish is truly matte.
Use a careful swatch comparison to check sheen and color accuracy; tilt the card to view reflections.
If the swatch’s finish and hue align with the wall, you’ll avoid mismatched repairs when you touch up.
Test Small Hidden Area
How will you know the paint is truly matte? You should do a quick test patch in hidden spots—like behind furniture or inside a closet—so you confirm sheen and color. Apply a small amount, let it dry, then compare texture and light reflection. If it matches, proceed. If not, note finish differences before touching up.
| Step | Area | Result |
|---|---|---|
| 1 | Closet | |
| 2 | Behind couch | |
| 3 | Baseboard back | |
| 4 | Inside cabinet |
How to Match Your Existing Matte Paint Color
Matching your existing matte paint starts with a careful comparison of color, undertone, and finish so your touch-up blends seamlessly.
You’ll sample nearby sections under natural and artificial light, note paint undertones, and use basic color theory to adjust hues.
Bring a small chip to a paint store for a match, then test mixed samples on poster board before committing to the wall.
Tools for Matte Paint Touch-Ups
Tools make the difference between a seamless repair and a visible patch, so you’ll want a small, specific kit before you begin.
Tools make the difference—assemble a small, specific kit before you begin for a seamless, invisible repair.
Gather touch up tools and repair supplies for proper wall preparation, color matching, and edge control. Include cleaning products and materials for blending methods and to accommodate different finish types.
Useful items:
- Cotton cloths
- Small putty knife
- Mixing tray
- Painter’s tape
Best Brushes and Rollers for Matte Touch-Ups
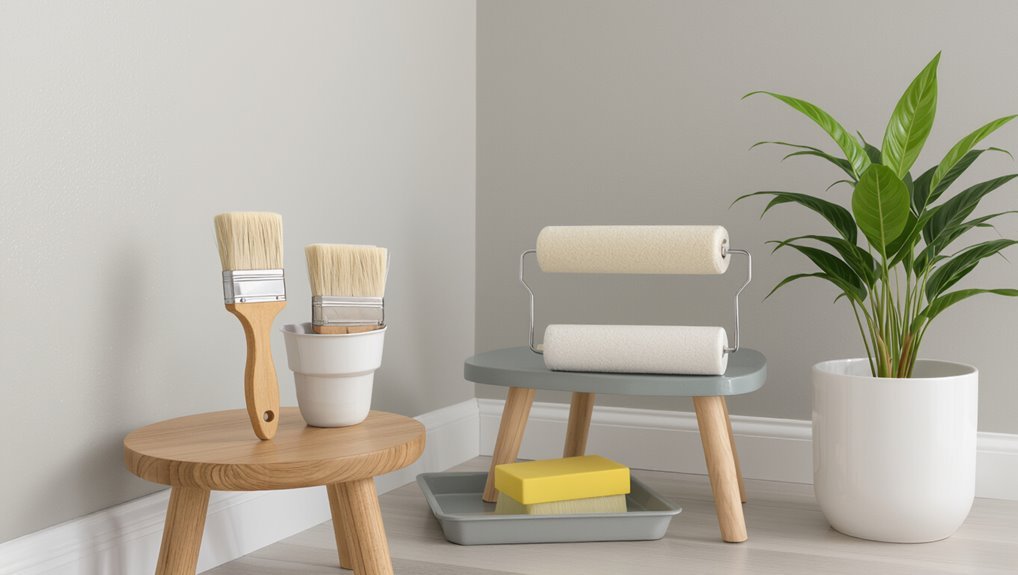
Once you’ve prepped the wall and gathered your supplies, pick brushes and rollers that’ll give you close control and a uniform matte finish.
For small spots use angled sash or small synthetic filbert brush types for precise feathering.
For larger touch-ups choose a microfiber or 1/4″ nap roller — roller selection should match surface texture to blend edges seamlessly without lap marks.
Prep: Clean, Degrease, and Protect Surrounding Areas
Start by clearing the work area and giving the wall a thorough clean—dust, dirt, and grease stop touch-ups from bonding properly.
You’ll use proper cleaning techniques for effective surface preparation, degrease problem spots, and protect floors, trim, and furniture before painting.
- Use mild detergent
- Spot-degrease stains
- Tape trim edges
- Lay drop cloths
Cleaning Methods That Won’t Alter Matte Sheen
Because matte finishes show scuffs and dirt more than gloss, you’ll want cleaning methods that lift grime without changing the paint’s flat look; use gentle, non-abrasive techniques and pH-neutral cleaners so you don’t burnish or add sheen.
Use gentle cleansing techniques: soft microfiber, mild detergent diluted in water, blot don’t scrub.
Choose safe cleaning solutions, rinse, and dry thoroughly to avoid streaks.
Sanding Edges and Feathering for an Invisible Blend
After cleaning, you’ll want to sand the repair edges and feather the surrounding paint so the patch disappears into the wall.
Use gentle sanding techniques, moving outward to soften ridges, then blend with light strokes. Work patiently to match texture and sheen without over-sanding.
- Start with fine-grit sandpaper
- Sand outward in overlapping passes
- Check texture frequently
- Finish with a soft brush for blending methods
When to Prime and Choosing the Right Primer
You’ll want to prime any bare drywall, patched areas, or stained spots before touching up matte paint so the finish matches and adhesion is strong.
Choose a primer based on the issue—stain-blocking for marks, high-build for patched texture, or a bonding primer for glossy surfaces.
Apply primer thinly and evenly, feathering the edges and letting it fully dry before repainting.
When To Prime
If your wall has stains, uneven patches, or bare drywall, prime it before applying matte paint to guarantee consistent coverage and adhesion.
You’ll address priming importance by priming spots that differ in porosity or color. For primer selection, pick one suited to the substrate and problem.
Consider these checks:
- Stain blocking needed?
- Surface porosity varied?
- New drywall present?
- Glossy paint to cover?
Primer Types Explained
Now that you know when to prime, let’s look at the main primer types so you can pick the right one for your wall.
You’ll weigh primer types by primer benefits: adhesion, stain blocking, and leveling.
Consider primer compatibility with substrate and paint, primer durability for high-traffic areas, and primer finishes.
Follow primer selection and primer recommendations for proper primer application and primer usage.
Priming Technique Tips
While primer choice depends on the surface and the problem you’re fixing, you’ll want to prime whenever bare drywall, patched areas, or stains might show through the new matte coat.
You should assess surface preparation, choose stain-blocking or adhesion primers, and match priming methods to the repair size to avoid flashing.
- Spot prime patches
- Feather edges
- Use stain blocker
- Sand lightly before priming
Mixing Small Batches to Match Factory Paint Consistency
Because factory-matched matte paint has a specific flow and pigment load, you’ll want to mix small batches that mimic those properties rather than guessing with large amounts. Use careful mixing techniques to replicate paint consistency, stir slowly, and test on scrap. Keep batches small to adjust tint and sheen until it blends seamlessly.
| Batch Size | Stir Method | Test Surface |
|---|---|---|
| 100 ml | Slow fold | Cardboard |
| 250 ml | Gentle swirl | Scrap wall |
| 500 ml | Short stir | Hidden corner |
Leftover Paint vs. Tint-Matched Sample: Which to Use
If you’ve got leftover paint from the original job, it’s usually the easiest way to get a perfect color and sheen match.
However, check that it’s still well-mixed and hasn’t gone bad. A tint-matched sample can be a great backup when you don’t have leftovers, since it’s formulated to match the exact color, though batch and finish variations can still show.
We’ll compare the pros and cons so you can pick the best option for your touch-up.
Leftover Paint Pros/Cons
When you’re touching up a wall, choosing between leftover paint and a tint-matched sample comes down to convenience, color accuracy, and finish consistency.
You’ll weigh leftover paint advantages like perfect sheen match and immediate availability against leftover paint disadvantages such as color shift with age.
Use leftover when confident in batch and storage; otherwise test first.
- Saves time
- Matches sheen
- May have faded
- Risk of batch variation
Tint-Matched Sample Benefits
Leftover paint can be convenient, but a tint-matched sample gives you the best chance of a seamless repair when batches or aging throw off color and tone.
You’ll get superior color accuracy and shear consistency, so touch-ups blend into surrounding matte finish.
Sample advantages include small quantity, fresh pigments, and the ability to test before committing — saving time and avoiding visible patches.
Test Color and Sheen in Natural and Artificial Light
Because light changes how paint looks, you’ll want to check both color and sheen in natural and artificial light before committing to a touch-up.
Because light alters paint, test a small swatch and view it in natural and artificial light before touching up.
Test a small swatch on the wall, let it dry, then view at different times and with lamps.
Compare against surrounding finish to avoid surprises.
- Morning natural light
- Evening natural light
- Warm artificial light
- Cool artificial light
Spot-Repair Sequence: Step-by-Step
Gather your supplies and clear the area so you can work efficiently: clean the spot, sand any rough edges, apply primer if needed, and then feather on the touch-up paint in thin layers until the repair blends with the surrounding matte finish.
Next, dab small amounts, let each dry, assess color match, repeat as necessary, and finish by blending edges.
Use proper repair techniques.
Feathering Technique: A Clear Step-by-Step
Now that you’ve prepped and applied your initial layers, focus on feathering to blend the new paint into the old finish.
Use a light-loaded brush, soften the perimeter, and work outward with short strokes. The feathering technique guarantees smooth blending edges without ridges.
- Light pressure
- Short outward strokes
- Thin paint load
- Soften perimeter
Rolling vs. Brushing: Which Hides Patches Best
Decide whether a roller or brush will match your wall’s texture before you start, since each tool lays paint differently.
Use short, light roller strokes or soft brush feathering to blend new paint into the surrounding matte finish.
Pay special attention to edges, feathering them outward so the patched area disappears into the existing wall.
Roller Versus Brush
Whether you touch up with a roller or a brush depends on the size and texture of the patched area: rollers blend broader areas and mimic the stipple of most matte finishes, while brushes work better for tiny spots or edges.
Use roller techniques for consistency; note brush advantages for control.
- Match nap and pressure
- Feather edges lightly
- Work damp-to-dry
- Test invisibility first
Texture Blending Techniques
Although the choice between rolling and brushing comes down to the patch size and wall texture, you’ll usually get the most invisible repair by matching your technique to the existing finish: use a roller to recreate broad, subtle stipple on matte walls and a brush for tight spots, corners, or raised details where control matters.
You’ll assess texture variation, choose blending techniques that mimic surrounding patterns, and feather strokes subtly to match.
Edge Feathering Tips
When you’re blending a touch-up into a matte wall, edge feathering is what keeps the repair from reading like a patch; roll for soft, diffuse edges on larger areas and brush for crisp control in tight spots or along trim.
Use a consistent feathering technique for seamless edge blending.
Tips:
- Light pressure with roller
- Stipple and lift brush
- Match nap length
- Work damp edges
Applying Multiple Thin Coats Without Lap Marks
Start by working in small, consistent sections so each thin coat overlaps wet edges before they begin to dry; that prevents lap marks and keeps the finish even.
Use paint layering techniques: apply thin, even passes, letting each dry only to tack before recoat.
Maintain a wet edge, feather slightly into surrounding paint, and check under different light to verify lap mark prevention without overworking the area.
Blending on Textured Walls vs. Smooth Walls
Because textured surfaces hide edges differently than smooth walls, you’ll need distinct blending approaches for each to make touch-ups invisible.
For textured blending, mimic the surface pattern and feather edges; for smooth blending, match sheen and use light feather strokes. Choose tools and technique to match texture.
- Match texture pattern
- Feather the edges
- Use correct tool
- Check in varied light
Tackling High-Traffic and Frequently Touched Spots
When you’re fixing high-traffic spots, start by thoroughly prepping the surface—clean, sand, and remove any loose paint so the touch-up will adhere.
Make sure your paint color matches the existing matte finish, testing a small area first.
Feather and blend the edges with a light brush or sponge to hide shifts and restore a seamless look.
Prep The Surface
High-traffic areas and spots you touch often—light switches, doorknobs, and chair rails—need a little extra prep before you paint so the touch-up blends and lasts.
Do a surface preparation and damage assessment: clean, sand, repair, and prime small spots to guarantee adhesion and even finish.
- Clean grease and dirt
- Sand glossy edges
- Fill dents and holes
- Apply spot primer
Match Paint Color
Want the touch-up to disappear instead of stand out? For high-traffic, frequently touched spots, bring color matching up front: test paint samples on inconspicuous areas under the room’s light.
Let them dry fully — matte shifts when cured. Compare at different times of day, choose the closest match, and keep the original can’s batch number for future touch-ups to guarantee consistency.
Feather And Blend Edges
Although small touch-ups can blend in if the color’s right, you’ll still need to feather and blend the edges so repairs don’t read as patches; use light, overlapping strokes to thin the paint at the perimeter and work outward from the center of the spot.
Focus on edge blending to match sheen and prevent color fading in high-traffic areas.
- Use a soft brush
- Light strokes
- Blend outward
- Check in daylight
Drying Times: How Long to Wait Between Coats
Before you apply a second coat, make sure the first one’s dry to the touch and no longer tacky; typical latex matte paints need about 1–2 hours between coats, while oil-based formulas often require 6–8 hours or more.
Check drying time on the label, and wait longer in high humidity or low temperature.
For ideal conditions, keep airflow steady and avoid heavy ventilation that causes dust.
Inspecting Repairs: Lighting Tricks to Reveal Patches
Once your coats have fully dried, hold a light at a low angle across the wall to hunt for uneven spots and feathered edges that blend poorly with the surrounding matte finish.
Once dry, hold a low-angled light to reveal uneven spots and feathered edges against the matte finish.
You’ll use different lighting angles to assess patch visibility and catch subtle texture or sheen differences.
Check from multiple positions:
- Stand level with the wall
- Look from the side
- Move the light closer
- View from across the room
Fixing Seams, Sheen Differences, and Color Shifts
When you spot visible seams, sheen mismatches, or subtle color shifts, address each issue deliberately so the repair blends smoothly with the surrounding matte finish.
For seam repair, sand lightly, apply thin joint compound, feather edges, and repaint in thin, overlapping coats.
To counter color fading and sheen differences, use matched paint, flattening additive if needed, and blend outward until connections disappear.
How Humidity and Temperature Affect Drying and Blending
You’ll notice humidity changes how fast touch-up paint dries, so high moisture can keep it tacky and slow blending.
Cold or hot temperatures also affect drying speed and can change how well the new paint adheres to the old.
Keep conditions moderate to improve adhesion and achieve a seamless finish.
Drying Time Differences
Although temperature and humidity might seem like minor details, they directly change how fast matte paint dries and how well new touch-ups blend with the surrounding wall.
You’ll notice drying times vary; humidity effects slow evaporation, causing tacky patches. Adjust schedule and ventilation to match conditions.
- Check forecast
- Work in consistent conditions
- Test a small area
- Wait between coats
Temperature’s Impact On Adhesion
If the room’s too cold or too humid, paint won’t bond or level properly, so you’ll get visible seams and tacky spots that resist blending.
You should control temperature fluctuations and humidity effects before touching up: work when conditions match original paint’s curing environment, use a heater or dehumidifier if needed, and wait longer in cooler or damper rooms to guarantee seamless adhesion and uniform sheen.
Should You Use a Retarder or Flow Improver With Matte Paint?
Wondering whether to add a retarder or flow improver to your matte paint? You can use additives to slow drying and improve leveling, but test first on a scrap to see retarder benefits and how a flow improver alters sheen.
Match manufacturer recommendations and mix sparingly. Watch viscosity and drying time to avoid sagging or texture changes.
- Test small area
- Follow label ratios
- Adjust application techniques
- Avoid overuse
When to Call a Pro for Complex Matches or Large Repairs
If the repair is large, the texture’s tricky, or you’re trying to match an old, faded matte, call a pro who’s color-matching tools and experience.
You’ll save time and avoid obvious patches when they blend tones and sheens correctly.
For small nicks you can DIY, but for complex matches or extensive damage it’s worth getting an expert.
When To Hire
When a touch-up goes beyond a few scuffs or requires matching an older, sun-faded finish, call a pro—you’re saving time and avoiding a patchy result.
You should hire when paint damage is extensive, your touch up strategies fail, or color consistency matters across large areas.
Consider hiring professionals if:
- large surface repair
- multiple faded sections
- visible texture mismatch
- time or skill limited
Complex Color Matching
Because small scuffs are one thing but large patches and intricate fades demand precision, call a pro for complex color matches or major repairs.
You’ll save time and avoid frustration when experts apply color theory and advanced blending techniques to recreate subtle undertones and sheen.
If stains, textured surfaces, or large areas are involved, let a professional guarantee seamless, lasting results.
Budget-Friendly Tips for Small Touch-Up Jobs
Although you’re working on a small area, you don’t need expensive tools or a pro to get great results; with a few affordable supplies and the right approach, you can blend matte paint touch-ups so they vanish into the wall.
Use DIY techniques, careful feathering, and proper lighting. Keep it simple:
- Match paint sheen
- Use a small brush or sponge
- Feather edges gently
- Let layers dry between coats
Touching Up Baseboards and Trim to Match Matte Walls
Before you paint, clean and sand the trim so the new coat will stick and look smooth.
Feather the paint edges into the wall to avoid harsh lines where trim meets matte paint.
Finally, check and match the sheen carefully so the trim’s finish complements, not clashes with, the matte walls.
Prep And Clean Trim
When you’re touching up matte-painted walls, prepping and cleaning the trim first guarantees the new paint matches and adheres properly. Remove dust, grime, and scuff marks with a mild detergent or TSP substitute, then rinse and let the trim dry completely.
Match paint finishes to trim styles, sand glossy spots, and tape edges. Don’t skip primer on stained areas.
- Use mild detergent
- Sand glossy spots
- Apply primer where needed
- Protect adjacent flooring
Feather Paint Edges
If your trim needs a seamless blend with matte walls, feather the paint edges by thinning your touch-up paint slightly and working outward from the trim into the wall with a light, overlapping stroke.
This softens the boundary so the finish reads uniform from a distance. Use fine brushes and feathering techniques, keeping strokes short and consistent for subtle edge blending.
Let dry, reassess, repeat sparingly.
Match Sheen Carefully
Because trim often has a glossier factory finish than matte walls, you’ll need to match sheen carefully to avoid obvious touch-up spots; sand lightly, clean, and test samples.
Choose compatible sheen types and maintain sheen consistency across repairs. Use small brushes for control and blend outward.
- Test in daylight
- Match finish, not just color
- Feather edges
- Use same product line
Building and Maintaining a Matte Touch-Up Kit
Before you start patching, assemble a compact matte touch-up kit that keeps the right tools and matching paint on hand so repairs are fast and consistent.
Include a small can of matched matte paint, a fine brush, foam applicator, sandpaper (240–320), painter’s tape, stir stick, and labeled dropper bottles for blends.
Store in a cool, dry place and check supplies yearly.
How to Remove Bad Old Touch-Up Attempts
Now that your kit’s ready, you’ll often find older touch-ups that look blotchy, shiny, or mismatched and need to come off before you can get a clean repair.
Remove bad touch ups and old paint by softening, scraping, cleaning, and feather-sanding. Work gently to avoid gouges.
Soften, scrape, clean, and feather-sand away old touch-ups—work gently to avoid gouges for a smooth repair.
- Score edges
- Use heat/solvent cautiously
- Clean residue
- Feather-sand junctures
Minimize Sheen Differences With Subtle Topcoat Tricks
When you’ve removed the old mishmash, tame remaining sheen differences by subtly blending a topcoat rather than slathering on full coverage; a light mist of matching matte or an ultra-thin satin glaze will marry the new and old surfaces without changing color.
You’ll do a quick sheen comparison, feather edges, and use controlled topcoat application so shifts vanish and texture stays consistent.
Use Photos and Video to Spot Invisible Patches
Turn on a raking light or angle a flashlight across the wall to cast shadows that reveal subtle texture and sheen differences you might miss with normal lighting.
Take close-up photos and a short video from a few angles, then compare them side-by-side to spot invisible patches.
You’ll catch irregularities faster on screen than with the naked eye.
Use Raking Light
Want to catch those nearly invisible uneven spots? Use raking light techniques—shine a low, angled light across the wall to reveal texture differences, highlighting imperfections you’d miss head-on.
Photograph or video while you inspect. Then address touch-ups where shadows or sheen change.
- Angle light low
- Move along the wall slowly
- Use a narrow beam
- Mark spots for correction
Compare With Camera
After you’ve flagged uneven spots with raking light, use your camera to catch what your eyes might miss—photos and video amplify subtle sheen and texture differences so you can pinpoint exactly where to touch up.
Shoot from multiple angles, test camera settings for exposure and white balance, and reproduce the room’s lighting conditions.
Review footage on a larger screen to mark tiny mismatches before you paint.
Preventive Measures to Reduce Future Touch-Up Needs
Because small habits and smart choices cut down on scuffs and chips, adopting a few preventive measures will keep your matte walls looking fresh longer.
You should use preventive maintenance: regular inspections, proper paint selection, protective coatings, and mindful furniture placement.
Factor environmental factors into cleaning routines and set a simple touch up schedule.
Suggestions:
- Use impact resistance trim
- Rotate furniture placement
- Gentle cleaning routines
- Add wall coverings
Quick Checklist Before You Declare the Job Done
Once you’ve taken preventive steps and given fresh paint time to cure, run through a quick checklist before declaring the job done: inspect under different light angles, feel for texture mismatches, and compare sheen.
Use targeted touch up techniques for any seams or thin spots, feather edges, and blend with surrounding matte.
Follow final inspection tips: step back, view from normal angles, and confirm uniform appearance.
Frequently Asked Questions
Can Sunlight or Seasonal Light Changes Reveal Previously Invisible Touch-Ups?
Yes — sunlight and seasonal lighting changes can reveal previously invisible touch-ups. You’ll notice different lighting conditions highlighting texture or subtle color shifts, so guarantee precise color matching and feathering to minimize detection across varied light.
How Do Pets, Oils, or Nicotine Stains Affect Future Touch-Up Success?
Pets, oils, nicotine all stain, all contaminate, all compromise future touch-ups: you’ll need stain removal first, you’ll need to degrease, you’ll need a primer to restore paint adhesion, or patches will fail and show.
Will Using Contractor-Grade vs. Consumer Matte Paint Change Blending?
Yes — contractor-grade paint often has higher paint quality and stronger pigments, so you’ll need refined blending techniques; you’ll match sheen and color, feather edges, and possibly dilute or use primer to guarantee smooth, invisible shifts.
How Long After Painting Can Furniture Be Placed Against Repaired Wall?
You can place furniture against the repaired wall after full drying time, usually 24–48 hours for matte paint; wait 72 hours if humidity’s high or paint’s contractor-grade, and avoid pressing edges for another week.
Can Heated or Spray-Dryer Tools Speed Curing Without Harming Sheen?
You can use gentle heated or low-velocity spray-dryer tools to speed curing, but you’ll monitor drying times closely; combine with proper touch up techniques to preserve sheen, avoiding high heat or intense airflow that risks sheen loss.
