
How to Paint Shoe Molding Without Drips or Tape Nightmares
You can paint shoe molding cleanly by prepping, using the right brush, and applying thin, slow coats to avoid drips and messy tape. Clean and sand, fill gaps, and protect floors; use an angled sash brush loaded sparingly and work along the grain. Choose trim-grade paint in satin or semi-gloss, thin slightly if needed, and wipe runs immediately. Paint face first, wrap into edges, and feather for crisp lines—follow these steps and you’ll get pro results with easy-to-follow tips ahead.
Quick Answer: Paint Shoe Molding Without Drips
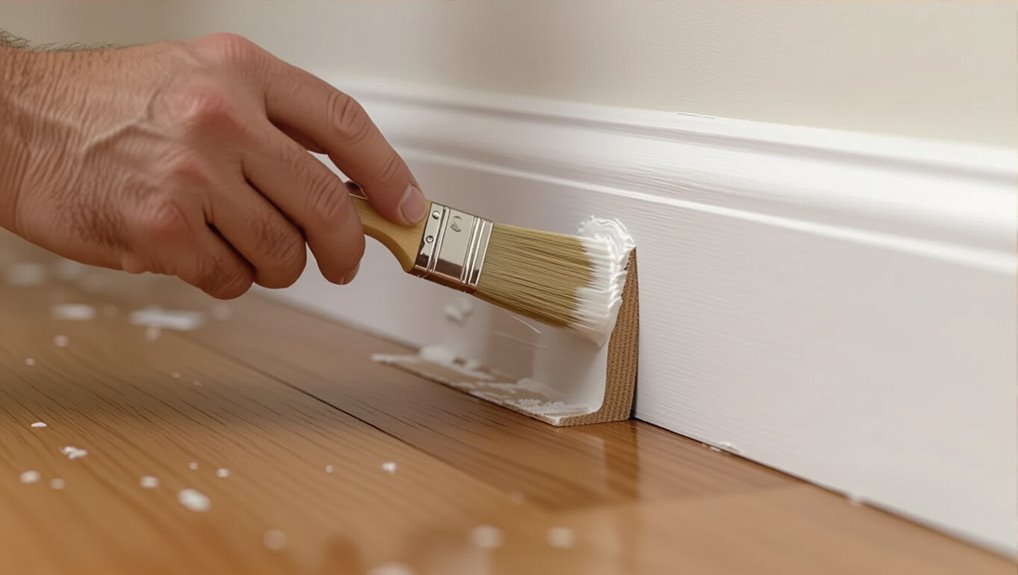
If you want a clean, drip-free finish, prep the shoe molding, use the right brush, and control the paint load on your brush.
You’ll sand lightly and wipe dust, apply thin coats, and use smoothing techniques to glide paint evenly.
Keep paint consistency slightly thicker than wall paint to avoid runs, work along the grain, and wipe excess immediately for crisp results.
Why Shoe Molding Is Trickier Than Baseboards
Because shoe molding sits at the floor-wall junction and is much narrower, painting it demands steadier hands and more control than baseboards do. You’ll face Shoe Molding Challenges like tight curves and floor protection. Compare Baseboard Differences and adjust Painting Techniques for precision. Focus on clean Trim Finishing to avoid drips and scuffs.
| Issue | Impact | Fix |
|---|---|---|
| Narrow profile | High drip risk | Slow strokes |
| Floor gap | Paint on floor | Shield edges |
| Rounded edges | Hard to cut in | Angled brush |
| Dust | Bumpy finish | Clean first |
Tools and Materials You’ll Need
Gather the right tools and materials before you start painting shoe molding so you can work cleanly and efficiently: gloves, drop cloths, fine-grit sandpaper, painter’s putty, a small paint tray, quality trim paint, and a narrow brush.
Include a foam roller for smooth coats.
Learn paint application techniques and brush cleaning tips to maintain control and avoid drips.
Choose the Best Brush for Crisp Trim Edges
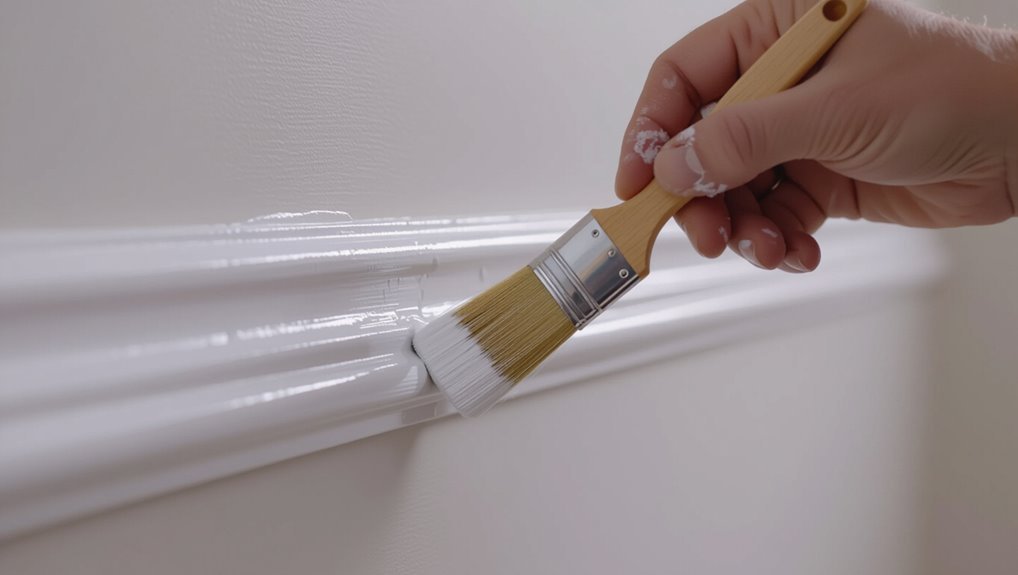
To get sharp, professional-looking edges on your shoe molding, pick the right brush.
Use a natural bristle brush for smooth, even coverage with oil-based paints, and grab an angled sash brush for precise control in corners and tight spots.
With those two tools you’ll cut cleaner lines and work faster.
Natural Bristle Brush
Reach for a natural bristle brush when you want the sharpest, cleanest edges on shoe molding—its tapered, split ends hold and release paint smoothly, letting you lay down crisp lines with minimal brush marks.
You’ll appreciate natural bristle benefits for oil and latex finishes; practice steady strokes, wipe excess, and follow brush maintenance like cleaning and reshaping to keep performance reliable.
Angle Sash Brush
One angled sash brush gives you control for painting tight corners and long runs of shoe molding. Its slanted tip lets you cut clean, consistent edges without dragging paint onto the wall or floor.
You’ll use angle sash selection and precise brush techniques to trim neatly, minimize touchups, and speed work. Choose size, bristle type, and grip for steady control.
- Pick the right width
- Use short strokes
- Keep a light load
- Maintain a steady angle
- Clean and reshape bristles
Pick Paint Type and Sheen to Reduce Runs
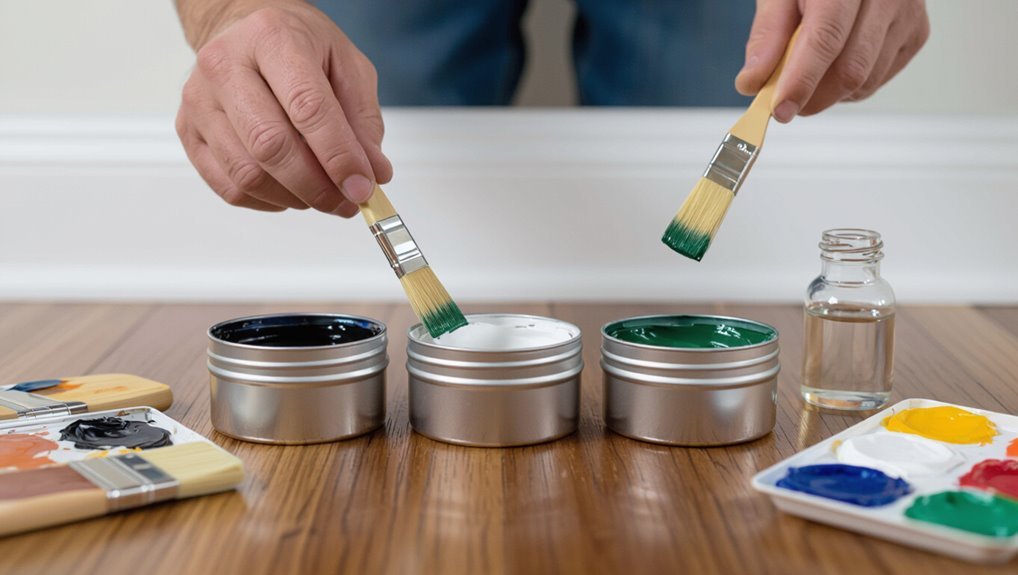
Pick a paint formulation and sheen that help the coat lay down smoothly and resist dripping.
Choose a trim-grade acrylic or alkyd for paint durability, then pick a lower-gloss sheen to reduce runs while still allowing easy cleaning.
Satin or semi-gloss balances durability and sheen impact; they level out brush marks better than high gloss.
Test a small section before committing.
How and How Much to Thin Paint for Trim
Thinning trim paint slightly can improve flow, level brush marks, and reduce visible strokes without weakening coverage—aim for small adjustments and test as you go.
- Start with manufacturer recommendations for paint viscosity.
- Add 5–10% solvent for water-based trim paint.
- Stir thoroughly and retest on scrap.
- Avoid over-thinning to prevent runs.
- Adjust in tiny increments until brush lays flat.
Prep the Room: Protect Floors and Control Dust
Before you start painting shoe molding, protect your floors with drop cloths or rosin paper and tape seams to prevent paint bleed.
Seal off vents, doorways, and other dust sources with plastic sheeting so sanding residue doesn’t spread.
Move small furniture out and elevate larger pieces on blocks or covered platforms to keep everything clean and accessible.
Protect Flooring Thoroughly
Start by clearing a wide work area and laying down durable protection—heavy-duty contractor paper, rosin paper, or canvas drop cloths—so paint, dust, and spills can’t reach your floors.
Then secure floor protection, match coverings to flooring materials, set furniture barriers, wear protective gear, and plan cleaning methods.
Maintain workspace organization to minimize tracking and guarantee dust prevention.
- Use weighted drop cloths
- Seal seams
- Elevate furniture
- Keep tools contained
- Wet-wipe edges
Seal Off Dust Sources
While you’re protecting floors, shut off HVAC vents and close doors to create a contained workspace.
Use plastic sheeting and painter’s tape on thresholds, vents, and light fixtures.
Employ simple sealing techniques like overlapping edges and weight-taped hems to limit drafts.
Wipe surfaces, run a portable HEPA fan briefly, and use tack cloths for dust control before painting shoe molding.
Clear And Elevate Furniture
1. Clear and elevate furniture to keep floors safe and dust-free while you paint shoe molding.
Shift items for good furniture arrangement, wrap delicate pieces, and raise legs on blocks so cleaning and color coordination checks are easy.
- Move seating away from walls
- Stack small items in boxes
- Wrap upholstery in cloth
- Use wooden blocks under legs
- Leave walkways clear
When to Remove Shoe Molding : Or Leave It in Place
If your goal is a quick refresh, you can often leave shoe molding in place and paint it where it sits; but if the molding’s damaged, warped, or the gap behind it needs new caulk or flooring, you’ll want to remove it first so you can get a clean, lasting result. Consider remove considerations and leave options:
| Condition | Action | Result |
|---|---|---|
| Minor | Leave | Fast |
| Damaged | Remove | Repairable |
| Gap | Remove | Sealable |
Clean and Sand Molding for Better Adhesion
Start by removing dust and debris with a soft brush or vacuum so paint can stick evenly.
Lightly sand the molding with fine-grit paper to give the surface some grip without damaging the profile.
Finish by wiping the dust away with a solvent-soaked cloth so the surface is clean and ready to prime.
Remove Dust And Debris
Wipe down the shoe molding thoroughly to remove dust, cobwebs, and loose paint chips so the new finish will stick.
Use gentle cleaning techniques and a tack cloth for dust prevention before painting. Vacuum nearby surfaces, wipe crevices with a damp sponge, and let dry completely.
- Dry cloth wipe
- Vacuum crevice tool
- Tack cloth pass
- Damp sponge detail
- Inspect under light
Lightly Sand For Grip
Gently sand the shoe molding with fine-grit sandpaper (220 grit works well) to scuff the surface so primer and paint will adhere; you’ll only need light, even strokes—focus on glossy spots, edges, and any remaining loose paint.
Then wipe away the dust with a tack cloth before moving on.
Use consistent sanding techniques for grip enhancement, sanding along the profile, checking for smooth, even abrasion.
Wipe With Solvent
After lightly sanding, remove dust and oils with a solvent-soaked cloth so primer and paint will stick. You’ll choose solvent types (mineral spirits for oil, denatured alcohol for shellac) and follow safe application techniques.
Wipe along grain, change cloth often, let surface dry, and avoid pooling.
- Use proper PPE
- Test hidden spot
- Work small sections
- Use lint-free cloth
- Dispose rags safely
Use Caulk and Filler to Smooth Seams
Before you paint, seal gaps between the shoe molding and the wall with caulk and fill any nail holes so the finish looks continuous and professional.
Use careful caulk application for clean lines, then apply filler techniques to depressions.
Smooth seams with a damp finger or tool, sand lightly when dry, and make sure seam smoothing improves paint adhesion for a seamless, durable result.
Choose a Primer for Bare or Stained Molding
Check the wood for knots, tannin bleed, or bare spots so you know if it needs a stain-blocking primer.
Match the primer to the existing stain color and type to prevent show-through.
Decide between oil-based primers for tough stains and latex for easier cleanup and flexibility.
Assess Wood Condition
Wood condition determines the primer you’ll need, so inspect the molding for bare wood, previous stain, tannin bleed, or uneven sheen.
You’ll do wood inspection and moisture assessment, check for mold presence, note wear indicators and grain visibility, and evaluate adhesive quality and alignment checks to plan surface preparation and any stain removal before priming.
- wood inspection
- moisture assessment
- mold presence
- surface preparation
- finish durability
Match Primer To Stain
If your molding shows bare wood or lingering stain, match the primer to the substrate so the finish will adhere and the stain won’t bleed through; choose a stain-blocking oil- or shellac-based primer for tannin-rich or previously stained pieces, and a high-quality latex or water-based primer for clean, dry bare wood.
You’ll test small areas, follow stain matching guidance, and pick primer types that prevent bleed and guarantee adhesion.
Choose Oil Or Latex
When deciding between oil- and latex-based primers for bare or stained shoe molding, consider the wood’s condition and the paint you’ll use so the primer does the job without causing problems later.
You’ll weigh oil benefits vs. latex advantages: oil seals tannins and boosts finish durability; latex offers faster drying times and more color options. Choose based on application techniques and final paint.
- Oil benefits: stain blocking
- Latex advantages: easy cleanup
- Drying times: plan accordingly
- Finish durability: long-term wear
- Color options: tintable primers
How to Load Your Brush to Avoid Excess Paint
Start with a small bead of paint along the ferrule and dip only the tip of the bristles about one-third of their length into the paint; this lets you control flow and keeps excess from dripping or gumming up the molding’s edges.
Use balanced brush loading techniques: tap excess on the can’s rim, wipe the heel on paper, and reload frequently to avoid overloading and drips.
Back-Brushing Shoe Molding for One-Coat Coverage
Back-brush the shoe molding immediately after laying a thin coat so the paint gets pushed into tool marks and tight corners, giving you true one-coat coverage.
Use steady pressure and short pulls to flatten bristles and spread paint for achieving uniformity with proven back brushing techniques.
Don’t overwork; stop when surface looks even.
- steady pressure
- short pulls
- flatten bristles
- stop when even
- one-coat goal
Stroke Patterns for a Factory-Smooth Finish
Although it takes a little practice, using consistent stroke patterns will give your shoe molding a factory-smooth finish every time.
Work from one end, use even, overlapping strokes, and maintain light pressure.
Choose stroke techniques—long pulls for flat faces, short controlled taps for corners.
Wipe excess, keep a wet edge, and focus on finish smoothing to avoid ridges and visible brush marks.
Paint the Inside Edge Where Molding Meets Floor
Tuck the brush tip into the joint where the shoe molding meets the floor and pull a thin, steady bead of paint along the inside edge, keeping the bristles angled so paint doesn’t puddle against the baseboard.
You’ll master molding techniques and precise edge painting by working slowly, wiping excess, and keeping passes short.
- steady hand
- thin beads
- wipe excess
- short passes
- inspect seam
Paint the Top Edge Where Molding Meets Wall
Now focus on the top edge where the molding meets the wall; you’ll need a steady hand to keep the line crisp.
Use a small angled brush and make feathered strokes to blend paint smoothly without ridges.
Take your time and rest your wrist on the wall for better control.
Steady Hand Technique
Steady your wrist and angle the brush so the long edge rides just along the joint where the molding meets the wall; that control gives you a crisp, even top edge without relying on tape.
You’ll use a steady hand and focused brush control to paint confidently.
- Relax your grip
- Load a thin bead of paint
- Move slowly
- Keep consistent angle
- Wipe excess often
Feathered Brush Stroke
Anyone can learn to feather the top edge by using light, controlled strokes that blend paint from the molding onto the wall; hold the brush so the long edge rides the joint and use short, overlapping strokes to taper the paint thinly at the wall line.
You’ll practice precise brush techniques, create a seamless feathered finish, and avoid ridges by keeping paint load light and strokes consistent.
Handle Corners and Butt Joints Without Smudges
1 simple rule will save you from most smudges at corners and butt joints: paint the face of the molding first, then wrap the brush into the edge with a light, controlled stroke so excess paint doesn’t squeeze into the joint.
Use corner techniques and focus on joint finishing.
Quick tips:
- Load less paint
- Feather into corner
- Use angled brush
- Pause to wipe
- Inspect seams closely
Work Around Carpets, Rugs, and Uneven Floors
After you’ve handled corners and joints, deal with carpets, rugs, and uneven floors before you paint the baseboards near them.
Use carpet protection and rug management: roll edges, lift or secure rugs, and clear furniture positioning for access.
Roll carpet edges, lift or secure rugs, and move furniture for clear, paint-ready access.
Apply uneven surface techniques for edge alignment at thresholds.
Plan threshold considerations, maintain space organization, and finish with careful color matching for a seamless, professional result.
When to Use Painter’s Tape Without Peeling Paint
When you want crisp edges without risking fresh paint chips, use painter’s tape when the surface is clean, fully cured, and the tape will stay put long enough to remove it without tugging.
You’ll follow smart tape techniques and simple painter’s tips to avoid peeling.
- Clean surface first
- Test a small strip
- Use low-tack tape
- Remove at 45°
- Pull slowly
Tape Alternatives: Shields, Cardboard, and Angled Tools
You don’t always need painter’s tape to get a clean line; shields, cardboard strips, and angled tools can protect adjacent surfaces and give you more control, especially on freshly painted or delicate finishes.
Use shield techniques by sliding a thin metal or plastic guard along the edge while brushing.
Cardboard methods work as removable straightedges.
Angled brushes and putty knives complete precise, tape-free edging.
Drying Times and Preventing Runs While Curing
Although paint can look dry to the touch within an hour, shoe molding needs longer to cure fully, so plan for several hours to a few days depending on the paint type and conditions.
Use proper drying techniques and monitor curing conditions to prevent runs while paint firms.
Follow these tips:
- Thin coats
- Light, even brushstrokes
- Moderate humidity
- Steady temperature
- Gentle airflow
Spot and Remove Drips Before They Set
Once paint starts to firm, keep a sharp eye out for tiny drips or sags along the shoe molding—catching them early makes removal far easier.
For drip detection, run a fingertip or soft cloth gently beneath each bead; lift or blot before it sets.
Use a damp brush or scraper for quick remedies, working along the grain to preserve edges and finish.
Sand and Feather Between Coats for Invisible Joins
1 simple step between coats makes joins vanish: sand and feather the edges lightly. You’ll blend layers for a seamless finish by using proper sanding techniques and feathering methods, working gently along the bead.
Clean dust, test a small area, and recoat when smooth.
Wipe away dust, try a discreet spot, and recoat once the surface feels perfectly smooth.
- Use fine-grit sandpaper
- Sand with the grain
- Feather toward the trim
- Remove dust thoroughly
- Light touch only
When One Coat Is Enough : When to Add a Second
If the first coat covers evenly, matches the trim’s texture, and hides the old color, you can stop there; add a second coat only when you see streaks, thin spots, or a noticeably different sheen once the paint dries.
Check paint consistency and use proper drying techniques—gentle airflow and temperature control—to judge true coverage.
Only recoat where flaws persist, sanding lightly first.
Quick Touch-Up Hacks for Tiny Chips and Nicks
Start by cleaning and lightly sanding the tiny chip so paint will stick.
Use a toothpick to apply a thin bead of paint with pinpoint control.
Feather the edges with a damp brush to blend the repair into the surrounding molding.
Prep The Surface
Before you paint, address tiny chips and nicks so the finish looks smooth and professional.
You’ll do simple surface cleaning, match molding texture, and fill imperfections for a seamless result. Use light sanding and appropriate filler, then wipe dust before painting.
- Clean with mild detergent
- Sand feathered edges
- Apply wood filler sparingly
- Match molding texture
- Wipe surface clean
Use Toothpick Precision
When a tiny chip shows up after painting, reach for a toothpick to apply filler or paint with pinpoint accuracy so you don’t overload the molding.
Use the toothpick technique to dab minimal product into nicks, wipe excess on a paper towel, and let it cure.
For precision painting, work slowly under good light and check angles to avoid smudges or drips.
Feather And Blend Edges
Feathering the paint and blending the edges lets your touch-ups disappear into the surrounding finish, so the repair won’t catch the eye.
Use a tiny brush, work outward, and lift lightly to feather technique strokes.
Keep paint thin, match sheen, and soften boundaries while wet so blending edges read seamless.
- tiny brush
- thin coats
- lift and feather
- match sheen
- soften edges
Clean Brushes and Tools to Keep Them Working Well
Keep your brushes and tools clean after each coat so they perform reliably and last longer.
Rinse brushes thoroughly, reshape bristles, and remove excess paint with the right solvent.
Wipe rollers and trays, and let items dry upright.
Practice regular brush maintenance and organized tool storage to prevent damage and contamination.
Label containers and store in a ventilated, dust-free spot for quick, tidy reuse.
Top Mistakes That Cause Drips : And How to Avoid Them
You’ll cause drips if you use the wrong brush size, overload it with paint, or skip the primer.
Use a narrow angled brush for control, wipe excess paint off the bristles before you start, and always prime bare wood or patched areas.
Follow those steps and you’ll get a smooth, drip-free finish.
Wrong Brush Size
Picking the wrong brush size is one of the quickest ways to end up with drips and runs on shoe molding. You need the right balance of brush materials and brush techniques to control coverage without overworking edges.
Choose a narrow angled brush for corners and a slightly wider one for flats to keep lines clean.
- Narrow angled for corners
- Slightly wider for flats
- Match bristle type
- Test on scrap
- Maintain light pressure
Excess Paint Load
Overloading your brush or roller is the fastest way to get drips on shoe molding—excess paint beads up, runs into crevices, and ruins crisp lines.
You’ll prevent this by loading sparingly, tapping off rollers, and wiping brush edges.
Refine your brush technique: use short, controlled strokes, reload frequently with small amounts, and smooth out drips before they set to keep edges clean.
Skipping Primer Step
If you skip priming the shoe molding, paint won’t adhere evenly and is far more likely to sag or run, especially on bare wood or stained surfaces.
You’ll face poor paint adhesion and drips. Prep with primer to seal and level, then paint thin coats.
- Skipping primer causes runs
- Primer improves adhesion
- Saves time sanding
- Prevents blotchiness
- Promotes even finish
Pace Your Work: Speed vs. Quality for Best Results
While you want to finish the trim efficiently, rushing through shoe molding invites drips, missed spots, and uneven edges—so slow down where precision matters and speed up during low-risk steps.
You’ll balance careful brushwork with quicker touch-ups, applying work life balance habits and efficiency strategies: set timed segments, prioritize corners, rest between coats, and inspect wet edges to keep quality high without wasting time.
Cost-Saving Tips That Won’t Hurt the Finish
Because you don’t need premium materials to get a professional look, you can save money by choosing smart substitutes and doing careful prep yourself.
You can achieve a pro finish without premium supplies by choosing smart substitutes and doing careful prep yourself.
Use cost effective materials and budget friendly techniques to maintain a smooth finish without shortcuts that cause touch-ups later.
- Buy quality brushes on sale
- Thin paint for even coats
- Reuse drop cloths
- Sand between coats
- Clean tools promptly
Sprint Checklist: Step-by-Step to Drip-Free Molding
Before you start, you’ll prep the surface by cleaning, sanding, and filling any gaps so paint adheres smoothly.
Pick the right paint and sheen for trim to avoid runs and get full coverage with fewer coats.
Then control your application—use thin, steady strokes and the proper brush or roller to keep molding drip-free.
Prep The Surface
If you want drip-free shoe molding, prep the surface thoroughly so paint adheres evenly and runs are less likely.
You’ll assess molding conditions, perform surface cleaning, and repair imperfections before painting.
Follow this quick checklist to save time and prevent issues:
- Wipe dust and grease with degreaser
- Sand gloss to dullness
- Fill gaps and nail holes
- Remove loose paint
- Vacuum and tack cloth
Use The Right Paint
Now that the surface’s clean, sanded, and patched, pick paint that resists drips and hides brush marks. Choose durable paint finishes suited to trim and consider color choices that complement floors. Test samples. Balance sheen for washability without showing flaws.
| Feature | Tip |
|---|---|
| Finish | Semi-gloss or satin |
| Sample | Try small swatch |
| Durability | High-quality trim paint |
| Color | Coordinate with baseboard |
| Cleanability | Easy-wipe formula |
Control Paint Application
1. You’ll control paint application by balancing paint viscosity and paint consistency, using precise brush technique to guarantee smooth application and precision painting while reducing dripping.
Manage application speed and employ control methods for dripping prevention. Focus on edge detailing and finishing touches for crisp lines.
- Keep thin coats
- Wipe excess paint
- Use angled brush
- Slow, steady strokes
- Inspect edges often
Frequently Asked Questions
Can I Spray Shoe Molding Instead of Brushing It for Faster Results?
Yes — you can spray shoe molding for faster results; for example, a contractor used HVLP spray techniques and cut drying time dramatically. You’ll need light, even passes, proper ventilation, and minimal overlap to avoid drips.
How Do I Paint Shoe Molding That’s Already Finished With Polyurethane?
You’ll scuff the polyurethane with fine sanding techniques, clean dust, prime with bonding primer, then paint using a high-quality angled synthetic brush; you’ll avoid heavy coats, feather edges, and let proper drying between thin layers.
Will Temperature or Humidity Affect Shoe Molding Paint Adhesion?
Yes — humidity and temperature cut adhesion: studies show up to 40% higher failure rates in extreme conditions. You’ll control paint application and environmental factors, so prep, dry conditions, and correct temperatures guarantee lasting adhesion.
Can I Paint Shoe Molding Before Installing Baseboards?
Yes — you can paint shoe molding before installing baseboards; pre installation benefits include easier handling and cleaner edges. Use painting techniques like light coats, angled brush strokes, and sanding between coats to guarantee smooth adhesion and fit.
How Do I Match New Shoe Molding Paint to Aged Existing Trim?
Think of your trim as weathered wood; you’ll blend new and old by aging samples. You’ll use color matching, apply paint samples to scrap, adjust tint, feather edges, and test under real light before committing.
