
How to Paint a Plywood Ceiling So It Looks Clean and Intentional
You can make a plywood ceiling look crisp and intentional by prepping, priming, and painting with care: clean and sand, fill seams and holes, then use a stain‑blocking primer if needed. Pick a flat or eggshell topcoat and roll in manageable sections with the right nap to match texture, sanding lightly between coats and keeping a wet edge to avoid lap marks. Follow safe ladder and ventilation practices, and keep going to learn detailed tips and pitfalls.
Quick Answer: Make a Plywood Ceiling Look Crisp

Start by cleaning and sanding the plywood, then prime and paint with a roller for an even finish—you’ll get the crisp look by using a high-quality primer, a flat or eggshell topcoat, and clean cutting-in along edges.
You’ll use clean techniques: tack cloths, proper drying times, and light sanding between coats. Aim for intentional finishes by controlling sheen and edge crispness.
Should You Paint or Replace a Plywood Ceiling?
If you’ve prepped and painted your plywood ceiling and still don’t like the look or condition, it’s worth weighing painting against replacement.
Painting saves time and cost, can improve paint durability with proper primers and sealers, and boosts aesthetic impact for many rooms.
Replace if structural damage, persistent warping, or insulation upgrades are needed—otherwise paint is usually the smarter, quicker choice.
Who Should Read This Guide and What It Covers
If you’re deciding whether to paint a plywood ceiling yourself or hire it out, this guide’s for you.
It covers who benefits from painting versus replacing, the step-by-step process and materials, and the basic skills and tools you’ll need.
You’ll get a clear sense of what’s involved so you can plan time, budget, and whether to call a pro.
Who This Helps
This guide is for homeowners, renters, and DIYers who want to refresh a room by painting a plywood ceiling or who need practical steps for prepping and finishing plywood overheads.
You’ll benefit if you’re DIY enthusiasts wanting clear methods, interior designers seeking reliable execution, or anyone balancing budget considerations with aesthetic choices.
Use it to decide if this project fits your skills and goals.
What’s Included
You’ll find step-by-step instructions, a tool-and-materials checklist, surface-prep and priming guidance, paint and finish recommendations, and troubleshooting tips tailored to common plywood-ceiling issues.
You’ll learn how plywood ceiling aesthetics and painting techniques affect final results and when to adjust approaches for grain, gloss, or stain.
- Choosing finishes
- Prep sequences
- Paint application methods
- Fixing common flaws
Skill And Tools
Whether you’ve never picked up a paintbrush or you’re comfortable with weekend projects, this guide tells you what skills and tools you need and where to be realistic about your limits.
You’ll learn basic prep techniques, tool selection, surface repair, priming, and safe ladder use. If you’re unsure about ladders or electrical fixtures, consider hiring a pro for those steps.
How to Evaluate Plywood Type and Condition
Before you grab paint, identify the plywood species, grade, and surface condition so you know how it will accept primer and paint.
You’ll perform a quick condition assessment using clear evaluation criteria to guide surface preparation and paint compatibility choices.
- plywood types present (veneer, OSB, marine)
- finish types and sanding needs
- moisture impact signs
- age factors and repairs needed
How Moisture, Age, and Finish Affect Paint on Plywood
When plywood has absorbed moisture, aged, or carries an existing finish, it changes how paint bonds and how long the job lasts. Therefore, you should assess these factors before priming.
Damp or swollen veneers, surface contaminants from old finishes, and deterioration from UV or rot all demand different prep and product choices.
Evaluate moisture impact, age factors, and finish types. Address plywood deterioration with sealing techniques, surface preparation, and consider environmental influences to guarantee paint adhesion.
Tools and Supplies for Painting a Plywood Ceiling
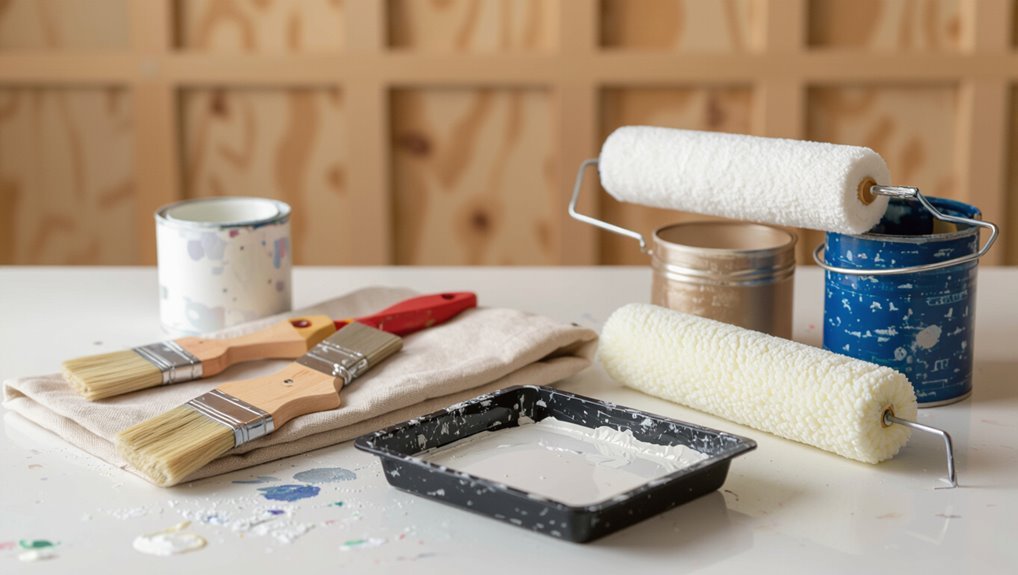
Now that you’ve assessed moisture, age, and existing finishes, gather the right tools and supplies to make painting a plywood ceiling efficient and long-lasting.
Create a tools checklist focusing on surface preparation, paint types, application techniques, finish options, and maintenance tips.
Consider:
- Primer, paint, and finish options
- Rollers, brushes, extension poles
- Sandpaper, patching compounds
- Drop cloths, tape, trays
Safety, Ladders, Scaffolding, and Ventilation Tips
Before you start painting, make sure you set up ladders on stable ground and angle them correctly to prevent slips.
If you need more reach, use properly assembled scaffolding with guardrails and secure planks.
Keep the area well ventilated and wear a respirator if you’re sanding, priming, or using solvent-based paints.
Ladder Placement Safety
Even if you’ve set up your workspace carefully, improper ladder placement can turn a simple ceiling job into a hazard, so position ladders and scaffolding with intention: Use correct ladder positioning and wear safety gear; check stability before climbing.
- Set feet on firm, level ground
- Lock spreaders and braces
- Keep hips centered between rails
- Maintain three points of contact
Scaffolding Setup Tips
One well-set scaffold will save you time and reduce risk, so take care assembling and positioning it: choose a level base, lock all casters or foot pads, secure guardrails and toe boards, and double-check that planks are rated for your load.
Inspect scaffolding types for suitability, follow scaffolding safety guidelines, keep tools organized, avoid overreaching, and use a stable access point to move safely.
Ventilation And Respiratory Protection
Good ventilation and proper respiratory protection keep you safe while sanding, priming, and painting a plywood ceiling; open windows and doors, run cross-ventilation with fans, and wear a NIOSH-rated respirator or at least a P95/particulate mask when working with dust, solvent-based primers, or spray finishes.
- Use box or oscillating fans for airflow
- Position exhaust toward outdoors
- Change filters regularly
- Inspect respirator fit
Practice ventilation methods and respiratory safety always.
Measure Surface Area and Order Materials for Your Plywood Ceiling
Start by measuring the length and width of each ceiling plane and multiplying them to get square footage so you know how much plywood and paint to buy.
Use measure tools like a tape measure, laser, and level.
List material types—plywood grade, primer, paint, caulk, fasteners—and add 10–15% waste.
Order from reliable suppliers and confirm delivery timing.
Plan Your Timeline for Prep, Priming, and Coats
Plan your timeline by checking the primer and paint labels for drying and curing times so you don’t rush between steps.
Schedule separate blocks for surface prep, priming, and each paint coat with built-in air-dry and cure windows.
Leave time after the final coat for touch-ups and a full cure before reinstalling fixtures or moving furniture.
Assess Drying And Curing
Because moisture and temperature directly affect adhesion and finish, you should map out realistic drying and curing windows before you begin sanding or priming your plywood ceiling.
Plan for drying time and account for the curing process so coats won’t trap moisture.
Consider:
- Current room humidity and temperature
- Ventilation and fans
- Manufacturer’s recommended wait times
- Extra time after high humidity conditions
Schedule Primer And Paint
Once you’ve confirmed the plywood is dry and sanded, set a realistic timeline that spaces prep, priming, and topcoats to allow proper drying and curing between each step.
Decide primer types based on wood tannin content and finish desired, then map paint scheduling around manufacturer dry times and humidity.
Factor in ventilation, steady temperatures, and at least overnight cure periods before recoating.
Allow For Touch Ups
After you’ve scheduled primer and paint, build time for touch-ups into your timeline so final imperfections don’t force rushed fixes.
Plan a calm final pass: inspect lighting, note spots, and let coats cure. Keep a small kit and follow touch up techniques to blend sheen.
Maintenance tips include cleaning tools and scheduling a quick revisit within a week.
- Inspect under good light
- Keep a mini kit
- Feather edges gently
- Recoat if needed
Protect Walls, Fixtures, and Floors From Ceiling Paint
Start by covering everything you don’t want paint on: tape off trim and fixtures, drape plastic or drop cloths over walls and floors, and wrap light fixtures and vents.
Use protective measures and masking techniques for edge protection and wall protection.
Prioritize surface preparation before paint application, secure floor covering, apply fixture shielding, and keep a clean workspace to prevent splatters and simplify cleanup.
Inspect Joints and Seams for Gaps and Unevenness
Walk the length of the ceiling and closely examine every joint and seam for gaps, raised edges, or uneven plywood alignment.
You’ll perform a careful joint inspection and seam evaluation to plan fixes without yet filling anything. Check for issues like:
- visible gaps along panel edges
- misaligned plywood ends
- raised or cupped seams
- uneven surface at fastener lines
Record locations for targeted repairs.
Fill Seams, Nail Holes, and Gouges for a Smooth Ceiling
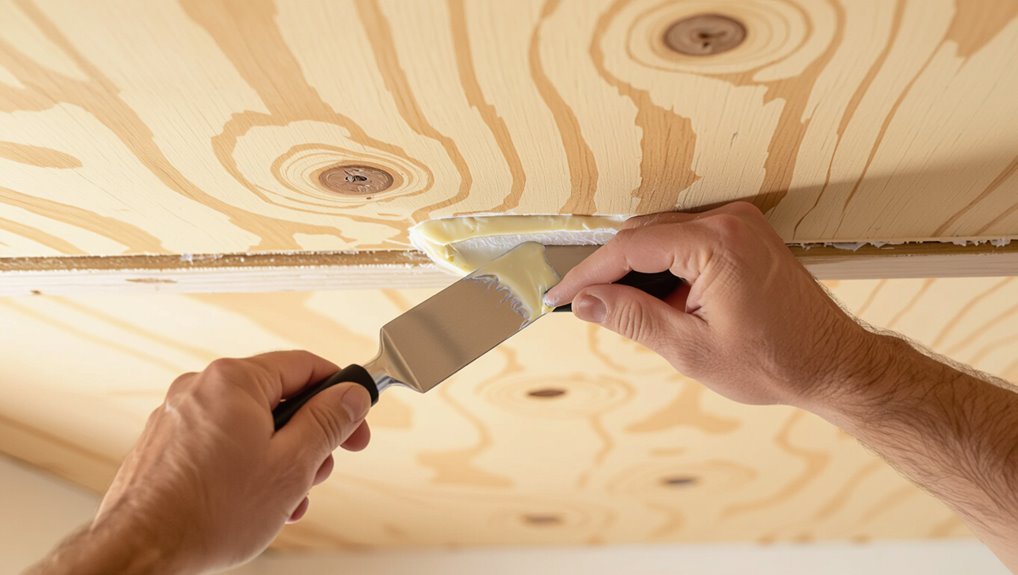
Now that you’ve mapped every gap and uneven seam, it’s time to fill them so the ceiling reads as one smooth plane.
Use appropriate seam filling and hole patching compounds, applying repair techniques that promote surface smoothing.
Match texture to surrounding plywood for texture matching.
Choose primer selection that improves paint adhesion and guarantees finish uniformity, so your painted ceiling looks seamless and intentional.
Sand Plywood Without Raising the Grain
Before you sand, dampen the plywood lightly with a mist of water—this prevents the fibers from lifting and keeps the surface smooth as you work.
Use gentle sanding techniques and circular motions to avoid tearing. Focus on grain control, light pressure, and progressive grit changes.
- Start with 150–180 grit
- Finish with 220 grit
- Sand with the grain
- Check for raised fibers
Clean Plywood Surfaces for Primer Adhesion
Start by removing dust, sanding residue, and any greasy fingerprints so the primer can bond evenly to the plywood.
Wipe with a damp microfiber cloth and a mild detergent, then rinse and let dry. Use tack cloths for final dust pickup.
Match cleaning techniques to chosen primer types and manufacturer prep instructions to guarantee consistent adhesion and a smooth, long-lasting finish.
When to Use a Stain Blocker or Tannin-Sealing Primer
If your plywood shows knots, heavy sap streaks, water stains, or old tannin-rich finishes, you’ll want a stain-blocking or tannin-sealing primer before painting so those discolorations don’t bleed through the topcoat.
Use a stain blocker for stubborn bleed, apply tannin sealing techniques for raw wood, then:
- Test a small area first
- Sand glossy spots
- Allow full cure time
- Spot-prime missed areas
Best Primers for Raw and Finished Plywood
Choose a primer that matches the plywood’s condition and your topcoat: for raw plywood pick an alkyd or high-quality oil-based primer to seal tannins and stabilize the surface, while for previously finished or lightly stained plywood a high-build acrylic or latex bonding primer will adhere well and block minor stains.
You’ll compare primer types, select compatible products, and follow application techniques for even coverage and adhesion.
Choose the Right Paint Sheen for Ceilings
One key decision you’ll make before rolling is the paint sheen, because it affects light reflection, blemish visibility, and cleanability on a ceiling.
Choose based on texture, light, and ceiling maintenance needs.
- Flat: hides flaws, low cleanability
- Matte: similar to flat, slight durability
- Satin: balances sheen and wipeability
- Semi-gloss: best for frequent ceiling maintenance
Pick a Color That Flatters the Room and Hides Flaws
While you’ll want a color that complements the room’s style and lighting, prioritize tones that minimize visible flaws in plywood—soft, warm neutrals and muted pastels tend to disguise seams and grain better than stark whites or glossy darks.
Use color psychology to set mood while keeping design harmony with furnishings and natural light. Test samples on the ceiling before committing to a full coat.
Calculate Sheen and Contrast With Walls and Trim
After you’ve settled on a color that flatters the room and masks plywood imperfections, decide on a sheen that complements — and contrasts with — your walls and trim.
You’ll make deliberate sheen selection for subtle reflection and clear wall contrast. Consider these quick choices:
- Matte for minimal glare
- Eggshell for soft warmth
- Satin for mild sheen
- Semi-gloss for durable trim-like accents
Latex vs Oil on Plywood Ceilings: Pros and Cons
Because your choice of paint affects durability, appearance, and cleanup, you’ll want to weigh latex and oil carefully for plywood ceilings.
You’ll find latex advantages include quicker drying time, easier maintenance ease, lower environmental impact, and flexible application techniques.
Oil drawbacks are richer color selection and tougher finish durability but longer drying time, stronger fumes, harder cleanup, and more restrictive maintenance.
Test Paint Adhesion and Coverage on a Sample Board
Before you roll onto the ceiling, paint a small sample board and press it firmly to the plywood to test adhesion.
Let it dry fully, then inspect for even coverage and any patchy spots.
If the finish bonds well and looks uniform, you can proceed with confidence on the full ceiling.
Test A Small Area
Start by cutting a 12″x12″ sample from leftover plywood or use a spare board so you can test adhesion and coverage without risking the ceiling.
You’ll confirm test area preparation and paint adhesion on a small piece.
Apply finish, wait, and inspect.
Consider:
- sanding grit
- primer type
- application method
- drying time
Check Coverage Uniformity
Now that you’ve confirmed adhesion on a scrap, check how evenly the paint covers the surface and how well it bonds under realistic conditions.
Apply your chosen paint with the same coverage techniques and tools you’ll use on the ceiling. Let it dry fully, inspect for streaks, thin spots, and texture mismatches, and test durability.
Adjust paint selection or technique before proceeding to the full ceiling.
Undercoats That Hide Grain and Boost Coverage
A good undercoat can dramatically reduce visible grain and cut the number of finish coats you’ll need, so choose one formulated for plywood or exterior-grade veneers.
You’ll focus on undercoat types for grain concealment and coverage enhancement during primer application.
Pick high-build or stain-blocking formulas, then:
- Oil-based or acrylic options
- High-build undercoats
- Stain-blocking primers
- Sandable formulations
Apply Primer Evenly: Brush, Roller, and Sprayer Tips
Pick a primer formulated for plywood to seal tannins and level the surface before you start.
Use a brush for edges, a roller for broad, even coats, and a sprayer for the fastest, smoothest finish if you can control overspray.
Work methodically and keep a wet edge so your technique gives consistent coverage.
Choose The Right Primer
One good primer choice and the right application technique will make your plywood ceiling accept paint evenly and resist tannin bleed-through.
You’ll pick primer types based on tannin-blocking, adhesion, and drying time, then plan primer application for your tools.
Consider:
- Shellac or oil-based for heavy tannins
- Acrylic for low VOC needs
- Quick-dry for multiple coats
- High-adhesion for smooth plywood
Technique For Smooth Coverage
Start by working in manageable sections so you can keep a wet edge and lay primer on smoothly; whether you use a brush, roller, or sprayer, steady, overlapping passes prevent lap marks and uneven build.
You’ll focus on surface preparation, choose primer options, and use proper roller selection.
Employ paint techniques for smooth application, address texture variations, and maintain finish consistency for accurate color matching.
Avoid Lap Marks and Roller Lines on Ceilings
When you roll paint across a plywood ceiling, work wet edges and keep a consistent pressure so the coat lays down evenly and you don’t get visible lap marks or roller lines.
Use these tips for lap mark prevention and proper roller technique:
- Maintain a wet edge across entire panel
- Reload roller frequently
- Roll in a consistent direction
- Feather out overlaps immediately
Cut In Edges Cleanly Where Ceiling Meets Wall
When the ceiling meets the wall, you’ll get the neatest line by taping off the wall with painter’s tape and pressing it down firmly.
Cut along the tape with a steady hand using a quality angled brush, keeping your strokes smooth and confident.
Peel the tape while the paint is still tacky for a crisp edge.
Use Painter’s Tape
Although taping might seem minor, using quality painter’s tape is the best way to get a sharp, clean line where the ceiling meets the wall. You’ll rely on tape techniques and edge sealing to prevent bleed.
Apply, press down firmly, remove at a 45° angle while paint’s tacky.
Tips:
- Choose low-tack tape
- Clean surface first
- Press seams with a putty knife
- Remove slowly
Cut With A Brush
Start by loading a high-quality angled sash brush with a moderate amount of paint—too much and it’ll drip, too little and you’ll make extra passes.
Work in short, steady strokes, keeping wrist steady for edge precision.
Use brush techniques like tipping and feathering to blend into rolled areas.
Pause to remove drips and reload before paint runs, maintaining a crisp seam.
Choose the Right Roller Nap for Plywood Texture
Pick a roller nap that matches the plywood’s surface: smoother plywood needs a 1/4″–3/8″ nap, while rougher or textured plywood calls for 1/2″–3/4″ to get paint into grooves and avoid streaks.
You’ll control roller texture and paint absorption by choosing nap length. Consider:
- Test on scrap
- Match primer and finish
- Use quality sleeves
- Replace when matted
Apply Topcoat for Streak-Free Coverage
Begin by applying your topcoat in long, even passes so you lay down a uniform film that minimizes roller marks and brush strokes.
Work wet edge to wet edge, maintain consistent pressure, and use high-quality rollers for topcoat techniques that reduce texture pickup.
Lightly tip with a brush only for edges.
Employ streak free methods: moderate speed, thin loads, and inspect under angled light.
How Many Coats You’ll Need and When to Stop
How many coats you’ll need depends on the type of paint, the plywood’s porosity, and the finish you want; generally two to three coats—one sealer/primer plus one or two topcoats—are sufficient for even coverage and durability.
Monitor coverage and adjust coat thickness and paint application. Stop when color is uniform and no soak-through shows.
- Inspect under good light
- Note manufacturer guidance
- Test a small area
- Track drying times
Sand Between Coats for a Polished Finish
Between coats, lightly sanding the surface removes dust nibs, levels brush or roller texture, and helps the next layer adhere, so you’ll get a smoother, more professional-looking ceiling; use a fine-grit sandpaper (220–320) or a sanding block and wipe away residue with a tack cloth before applying the next coat.
Choose sanding techniques matched to your finish types, sand gently, and clean thoroughly.
Handle Knots, Resin Bleed, and Tannin Stains
Knots can bleed through paint, so you’ll want to seal them first with a knot sealer or shellac-based primer.
If you spot resin or tannin stains, block them with a stain-blocking primer before topcoating.
Taking these steps now prevents blotches and keeps your finish uniform.
Seal Knots First
Before you prime or paint, seal any knots so resin and tannins don’t bleed through and ruin your finish.
You’ll improve knot sealing and paint adhesion by treating problem spots first. Use a shellac or stain-blocking primer, let it dry, then spot-sand.
Tips:
- Clean surface of dust and resin
- Apply primer thinly
- Recoat stubborn knots
- Test a hidden area first
Block Resin Stains
When resin or tannins start bleeding through your primer, stop them with a stain-blocking product designed for wood: shellac-based primers work fastest, while oil-based stain blockers give longer protection—choose based on your drying-time needs.
Apply a thin, even coat over knots, sand lightly when dry, then repaint. For persistent resin bleed, repeat and use solvent-cleaning before priming for reliable stain prevention.
Spray Painting a Plywood Ceiling Without Overspray
Although spray painting speeds the job, you’ll need careful setup to keep overspray off walls, fixtures, and floors.
Although spray painting speeds the job, careful setup is essential to prevent overspray on walls, fixtures, and floors.
You’ll use precise spray techniques and overspray prevention to protect surfaces and get even coverage. Prep and control matter:
- Mask edges with high-quality tape
- Hang plastic sheeting neatly
- Use a directional spray gun
- Work in controlled, overlapping passes
Maintain Consistent Drying to Avoid Color Shifts
After you’ve finished spraying and protected surrounding areas, focus on keeping drying conditions uniform so the paint cures evenly and you don’t get visible color shifts.
Use consistent drying techniques and monitor drying times; control humidity and temperature effects with fans or HVAC.
Match paint application and surface prep standards across the ceiling.
Minimize environmental factors variability to preserve color consistency and predictable finish.
Troubleshoot Blotches, Streaks, and Flashing
If you spot blotches, streaks, or flashing, you’ll want to identify the cause quickly so you don’t waste time repainting.
Check for uneven primer, excess roller pressure, or thinning from over-brushing, and adjust your technique accordingly.
Fixes usually involve spot-sanding, re-priming problem areas, and applying even, consistent coats with the right roller nap.
Identify Causes Quickly
When blotches, streaks, or flashing appear on your plywood ceiling, act quickly to spot the root cause so you can fix it before the whole surface looks uneven; common culprits include poor surface prep, uneven primer application, moisture issues, or incompatible paint layers.
Identify causes by checking:
- surface preparation gaps affecting paint adhesion
- signs of moisture damage
- inconsistent primer coverage
- poor color selection or layer incompatibility
Correct Application Techniques
Now that you’ve ruled out surface and moisture problems, focus on how you apply primer and paint to stop blotches, streaks, and flashing.
Use consistent application methods: work in wet edges, maintain even pressure, and avoid overloading the roller.
Sand between coats for uniform paint adhesion, thin slow-drying coats if needed, and inspect under varied light to catch flaws early.
Hide or Emphasize Plywood Seams With Paint and Trim
Whether you want the ceiling to read as a smooth, continuous surface or to showcase the plywood’s natural grid, paint and trim give you clear options: You can hide seams or highlight them deliberately.
Use seam hiding techniques and trim options strategically:
Use seam-hiding techniques and trims strategically to either blur joints or make the plywood grid sing.
- Feather primer and sand joints
- Paint seams same color as panels
- Add narrow battens for contrast
- Install shadow gaps for pattern
Finish Exposed Plywood Edges So They Look Intentional
Don’t leave raw plywood edges looking accidental—sand and smooth them first so they read clean and intentional.
You can add thin edge trim to define the perimeter or blend it with the ceiling plane.
Finish everything with a clear sealer to protect the edges and keep the grain consistent with the painted surface.
Sand and Smooth Edges
Sand the exposed plywood edges smooth so they read as a deliberate design detail rather than a rough afterthought.
You’ll use sanding techniques and focus on edge smoothing to prep for finish coats. Work consistently, remove splinters, and feather changes.
- Start with coarse grit, finish with fine
- Sand with the grain
- Check for hollows and high spots
- Clean dust before priming
Apply Edge Trim
Add a clean trim to the exposed plywood edges to give the ceiling a finished, intentional look.
Choose edge trim styles—simple square, bullnose, or decorative molding—to match your room. Cut and fit trim carefully, glue and nail into place, then fill gaps and sand.
Select edge trim materials like wood, PVC, or MDF for durability and paintability so the ceiling reads as intentional.
Seal With Clear Finish
Seal the exposed plywood edges with a clear finish to protect them and make the trim look intentional and professional.
You’ll appreciate clear finish benefits: durability, moisture resistance, and enhanced grain. Use careful application techniques to avoid drips.
Follow steps below:
- Sand edges smooth before finishing
- Wipe dust with tack cloth
- Apply thin, even coats with a brush
- Lightly sand between coats
Integrate Trim, Beams, and Lighting With the Ceiling
When you’re tying trim, exposed beams, or light fixtures into a painted plywood ceiling, plan how each element will contrast or blend so the room reads as one cohesive surface. Use ceiling integration techniques and lighting placement strategies to align finishes, hide fasteners, and center fixtures.
| Element | Finish | Tip |
|---|---|---|
| Trim | Matte | Miter joints tight |
| Beams | Stain | Highlight grain |
| Lights | Flush | Center on panels |
Choose Wall and Trim Colors to Complement a Painted Plywood Ceiling
Now that your ceiling elements are harmonized, pick wall and trim colors that reinforce the room’s mood and make the plywood ceiling read as intentional rather than an afterthought.
Use color psychology and texture harmony to guide choices. Consider:
Let color psychology and texture harmony guide your choices—match undertones, contrast trim, and test samples in varied light
- Match undertones for cohesion
- Contrast trim to frame ceilings
- Use muted walls to highlight texture
- Test samples in different light
Create Effects: Whitewash, Lime, or Full-Coverage Looks
Decide how much wood grain you want to show—whitewash keeps it visible, limewash softens it, and full coverage hides it.
Try different techniques on a scrap piece to test opacity and texture before you commit. Small changes in brush pressure, dilution, or number of coats will give you distinct surface effects.
Choosing Your Desired Opacity
Because the opacity you choose sets the room’s mood and maintenance needs, pick a finish that fits both style and practicality: You’ll weigh opacity levels, finish options, color choices, aesthetic impact, light reflection, maintenance tips, design considerations, and application techniques to decide whitewash, lime, or full coverage.
Consider:
- Sheer whitewash for subtle grain
- Semi-opaque for balance
- Opaque for uniformity
- Test swatches under light
Technique Variations For Texture
Play with brushes, rags, and glazes to get the textured ceiling effect you want—whitewash keeps the grain visible, lime wash gives a soft, chalky patina, and full-coverage hides knots for a smooth, uniform look. Choose texture techniques and finish variations to match mood: rustic, airy, or refined.
| Feeling | Result |
|---|---|
| Warm | Grain shows |
| Calm | Chalky patina |
| Clean | Smooth hide |
Maintain and Touch Up a Painted Plywood Ceiling
Keeping a painted plywood ceiling looking fresh means catching issues early and using the right fixes—cleaning, spot-priming, and touch-up paint will handle most problems without a full repaint.
Catch issues early: clean, spot-prime, and feather touch-up paint to keep plywood ceilings looking freshly painted.
You’ll follow a Maintenance schedule, use Cleaning methods, perform Seam inspection, and apply Surface preparation for Repairs.
Focus on Touch up techniques, Color matching, Repair strategies, and Paint longevity:
- Inspect seams and joints
- Clean stains gently
- Prime bare spots
- Feather touch-up paint
How Humidity and Seasons Affect Painted Plywood Ceilings
When humidity rises or the seasons shift, your painted plywood ceiling will expand, contract, and react differently than painted drywall.
So you need to monitor and adapt your maintenance habits accordingly. Track humidity effects and moisture levels; note seasonal changes and temperature fluctuations that affect plywood durability.
Adjust painting timelines and follow weather considerations to protect finish longevity, reducing cracks, peel, and warping.
Protect Your Painted Ceiling From Stains and Smoke
Prevent stains and smoke damage by creating simple routines that stop contaminants from reaching your painted plywood ceiling.
Use stain resistance primers and clean filters to reduce airborne particles. Follow maintenance tips and spot-clean gently to keep finishes intact for ceiling longevity.
- Replace kitchen exhaust filters regularly
- Ban indoor smoking or use air purifiers
- Wipe grease with mild detergent
- Inspect for discoloration monthly
Repaint or Repair Areas Without Redoing the Whole Ceiling
Even with good care, small stains, scuffs, or flaking paint will happen, and you don’t have to redo the entire plywood ceiling to fix them. Use spot cleaning, light sanding, primer, and matched paint; try touch up techniques and routine ceiling maintenance to blend repairs. Quick fixes preserve finish and save time.
| Issue | Fix |
|---|---|
| Stain | Clean + primer |
| Scuff | Light sand |
| Flake | Patch + paint |
| Small hole | Wood filler |
| Discolor | Feathered blend |
Estimate Costs and Budget: DIY vs Hiring Pros
You’ll want to compare a DIY cost breakdown—paint, primer, tools, and any scaffolding—against professional quote factors like labor, prep time, and cleanup.
Think about how warranties, finish quality, and time saved affect long-term value. That way you can choose the option that fits your budget and expectations.
DIY Cost Breakdown
Tackling a plywood ceiling yourself can shave hundreds of dollars off the job, but you’ll need to weigh material, tool, and time costs against hiring pros.
Use cost estimation and budget planning to decide. Compare expenses:
- Paint, primer, caulk
- Sandpaper, rollers, brushes
- Rental ladders/scaffolding
- Unexpected touch-ups and wasted materials
Track receipts to stay on budget.
Professional Quote Factors
When you’re comparing DIY costs to professional quotes, focus on the line items contractors include so you can make an apples-to-apples comparison: labor rates, material markups, surface prep (cleaning, sanding, priming), scaffolding or access fees, waste disposal, and any warranty or cleanup charges.
Ask for detailed estimates, compare professional insights on timelines and painting techniques, and factor in permits, insurance, and travel fees.
Long-Term Value Comparison
Although DIY painting can save money upfront, comparing long-term value means weighing ongoing costs, time, and risk against the contractor’s higher initial price.
You should do an investment analysis focused on durability and cost efficiency; decide if your time and potential rework justify savings.
- Material quality differences
- Labor time versus hourly rates
- Warranty and liability
- Resale value impact
When to Hire a Pro for High or Complex Ceilings
If your ceiling sits above 10–12 feet, has steep angles, layered soffits, or fragile finishes, you should consider hiring a pro—these conditions raise safety risks and make getting even coverage hard with DIY gear.
You’ll benefit from Pro Ceiling Techniques and Complex Ceiling Considerations: scaffold use, spray application, substrate repair, and controlled ventilation.
Hiring saves time, reduces mistakes, and protects finishes and yourself.
How to Brief a Contractor and Set Finish Expectations
Before work starts, give your contractor a clear, written brief that covers scope, timeline, budget, materials, and the exact finish you want so everyone knows what success looks like.
Define contractor communication and finish specifications, then confirm approvals, samples, and cleanup.
Include:
- exact paint type and sheen
- sample board approval
- touch-up plan
- inspection checklist
Achieve a High-End Look on a Budget With Smart Choices
You don’t need to spend a fortune to make a plywood ceiling look upscale; picking a quality paint with good coverage and durability is the first smart choice.
Focus your effort on visible details—seams, fastener heads, and trim—and you’ll raise the perceived finish without costly upgrades.
With careful prep and the right products, you’ll get a clean, high-end result on a budget.
Choose Quality Paint
Choosing the right paint makes the biggest visible difference when you want a high-end plywood ceiling without overspending.
You’ll pick based on paint types and proper surface preparation, balancing durability and sheen. Consider:
- High-quality acrylic for longevity
- Satin for subtle reflection
- Primer suited to plywood
- Low-VOC for indoor comfort
You’ll save by choosing smart, durable options that mask imperfections.
Refine Visible Details
Now that you’ve picked paint that balances durability and sheen, focus on the visible details that make a plywood ceiling read as high-end: crisp seams, consistent grain direction, neatly filled screw holes, and clean edges where the ceiling meets trim.
Sand and prime joints to minimize visible textures, caulk gaps, and touch up edges. These small moves elevate ceiling aesthetics without costly materials.
Case Studies: Cabin, Loft, and Garage Ceiling Approaches
Although each space has its own character and constraints, you’ll find the same basic steps apply: prep the plywood, pick a finish that suits the room’s use and style, and apply paint with attention to seams and fasteners.
Tailor case studies to function and look:
- Cabin aesthetics: rustic charm, warm stains, texture options
- Loft designs: modern appeal, bold color choices, sleek ceiling techniques
- Garage finishes: durable paint, utilitarian color choices, easy-clean textures
Common Mistakes to Avoid When Painting Plywood Ceilings
When you move from planning finishes to actual painting, knowing common pitfalls will save time and keep the ceiling looking professional.
You’ll avoid common plywood issues by using proper preparation techniques, choosing primers wisely, and following paint selection tips.
Focus on ceiling texture considerations, drying time importance, handling imperfections effectively, avoid messy edges, use correct paint application methods to achieve even finish.
Quick Checklist: Step-by-Step Sequence to Paint a Plywood Ceiling
Gather your tools and follow this streamlined checklist to paint a plywood ceiling efficiently and with professional results.
First prep: clean, sand, fill gaps, consider ceiling textures and color psychology for mood.
Prime well. Paint edges, then roll in sections. Finish with a second coat once dry.
- Clear workspace and protect floors
- Sand and repair seams
- Prime evenly
- Roll two thin coats
Frequently Asked Questions
Can I Paint Plywood Ceiling Joists or Leave Them Natural?
You can—paint joists for cohesion or leave them natural for contrast; it’s your call. Embrace plywood aesthetics and prioritize ceiling maintenance, since painted joists hide flaws while natural wood highlights grain and requires more upkeep.
Will Painted Plywood Ceiling Affect Indoor Air Quality or VOCS Long-Term?
Yes — painted plywood can emit VOCs initially, but low‑VOC paints and good indoor airflow will reduce long‑term VOCs emission; you’ll minimize odors and health risks by sealing properly, ventilating during and after painting.
How Do I Deal With Existing Popcorn or Textured Ceiling Over Plywood?
You’ll remove popcorn texture removal carefully, testing for asbestos first; wet and scrape small sections, repair plywood, sand, and use ceiling preparation techniques like skim-coating or a thin joint compound before priming and painting for a smooth finish.
Can I Install Recessed Speakers or Fixtures After Painting Without Repainting?
Yes — you can install recessed speakers or fixtures after painting without repainting, provided you plan speaker installation and fixture placement beforehand, protect paint edges, use compatible mounts, and touch up any scuffs or gaps after cutting and securing.
What’s the Best Way to Repair Water-Damaged Plywood Ceiling Panels?
You’ll act like a ceiling surgeon: cut out rotten plywood, dry the cavity, treat mold, install new plywood, tape and mud seams, sand, prime, and paint—address water stains promptly to prevent bigger issues and aid ceiling maintenance.
