
Can You Use Exterior Paint on Metal Surfaces? Here’s What to Know
Yes — you can use exterior paint on metal if you prep and prime it properly. Clean and dry the surface, degrease, remove rust, smooth edges, and wipe away dust. Match a rust-inhibiting primer to the metal (epoxy for steel, self-etching for aluminum), then choose oil-based enamel for durability or acrylic latex for flexibility. Apply primer within 24 hours of sanding and inspect for chips later. Keep going to learn step-by-step prep, primer, and finish tips.
Who This Guide Is For
This guide is for homeowners, DIYers, and maintenance pros who need durable, weather-resistant paint solutions for metal surfaces like railings, gutters, HVAC units, and exterior trim.
You’re the target audience if you plan or supervise painting projects on metal.
You’ll get concise, practical steps—surface prep, primer choice, and durable coatings—so you can finish jobs faster and avoid common metal-painting pitfalls.
Quick Answer: Can You Use Exterior Paint on Metal?
Wondering if exterior paint will hold up on metal? You can—if you address metal paint compatibility, prep the surface, use rust-inhibiting primer, and pick coatings designed for adhesion.
Exterior finish options include acrylic enamel, oil-based and hybrid formulas; each offers varying durability and sheen. Match paint to exposure conditions, follow manufacturer instructions, and you’ll get a lasting, protective coat on metal.
Which Metal Surfaces: Railings, Fixtures, Furniture
Now that you know exterior paints can work on metal with the right prep and primer, consider which metal items you’re painting: railings, light fixtures, outdoor furniture, gutters, and ornamental hardware each pose different challenges. You’ll plan metal railing maintenance, protect finishes, and extend outdoor furniture longevity.
| Surface | Concern |
|---|---|
| Railings | Rust spots |
| Fixtures | Heat/fading |
| Furniture | Wear/weathering |
When Exterior Paint Alone Works on Metal
If the metal is clean, dry, and free of rust or loose coating, exterior paint alone can perform well—especially on galvanized or powder‑coated pieces that already have a stable surface.
You’ll enjoy exterior paint benefits when you follow basic metal surface considerations and prep correctly.
- Clean with degreaser
- Lightly abrade for adhesion
- Use rust‑inhibiting primer when unsure
- Apply thin, even coats
- Allow proper cure time
When Exterior Paint Isn’t Enough
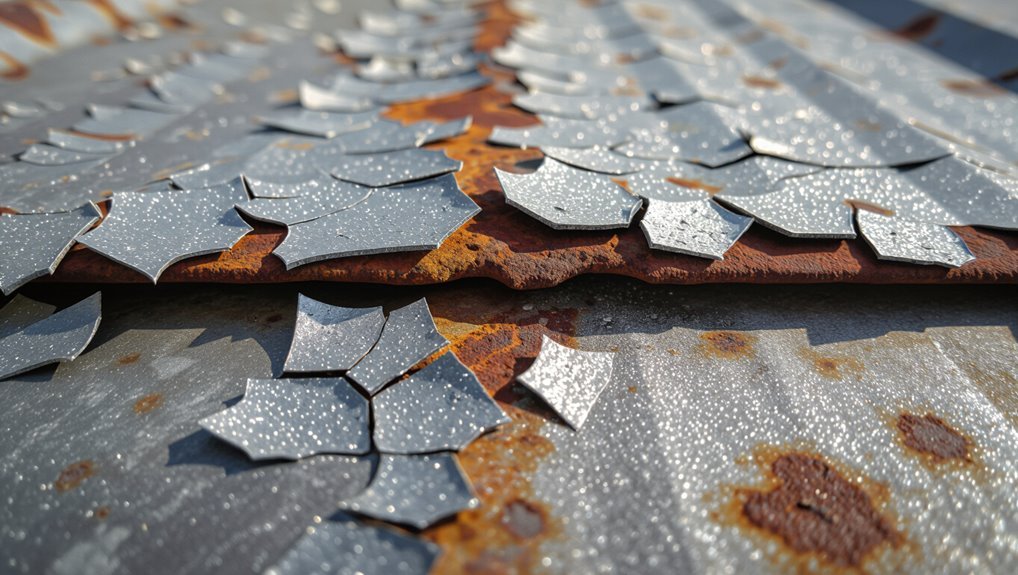
Sometimes plain exterior paint won’t cut it—you’ll need thorough surface prep to remove rust and contaminants before you paint.
Check primer compatibility carefully, because the wrong primer can cause peeling or poor adhesion.
For long-term protection you may need specialized coatings or corrosion inhibitors rather than just a topcoat.
Surface Preparation Needed
When exterior paint alone won’t protect metal, you’ll need to strip rust, remove old coatings, and clean the surface thoroughly before applying anything new.
You’ll assess surface types and choose appropriate painting techniques to guarantee adhesion and durability.
- Degrease with solvent
- Remove rust mechanically
- Strip peeling coatings
- Smooth and sand edges
- Wipe with tack cloth
Primer Compatibility Issues
Because metal and primers vary in chemistry and purpose, you’ll need to match them carefully to avoid peeling, bubbling, or poor adhesion. You’ll face primer compatibility challenges; use primer selection criteria like metal type, coating chemistry, and environment. Pick zinc or epoxy primers for bare steel, etch primers for aluminum, and test adhesion before full application.
| Metal | Primer | Use |
|---|---|---|
| Steel | Epoxy | Durable |
| Aluminum | Etch | Adheres |
| Galvanized | ZP | Protects |
Long-Term Corrosion Protection
If exterior paint alone can’t stop rust from advancing, you’ll need to add systemic corrosion controls that go beyond surface coatings.
You should combine corrosion prevention tactics with regular metal maintenance to protect structure and function.
Consider these measures:
- Galvanization or sacrificial anodes
- Epoxy or ceramic linings
- Cathodic protection systems
- Design for drainage and ventilation
- Scheduled inspections and touch-ups
Exterior Paint Types That Work on Metal
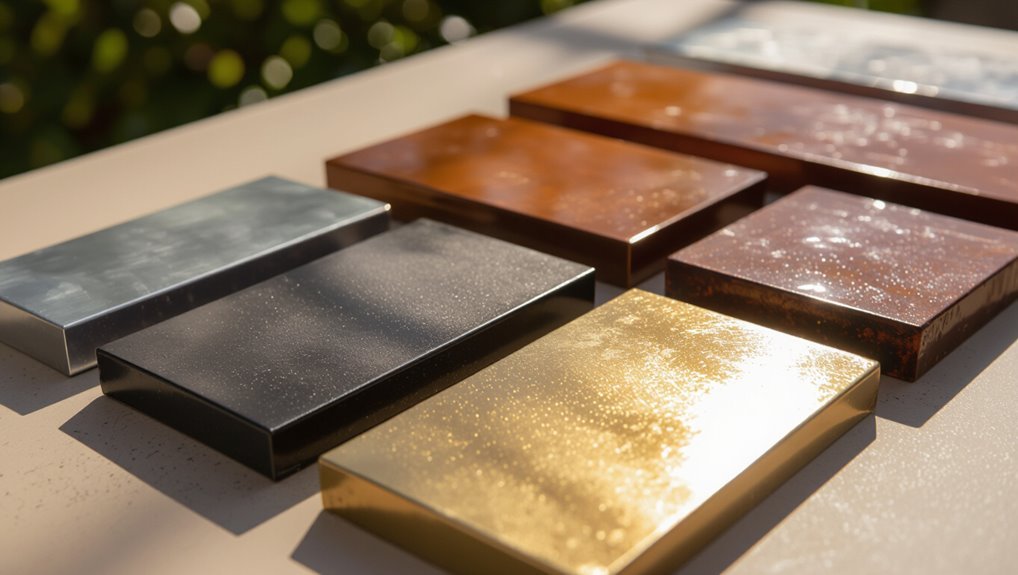
You’ll want to pick a paint system suited to metal, starting with oil-based enamel paints for tough, durable finishes.
Use a rust-inhibiting primer underneath to stop corrosion before it starts.
For easier cleanup and flexibility, consider acrylic latex variants formulated for metal.
Oil-Based Enamel Paints
Oil-based enamel paints provide a durable, glossy finish that resists chipping and stands up well to moisture and temperature changes on metal surfaces.
You’ll appreciate oil durability and smooth enamel finishes for long-lasting protection and appearance.
- Strong adhesion
- High gloss retention
- Weather resistance
- Easy to clean
- Smooth leveling
Rust-Inhibiting Primers
When metal’s exposed to moisture and oxygen, rust starts the countdown—and a rust-inhibiting primer stops it before it begins.
You should pick primers formulated for metal to block corrosion, follow primer application techniques like cleaning, sanding, and thin even coats, and pair them with compatible topcoats.
These rust prevention strategies extend service life and simplify maintenance, saving time and money.
Acrylic Latex Variants
Acrylic latex paints offer durable, flexible finishes that adhere well to properly prepped metal, and they come in several formulations tailored to outdoor use.
You’ll get acrylic durability plus latex flexibility for expanding, contracting surfaces. Choose high-build or low-VOC blends depending on exposure, and always prime.
Recommended options:
- 100% acrylic exterior
- Acrylic-enamel hybrid
- Low-VOC latex
- High-build latex
- Fast-dry acrylic
Why Oil-Based Paints Bond to Metal
Because metal surfaces are often smooth and nonporous, oil paints rely on molecular attraction and solvent-driven wetting to form a durable bond with them.
You’ll appreciate oil based advantages like slower curing, deeper film build, and better penetration into tiny imperfections.
Those traits enhance metal adhesion, resist moisture, and provide a hard, long-lasting coating ideal for exterior metal fixtures and trim.
Why Acrylic-Latex Is Popular Outdoors
You’ll find acrylic-latex is a top pick for outdoor metal because it resists sun, rain, and temperature swings without chalking or cracking.
It’s also flexible, so it moves with the metal instead of splitting as conditions change.
And cleanup is simple — soap and water do the job, saving time and harsh solvents.
Weather Resistance Benefits
When you need paint that stands up to sun, rain, and shifting temperatures, acrylic-latex delivers dependable weather resistance without special maintenance; its flexible film resists cracking and sheds moisture while still allowing trapped vapor to escape.
You get weatherproof coatings with proven seasonal durability for metal exteriors.
- UV resistance
- Water shedding
- Freeze-thaw resilience
- Breathable barrier
- Corrosion inhibition
Easy Cleanup And Flexibility
If you want a finish that’s forgiving during application and simple to maintain afterward, acrylic-latex fits the bill: you’ll appreciate easy cleanup methods—soap and water remove brushes and spills—and flexible application techniques that suit brushes, rollers, or sprayers.
It stretches with metal’s temperature shifts, resists cracking, and lets you redo spots quickly, making outdoor metal projects less stressful and more efficient.
Specialty Metal Paints: Enamel, Epoxy, Marine
Although each type of specialty metal paint serves a distinct purpose, you’ll choose among enamel, epoxy, and marine coatings based on durability, surface compatibility, and exposure conditions.
You’ll prefer enamel for glossy finish and enamel benefits, epoxy for unmatched epoxy durability, and marine for saltwater marine applications.
Consider primers, surface prep, curing time, ventilation, and expected lifespan.
Powder Coating vs. Exterior Paint
Because powder coating fuses dry pigment and resin into a hard, uniform finish, you’ll get far greater durability and chip resistance than with conventional exterior paint. You should weigh Powder Benefits like longevity and low maintenance against Paint Durability advantages like ease of touch-up and color variety. Decide by use, budget, and desired finish.
| Feature | Powder | Paint |
|---|---|---|
| Durability | High | Medium |
| Maintenance | Low | Moderate |
| Repairability | Hard | Easy |
How Rust and Corrosion Affect Paint
You’ll see that rust and corrosion will quickly break paint adhesion if you don’t prepare the surface properly, so you should remove loose scale and feather edges before painting.
Use a corrosion-inhibiting primer to block further metal decay and give topcoats something to stick to.
For long-term protection, combine proper prep, the right primer, and durable topcoats or coatings designed for metal.
Surface Preparation Importance
When metal’s protective coating breaks down and rust takes hold, paint can’t bond properly and will fail prematurely.
So you need to remove corrosion and create a clean, stable surface before applying exterior paint. You’ll eliminate surface contaminants, improve paint adhesion, and extend finish life.
Follow steps:
- Degrease thoroughly
- Remove loose rust
- Abrade to bare metal
- Clean dust away
- Dry completely
Primer For Corrosion
Although rust looks like surface damage, it actually undermines paint adhesion and eats away the metal beneath, so you need a primer formulated to stop corrosion before you paint.
You should remove loose scale, apply a rust-inhibiting primer, and let it cure. That primer creates a bond, aids corrosion prevention, and simplifies ongoing metal maintenance so paint performs and lasts.
Long-Term Protection Methods
1 key way to keep painted metal lasting is to stop rust before it spreads, because corrosion not only flakes paint but also breaks the bond between coating and substrate.
You should use primers with corrosion inhibitors, control environmental factors, and maintain coatings regularly to prevent undercutting and failure.
- clean surface
- apply inhibitor primer
- use compatible topcoat
- monitor exposure
- repair chips promptly
Assessing Your Metal Surface Before Painting
Before you reach for paint, take a close look at the metal so you know exactly what prep it needs.
You’ll perform a metal surface assessment: check for coatings, adhesion, and contaminants.
Note whether the surface is smooth or porous, bare or previously painted.
These painting considerations guide primer choice, cleaning method, and compatibility tests so your exterior paint will adhere and last.
Removing Rust and Loose Paint Safely
Before you paint, you’ll need to remove all rust and strip any loose paint so the new coating will adhere properly.
Use a wire brush, sandpaper, or a rust remover to get down to clean metal, then wipe away dust and residue.
Don’t skip this step—any remaining rust or flaky paint will cause premature failure of your finish.
Remove Rust Completely
Start by tackling all rust and flaking paint until you reach clean, sound metal—any remaining corrosion will keep spreading under new coatings.
You’ll remove rust fully, then treat and prime quickly to enable rust prevention and routine maintenance strategies.
- Wire-brush or sand to bright metal
- Use rust converter where needed
- Clean thoroughly with solvent
- Dry completely before priming
- Apply corrosion-inhibiting primer
Strip Loose Paint
Strip away any loose paint and remaining rust flakes until the substrate feels solid—if paint peels or gouges, it won’t hold the new coating.
You should use scrapers, wire brushes, or a power sander for effective paint stripping, then clean debris and grease.
Follow with appropriate surface treatment—primer or rust converter—so the exterior paint bonds and resists future corrosion.
When to Use Chemical Rust Converters
If rust covers only the surface and the metal still feels solid, you can often treat it with a chemical rust converter rather than grinding it all away.
You’ll get a stable base for paint and chemical applications that aid rust prevention.
Consider these steps:
- Assess surface solidity
- Remove loose flakes
- Apply converter evenly
- Allow full cure time
- Prime before painting
Cleaning Metal for Best Adhesion
Before you paint, remove all rust down to clean metal so the coating can grab hold.
Then degrease and wash the surface to get rid of oils, dirt, and salts that will block adhesion.
Finally, scuff or abrade the metal to create a rough profile that helps primers and paint bond.
Remove Rust Completely
Start by removing all loose rust, scale, and flaking paint so the new coating can bond to solid metal rather than debris.
You’ll use wire brushes, sandpaper, or power tools to reach bare metal, then select appropriate rust prevention tips and metal treatment methods to treat remaining corrosion before priming.
- Wire brush
- Sandpaper grades
- Power sanding
- Rust converter
- Metal primer
Degrease And Clean
Scrub the surface thoroughly to remove oil, grease, dirt, and any remaining contaminants so your primer can form a solid bond with the metal.
Use degreasing techniques like solvent wiping or a biodegradable degreaser, following instructions and rinsing well.
Choose appropriate cleaning products—mild detergents for light grime, commercial degreasers for heavy oil—and dry completely before priming to guarantee lasting adhesion.
Scuff For Better Bond
Roughen the metal surface lightly with a scuff pad or fine-grit sandpaper to give primer something to grip; a uniform, dull finish—rather than deep scratches—provides the best mechanical bond.
You’ll use scuff techniques to boost adhesion and achieve measurable bond improvement before priming.
- Use 220–320 grit sandpaper
- Sand along contours
- Remove dust with tack cloth
- Inspect for glossy spots
- Apply primer within 24 hours
Best Cleaners and Degreasers for Metal
Wondering which cleaner will give you a sound, paint-ready metal surface? You’ll want degreasers and cleaners that remove oil, rust scale, and contaminants. Use purpose-made cleaning solutions for metal maintenance: citrus degreasers, trisodium phosphate alternatives, and dedicated metal cleaners. Rinse thoroughly and let dry before priming.
| Product | Best for |
|---|---|
| Citrus Degreaser | Heavy oil |
| TSP Substitute | Grease |
| Solvent Cleaner | Paint residue |
| Phosphoric Cleaner | Rust |
| Water & Detergent | Light dirt |
When and How to Sand Metal
After you’ve cleaned and degreased the metal, sanding gives the surface the right profile for primer and paint to stick.
You’ll choose sanding techniques based on rust, scratches, and desired metal finishes. Sand evenly, use progressively finer grits, and remove dust before coating. Consider power or hand sanding for control.
- Start with coarse grit
- Progress to medium
- Finish with fine grit
- Clean between steps
- Inspect for uniform profile
Choosing a Primer for Metal Surfaces
Before you pick a primer, you’ll need to finish surface prep: clean, remove rust, and sand to a smooth, keyed finish.
Then choose the primer type—rust-inhibiting, etch, or bonding—based on the metal and exposure conditions.
I’ll explain the pros and proper use of each so you can get reliable adhesion and corrosion protection.
Surface Preparation Steps
One essential step in prepping metal for exterior paint is choosing the right primer, since it bonds to metal, blocks corrosion, and creates a surface the topcoat can adhere to.
You’ll follow surface cleaning, rust removal, and select prep tools suited to metal types while considering environmental factors to boost paint adhesion, coating durability, and long-term maintenance practices.
- Clean surface thoroughly
- Remove rust
- Degrease and sand
- Match primer to metal type
- Plan for curing conditions
Primer Types Explained
Now that the metal’s cleaned, rust-free, and properly sanded, you’ll choose a primer that matches both the metal type and the environmental conditions where the piece will live.
For steel, use a rust-inhibiting epoxy; for aluminum, use a self-etching or acrylic primer.
Consider primer benefits like adhesion and corrosion protection, and follow manufacturer primer application instructions for drying times and recoating intervals.
Zinc-Rich Primers: When to Use Them
Although zinc-rich primers cost more up front, you’ll want them whenever steel will face prolonged exposure to moisture, salt, or industrial pollutants.
They suit zinc applications that prioritize cathodic protection and long-term corrosion resistance. Use them on bridges, marine hardware, and structural steel.
Consider surface prep and topcoat compatibility.
- Bridges
- Marine fittings
- Industrial frameworks
- Outdoor signage
- Pipeline supports
Self-Etching Primers: Pros and Cons
When you need fast adhesion on bare or slightly weathered metal, self-etching primers give a reliable chemical bite without the heavy sanding that other primers demand.
You’ll weigh Self etching benefits against Surface compatibility; smart Primer selection and Application techniques guarantee Metal adhesion and Surface bonding.
Proper Coating methods boost Paint durability and Primer effectiveness while aiding Rust prevention for long-lasting results.
Rust-Inhibiting vs. General-Purpose Primers
Self-etching primers give you quick adhesion on clean or lightly corroded metal, but they don’t all offer the same corrosion protection as dedicated rust-inhibiting primers.
You’ll choose based on durability and rust prevention needs; primer selection matters for longevity and paint bonding.
- Surface compatibility
- Corrosion resistance rating
- Drying time
- Topcoat adhesion
- Environmental exposure
Matching Primer to Metal and Conditions
You’ll want to pick a primer that matches the metal type—steel, aluminum, and galvanized surfaces each need different chemistry.
Start by preparing the surface (clean, remove rust, and scuff or etch as recommended) so the primer can bond properly.
Check the primer’s compatibility chart and environmental recommendations to guarantee it’s suited to your metal and the conditions it’ll face.
Metal Type Matters
Although different metals might look similar, each needs a primer matched to its composition and the conditions it’ll face; pick the wrong one and the paint won’t bond, will peel, or corrosion will continue underneath.
You should choose primers that prevent metal corrosion and promote paint adhesion. Consider these factors:
- Type: steel, aluminum, galvanized
- Exposure: marine, urban, sheltered
- Compatibility: solvent vs. waterborne
- Temperature tolerance
- Topcoat chemistry
Surface Preparation Steps
Preparation is where a paint job lives or dies, so match your primer choice to the metal type and the environment before you apply anything.
You’ll do surface cleaning, remove rust, and choose primer selection to boost paint adhesion and rust prevention.
Use proper painting techniques for outdoor durability and desired finish options, weigh environmental impact, and follow maintenance tips to extend results across metal types.
Primer Compatibility Guide
1 key to long-lasting metal paint is picking a primer that matches both the metal type and the conditions it’ll face; this primer acts as the bond between substrate and topcoat and prevents corrosion, so select formulations specifically for steel, aluminum, galvanized surfaces, or exotic alloys and for whether the piece will be exposed to salt air, high humidity, or heavy wear.
- Zinc-rich for bare steel
- Etching for aluminum
- Galvanized-specific primers
- High-build for repairs
- Conversion coatings for exotic alloys
Match primer types to conditions and follow proper application techniques to guarantee adhesion and corrosion resistance.
Brush vs. Roller vs. Spray: Choosing a Method
When you’re choosing between a brush, roller, or sprayer for metal surfaces, think about the shape, texture, and size of the piece—each method gives different control, finish, and speed. You’ll weigh brush techniques, roller advantages, spray tips, method comparisons, application efficiency, finish quality, surface coverage, and project suitability.
| Emotion | Choice |
|---|---|
| Calm | Brush |
| Proud | Roller |
| Excited | Spray |
| Confident | Combine |
Thinning Paint for Spraying Metal
When you’re shooting exterior paint on metal, choose a thinner that’s compatible with the paint’s base—water for acrylics, mineral spirits for alkyds.
You’ll also need to test and adjust viscosity ratios to get consistent atomization without runs. Start with the manufacturer’s recommended dilution, then fine-tune by spraying small patches.
Proper Thinner Selection
Although metal paints often look ready straight from the can, you’ll usually need to thin them for spray application to get proper atomization and an even finish.
Choose compatible thinner types, follow manufacturer guidance, and match application techniques to sprayer specs. Test small batches. Use recommended PPE.
- solvent type
- water-based options
- reducer compatibility
- drying time
- cleanup method
Adjusting Viscosity Ratios
Because spray performance hinges on paint viscosity, you’ll need to thin metal coatings to the right ratio rather than guessing—measure and adjust so the paint flows smoothly through your gun without runs or dry spray. Use viscosity measurement tools to track paint consistency, start with manufacturer ratios, test spray, and tweak until atomization and coverage meet specs.
| Ratio | Thinner | Result |
|---|---|---|
| 10% | X | Good |
| 20% | Y | Thin |
How Many Coats Metal Needs
A typical metal project usually needs two coats of paint: a single full coat to seal and a second to guarantee even coverage and durability.
You should mind Coat Thickness and use proper Application Techniques to avoid runs and thin spots.
- Clean surface
- Prime if needed
- Apply first even coat
- Lightly sand between coats
- Apply final coat for protection
Drying Times and Recoat Windows for Metal
Temperature affects how fast paint and primer cure, so you’ll want to check surface temps before you start.
Primer usually needs more time to set on metal than on wood, and the label will give specific drying times you should follow.
Aim to recoat within the manufacturer’s recommended window—too soon causes lifting, too late can hurt adhesion.
Surface Temperature Effects
When metal gets cold or hot, it changes how paint dries and how long you’ll wait before recoating; you’ll notice faster tack-free times in heat but longer cure and recoat windows in cooler conditions.
- Monitor surface heat before painting.
- Warm surfaces speed solvent evaporation.
- Cold slows polymer crosslinking.
- Extreme heat can weaken paint adhesion.
- Plan longer recoat windows in low temperatures.
Primer Drying Time
Since surface temperature affects how paint cures and how long you’ll wait between coats, you’ll also see those same factors shape primer drying times on metal.
You should expect primer drying times to vary with humidity, temperature, wind, and metal mass.
Check manufacturer specs, wait longer in cold or humid conditions, and use fans or heaters cautiously to control environmental factors for consistent curing.
Optimal Recoat Window
Although metal primers and topcoats can feel dry to the touch fairly quickly, you should wait for the manufacturer’s recommended recoat window to avoid adhesion problems and uneven finish.
You’ll guarantee ideal timing and understand recoat importance by following guidelines and weather conditions.
- Check label recoat window
- Confirm surface temperature
- Avoid high humidity
- Lightly sand between coats
- Allow full cure before exposure
Avoiding Runs, Drips, and Orange Peel
3 simple habits will prevent most runs, drips, and orange peel when you paint metal: control your spray technique, manage paint viscosity, and keep consistent distance and speed.
Use steady paint application techniques, short overlapping passes, and thin coats.
Sand between coats to minimize surface texture effects.
Inspect under good light, adjust flow and gun settings, and let each coat level before recoating.
Best Weather and Temperatures for Painting Metal
Even with perfect technique and thin, even coats, weather and temperature will make or break your finish on metal. You should follow clear temperature guidelines and consider weather impact before painting.
Aim for steady, moderate conditions and avoid extremes. Check forecast and use proper coatings rated for ambient temps.
- Paint when temps are stable
- Avoid freezing conditions
- Skip very hot days
- Prefer mild sunlight
- Watch wind speed
How Humidity and Dew Affect Metal Painting
When humidity climbs or dew forms, your paint’s adhesion and drying times change dramatically.
You should plan around moisture to avoid blistering, streaking, or poor bonding.
Check humidity effects before starting: paint won’t cure properly if air is saturated or surface temperature nears the dew point.
Wait for lower humidity, warmer surfaces, and follow product limits to guarantee proper adhesion and finish.
Preventing Future Rust: Maintenance Tips
To keep painted metal from returning to rust, inspect it regularly and address any chips or scratches the moment you spot them; small bare spots are the usual entry point for moisture and corrosion.
You should use Maintenance scheduling and Routine checks to preserve Corrosion resistance with Protective coatings and Surface treatments. Follow simple Cleaning methods and Seasonal inspections:
- Clean and dry before touch-up
- Apply rust inhibitor promptly
- Use compatible surface treatments
- Track Maintenance scheduling dates
- Inspect seals and joints regularly
Seasonal Touch-Up Strategy for Outdoor Metal
Start by prepping and cleaning the metal so paint adheres and you can spot damage.
Do a seasonal rust inspection—focus on joints, edges, and areas with chipped coating.
Schedule touch-up paint shortly after inspection and when temperatures and humidity suit the product’s instructions.
Prep And Clean First
Scrub and inspect the metal surface before you touch any paint — seasonal cleanings remove dirt, loose rust, and old flaking paint so your touch-up will adhere and last.
Use proven metal cleaning techniques and consider paint adhesion factors to optimize results. Do these steps each season:
- Degrease with detergent
- Remove loose paint
- Lightly sand smooth
- Rinse thoroughly
- Dry completely
Seasonal Rust Inspection
When you inspect metal outdoors each season, look for early signs of rust—tiny pinholes, bubbling paint, or brown-orange streaks—so you can catch corrosion before it spreads.
Note affected spots, remove loose flakes, and clean surfaces promptly. Regular seasonal maintenance limits damage and supports rust prevention.
Keep a simple log of inspections and minor repairs so small problems don’t become big ones.
Touch-Up Paint Timing
Because outdoor metal weathers unevenly, you should plan touch-ups around seasonal cycles rather than waiting for visible rust to spread.
Use proactive timing strategies: inspect early spring and late fall, address scratches after winter thaw, and do minor maintenance mid-summer. Apply touch up techniques promptly to prevent corrosion growth.
- Inspect quarterly
- Prioritize high-exposure areas
- Clean before painting
- Match primer type
- Record touch-up dates
Choosing Durable Colors and Finishes
Picking durable colors and finishes starts with balancing aesthetics and longevity: darker, glossier paints hide stains and shed water better, while lighter, matte tones resist fading in intense sunlight.
You should consider color psychology to match mood and context, and prioritize finish durability for exposure and abrasion.
Test samples outdoors, factor maintenance needs, and choose coatings rated for corrosion resistance and UV stability.
Matching Paint to Existing Metal Finishes
After you’ve settled on durable colors and finishes, you’ll want to match new paint to the metal’s existing finish so repairs and touch-ups blend in and don’t draw the eye.
Use small samples, test under real light, and refine finishing techniques for texture and sheen.
Focus on precise color matching and application to maintain uniformity.
- test samples
- check sheen
- match texture
- adjust tint
- feather edges
Safety Gear and Ventilation for Metal Painting
Before you start painting metal, make certain you’re suited up with proper PPE—gloves, eye protection, and a respirator rated for paint fumes.
Wear long sleeves and coveralls to protect skin from solvents and overspray.
Also guarantee good ventilation or use local exhaust to keep fumes away from your breathing zone.
Protective Clothing And PPE
While you’re prepping metal for painting, don’t skimp on protective clothing and PPE—these items keep you safe from chemical exposure, airborne particles, and accidental splashes.
You should follow protective gear and safety precautions strictly to prevent skin contact and inhalation. Use clean, fitted items and replace damaged pieces promptly.
- Gloves (chemical-resistant)
- Safety goggles
- Coveralls
- Respirator mask
- Steel-toe boots
Ventilation And Fume Control
Because paint fumes and solvent vapors can build up quickly and cause health risks or fire hazards, you should establish strong ventilation and fume-control measures whenever you’re working on metal surfaces.
Use local fume extraction or a ventilated booth, open windows and doors for cross air circulation, and position fans to pull fumes away.
Wear a respirator rated for organic vapors.
Environmental and Disposal Rules for Paint Waste
When you’re done painting, handle leftover paint and solvents as regulated waste to prevent pollution and avoid fines; many communities treat oil-based paints and solvent-soaked rags as hazardous, while water-based latex may be accepted at household hazardous waste programs once dried.
You should follow local environmental regulations for paint disposal and explore recycling options and proper waste management.
- Check local drop-off sites
- Solidify latex before disposal
- Store solvents sealed
- Use recycling programs
- Document hazardous waste handling
Estimating Paint Quantity for Railings and Fixtures
After you’ve handled leftover paint and disposed of solvents properly, you’ll want to figure out how much paint you’ll need for railings and fixtures to avoid waste or extra trips to the store.
Use railing estimation and fixture measurement: measure surface area, account for coats, and check the paint’s coverage calculation.
Combine these numbers to determine paint quantity and confirm paint requirements for accurate project planning.
Cost: Exterior Paint vs. Metal-Specific Coatings
If you’re balancing budget and performance, you’ll find that general exterior paints usually cost less per gallon but can end up pricier over time on metal because they often need more coats and earlier touch-ups.
Metal-specific coatings cost more upfront but offer better adhesion, corrosion resistance, and longer intervals between recoats, which can lower lifetime costs for railings and fixtures.
- cost comparison: initial vs lifetime
- consider durability factors
- maintenance frequency
- adhesion and rust protection
- long-term value analysis
When to Hire a Pro for Metal Painting
Because metal surfaces demand precise prep and the wrong method can trap rust, you should hire a pro for jobs that involve structural elements, extensive corrosion, complex shapes, or high-exposure locations.
You’ll benefit from professional painters who know advanced metal painting techniques, proper primers, and surface treatments.
Hiring pros saves time, guarantees warranty coverage, and reduces recurrence of rust or coating failures.
Common DIY Mistakes When Painting Metal
When you skip proper surface prep, paint won’t adhere and rust will keep spreading beneath it.
You’ll make common metal paint mistakes if you rush cleaning, ignore primer, or use the wrong paint.
Avoid preparation errors by planning steps, using appropriate products, and working in suitable conditions.
- Skipping degreasing
- No primer
- Painting over damp metal
- Using interior paint
- Ignoring rust removal
Troubleshooting Adhesion Failures on Metal
Although it’s tempting to blame the paint, adhesion failures usually result from surface issues you can fix—so don’t assume the product’s at fault.
Inspect for grease, rust, old paint, or moisture. Clean, degloss, sand, and prime appropriately. Use recommended primers and correct drying conditions.
These troubleshooting techniques target common adhesion problems so you can restore proper bonding before repainting.
Repairing Chipped or Blistered Metal Paint
Start by evaluating the damage to determine whether you’re dealing with isolated chips or underlying blisters that signal corrosion or trapped moisture.
You’ll remove loose chipped paint, clean and dry, sand edges, treat rust, prime, and repaint.
Suggested steps:
- Remove loose paint and rust
- Clean with solvent and dry
- Sand smooth edges
- Apply rust converter/primer
- Recoat with compatible exterior paint
Expected Lifespan of Painted Metal
If you maintain the surface properly and use quality primer and paint systems, painted metal can last anywhere from 5 to 25 years depending on exposure, coating type, and substrate preparation.
Your metal longevity depends on environmental exposure, surface prep, and maintenance frequency.
Choose systems rated for UV and corrosion resistance to maximize paint durability, inspect annually, and touch up chips promptly to prevent accelerated failure.
Case: Repainting a Metal Railing
Tackle repainting a metal railing by first evaluating its condition: check for rust, loose paint, dents, and areas where water pools, because those determine how much prep you’ll need and which products will work best.
You’ll address metal railing design quirks and safety considerations while sanding, priming, and choosing exterior paint.
- Sand rust
- Apply primer
- Match style
- Protect hands
- Inspect fasteners
Case: Refreshing Outdoor Metal Furniture
When your outdoor metal furniture shows chipped paint, surface rust, or faded color, you can quickly restore its appearance and protection with targeted prep, the right primer, and a durable exterior paint.
Pick finishes that suit furniture styles and follow current color trends to update patios.
Sand, remove rust, prime, and apply thin, even coats so your pieces look fresh and resist weather.
Quick Pre-Paint Checklist for Metal Projects
Before you pick up a brush, run through a short checklist to make sure the metal’s clean, sound, and ready for paint.
Before you pick up a brush, run a quick checklist to ensure the metal is clean, sound, and paint-ready.
You’ll assess for surface rust, choose appropriate metal paint types, and prep for adhesion. Follow these steps:
- Clean with degreaser and rinse
- Remove surface rust (wire brush/sand)
- Sand smooth and dust off
- Prime with metal-compatible primer
- Check dry, recoat conditions
Further Resources and Product Selection Tips
4 quick places to check when choosing products and learning more:
- manufacturer datasheets for compatibility and application tips,
- user reviews and project galleries for real-world results,
- supplier tech support for questions about primers or topcoats,
- and reputable how-to guides or videos for step-by-step techniques.
Use datasheets to compare paint durability, pick primers matched to substrate, and sample metal finishes so you’ll get lasting, correct results.
Frequently Asked Questions
Can Exterior Paint Be Used on Galvanized Metal Without Special Prep?
No, you can’t just paint galvanized metal without special prep; you’ll risk poor paint adhesion. You should clean, degloss or etch, and use a compatible primer so the exterior paint will stick and last.
Will Painted Metal Affect Wireless Signals or Electronics Nearby?
Yes — painted metal can affect nearby wireless signals if metal coatings create conductive surfaces or change reflectivity. You’ll usually see negligible signal interference unless coatings are thick, continuous, or paired with large metal areas near sensitive electronics.
Can Exterior Paint Be Applied Over Powder-Coated Metal?
Absolutely—you can paint powder-coated metal, but it’s not magic: prep is essential. You’ll address powder coating compatibility and paint adhesion concerns by cleaning, scuffing, priming with a suitable adhesion-promoting primer, then applying exterior paint evenly.
How Soon After Painting Metal Can It Be Exposed to Heavy Use?
You can generally expose metal to heavy use after 7–30 days, depending on drying time, temperature, humidity, and paint adhesion; wait the full cure period the manufacturer specifies to avoid scratches, chipping, or adhesion failure.
Are There Voc-Free Exterior Paints Suitable for Metal Surfaces?
Yes — you can find VOC-free exterior paints suitable for metal; you’ll want eco friendly options and proper metal surface preparation like degreasing, sanding, and priming first, and then apply compatible rust-inhibiting primers and coatings.
