
How to Stop Paint From Peeling on Wood Before It Gets Worse
First confirm it’s paint failing, not rotted wood—use a screwdriver: firm undercut paint, soft wood means rot. Stop moisture sources like leaks or poor flashing and let wood dry. Scrape loose paint, clean, sand smooth, then prime with a paint-appropriate primer and use quality exterior paint in thin coats. For small spots you can spot-repair; for widespread failure, strip and restore the whole surface. Keep up inspections and maintenance, and below you’ll find step‑by‑step fixes and prevention tips.
Is It Peeling Paint or Rotting Wood?
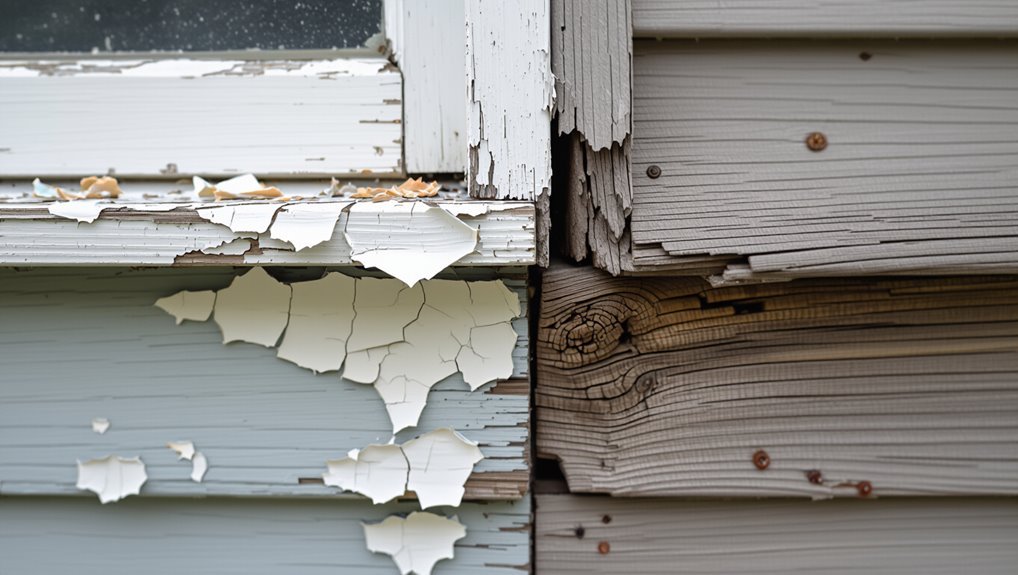
Is that flaky finish just paint coming off, or is the wood actually rotting underneath?
You’ll check peeling indicators: loose flakes, blistering, and softened edges.
Probe with a screwdriver—firm resistance means paint failure, soft crumbling signals rot.
Probe with a screwdriver: firm resistance = paint peeling, soft crumbling = wood rot—test before you repair.
Your wood assessment should note discoloration, moisture stains, and structural give.
That determines whether you strip and repaint or replace damaged boards.
Causes of Paint Peeling on Wood (Moisture, Sun, Bad Prep)
You’ll usually find peeling paint comes down to three main causes: moisture getting into the wood, relentless sun and UV exposure, and poor surface preparation.
Check for leaking gutters, splashback from soil, or trapped moisture behind trim, then think about whether the finish has been weakened by sunlight.
And don’t skip proper cleaning, sanding, and priming—bad prep almost always shortens a paint job’s life.
Moisture Intrusion Sources
When moisture gets into wood, it undermines the bond between paint and surface, causing blistering, flaking, and eventual peeling.
You should check gutters, water drainage, and landscaping adjustments to divert runoff.
Install moisture barriers, make ventilation improvements, and use humidity control inside.
Address seasonal weathering with insulation upgrades and timely maintenance, and inspect for foundation repair to stop rising damp before paint fails.
Sunlight And UV Exposure
Moisture isn’t the only enemy of paint — sunlight and UV rays also break down coatings and the wood underneath, causing chalking, fading, and eventually loss of adhesion.
- Sunlight damage speeds surface degradation and fading colors.
- Use UV protection to boost paint longevity and paint lifespan.
- Choose finishes with weather resistance for outdoor exposure.
- Regular checks aid wood preservation and prevent accelerated peeling.
Poor Surface Preparation
Although proper prep seems tedious, skipping it guarantees paint won’t bond and will peel sooner.
You must do thorough surface cleaning to remove dirt, mildew, and old flaking paint. Use correct sanding techniques to create a keyed surface, then wipe dust away.
Prime bare wood and repair defects before painting. Proper prep saves time and prevents premature peeling.
Decide: DIY Repairs vs. Hiring a Pro
Before you start scraping and sanding, honestly assess your skill level and how comfortable you’re with surface prep and repainting.
Compare the cost and time of doing it yourself — including tools, materials, and potential rework — against hiring a pro who can likely finish faster and guarantee the result.
That way you can choose the option that saves you money and stress while fixing the underlying problem.
Assess Your Skill Level
How confident are you tackling multi-step repairs yourself—can you strip paint, sand evenly, and apply primer and finish coats without skipping prep? Do a quick skill assessment and project evaluation to decide.
- List required techniques.
- Match tools you own.
- Identify tricky spots (rot, layers).
- Note safety and time limits.
If gaps worry you, consider professional help.
Compare Cost And Time
Now that you’ve assessed your skills and tools, weigh the cost and time differences between doing the job yourself and hiring a pro.
Do a cost analysis: materials, rentals, and potential mistakes.
Factor time investment: prep, sanding, priming, and drying.
If you value savings and have time, DIY works; if speed, warranty, or complex repairs matter, hire a professional.
Tools and Materials You’ll Need
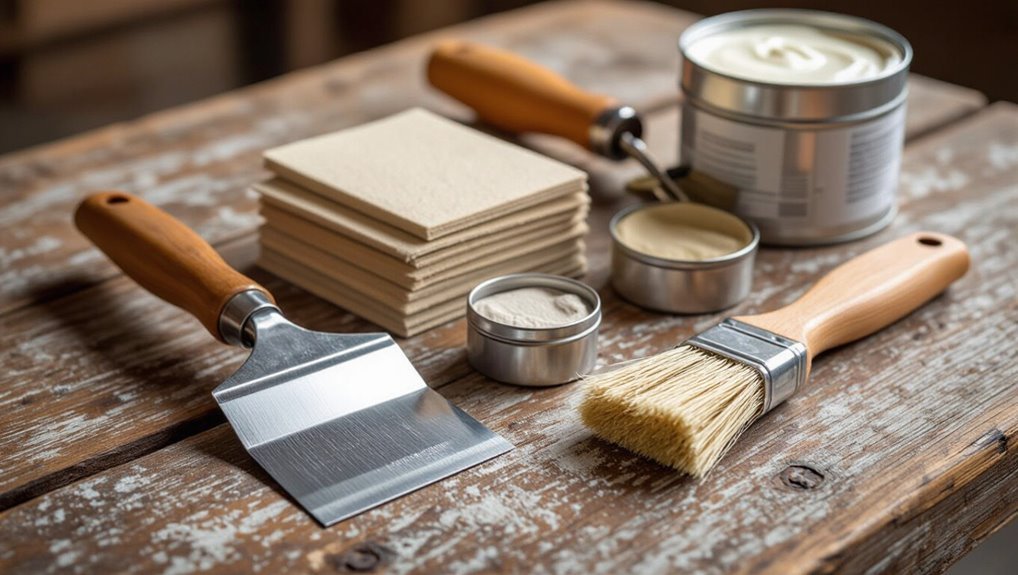
Because proper prep makes the difference between a short-lived fix and a lasting job, gather the right tools and materials before you start.
You’ll focus on paint adhesion, surface cleaning, tool selection, and appropriate material types.
- Sandpaper, scraper, wire brush
- Degreaser, cleaner, tack cloth
- Primer, compatible paint, sealant
- Brushes, rollers, respirator, gloves
Prep the Wood for a Lasting Repaint
Before you start painting, strip away loose paint, dirt, and contaminants so the new finish can bond properly; use a scraper and wire brush for flaking areas, sand smooth with progressively finer grit, and clean the dust with a tack cloth or mild degreaser.
Then apply proper sanding techniques, inspect for rot or damage, and use wood conditioning or primer to stabilize fiber and guarantee adhesion before repainting.
Safely Remove Loose Paint (Step‑by‑Step)
First check how well the paint is sticking by tapping and scraping small areas to spot loose or bubbled sections.
Put on a dust mask, goggles, and gloves before you start, and cover nearby surfaces to catch debris.
Then carefully strip loose paint with a scraper or wire brush, working only until you reach firmly bonded layers.
Assess Paint Adherence
Wondering if that flaking paint will keep spreading? Assess paint adhesion with a brief surface inspection before you scrape.
- Press fingernail to check loose areas.
- Tap for hollow sounds indicating delamination.
- Mark failed spots to prioritize removal.
- Note moisture stains or soft wood that hurt adhesion.
This quick check guides safe, efficient paint removal and prepping.
Use Proper Safety Gear
One essential step is to gear up properly: put on a respirator rated for paint particles and fumes, safety goggles, gloves, and a long-sleeved shirt to protect your skin from dust and old paint chips.
You’ll also want sturdy footwear and hearing protection if using power tools. Check fit, replace filters on respirator masks as recommended, and avoid touching your face while working.
Strip Loose Paint Carefully
Start by scoring loose paint with a putty knife or paint scraper to break the bond, then work outward from those spots to lift flakes without gouging the wood.
Follow safe paint removal techniques and protect surroundings for proper surface protection:
- Wear mask and goggles.
- Use scraper at low angle.
- Sand feathered edges.
- Clean debris and vacuum.
Choose and Apply the Right Primer
Because a primer creates the bond between wood and paint, pick one formulated for your wood type and the paint you’ll use.
Consider primer types—oil-based for tannin-rich or exterior wood, latex for easy cleanup and indoor use.
Prepare surfaces, sand smoothly, and follow recommended application techniques: thin, even coats, proper drying times, and light sanding between coats so paint adheres and peeling is prevented.
Best Paints and Finishes for Wood
Pick a durable finish that matches the wood’s location and wear—use a high-quality acrylic latex for indoor trim and furniture, oil-based or alkyd for tougher surfaces and exterior wood, and spar varnish or polyurethane where you need strong abrasion and moisture resistance.
- Acrylic latex — indoor, easy cleanup
- Alkyd/oil — durable finishes, tougher wear
- Spar varnish/polyurethane — moisture resistance
- Waterborne or plant-based — eco friendly options
Painting Techniques That Prevent Peeling
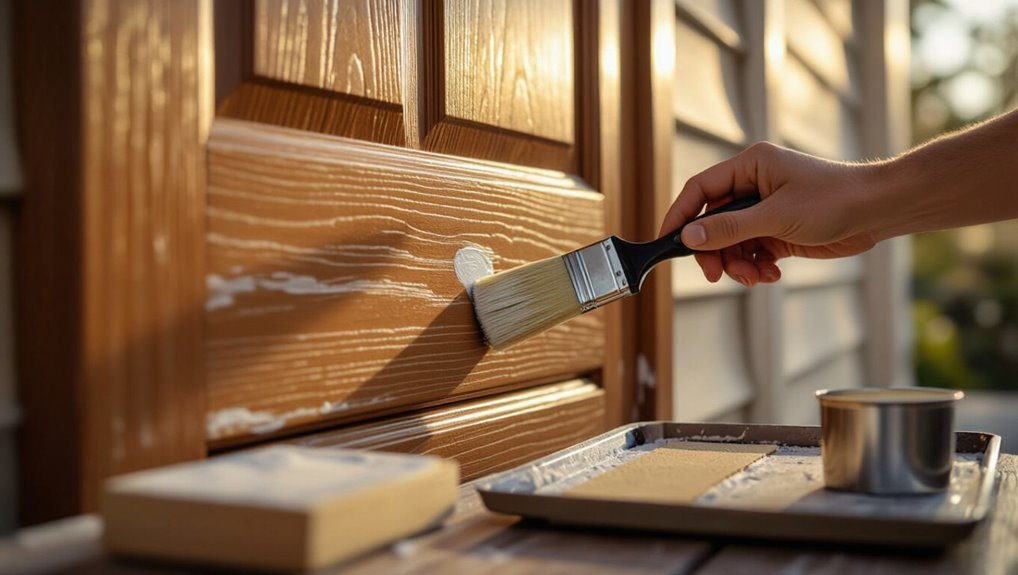
Now that you’ve chosen a finish that suits the wood and its use, the way you apply paint makes just as much difference in preventing peeling. You’ll prep, sand, and clean to match paint types and surface textures. Apply thin, even coats, dry between layers, and use proper brushes or sprayers to guarantee adhesion.
| Step | Action |
|---|---|
| 1 | Prep |
| 2 | Sand |
| 3 | Clean |
| 4 | Coat |
Fix Underlying Moisture Problems First
If you don’t address moisture first, any paint job will fail sooner or later, so find and stop the source before you sand or prime.
You should:
- Inspect leaks and fix flashing or roof issues.
- Add moisture barriers beneath siding or cladding.
- Improve airflow with ventilation improvements in attics and crawlspaces.
- Dry wood thoroughly before priming or painting.
Quick Spot Repairs vs. Full‑Surface Restoration
Deciding between quick spot repairs and a full-surface restoration comes down to how widespread the damage is and how long you want the results to last; small, isolated peeling can often be fixed fast, but extensive failure usually means stripping and restoring the whole surface.
You’ll choose spot repairs for targeted repair techniques; opt for full restoration to maximize paint durability, surface longevity, and broadened finish options.
Ongoing Maintenance to Keep Paint Intact
Because regular upkeep prevents small problems from becoming peeling disasters, you should schedule simple maintenance tasks—cleaning, inspecting, and touching up—at least twice a year.
Use preventive measures and regular inspections to catch failures early.
- Wash surfaces
- Check seams and trim
- Sand and spot-prime
- Repaint high‑wear areas
Frequently Asked Questions
Can Paint Peeling Be Caused by Insect Damage Like Termites or Carpenter Ants?
Yes — insect damage can cause peeling; you’ll see insect damage and termite effects like tunneling, weakened wood, and moisture retention that break paint adhesion, so inspect for frass, hollow sounds, and visible trails before repainting.
Will Humidity Indoors Affect Exterior Wood Paint Peeling?
Absolutely — like a Victorian telegram, you’ll see indoor humidity weaken paint adhesion on exterior wood when moisture migrates inside, causing swelling, blistering, and eventual peeling; control humidity to preserve adhesion and reduce exterior paint failure.
Can I Paint Over Existing Peeling Paint Without Scraping Everything?
You can, but you shouldn’t skip surface preparation: scrape loose paint, sand edges, clean and prime. Use painting techniques like feathering and flexible exterior paint to guarantee adhesion and delay further peeling.
How Long Should Newly Painted Wood Cure Before Exposure to Weather?
You should wait at least 24–48 hours for initial drying, but allow the full curing process of 7–30 days before significant weather exposure; colder or humid conditions will extend curing, so plan accordingly to protect the finish.
Are Eco‑Friendly or Low‑Voc Paints Less Durable on Exterior Wood?
You won’t need a superhero cape: eco‑friendly paints can match traditional durability when reformulated, though low VOC performance sometimes trails in extreme weather; you’ll get best results by choosing quality brands and proper surface prep for lasting protection.
