
How Long Should You Let Ceiling Paint Dry Before a Second Coat?
You should wait until the first coat is fully tack-free before applying a second coat—usually 2–4 hours for latex or acrylic ceilings and about 24 hours for oil-based paints. Thin, even coats dry faster; temperature, humidity, and ventilation will speed or slow drying, so use fans or dehumidifiers in damp conditions. Lightly sand glossy spots if needed. Follow the manufacturer’s recoat time for best results, and keep going to learn practical timing, sanding, and seasonal tips.
What This Guide Covers and Who It’s For
Whether you’re painting a small bathroom ceiling or tackling an entire house, this guide tells you how long different ceiling paints take to dry, what affects drying times, and how to know when it’s safe to recoat or restore fixtures.
You’ll get clear guidance on paint adhesion, practical drying techniques, suitable tools, and the conditions that matter so you can plan timing and avoid failures.
Quick Answer: When to Apply a Second Coat of Ceiling Paint?
If you’re working fast or taking your time, wait until the ceiling paint feels dry to the touch and no longer tacky before applying a second coat—usually 2–4 hours for latex and 24 hours for oil-based paints, with manufacturer directions taking precedence.
Check drying factors like temperature and humidity, test small areas, then apply recoat techniques: thin, even strokes and proper overlap to guarantee uniform coverage and avoid drips.
Paint Types and Drying: Latex, Oil, Acrylic
Because drying times and handling differ by formulation, you’ll want to know the basics of latex, oil, and acrylic paints before you start a ceiling project.
You’ll find latex drying faster, letting you recoat in hours in ideal conditions. Oil curing takes longer but gives durability.
Acrylic finish balances quick dry and flexibility. Choose based on desired paint longevity and room conditions.
Sheen and Recoat Time for Ceiling Paint
Paint sheen affects not just appearance but how long you should wait before recoating: flatter ceilings hide imperfections and let you recoat sooner, while higher sheens—like eggshell or semi-gloss—dry to a harder film and often require longer cure times between coats.
- Flattest: fastest recoat intervals
- Low sheen: moderate wait
- Eggshell: longer cure
- Semi-gloss: longest recoat intervals
Consider manufacturer guidance and sheen variations.
How Temperature Affects Ceiling Paint Drying
When you work in a cool, damp room, the ceiling paint will take noticeably longer to dry, while warmer, well-ventilated conditions speed up both drying and curing; adjust your schedule accordingly and check the manufacturer’s recommended temperature range before you start. You’ll monitor temperature impact on drying times and plan recoats; colder rooms slow drying, higher temps speed it.
| Temperature | Effect |
|---|---|
| Low | Slower drying |
| High | Faster drying |
Humidity, Ventilation, and Recoat Timing
If the air’s humid or still, your ceiling paint will take much longer to dry, so open windows, run a fan, or use a dehumidifier to speed things up and get you to a safe recoat time sooner.
- Monitor humidity effects with a hygrometer.
- Use cross-ventilation for faster drying.
- Run exhaust fans after painting.
- Place portable dehumidifiers nearby.
- Avoid closing rooms until tack-free; follow ventilation tips.
How Coat Thickness Changes Dry Time and Finish
How thick you apply each coat affects both drying time and the final look.
Thin coats dry faster and tend to give a smoother, more even texture, while thick coats take much longer and can sag or show brush/roller marks.
Aim for multiple thin, even layers rather than one heavy one to speed drying and improve surface finish.
Thin Vs. Thick Coats
Although a single thick coat might seem faster, thinner coats actually dry quicker, cure more evenly, and give you a smoother ceiling finish.
You’ll notice differences between thin applications and thick applications in drying time and finish; choose thin layers for control.
- Faster drying
- Easier touch-ups
- Less sagging
- Better adhesion
- Predictable recoat times
Effects On Surface Texture
You’ll see the difference in texture as soon as paint goes on: thin coats lay down smoothly, while thick coats tend to show brush marks, drips, and an uneven sheen.
Thick layers slow solvent evaporation, extend drying, and can sag, harming surface texture and paint adhesion.
Apply moderate coats, allow full tack-free time, then sand lightly to guarantee even finish and reliable adhesion.
Primer vs No Primer: What to Expect
If you prime the ceiling first, the paint usually dries faster because the primer seals the surface and evens out absorption.
If you skip primer, expect a longer wait as the paint soaks in and needs more time to cure.
Proper surface prep—cleaning, patching, and sanding—also affects drying time regardless of whether you prime.
With Primer: Faster Drying
When you prime your ceiling before painting, the whole job usually dries faster because primer seals porous surfaces and evens out absorbency so topcoats cure more predictably.
You’ll notice primer benefits quickly; use proper drying techniques to speed recoating.
Consider:
- improved adhesion
- uniform sheen
- fewer coats needed
- faster recoat times
- reduced blotching
Without Primer: Longer Wait
Although skipping primer can save time upfront, it usually means you’ll wait longer overall because unprimed surfaces absorb paint unevenly and slow down proper curing.
You’ll need to monitor drying duration more carefully, as tackiness and sheen can mislead.
For reliable results, factor extra hours between coats and revisit ceiling preparation to guarantee adhesion despite foregoing primer.
Surface Prep Affects Timing
Because the surface you start with changes how paint behaves, prepping it properly directly affects drying and recoating times. You’ll see primer speeds adhesion and evens absorbency, while bare drywall soaks paint and prolongs cures.
Match primer choice to substrate and monitor drying conditions.
- Primer evens porosity
- No primer = slower cure
- Sanding aids bond
- Clean surfaces dry faster
- Humidity alters timing
Porous vs Painted Ceilings: Drying Differences
If your ceiling’s surface soaks up moisture, it’ll change how long paint needs to dry, and you’ll want to account for that before doing any finishing work.
On porous ceilings you’ll often need longer between coats because they absorb solvent and thin the film.
With painted ceilings, less absorption speeds drying; however, existing paint type and gloss level still affect adhesion and recoating intervals.
Why Ceiling Surface Temperature Matters
Surface temperature affects how paint dries just as much as the substrate’s porosity does, so check it before you start recoating.
You’ll want to monitor ceiling temperature because it controls drying time and paint adhesion. Cooler surfaces slow curing; hot ones speed it and can cause skinning.
- Check with an infrared thermometer
- Aim for manufacturer’s temp range
- Avoid drafts
- Wait if cold
- Guarantee even warmth
Color, Pigment Load, and Drying Speed
The color you pick affects how quickly ceiling paint cures: light tints reflect more heat and often dry a bit faster, while dark tints can absorb heat differently and change drying characteristics.
Higher pigment concentration can thicken the film and slow solvent evaporation, so heavily pigmented formulas may need more drying time.
Keep this in mind when scheduling recoat times and final inspections.
Light Vs. Dark Tints
Because darker tints contain more pigment and binders, they’ll generally take longer to dry than lighter shades.
So you should plan extra drying time when you’re choosing deep colors for a ceiling.
- light tints dry faster
- dark tints may feel tacky longer
- ventilation speeds drying
- thinner coats help uniformity
- test a small patch first
Pigment Concentration Effects
While choosing a color, remember that pigment concentration directly affects drying speed: higher pigment loads—common in deep or richly saturated paints—slow solvent evaporation and can leave a tacky feel longer.
So you’ll want to allow extra cure time and use thinner, even coats to promote uniform drying.
You’ll also test a small swatch, monitor drying speed, and adjust ventilation or coat thickness accordingly.
Additives and Conditioners That Change Recoat Time
Additives and conditioners can speed up or slow down recoat time, so you’ll want to choose and measure them carefully.
You’ll notice Additive effects vary by solvent, temperature, and paint brand; learn common Conditioner types before mixing.
Consider these when planning a second coat:
- Drying accelerators
- Flow improvers
- Rheology modifiers
- Anti-foaming agents
- Humectants
Ceiling Height, Access, and Scheduling Recoats
When your ceiling sits high or access is awkward, plan recoats around safe setup and realistic drying intervals. Tall or vaulted spaces often require ladders or scaffolding that slow movement and increase the time between coats.
You’ll factor ceiling height into access logistics, allow extra drying and transit time, address scheduling challenges proactively, and prioritize safety considerations so you don’t rush recoats or compromise results.
Simple Touch Tests to Check Recoat Readiness
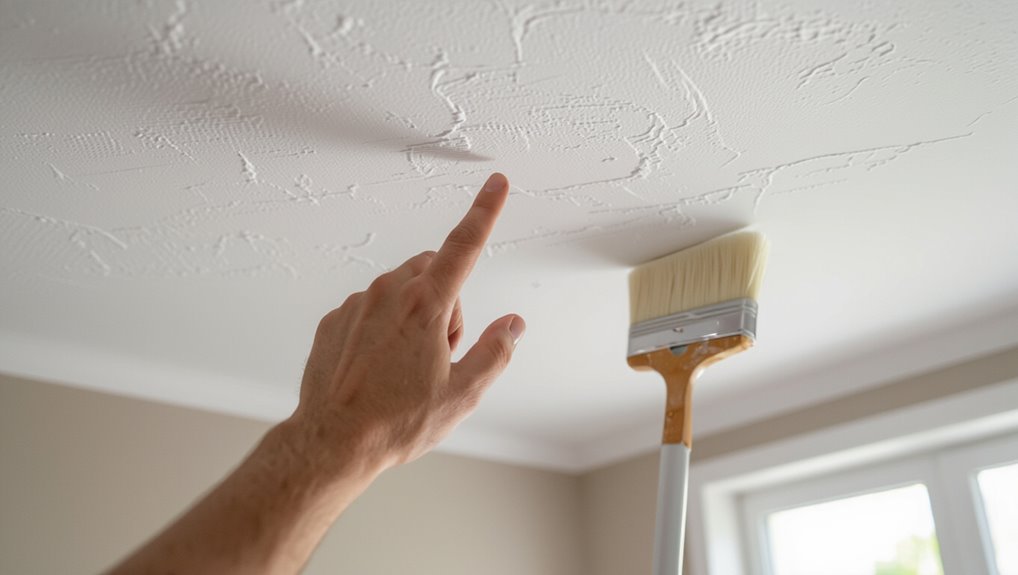
Before you grab a roller for a second coat, check that the ceiling is dry to the touch by lightly pressing a clean fingertip to an inconspicuous spot.
If it feels tacky, wait longer; if it’s dry but you’re unsure about film hardness, try a gentle fingernail test at a hidden edge to see if the paint lifts or dents.
Only recoat when the surface resists a soft nail press and shows no tackiness.
Dryness To The Touch
Although paint can look dry, your touch is the simplest way to confirm recoat readiness: lightly press your fingertip to a less visible spot and feel for tackiness, transfer, or skinning.
Use drying techniques and watch recoat indicators as you check.
- No tack
- Slight tack
- Paint transfers
- Skinning or film
- Even, matte feel
Gentle Fingernail Test
If the fingertip check leaves you uncertain, try the gentle fingernail test for a clearer result: lightly press a clean fingernail at an inconspicuous spot and see whether it leaves an impression, chips the film, or skates without marking.
Use this fingernail test to confirm surface readiness before recoating; no mark means you can proceed, any tack or damage means wait longer.
The Solvent‑Smell Test: What It Tells You
Smell is a simple, useful indicator: when you still notice a solvent odor in a room, the paint hasn’t fully cured and the fumes are still evaporating.
You’ll use solvent detection and paint odor cues to decide timing. Check for:
- lingering solvent scent
- stronger odor near vents
- faintness over hours
- no tackiness
- steady decrease before recoating
Visual Signs a First Coat Is Ready
You can also use your eyes to confirm readiness once the solvent scent has faded. Look for even sheen, no tackiness, and uniform color as key visual cues. Lightly touch an inconspicuous spot; no paint should transfer. Below is a quick reference of drying indicators.
| Visual cue | What it means |
|---|---|
| Even sheen | Surface sealed |
| No tack | Ready for recoating |
| Uniform color | Pigment settled |
Using a Moisture Meter to Verify Dryness
When you want a concrete measurement rather than just visual cues, a moisture meter gives quick, objective confirmation that ceiling paint and the substrate beneath it are dry enough for recoating.
You’ll use moisture measurement for drying verification by checking surface and substrate levels, comparing to manufacturer specs, and documenting readings before recoating.
- Check paint surface
- Measure substrate
- Compare specs
- Record readings
- Recheck before coat
When Tackiness or Lifting Means Wait Longer
If the painted ceiling still feels tacky or you see lifting at the edges, don’t rush into a new coat—these signs mean solvents or moisture haven’t fully left the film, and overcoating now can trap them, causing adhesion failures or uneven finish.
Wait until tackiness issues vanish and lifted areas dry and re-adhere.
Sand and spot-prime only once fully dry to avoid lifting paint.
Typical Recoat Windows for Common Product Types
For oil-based ceiling paints, you’ll usually wait longer before recoating—often 24 hours or more—so plan accordingly.
Water-based (latex) products typically let you recoat in 2–4 hours, though high-humidity conditions can extend that.
Specialty ceiling coatings like acoustic or stain-blocking primers each have their own windows, so check the product label before you proceed.
Oil-Based Paint Recoat Times
Although oil-based paints dry slower than latex, they offer durable, smooth finishes and predictable recoat windows you can plan around.
You’ll weigh oil based advantages against oil based drawbacks when timing coats.
Typical guidance:
- Touch dry: 6–8 hours
- Recoat: 24 hours
- Full cure: 7 days
- Cold/humid delay: add 24–48 hours
- Light traffic: after 48 hours
Water-Based Paint Windows
Switching from oil to water-based paints changes your timing: water-based formulas generally dry faster, letting you recoat sooner and get rooms back in use quicker.
For ceiling work near windows, expect 2–4 hours between coats in warm, ventilated conditions.
Those water-based advantages speed projects, but watch for cooler temps or high humidity.
Proper window application avoids dripping and guarantees even coverage.
Specialty Ceiling Coatings
When you choose a specialty ceiling coating—like stain-blocking primers, acoustic paints, or mold-resistant finishes—you’ll need to follow each product’s recoat window because they vary widely; typically primers and stain blockers require 1–4 hours for water-based versions and 24 hours for oil-based.
Meanwhile, specialty acrylic and elastomeric ceiling paints often recommend 2–6 hours in warm, dry conditions but can need up to 24–48 hours in cool or humid environments.
- Check label for recoat time
- Match product to ceiling textures
- Allow extra time in humidity
- Use specialty finishes sparingly
- Test a small area first
Fast‑Drying Paints: When You Can Recoat the Same Day
Fast‑drying ceiling paints can let you recoat in as little as two to four hours, so you won’t have to wait overnight to finish a room.
You’ll enjoy fast drying benefits like reduced dust attraction and faster project completion.
Use quick drying techniques—good ventilation, low humidity, and thin coats—to guarantee proper adhesion and avoid lifting when you apply the second coat the same day.
Slow‑Drying Paints: When to Wait 24–48 Hours
If your ceiling paint’s label says slow‑dry or lists a long recoat time, follow that guidance before doing anything else.
Keep an eye on room humidity and temperature, since high moisture can stretch drying to 24–48 hours.
When in doubt, do a gentle touch test on an inconspicuous spot—if it’s tacky, wait longer.
Check Paint Label
Because paint formulations vary a lot, always check the label before deciding how long to wait—some specialty or high‑gloss ceiling paints are slow‑drying and can need 24–48 hours to cure enough for light traffic or a second coat.
Check label for:
- recommended recoat time
- specified paint finish
- suggested drying conditions
- surface prep notes
- temperature range
Monitor Humidity Levels
While you’re waiting on slow‑drying ceiling paint, keep a close eye on humidity—higher moisture can stretch drying times to 24–48 hours or more.
Use a hygrometer and portable dehumidifier for humidity control, and run fans to improve airflow.
If rooms feel clammy or you spot condensation, damp conditions are slowing cure.
Adjust ventilation and wait longer before recoating for reliable results.
Perform Touch Test
High humidity can tell you to hold off, but the quickest way to confirm readiness is a simple touch test. You’ll check tackiness, cool spots, and scent to judge slow‑drying paints.
Consider these drying factors as you decide to wait 24–48 hours:
- Light fingertip press
- No paint transfer
- Even texture
- No indentations
- Consistent scent
Safe Ways to Speed Up Drying Without Harming the Finish
If you want the paint to dry faster without ruining the sheen or texture, focus on gentle, controlled methods that change the environment rather than the paint itself.
Use low-heat fans, a dehumidifier, and moderate room temperature to speed drying.
Use low-heat fans, a dehumidifier, and steady moderate warmth to encourage faster, safe paint drying.
Avoid paint additives unless manufacturer approves; improper solvents or dryers can alter sheen.
Test a small patch before broader use.
Improving Ventilation to Cut Recoat Time
How can better airflow shave hours off your ceiling paint’s recoat time? Use ventilation techniques and airflow strategies to speed evaporation safely.
Position fans, open windows, and clear obstructions. Monitor conditions and avoid drafts that cause uneven drying.
- Point fans toward windows
- Create cross-ventilation
- Remove room clutter
- Keep vents unobstructed
- Use low-speed circulation
When to Use a Dehumidifier
When should you bring a dehumidifier into the process? Use one when room humidity stays above recommended paint levels or drying stalls.
Set dehumidifier settings to moderate extraction, aiming for steady humidity control around 40–50%. Run it continuously until the ceiling surface feels dry and the paint’s tack is gone.
Don’t over-dry; follow paint manufacturer drying times.
Using Heat Lamps or Fans: Pros and Cautions
Although heat lamps and fans can speed drying, you should use them carefully to avoid problems like blistering, uneven sheen, or trapped solvents. You’ll control temperature and airflow for best results.
Consider these points:
- Use heat lamps at moderate distance
- Monitor fan usage for gentle circulation
- Follow safety precautions for wiring
- Avoid direct hot spots
- Apply efficiency tips like staggered timing
Avoiding Lap Marks and Roller Lines on the Second Coat
You should plan your second coat within the ideal drying window so the first layer is set but still receptive to bonding.
Use a smooth, even roller technique—light pressure, consistent overlap, and a full return to wet edges—to prevent roller lines.
Keep a wet edge and work quickly across the ceiling so you can blend new passes into still-tacky paint.
Ideal Drying Window
If you wait too long or rush the second coat, you’ll invite visible lap marks and roller lines; aim for the paint’s “open” or tack-free window so the new layer melds smoothly with the first.
Use proper drying techniques and surface preparation to time it right.
- Check tackiness
- Note manufacturer times
- Control humidity
- Warm the room slightly
- Test a small area
Roller Technique Tips
Start each pass with a loaded roller and work steadily in a consistent direction so fresh paint always overlaps a still-tacky edge; that continuous, wet-on-tack technique is the key to hiding lap marks and roller lines on the second coat. Use proper roller techniques for even ceiling application, light pressure, and short strokes.
| Tool | Pressure | Stroke |
|---|---|---|
| Roller | Light | Short |
| Extension | Steady | Consistent |
| Nap | Medium | Overlap |
Blending Wet Edges
Because the second coat is where lap marks show up, keep a wet edge by working steadily in one direction and immediately overlapping each pass while the previous strip is still tacky.
Use wet edge techniques and blending methods to hide roller lines:
- Work top-to-bottom consistently
- Overlap 50% of each pass
- Maintain consistent pressure
- Reload before dry edges form
- Feather edges with light strokes
Feathering and Back‑Rolling Ceilings for Even Coverage
When you work across a ceiling, feathering the edges of each painted pass and then back‑rolling the wet paint guarantees a uniform sheen and hides lap marks; do it while the paint’s still tacky so edges blend seamlessly. Use feathering techniques and note back rolling benefits: even texture, reduced lap lines, consistent sheen.
| Step | Tool | Result |
|---|---|---|
| Feather | Brush | Smooth edge |
| Back‑roll | Roller | Uniform sheen |
| Finish | Inspect | Hidden laps |
Prepping a Partially Cured First Coat Before Recoating
A partially cured first coat needs gentle prep before you recoat so the new layer bonds smoothly and you don’t trap imperfections.
You’ll respect the curing process, then do surface preparation to improve adhesion and finish consistency.
- Wait manufacturer’s minimum time
- Lightly scuff glossy spots
- Clean dust with a tack cloth
- Spot-prime bare areas
- Check humidity and temperature
Troubleshooting Peeling, Bubbling, or Flaking
If you notice paint peeling, bubbling, or flaking on your ceiling, it usually means the paint film has separated from the substrate or moisture’s trapped beneath the finish.
You’ll want to identify whether poor adhesion or surface moisture is the culprit before repairing.
Start by testing adhesion and checking for leaks or high humidity so you can fix the root cause.
Paint Film Separation
Although you let the ceiling paint dry on schedule, paint film separation—peeling, bubbling, or flaking—can still happen, and you’ll want to diagnose the cause before fixing it.
Check factors harming paint adhesion and film integrity, then address the root cause:
- old incompatible paint
- poor surface cleaning
- excessive humidity (not moisture troubleshooting)
- temperature extremes during drying
- mechanical impact or vibration
Surface Moisture Issues
When moisture gets into the ceiling or the space above it, paint can peel, bubble, or flake even after it seemed dry—so you’ll want to identify where the water’s coming from and how it’s reaching the paint film.
Inspect for leaks, fix ventilation, and remove compromised paint.
Improve surface preparation to prevent moisture retention, use mildew-resistant primers, and only repaint once substrates are fully dry.
When to Sand Between Coats and What Grit to Use
Before you apply another coat, check that the paint feels dry to the touch and shows no tackiness—then you can sand to promote adhesion and smooth imperfections.
Use proper sanding techniques and thoughtful grit selection to avoid damage.
- Lightly sand with 220–320 grit for latex
- Use 320–400 for ultra-smooth finishes
- Hand-sand raised brush marks
- Clean dust before recoating
- Don’t over-sand
How Many Coats Do Ceilings Usually Need?
Once you’ve checked for tackiness, sanded, and cleaned up dust, decide how many coats your ceiling needs based on color, coverage, and finish.
Typically two coats suffice: primer plus one or two finish coats depending on ceiling paint types and surface porosity.
Dark or bold ideal color choices may require extra coats.
Matte finishes hide imperfections; semi-gloss needs fewer coats for durability.
Seasonal Timing: Painting in Different Seasons
Although temperature and humidity shift with the seasons, you can still get reliable drying and adhesion by planning around their typical ranges; aim for interior painting when indoor temps sit between 50–85°F and relative humidity stays under 60%.
Although conditions vary by season, paint indoors at 50–85°F with humidity below 60% for best drying and adhesion
Consider seasonal considerations and temperature fluctuations:
- Winter: control indoor heat and ventilation
- Spring: watch humidity spikes
- Summer: cool and dehumidify
- Fall: balance heat and airflow
Monitor drying before recoating.
Practical Recoat Timing Checklist You Can Use on the Job
You’ve thought through seasonal factors; now use a short, practical checklist to judge when a ceiling’s paint is ready for a recoat. Check tackiness, temperature, humidity, and ventilation. Test a hidden patch before full recoat. Use recoat techniques and drying methods that match product labels.
| Item | Check | Action |
|---|---|---|
| Tack | Dry | Recoat |
| Temp | Optimal | Proceed |
| Humidity | Low | Proceed |
| Vent | Good | Proceed |
| Patch | Pass | Recoat |
Frequently Asked Questions
Can I Paint Over Wallpapered Ceilings Without Removing It First?
Sure — cautiously. Carefully consider wallpaper types, ceiling textures: you’ll sometimes skim-coat smooth papers or prime stable vinyl, but you shouldn’t paint loose, soaked, or textured papers; remove damaged or highly textured wallpaper first.
Will Recessed Lighting or Fixtures Affect Drying and Adhesion?
Yes — recessed lighting and fixture placement can affect drying and adhesion; ceiling texture and ventilation impact airflow and temperature, so you’ll avoid uneven drying, mask off fixtures, improve ventilation, and adjust drying times near lights.
How Soon Can I Hang Ceiling Fixtures After Final Coat?
By dusk, you can usually hang fixtures after 24–48 hours; consider painting techniques and fixture types since heavier or metal fixtures and dense techniques may need 72 hours. Don’t rush—use caution like a Victorian clockmaker.
Does Paint Expiration Date Change Recommended Recoat Times?
Yes — expired paint can alter recoat guidelines. If paint shelf life’s passed, it may dry unevenly or slower, so you’ll want longer wait times, test adhesion, and consider fresh paint for reliable recoat results.
Can Children or Pets Safely Reenter Room After Recoat?
Better safe than sorry: you should wait until paint’s fully dry and fumes lessen—usually 24–48 hours—before letting children or pets reenter. Take safety precautions, ventilate well, and watch for adverse pet reactions closely.
