
How to Fix Water Damage on a Painted Wall Before It Spreads
Act fast: shut off the water or isolate the leak, cut power to the area, and dry the wall with towels, fans, and a dehumidifier to stop spread and mold. Remove bubbled paint, blot stains, and clean any mold with vinegar or diluted bleach on nonporous paint. If drywall is soft, cut out damaged sections, let framing dry, then patch, prime with a moisture-resistant primer, and repaint. Keep going to learn repair steps, prevention, and when to call pros.
Immediate Steps to Stop Water Damage
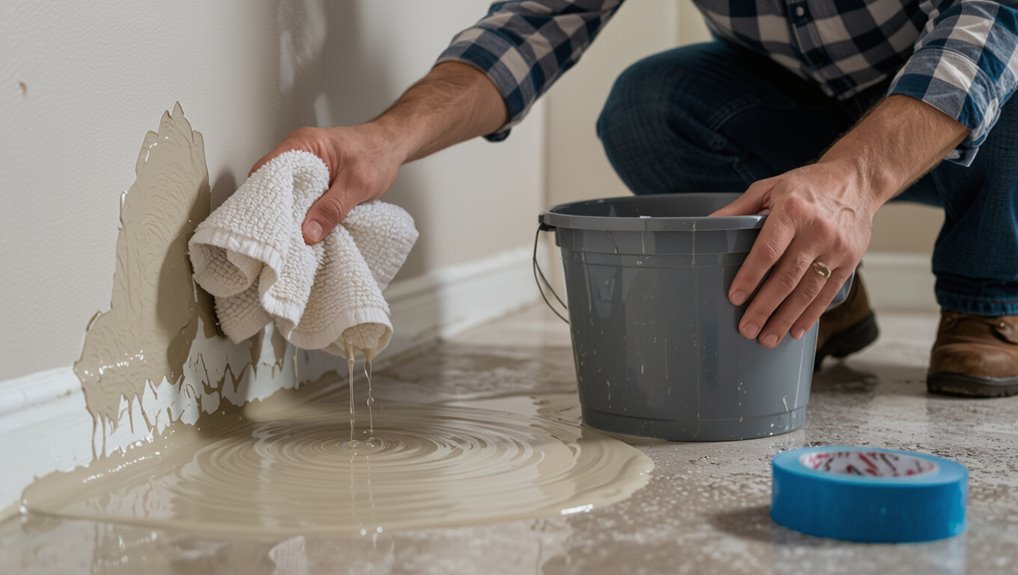
If water’s actively leaking, stop it before you do anything else: shut off the main water supply or isolate the leaking fixture, and turn off electricity to the affected area to prevent shocks.
Then dry the area with towels and fans, remove wet items, and ventilate the room.
You’ll document damage for insurance, call a plumber, and act fast for water damage prevention and moisture control.
Which Wall Water Damage This Guide Can Fix
This guide covers common interior wall water damage you can repair yourself—small leaks, surface stains, paint bubbling or peeling, and minor drywall softening—rather than structural failures or large-scale mold infestations.
- Drywall stains and soft spots
- Painted plaster with blistering
- Trim or baseboard water marks
- Small-ceiling drips affecting wall paint
You’ll assess types of walls and trace moisture sources before fixing.
Who Should Attempt DIY Water Damage Repair
You should tackle DIY water damage only if the issue is small, the source is fixed, and you know basic drywall and paint repairs.
Call a professional for ongoing leaks, large stains, mold growth, or any structural or electrical concerns.
Also consider health risks—if you suspect contaminated water or extensive mold, don’t risk it and get an expert.
When To Call Professionals
When water damage is limited to a small, obvious area and the source is cut off, you can often handle cleanup and repairs yourself; however, call a professional the moment mold appears, structural components are compromised, or the damage covers several square feet.
- You should request a water damage assessment.
- Seek professional services for mold remediation.
- Call pros if load-bearing elements are affected.
- Hire experts when damage spans multiple rooms.
Skills Needed For DIY
Assess your skills honestly before tackling water-damaged walls: basic repairs are fine if you’re comfortable with drying techniques, minor drywall patching, surface cleaning, and repainting.
However, leave the job to pros if you’re unfamiliar with moisture meters, mold identification, or structural repairs.
Use DIY Techniques, Essential Tools, Repair Strategies, and Repair Methods.
Follow Preparation Steps, Effective Materials, Maintenance Tips, watch Common Mistakes, consider Cost Estimates and Environmental Considerations.
Safety And Health Concerns
Because water-damaged walls can hide mold, electrical hazards, and structural weaknesses, you should only tackle repairs yourself if you’re confident spotting mold types, using moisture meters, shutting off power safely, and wearing proper PPE.
Follow safety measures and consider air quality and health risks. DIY is okay when trained; otherwise hire pros.
- Inspect mold prevention signs
- Test air quality
- Use PPE
- Cut power
When to Call a Professional Immediately
If the water damage affects load-bearing walls, ceiling joists, or you notice sagging, you should call a professional right away to assess structural integrity.
If you see extensive staining, persistent dampness, a musty smell, or anyone in the home has respiratory issues, get an expert to check for mold and health risks.
Don’t wait—early professional intervention can prevent costly repairs and protect your health.
Structural Integrity Concerns
When water has soaked through paint into drywall or wood, you should consider calling a professional right away—especially if you see sagging, large soft spots, mold growth, or warped baseboards that suggest the structure’s been compromised.
You’ll need a structural assessment and moisture evaluation.
Contact a pro if you notice:
- Visible sagging
- Cracked or crumbling studs
- Floor unevenness
- Fastener corrosion
Health And Mold Risk
Although minor stains might seem harmless, mold can develop quickly in damp walls and pose real health risks, so call a professional immediately if you or anyone in the home has respiratory issues, unexplained allergic reactions, persistent coughing, or if you spot visible mold, a musty odor, or recurrent moisture despite drying attempts.
| Concern | Action |
|---|---|
| allergy symptoms | assess air quality |
| moisture control | fix leaks |
| ventilation strategies | improve airflow |
| surface treatments | professional remediation techniques |
You’ll protect health, aid mold prevention, and restore safe indoor air.
How to Identify Active Versus Old Water Stains
Wondering whether that discolored patch is still leaking or just an old stain? You’ll check active stains versus old stains using clear moisture indicators and visual differences for rapid damage assessment.
- Look for color variations: dark, wet-looking spots.
- Feel for texture changes: damp or soft paint.
- Smell mustiness.
- Note paint degradation like bubbling or peeling.
Signs of Hidden Moisture Behind Paint
If paint is peeling or forming bubbles, you’ve likely got moisture trapped beneath the surface.
You might also notice a musty or damp smell even if the wall looks okay.
Both signs mean you should check behind the paint before repainting.
Peeling Or Bubbling Paint
Peeling or bubbling paint usually means moisture’s trapped behind the surface, and you’ll want to act quickly to prevent mold and structural damage.
- Inspect area for soft drywall or warped trim.
- Pry up loose peeling paint and test beneath.
- Dry the cavity with fans or a dehumidifier.
- Repair source, patch, prime, then repaint using mildew-resistant products.
Musty Or Damp Odors
Behind painted walls, a persistent musty or damp smell often signals trapped moisture you can’t see, and you should treat it as a likely indicator of hidden water damage or mold growth.
If you detect musty smells, inspect for leaks, condensation, or other moisture sources. Improve air circulation, dry affected areas, and address the source promptly to prevent mold in damp environments.
How to Trace the Source of Wall Water Damage
When you spot water stains or damp patches on a painted wall, start by following the visible trail upward and outward to locate where moisture is entering; common culprits include roof leaks, plumbing joints, window seals, and exterior siding gaps.
- Inspect seams and penetrations.
- Use water leak detection techniques.
- Employ moisture meter usage to map damp areas.
- Check adjacent rooms, basements, and attic.
Common Causes: Roof Leaks and Exterior Issues
If you notice water stains tracking down an interior wall, start by checking the roof and exterior envelope, because most indoor wall leaks come from failed shingles, flashing, or clogged gutters that let water run under siding or into vents.
You should schedule roof inspections, clear gutters, repair flashing, and maintain sealants.
Regular exterior maintenance prevents recurring intrusion and costly repairs.
Common Causes: Plumbing Leaks and Burst Pipes
Though you might first suspect the roof, many indoor water stains actually come from plumbing: burst pipes, pinhole leaks in supply lines, failed fittings, and appliance connections are common culprits.
- Inspect visible pipes for corrosion or drips.
- Check under sinks and behind appliances.
- Look for damp drywall or bulging paint.
- Shut off water and call a plumber if you find plumbing leaks or burst pipes.
Condensation and Humidity: Causes and Clues
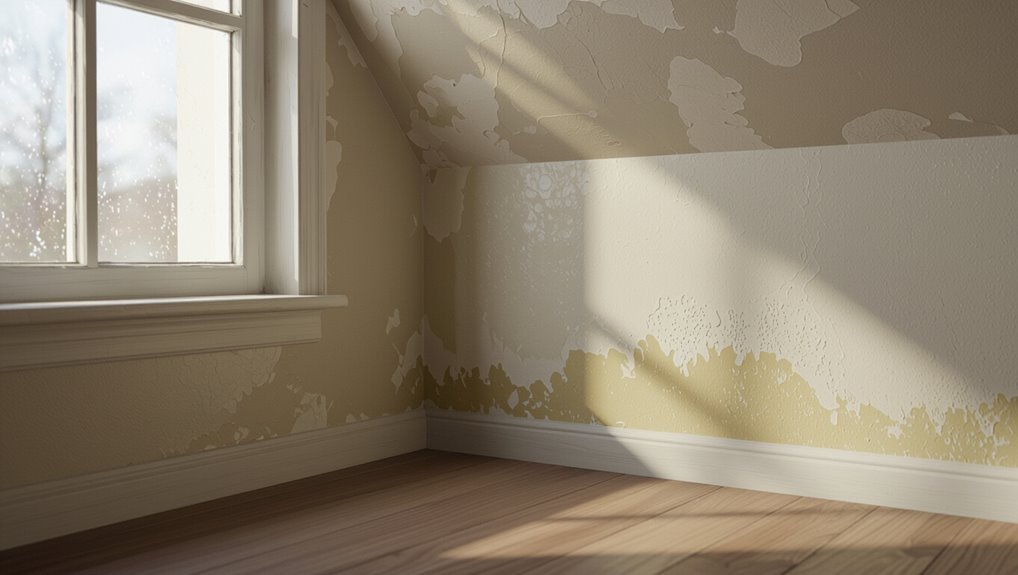
If your home has high indoor humidity, moisture can build up on walls and ceilings and lead to paint damage.
You’ll often see water beads or dark patches form where warm, moist air meets a cold surface like an exterior wall or poorly insulated window.
Look for recurring damp spots and musty smells as clues that condensation, not a leak, is the culprit.
High Indoor Humidity
Because warm indoor air holds more moisture than cold air, high indoor humidity often shows up as persistent condensation on windows, cool walls, or in corners where airflow is poor.
You’ll need humidity control and proactive moisture management.
Tips:
- Use a dehumidifier.
- Boost ventilation.
- Run exhaust fans.
- Repair leaks promptly.
Cold Surface Condensation
High indoor humidity is one cause of moisture problems, but you can still get condensation when warm, moist air meets a cold surface like an uninsulated exterior wall, single-pane window, or metal duct.
You should focus on condensation prevention with humidity control, temperature regulation, improved air circulation, and ventilation solutions.
Add thermal insulation and prioritize moisture management to stop damage and mold.
Tools and Supplies You’ll Need for a Small Repair
You’ll only need a handful of basic tools and materials to tackle a small water-damage repair: a utility knife, putty knife, sandpaper, patching compound, primer, matching paint, a small roller or brush, and some rags or drop cloths.
- Utility knife and putty knife
- Sandpaper and compound
- Primer and paint
- Roller/brush and rags
Check moisture testing before you start, and follow simple repair techniques to restore the finish.
Safety Gear and Precautions to Protect Yourself
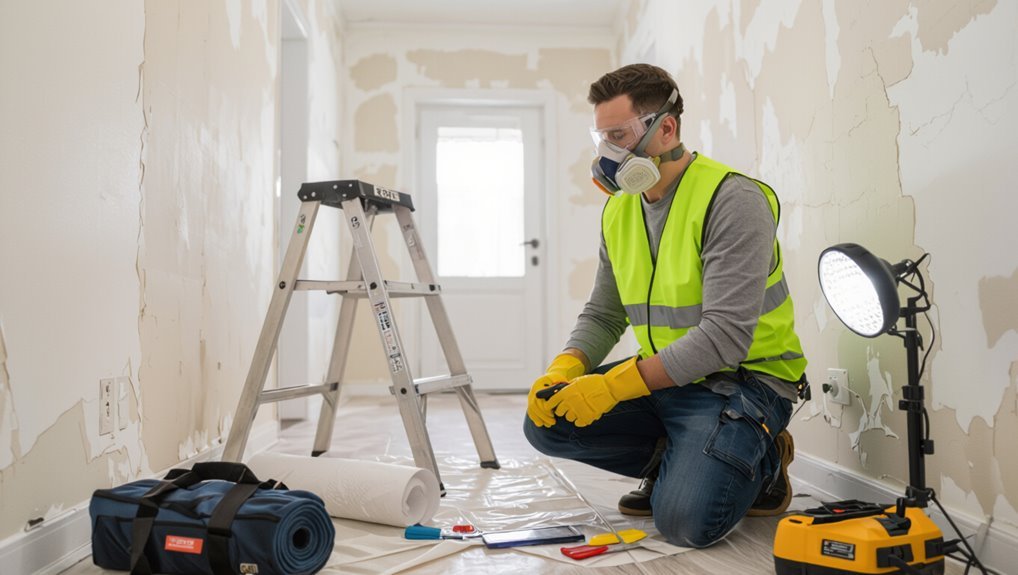
Put on durable, waterproof gloves to protect your hands from contaminants and harsh cleaners.
Open windows or run a fan to keep the work area well ventilated and reduce fumes.
Don’t skip these basic precautions—they’ll keep you safer while you repair the wall.
Wear Protective Gloves
When dealing with water-damaged paint and underlying drywall, wear chemical-resistant gloves to protect your skin from mold, cleaning agents, and deteriorated materials.
You should choose gloves that fit, inspect them, and replace torn pairs promptly.
Recommended steps:
- Select nitrile or neoprene gloves.
- Check for tears before use.
- Clean gloves after tasks.
- Dispose if compromised.
These steps make protective equipment practical.
Ensure Proper Ventilation
After you’ve put on gloves, make sure the work area has good airflow to reduce inhalation of mold spores, paint dust, and fumes from cleaners or sealants.
Open windows, run exhaust fans, or use a portable fan positioned to promote cross-ventilation.
Consider a HEPA air purifier for extra protection.
Choose ventilation methods that improve steady air circulation and reduce contaminant buildup while you work.
How to Protect Floors and Nearby Surfaces First
Before you start scraping paint or pulling off wallpaper, clear and protect the floors and nearby surfaces so water, debris, and cleaning solutions won’t cause new damage.
You’ll want simple, safe steps for floor covering and surface protection to guarantee damage prevention and material safety:
- Remove rugs/furniture.
- Lay plastic or tarp.
- Use absorbent pads.
- Tape edges and label wet zones.
How to Stop the Leak Temporarily During Assessment
If you suspect an active leak, act quickly to limit water while you assess the source: shut off the nearest shutoff valve (or the main supply if you can’t find one), place a bucket or pan under drips, and use temporary patching—like plumber’s tape, a rubber patch and hose clamp, or a self-fusing silicone tape—to slow the flow until a proper repair can be made.
Then begin systematic leak detection: trace pipes, check fittings, listen for running water, and mark wet areas so professionals or you can prioritize permanent fixes.
How to Dry a Damp Painted Wall Quickly and Safely
When a painted wall is damp, act quickly to prevent mold and paint failure:
- Blot standing moisture with absorbent towels, replacing them often.
- Open windows and doors briefly to increase ventilation while monitoring humidity.
- Remove wet trim or baseboards to let concealed areas dry.
- Apply gentle damp wall treatments like moisture-absorbing packs and monitor progress with a moisture meter.
When to Use Fans, Dehumidifiers, or Heaters
If the wall is only mildly damp and the room has good airflow, use fans to speed surface drying and prevent musty smells.
When humidity stays high or moisture has soaked into drywall or insulation, run a dehumidifier to pull moisture out of the air and materials.
You’ll choose between them based on how wet the wall and room feel—fans for airflow, dehumidifiers for lowering humidity.
When To Use Fans
Because air movement speeds drying, you’ll usually start with fans to remove surface moisture and keep paint from blistering or peeling.
Position fans for good fan placement and set airflow direction toward an open window or door. Use them when surfaces are damp, not soaked. Rotate air to prevent pockets of humidity.
- Spot fans
- Box fans
- Oscillating fans
- Window fans
When To Use Dehumidifiers
Although fans handle surface dampness, you’ll want a dehumidifier when the air stays humid or materials feel steadily wet, since it extracts moisture from the room and prevents hidden mold and prolonged paint damage.
Use one for sustained leaks, basements, or after flooding. Monitor humidity control with a hygrometer, empty or drain the unit regularly, and appreciate dehumidifier benefits for faster drying and lasting paint protection.
How to Test for Remaining Moisture Before Repairs
Before you start repairs, confirm the wall is dry so new paint and patching won’t fail; use a moisture meter or simple spot checks to verify moisture levels across the affected area.
- Use moisture detection with a handheld moisture meter.
- Tap and listen for hollow sounds.
- Check adjacent rooms and baseboards.
- Re-measure after drying efforts and before patching.
What Moisture Levels Mean Before You Patch
How dry does the wall need to be before you patch it? Aim for baseline moisture measurement comparable to surrounding undamaged drywall—typically under 15% for wood-based studs or manufacturer specs for drywall. Use moisture detection tools to confirm no lingering damp spots. If readings are consistently low, you can proceed; if not, continue drying and recheck until levels stabilize to avoid trapping moisture.
How to Remove Peeling Paint Without Damaging Drywall
Start by scoring and gently lifting loose paint with a utility knife or a stiff putty knife so you remove only what’s failing, not healthy drywall paper beneath.
Follow these steps for peeling paint and drywall care:
- Scrape edges smooth.
- Sand feathered edges light.
- Vacuum dust; wipe with damp cloth.
- Prime exposed drywall before patching or repainting.
How to Clean Moldy or Mildewed Paint Safely
Before you touch the wall, put on gloves, goggles, and an N95 mask to protect your skin and lungs.
You’ll then scrub the moldy area with a mild detergent or a bleach solution (1 cup bleach to 1 gallon water), working from top to bottom and rinsing as you go.
Dry the area thoroughly and monitor for regrowth before repainting.
Safety Gear First
A respirator, gloves, and protective eyewear are essential because mold spores can irritate your lungs, skin, and eyes when you scrub or sand painted surfaces.
Use safety equipment and protective clothing, and maintain hazard awareness; know emergency protocols.
- Fit a respirator correctly
- Wear nitrile gloves
- Don goggles and coveralls
- Keep a phone nearby for emergencies
Mold Cleaning Steps
Tackle mold on painted walls methodically: you’ll work in small sections, keep the area ventilated, and use the right cleaning solutions and tools so you remove growth without damaging the paint. Wear PPE, test a hidden spot, scrub with detergent or diluted bleach, rinse, dry, and apply mold removal techniques. Follow mold prevention strategies to avoid recurrence.
| Step | Action |
|---|---|
| 1 | Test area |
| 2 | Clean & rinse |
| 3 | Dry & monitor |
What Cleaners Kill Mold on Painted Surfaces
Wondering which cleaners actually kill mold on painted surfaces?
You’ll want safe, effective cleaning solutions and basic mold prevention techniques while addressing visible growth. Use these options carefully:
- Diluted bleach (1:10) for non-porous paint.
- White vinegar applied directly and wiped.
- Hydrogen peroxide 3% sprayed, left, then rinsed.
- Commercial mold removers labeled for painted surfaces; follow instructions and ventilate.
How to Treat and Prevent Mold Regrowth After Cleaning
If you’ve just removed visible mold, act quickly to stop it coming back by drying the area thoroughly, fixing moisture sources, and applying a protective treatment suited to painted surfaces. Use proper cleaning methods, monitor humidity, and repaint with mold-resistant primer to aid mold prevention.
| Drying | Sealing | Monitoring |
|---|---|---|
| Fans | Primer | Hygrometer |
| Dehumidify | Caulk | Inspect weekly |
How to Repair Water-Damaged Drywall Patches
Start by evaluating how much of the drywall is compromised so you know whether to cut out a small section or replace an entire sheet.
Remove the damaged drywall, then patch the hole with a new piece, taping and mudding the seams.
Once the compound’s dry, sand smooth and repaint to match the surrounding wall.
Assess Damage Extent
Begin by inspecting the affected area closely to determine how deep the water penetration goes and which materials are compromised. You’ll perform a water stain assessment and damage evaluation to plan repairs.
- Note stain size and color.
- Probe for soft drywall.
- Check surrounding paint adhesion.
- Smell for mildew.
Decide containment and drying needs based on findings.
Remove Damaged Drywall
Cut away the compromised drywall to expose the damaged area and create a clean, stable edge for repairs.
You’ll use drywall removal techniques like scoring, cutting with a utility knife, and removing wet sections back to solid material.
Perform damaged drywall identification by tapping, probing, and checking for mold or softness.
Remove debris, dry the cavity, and inspect framing before proceeding.
Patch, Sand, Paint
Patch the hole with a drywall patch or new piece of gypsum board sized to fit the opening. Secure it to the studs or backing, then apply joint compound over seams and fastener heads.
Once the compound’s dry, sand smooth, prime, and repaint to match the surrounding wall.
- Choose proper patch techniques.
- Use compatible primer.
- Sand with fine grit.
- Select correct paint types for finish.
How to Replace a Saturated Drywall Section
When a drywall section is soaked and soft, remove the damaged portion and surrounding wet material so you can install a clean, dry replacement that won’t invite mold or structural problems.
Cut back to solid studs, inspect framing, and choose matching drywall types. Fit, screw, tape, and mud seams using proper repair techniques.
Prime the new panel before repainting to seal and protect it.
Repairing Plaster Versus Drywall: Key Differences
When you compare plaster and drywall, you’ll see they’re built differently—plaster is a hard, multi-layered surface while drywall is gypsum board with a paper facing.
That structural gap means repair methods aren’t interchangeable: plaster often requires patching and re-coating, while drywall is usually cut out and replaced or skim-coated.
Knowing which material you’re working on lets you choose the right tools and technique to restore the wall properly.
Plaster vs. Drywall Structure
Although both plaster and drywall can show the same stains and peeling paint, they demand different repair methods and tools you should know before you start.
You’ll assess structure, fragility, and finish:
- Plaster characteristics: rigid, multiple coats, lath backing.
- Drywall advantages: lighter, uniform, easier to patch.
- Check for soft spots and mold.
- Choose compatible materials and fasteners.
Repair Techniques Compared
Now that you’ve identified whether the wall is plaster or drywall and checked for soft spots and mold, you’ll approach repairs differently depending on the material.
You’ll choose repair methods: patching and replastering for plaster, or replacing and taping seams for drywall.
This comparison analysis highlights tools, drying time, and finish blending so you can pick the faster, durable fix.
How to Fix Blistered or Bubbled Paint
Spot the problem: blistered or bubbled paint means moisture has separated the paint from the wall, creating raised pockets you can usually peel back with a fingernail.
Follow steps to repair and prevent spread:
- Remove loose blistered paint.
- Dry the area thoroughly.
- Apply primer for moisture resistance.
- Repaint with matching finish after primer cures.
How to Sand and Feather Edges for a Smooth Patch
You’ll want to create smooth blend edges so the repair blends with the surrounding paint.
Use progressively finer sandpaper and feather the compound outward in light strokes to avoid a hard edge.
Keep checking by touch and sight until the patch is flush and seamless.
Smooth Transition Edges
Before you paint, sand and feather the patch so its edges blend seamlessly with the surrounding wall; that makes the repair invisible once finished.
Use smooth blending techniques and edge finishing tips to get a seamless look.
- Lightly sand perimeter
- Gradually taper compound
- Remove dust with brush
- Prime only repaired area before painting
Feathering With Sandpaper
Start by sanding the repair’s edges with medium-grit sandpaper, working outward in light, overlapping strokes to taper the joint and remove any ridges.
Use progressive sandpaper grades—medium, fine, then very fine—to blend the patch into the wall.
Employ feathering techniques with gentle pressure, checking often for a seamless shift.
Wipe dust away and inspect under good light before priming and painting.
What Primer to Use on Previously Wet Areas
When dealing with previously wet areas, pick a primer that blocks stains and seals moisture-affected drywall or plaster so new paint adheres and looks even.
Use a water resistant primer or moisture blocking sealant to stop tannin bleed and mold. Choose products labeled stain-blocking and mildew-resistant.
- Clean
- Dry
- Prime
- Repaint
How to Choose Paint That Resists Future Moisture
Pick paints formulated specifically for moisture-prone areas so you get durable, long-lasting protection; look for water-resistant acrylic latex or 100% acrylic paints labeled for bathrooms, kitchens, or high-humidity spaces because they resist peeling and mold better than flat or low-quality paints.
Choose moisture resistant paint with mildew inhibitors, and select paint finish options—satin or semi-gloss—for easier cleaning and added moisture protection.
How to Repaint a Repaired Wall for a Seamless Finish
After you’ve selected moisture-resistant paint, you’ll want to repaint the repaired area so the patch blends invisibly with the rest of the wall.
- Clean, sand, and prime the patch.
- Test color matching with small swatches under room light.
- Use compatible paint types (finish and base) to avoid sheen shifts.
- Feather edges, apply thin coats, and let each dry fully before evaluating.
How to Handle Water Damage on Textured Walls
If your wall has texture, you’ll need to treat the damaged area differently than you would a smooth surface. You’ll remove loose material, dry thoroughly, apply texture repair compound to match pattern, sand lightly, and check paint compatibility before repainting to blend seamlessly.
| Tool | Step | Result |
|---|---|---|
| Scraper | Remove debris | Clean base |
| Compound | Match texture | Even surface |
| Paint | Test | Seamless blend |
How to Protect Baseboards, Trim, and Moldings
While you repair textured walls, don’t forget to protect baseboards, trim, and moldings from moisture and repair debris—these elements often take the brunt of water damage and can undermine a finished job if ignored.
- Use moisture barriers and water resistant coatings for baseboard protection.
- Apply paint sealants during trim maintenance.
- Follow molding care repair techniques.
- Practice preventive measures and cleaning tips for aesthetic considerations.
How to Check and Repair Insulation Behind the Wall
If water reached your wall cavity, pull a small inspection hole and check the insulation for dampness or mold.
Wet batt or loose-fill insulation needs to be removed and replaced to prevent ongoing moisture and odor problems.
Wear gloves and a mask while you work, and fully dry the cavity before installing new insulation.
Inspect Insulation For Moisture
Before you open the wall, locate the wet area and check for signs that moisture reached the insulation—staining, musty odors, compressed or sagging batts, and visible mold are clear indicators you’ll need to remove and replace affected material.
- Use moisture detection tools for hotspots.
- Perform quick insulation assessment visually.
- Note affected cavity locations.
- Wear PPE and avoid spreading contamination.
Replace Damaged Insulation
Start by removing the wet, contaminated insulation so you can fully assess and stop ongoing moisture damage.
Wear gloves, mask, and dispose of soaked batts.
Replace with appropriate insulation types for your climate and cavity—batts, foam, or blown—ensuring proper moisture barriers and vapor control are installed.
Seal gaps, restore drywall, and monitor for recurring dampness to prevent mold and structural issues.
Inspecting and Repairing Exterior Causes Afterward
Once you’ve repaired the interior damage, turn your attention outside to find and fix the source—roof leaks, clogged gutters, failing flashing, or poor grading can let water reach the wall again.
Use exterior inspections and proven repair techniques to stop recurrence. Do these steps:
- Scan siding for gaps.
- Check foundation grading.
- Test window seals.
- Look for damaged trim.
Fix Roof Flashing and Gutter Issues That Cause Stains
Start by inspecting flashing seams for gaps or rust where water can sneak in, and tighten or replace any compromised pieces.
Clear gutters of debris and repair sagging sections so water flows away from the wall.
Finally, seal roof-to-wall junctions with proper flashing tape or caulk to stop leaks at the source.
Inspect Flashing Seams
Because flashing and gutters direct water away from your walls, a small seam or clog can quickly lead to stains and paint damage, so you’ll want to check them carefully.
Perform a flashing inspection focused on seam integrity and water paths.
- Scan for gaps
- Probe sealant adhesion
- Look for rust or warping
- Note loose fasteners
Clear And Repair Gutters
Check your gutters and downspouts for debris and damage, since clogged or misaligned gutters will funnel water against siding and cause the stains you’re seeing.
You should clear leaves, secure loose hangers, and repair holes or pitch issues to restore proper water flow.
Regular gutter maintenance prevents recurring stains and protects painted walls—schedule seasonal checks and replace worn sections promptly to avoid further damage.
Seal Roof-To-Wall Junctions
Gutters and downspouts handle a lot, but problems higher up—where the roof meets the wall—can send water behind your siding and stain painted surfaces.
- Inspect flashing for gaps.
- Apply waterproof sealing to seams.
- Reposition or replace flashing where needed.
- Schedule regular maintenance tips: check after storms and clear debris to prevent leaks.
How to Locate and Repair Hidden Plumbing Joints
When hidden plumbing joints leak behind a painted wall, you’ll first need to find the exact source before you start repairs; use visual clues like staining, bulging paint, or a musty smell and couple them with moisture meters, infrared cameras, or gentle probing to pinpoint the wettest area.
Perform a focused plumbing inspection for hidden leaks, shut the supply, expose the joint, replace or reseal fittings, and dry.
How to Manage Repeated Condensation Problems
If condensation keeps returning on your painted wall, you’ll need to tackle both the moisture source and the conditions that let it form; start by reducing indoor humidity, improving ventilation, and insulating cold surfaces so dew doesn’t keep collecting.
Use these steps to control recurrence:
Use these steps to stop recurring condensation: reduce humidity, raise surface temperatures, and improve ventilation.
- Check condensation causes and climate impacts.
- Implement humidity control and temperature regulation.
- Add insulation types and moisture barriers.
- Promote air circulation with ventilation solutions.
Improve Ventilation to Prevent Recurrence
Start by making sure air can move freely through the room: open vents, unblock returns, and use exhaust fans or windows to remove moist air at the source.
You should apply proven ventilation techniques—ceiling fans, timed extractor use, and duct maintenance—to improve airflow.
Monitor humidity with a hygrometer for effective moisture control, and adjust habits to prevent recurrence.
When to File an Insurance Claim for Wall Water Damage
How do you know whether the damage warrants an insurance claim? Assess scope, cost, and cause quickly, then decide if filing fits your situation.
- Large structural or spreading damage likely triggers insurance coverage.
- Repair estimates exceed your deductible.
- Cause aligns with covered perils.
- You want professional remediation documented for the claim process.
Act promptly to limit harm and follow insurer timelines.
What Documentation Insurers Typically Require
Once you decide to file a claim, insurers will expect clear, timely documentation to support the loss and its cause.
Once you file a claim, provide clear, timely documentation proving the loss and its cause to avoid delays.
You should photograph damage, note dates/times, keep repair estimates and receipts, and document any emergency mitigation.
For the insurance claim process, provide owner statements, contractor reports, and proof of ownership.
Submit required documentation promptly to avoid delays or denials.
How to Estimate Repair Costs for Budgeting
A realistic budget begins with a clear breakdown of the work: list affected areas, separate materials from labor, and note whether you’ll need mold remediation, drywall replacement, repainting, or trim repair.
Use repair cost estimation and budgeting strategies to set contingencies.
- Inspect and list damage
- Price materials
- Estimate labor hours
- Add 15% contingency
How to Pick a Contractor for Major Water Damage
Finding the right contractor for major water damage means prioritizing experience, licensing, and clear communication so you won’t get hit with surprises down the line.
Check contractor credentials, insurance, and references, and confirm realistic project timelines in writing.
You’ll want a firm that documents scope, uses certified subcontractors, and provides a warranty so repairs are done thoroughly and accountability is clear.
Questions to Ask a Restoration Professional
Why should you ask specific questions before hiring a restoration pro? You’ll get clear expectations and avoid surprises.
Use questions for restoration that focus on scope and timeline. Ask when they’ll start, how they’re evaluating damage, what steps they’ll take, and who’s responsible for permits or insurance communication.
- Start date
- Evaluation method
- Scope details
- Insurance handling
Temporary Fixes That Buy You Time Safely
While you wait for professional repairs, you can take a few safe, temporary steps to limit damage and protect your painted wall: apply immediate responses like blotting moisture, use patch options (waterproof tape or plastic sheeting), and employ quick repairs such as caulking small leaks.
These emergency measures and stopgap strategies are short term fixes and urgent interventions—temporary solutions that buy time until experts arrive.
Long-Term Fixes That Stop Water Damage From Returning
Those short-term steps will keep things from getting worse, but you’ll need permanent repairs to stop water damage from coming back.
Install moisture barriers in walls and crawlspaces, repair flashing and roof penetrations, upgrade drainage solutions around foundations, and replace/restore damaged drywall with mold-resistant materials.
Follow a contractor’s plan, seal exterior gaps, fix grading, and choose durable finishes to prevent recurrence.
How to Monitor Repaired Areas for Early Warning Signs
After repairs are finished, keep a simple routine of inspections so you can catch problems early before they worsen.
Check repaired areas weekly at first, then monthly, using basic monitoring techniques: moisture meter readings, visual checks for discoloration or bubbling, and touch tests for dampness.
Note any warning indicators, photograph changes, and log dates so you can act quickly if issues recur.
Common Mistakes That Make Water Damage Worse
One common mistake is rushing repairs without finding the moisture source—you’ll patch and paint only for stains to return because the leak or high humidity wasn’t fixed.
Never rush fixes—patching stains without finding the moisture source just guarantees they’ll come back.
- Ignoring water damage prevention steps.
- Skipping moisture control diagnostics.
- Painting over damp walls.
- Delaying mold inspection and remediation.
Quick Checklist to Follow After Finding Wall Water Damage
First, stop further damage by cutting power to affected areas and containing the leak or moisture source so you can assess the situation safely.
Then document the damage, ventilate the space, and call a professional if you suspect structural issues or extensive mold.
Next, dry surfaces, remove soaked materials, photograph progress, and note measurements.
Prioritize water damage prevention and follow basic wall repair techniques or hire a contractor.
Frequently Asked Questions
Can Water Damage Affect Electrical Wiring Behind the Wall?
Yes — water can reach wiring and compromise electrical safety; like a Trojan horse, moisture detection becomes essential because hidden dampness can corrode insulation, cause shorts, spark fires, and force shutdowns until a qualified electrician inspects.
Will Wartime or Flood-Related Contaminants Require Special Handling?
Yes—you’ll need contaminant identification first, since wartime or flood-related hazards can be toxic. You’ll follow local regulations, use PPE, and arrange special disposal for hazardous materials to protect health and avoid legal issues.
Can Wallpaper Be Salvaged After Water Stains?
“Where there’s life, there’s hope.” You can often salvage wallpaper after water stains if you act fast: perform a moisture assessment, start wallpaper restoration steps, replace ruined sections, and dry and treat adhesive to prevent mold.
Do Water Stains Indicate Structural Framing Rot Risk?
Yes — water stains can signal framing rot risk; you’ll use moisture detection and water stain removal steps, inspect studs, probe soft spots, and act fast to dry, repair, or hire a pro before decay worsens.
How Long After Drying Can Furniture Be Returned Near Repaired Wall?
You can return furniture after about 48–72 hours of drying time for minor repairs; for deeper or previously saturated areas, wait a week to confirm furniture placement won’t trap moisture or cause mold, and monitor humidity levels.
