
How to Paint a Wall: A Step-by-Step Video Guide Worth Watching
You’ll get a clear, pause-and-practice video that shows every step—from prepping, priming, and protecting surfaces to cutting in, rolling, and finishing—so you can copy tool angles, timing, and fixes in real time. It highlights when to repaint, how to pick finishes and low‑VOC paint, plus quick fixes for drips and brush marks. You’ll save time and avoid common mistakes, and if you keep going you’ll learn advanced tips, money‑saving tricks, and pro-level techniques.
Why a Step-by-Step Video Is Best for Learning to Paint a Wall
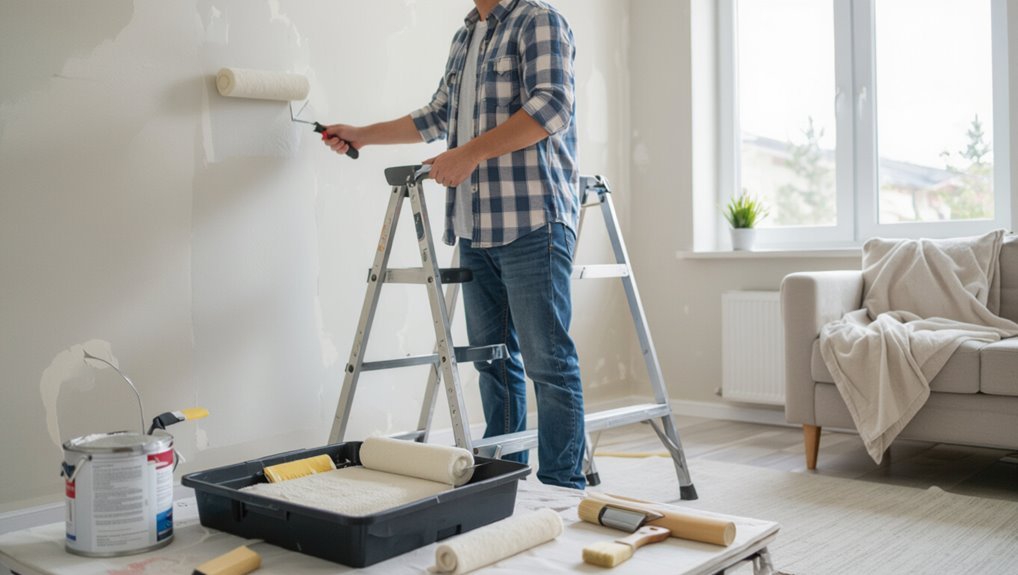
Anyone can pick up tips faster from a step-by-step video because you see each motion, tool angle, and timing in real time.
You’ll grasp techniques faster through visual learning, notice common mistakes, and replay tricky segments.
These video benefits cut trial-and-error time, boost confidence, and help you match professional results.
Cutting trial-and-error, building confidence, and guiding you to professional-level results faster and with fewer mistakes.
You’ll learn pacing, pressure, and edge work by watching, not guessing.
Quick Step-by-Step Overview of the Painting Process
Start by prepping the room, then work systematically: clear furniture, protect floors and trim with drop cloths and tape, repair and sand any imperfections, prime if needed, and finally apply paint—cutting in first with a brush and rolling the main surfaces in overlapping passes for even coverage. Use proper painting techniques and thorough wall preparation to get crisp, durable results.
| Step | Tool | Tip |
|---|---|---|
| Prep | Tape | Clean first |
| Prime | Roller | Thin coats |
| Paint | Brush+Roller | Overlap passes |
When to Repaint: Signs Your Wall Needs Fresh Paint
If your walls show peeling, noticeable stains, or faded color, it’s time to repaint—these signs mean the finish no longer protects or flatters the surface.
Check for scuffs, nail pops, mold, or uneven gloss.
Consider updating because color trends shift and worn paint dates a room.
Also assess wall textures; damaged or dirty textures call for repainting or repair before applying new coats.
Choosing the Right Interior Paint Type
You’ll pick the finish (flat, eggshell, satin, semi-gloss) based on durability and how much light or imperfections you want to hide.
Decide between latex and oil bases for drying time and cleanup, and check VOC levels so you’re choosing a safer option for your home.
We’ll compare sheen options, base differences, and VOC/safety so you can make the best choice.
Paint Sheen Options
Pick the right sheen and you’ll change how a room looks and performs: flat and matte hide imperfections, eggshell and satin offer a soft, durable finish for living spaces, while semi-gloss and gloss resist moisture and clean easily—making them better for kitchens, bathrooms, and trim.
Use sheen comparisons to match function and style; consider sheen effects on light, durability, and cleaning needs.
Base Type Differences
Sheen affects how a room looks and performs, but the paint’s base—latex (water-based), oil (alkyd), or specialty formulations—determines application, durability, odor, and cleanup. You’ll weigh base material considerations and primer options to match finish to use. Choose latex for easy cleanup, oil for tough surfaces, specialty for unique needs.
| Feel | Use | Emotion |
|---|---|---|
| Smooth | Living | Calm |
| Durable | Trim | Pride |
VOC And Safety
Because indoor paint choices affect your health as much as appearance, you should consider VOC levels and safety features before buying.
Choose low- or zero-VOC formulas for VOC reduction, check labels for certifications, and confirm stain resistance and washability.
Use ventilation, masks, and gloves as basic safety measures, store cans sealed, and keep children and pets away during application and drying for safer indoor air.
Pick the Right Paint Finish: Matte, Eggshell, Satin, Semi-Gloss
Now you’ll pick a finish—matte, eggshell, satin, or semi-gloss—based on how you want the wall to look and reflect light.
Consider durability and washability, since higher-sheen finishes stand up better to scrubbing and wear.
Match the finish to the room: matte for low-traffic living spaces, eggshell or satin for most rooms, and semi-gloss for trim, kitchens, and bathrooms.
Finish Appearance Differences
When you pick a paint finish, you’re choosing how light and texture will show on your walls—matte hides imperfections, eggshell gives a soft low-luster, satin adds a subtle sheen that cleans well, and semi-gloss reflects noticeably and stands up to heavy wear.
Consider finish texture and sheen impact as you decide.
- Matte flat look for cozy rooms.
- Eggshell balances soft glow.
- Satin/semi-gloss highlight trim.
Durability And Washability
Sheen affects how a room looks, but durability and washability determine how long that look lasts under daily use.
You’ll consider durability factors like stain resistance, film thickness, and abrasion tolerance when choosing finish.
Washability benefits include easy spot cleaning and fewer touch-ups, letting you keep walls fresh with minimal effort.
Pick a finish that balances appearance with practical maintenance needs.
Best Room Applications
Choosing the right finish—matte, eggshell, satin, or semi-gloss—helps you match a room’s function to how the walls will look and hold up over time.
Use color psychology and wall textures to guide choices.
- Matte: hides flaws in low-traffic rooms.
- Eggshell: subtle sheen for living areas.
- Satin/semi-gloss: durable, easy-clean for kitchens and baths.
How Much Paint to Buy for One Wall (Simple Calc)
Anyone can figure out how much paint you need for a single wall with a few quick measurements and a simple math step: measure the wall’s width and height in feet, multiply them to get square footage, then divide by the paint’s coverage (usually on the can) to determine how many gallons you’ll need.
Use wall dimensions to calculate paint quantity, adjust for doors/windows, and round up.
Essential Tools and Supplies for Painting a Wall
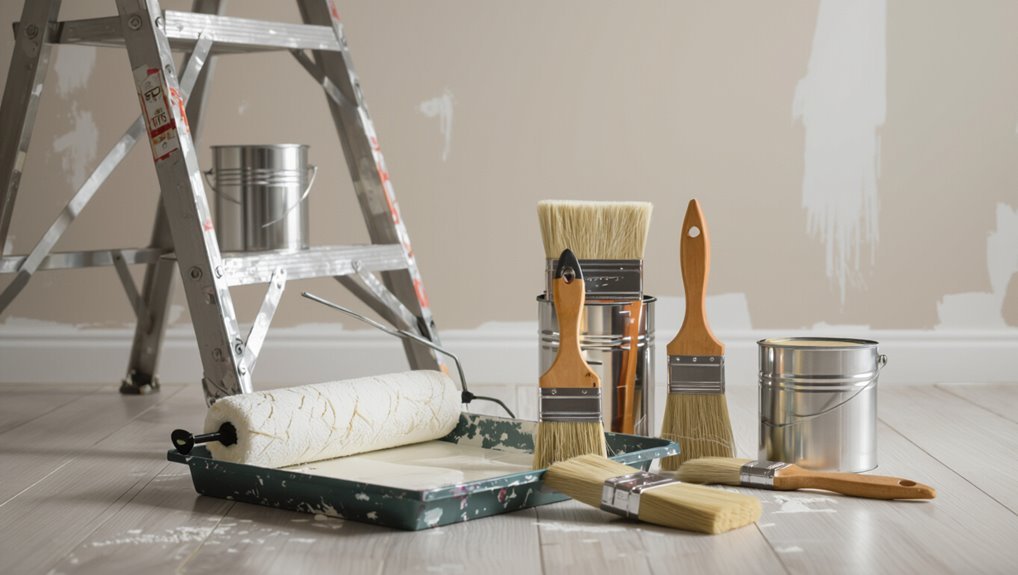
Start with a few key tools and supplies so you’re ready to work efficiently: a quality angled brush for corners and trims, a 9–12″ roller with a nap suited to your wall texture, a tray and liner, painter’s tape, a drop cloth, a putty knife and spackle for small repairs, sandpaper, a stir stick, and the correct primer and paint.
Start with essential tools: angled brush, 9–12″ roller, tray and liner, tape, drop cloth, spackle, sandpaper, primer and paint.
- Choose tools by paint color and wall texture.
- Prep surfaces; fix holes, sand smooth.
- Keep extras: liners, brushes, and tape.
Safety and Ventilation Before You Start Painting
Before you open a can of paint, make sure the room has good airflow by opening windows, using fans, or running an exhaust to push fumes outside.
Put on gloves, a respirator or mask rated for paint fumes, and eye protection so you don’t inhale or absorb chemicals.
Keep paint cans sealed and stored upright in a cool, well-ventilated spot away from heat or children.
Proper Ventilation Setup
Although painting can feel like a simple weekend task, you should set up proper ventilation to keep fumes from building up and to help paint dry evenly.
Use ventilation methods that boost air flow and preserve air quality. Do this quickly and safely:
- Open windows and doors for cross-breeze.
- Run box or exhaust fans toward outdoors.
- Use floor fans to circulate air and speed drying.
Personal Protective Equipment
Safety gear keeps you comfortable and prevents injuries and long-term health problems while you paint. Wear protective eyewear or safety goggles, a respirator mask or dust mask, and choose gloves selection for solvent resistance. Use a paint apron, long sleeves, work boots, and knee pads for support. Stay safe and ventilate well.
| Item | Purpose |
|---|---|
| Respirator mask | Fumes |
| Knee pads | Comfort |
Safe Paint Storage
When you’re not using paint, store cans in a cool, dry place away from direct sunlight and heat sources to prevent pressure build-up and premature spoilage.
You’ll extend paint longevity by sealing lids tightly and using ideal containers for small batches.
Keep ventilation good and labels visible.
- Cool, dry shelf
- Airtight lids or sealers
- Away from children and flames
Prep the Wall: Cleaning, Sanding, and Fixing Holes
Start by giving the wall a thorough cleaning so paint will stick and repairs will last.
For proper wall preparation, do a surface inspection, remove dust and grease with mild detergent, sand rough spots, and wipe away residue.
Fill holes with spackle, sand smooth when dry, and vacuum debris.
You’ll create a solid, even base ready for the next step.
When and How to Prime a Wall for Best Coverage
Although you’ve prepped the surface, priming is the essential next step to guarantee even coverage and lasting adhesion.
Although the surface is prepped, priming next ensures even coverage and long-lasting adhesion.
You’ll see priming benefits like uniform color and sealed porous patches.
Use these priming techniques to work efficiently:
- Spot-prime stains and repairs first.
- Roll broad areas with nap suited to texture.
- Cut edges with a brush, then blend into rolled sections.
Protect Floors, Trim, and Furniture
Before you lay down drop cloths or tape, move furniture out of the room or to the center and cover it—this makes cleanup faster and prevents accidental paint on valuable pieces.
Next, install floor protection and secure furniture covers. Use trim masking to protect baseboards and moldings.
Check seams and tape edges as part of area preparation so dust and splatters stay contained.
How to Cut In Clean Edges With a Brush
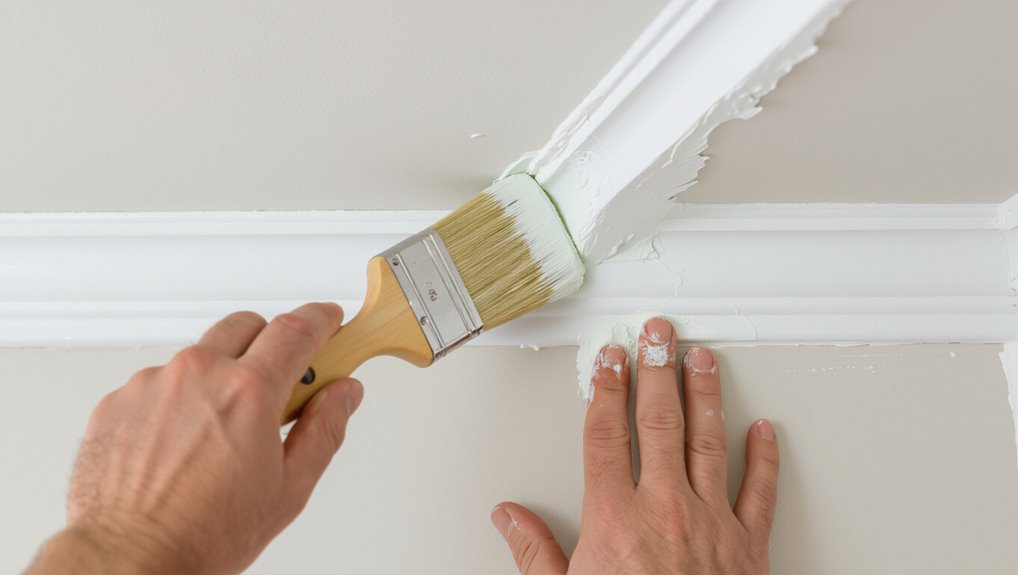
Gather the right tools—angled sash brush, paint tray, and a steady hand—so you’re set up for clean lines.
Use short, controlled strokes and hold the brush like a pencil to keep paint on the wall, not the trim.
Finish by feathering and blending the brushwork into the rolled paint for a seamless edge.
Tools You Need
You’ll need a high-quality angled sash brush, a paint tray or small cup, and clean water or solvent handy to cut in crisp edges with a brush.
Gather essential tools for wall prep: brush types, roller options, painter’s tape, drop cloths, extension poles, paint trays, and cleaning supplies.
- Quality angled sash brush
- Paint tray or small cup
- Clean water/solvent and rags
Proper Brush Technique
With your angled sash brush and a cup of water or solvent ready, start by loading the brush correctly: dip only the tip of the bristles into paint, tap off excess, and keep the ferrule clean so you get a controlled, even line.
Hold the brush like a pencil, use short steady brush strokes, maintain consistent pressure, and practice application techniques for crisp, straight edges.
Feathering And Blending
Feathering and blending let you soften the brush line so it disappears into the rolled area, giving a seamless edge; use light, overlapping strokes that taper off as you move away from the corner or trim.
You’ll use feathering techniques and blending methods to match texture and color.
Practice these steps:
- Load brush lightly.
- Stroke outward, tapering.
- Check and smooth edges.
Choose the Right Roller Nap and Frame
Pick a roller nap that matches your wall’s texture and the paint’s sheen so you get even coverage without excess splatter.
Match the roller nap to your wall texture and paint sheen for even coverage and minimal splatter.
Choose nap length based on smooth, semi-smooth, or textured surfaces.
Compare roller types for fiber and pile.
Pick a sturdy frame; check frame materials for corrosion resistance and comfortable grip.
A good combo saves time and improves finish.
How to Load a Roller and Avoid Drips
1. Load the roller evenly, dip one-third into the tray well, and roll across the slope to distribute paint—this roller technique reduces excess.
- Roll off excess on the tray ridge.
- Keep a steady wrist and moderate speed.
- Check edges of the roller for puddles.
These steps improve drip prevention so you won’t have runs or splatters while painting.
Rolling Technique for Smooth, Even Coverage
Now that your roller’s loaded correctly, you’ll want to focus on a consistent rolling pattern to get smooth, even coverage.
Start with a “W” or zigzag and then fill it in without pressing too hard, keeping the nap lightly touching the wall.
Work each section until the paint looks uniform before moving on.
Proper Roller Loading
Load the roller correctly to get smooth, even coverage without drips or lap marks.
You’ll feel the right roller technique when the nap’s saturated but not dripping; check paint consistency before loading.
Roll in the tray’s well, spin off excess, then start.
- Dip evenly into tray.
- Roll back and forth to distribute.
- Test on scrap wall.
Consistent Rolling Pattern
With the roller properly loaded and excess paint removed, keep a steady pattern to avoid streaks and uneven buildup.
You’ll work in overlapping W or N shapes, maintaining the rolling technique across a 3×3 foot section.
Keep paint consistency even on the roller, reload before it dries, and finish with light, unbroken strokes to blend edges for a smooth, uniform surface.
Keep a Wet Edge and Avoid Lap Marks
If you want a smooth, uniform finish, keep a wet edge as you paint so each new stroke blends into the previous one before it dries.
You’ll avoid visible lap marks by working quickly and overlapping wet paint.
- Work in manageable sections.
- Maintain consistent pressure and paint load.
- Blend edges immediately to prevent drying seams.
When to Apply a Second Coat and How to Inspect Coverage
Wait until the first coat is fully dry to the touch and no longer tacky before you consider a second coat.
Hold a light at an angle and scan the wall to inspect for thin spots, streaks, or visible brush/roller marks.
If coverage looks uneven or the original color shows through, apply the second coat.
When To Apply
Before you grab another brush, let the first coat fully set so you can judge coverage accurately; touch the wall lightly after the recommended dry time and look for streaks, thin spots, or color variations.
Consider timing considerations and environmental factors like humidity and temperature before recoat.
- Wait recommended dry time.
- Check for thin areas.
- Account for humidity and temp.
Inspect For Even Coverage
Now that the first coat has dried and you’ve checked for thin spots, it’s time to inspect the wall systematically for even coverage and decide whether a second coat is needed. Walk the room in different light, note color consistency and wall texture. Touch for smoothness; mark areas needing more paint.
| Area | Issue | Action |
|---|---|---|
| Top | Sheen variation | Re-roll |
| Center | Thin | Second coat |
| Bottom | Texture show | Light spray |
Safely Paint Around Outlets, Switches, and Fixtures
A few careful steps will keep outlets, switches, and fixtures safe while you paint. You’ll use outlet safety and switch protection habits, follow fixture precautions, and practice electrical awareness alongside precise painting techniques.
- Turn power off, remove covers, label screws.
- Tape edges with painter’s tape; shield fixtures.
- Use angled brush for tight gaps; replace covers when dry.
Handling Corners, Textured Walls, and Trim Transitions
When you reach corners, textured walls, and trim changes, slow, deliberate strokes and the right tools will give you crisp lines and consistent coverage. Use corner techniques with a sash brush, textured application via stippling or nap rollers, and focus on trim details with painter’s tape. Shift tips: feather edges, match nap, and work in small sections.
| Tool | Purpose | Tip |
|---|---|---|
| Brush | Corners | Angle |
| Roller | Texture | Stipple |
| Tape | Trim | Seal |
Quick Fixes: Drips, Streaks, Bubbles, and Brush Marks
If you spot a drip, sand it smooth once the paint’s dry and feather in a bit of touch-up paint to blend the repair.
To get rid of brush marks, work wet edges and use long, light strokes or switch to a foam roller for a smoother finish.
Tackle small mistakes right away so they don’t harden into bigger problems.
Fixing Paint Drips
Spot the drip early and you’ll save time and frustration later.
You can fix drips cleanly with simple drip removal techniques and precise touch up methods so the wall looks smooth.
- Scrape excess with a razor, sand lightly.
- Wipe dust, apply thin touch up coat.
- Feather edges, blend with surrounding paint and allow full dry.
Eliminating Brush Marks
Catch brush marks while the paint’s still wet so you can smooth them out without redoing the whole wall.
Lightly drag a clean, slightly damp brush along the mark using consistent brush techniques to blend edges. For stubborn ridges, sand gently when dry and feather with thin paint application.
Work in small sections, keep strokes even, and wipe excess paint immediately to prevent new marks.
Drying Times and When to Rehang Decor
Because paint cures in stages, you’ll want to know both dry-to-touch and full-cure times before rehanging anything.
Because paint cures in stages, check both dry-to-touch and full-cure times before rehanging anything.
Check manufacturer drying times and room conditions; humidity and temperature affect cure. Wait full-cure for heavy items to avoid marks or slippage.
- Light items: 24 hours.
- Medium frames/mirrors: 48–72 hours.
- Heavy decor: 7–14 days.
Cleanup Checklist for Brushes, Rollers, and Disposal
Once your paint has cured enough to rehung decor, you’ll want to wrap up cleanup properly so brushes and rollers stay usable and you dispose of waste safely.
Rinse brushes with appropriate cleaning solutions, reshape bristles, and air dry.
For roller maintenance, remove excess paint, wash or replace covers, and store upright.
Follow local disposal practices for leftover paint, cans, and contaminated rags.
Save Money on Your DIY Paint Job: And When to Hire a Pro
Smart choices can cut hundreds off your paint job without sacrificing quality: pick mid-grade paint with good coverage, prep thoroughly to avoid extra coats, and buy only the tools you’ll actually reuse.
Smart choices save hundreds: choose mid-grade paint, prep well to avoid extra coats, and keep only reusable tools.
- Estimate accurately — DIY Budgeting saves wasted gallons.
- Trade time for savings — do walls yourself if you’re confident.
- Hire Professional Help for high ceilings, complex repairs, or tight deadlines.
Accent Walls, Stripes, and Other Advanced Techniques
Accent walls and stripes give your room personality without repainting everything, and they’re well within reach if you plan carefully and use the right tools.
You’ll pick a focal wall, test colors, and try simple accent wall techniques like color blocking or textured finishes.
For stripe painting, measure, tape precisely, and paint in thin coats for crisp lines and professional results.
How to Use the Video: Pause Points and Practice Drills
Start the video and stop at the marked pause points to practice each step before moving on; you’ll work at your own pace and build confidence through short, focused drills.
Use these video engagement tips and practice techniques to sharpen skills quickly.
- Rewind and repeat tricky strokes.
- Time short drills (5–10 minutes).
- Compare your results to the clip and adjust.
Resources and Products We Used in the Video
Now that you’ve practiced the key strokes and paused the video where needed, let’s look at the tools and materials we used so you can match the results.
You’ll need quality rollers, angled brushes, painter’s tape, drop cloths, primer, and a tray.
Check color selection swatches, compare paint brands for coverage and sheen, and keep a small touch-up kit for final fixes.
Frequently Asked Questions
Can I Paint Over Wallpaper Without Removing It First?
Yes — you can sometimes paint over wallpaper, but don’t get smug: wallpaper types matter. You’ll need to prep for proper paint adhesion, repair seams, prime, and choose compatible paint so it won’t bubble or peel.
How Do I Choose Eco-Friendly Low-Voc Paint Brands?
Look for green paint options labeled low‑VOC or zero‑VOC, check for third‑party certifications, read ingredient lists, and choose sustainable brands with transparent supply chains and recycled packaging; you’ll support healthier indoor air and reduced environmental impact.
What Temperature and Humidity Are Ideal for Painting?
Like a knight with a smartphone, you should paint between 50–85°F (10–29°C); ideal conditions hover near 65–75°F with 40–60% RH. Humidity effects slow drying or cause blistering, so avoid extremes.
How Long Does Paint Smell Linger After Application?
Typically the paint smell lingers 2–7 days, though low-VOC paints and good paint ventilation can reduce smell duration to 24–48 hours; you’ll speed clearing by airing out, using fans, and keeping humidity and temperature ideal.
Can I Use Leftover Paint for Touch-Ups Years Later?
About 60% of homeowners keep leftover paint, so yes — you can use it for touch-ups years later if you practiced proper paint storage and saved a sample for color matching; shake, test, and thin slightly if needed.
