
How to Spray Paint Walls Without Getting Overspray on the Ceiling
You can spray paint walls without ceiling overspray by sealing and taping the ceiling edge, hanging plastic or a drop cloth along the top, and using low-tack painter’s tape on a clean, dry surface. Use an HVLP sprayer or a small airless tip, keep the gun 6–8 inches from the wall, and spray in controlled, overlapping passes while shielding corners with cardboard or a brush-feathered edge. Keep kids and pets away, and keep going to learn pro tips and troubleshooting.
Quick Action Plan to Prevent Ceiling Overspray
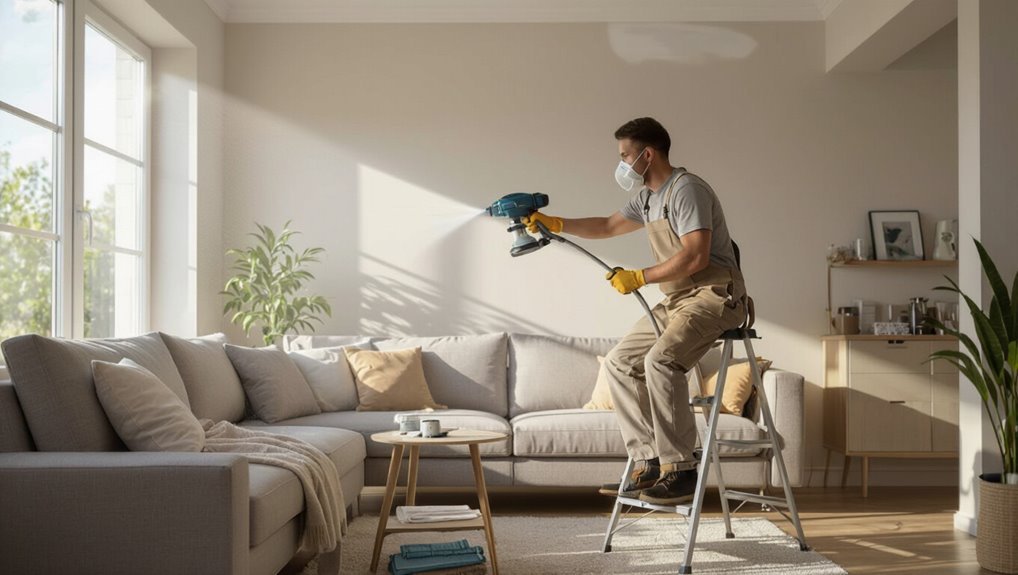
Start by cutting power to any ceiling fans and covering light fixtures with plastic and painter’s tape so you won’t damage them or risk sparks.
Next, hang a 6–8 foot drop cloth or plastic sheeting along the top edge of the wall and secure it to the ceiling with low-tack painter’s tape to catch overspray.
Then prep edges, mask trim, choose gentle overspray techniques, and verify ceiling protection.
Why Ceiling Overspray Happens
When you spray paint, tiny paint particles get carried by the air, and if airflow isn’t controlled those particles will drift upward and settle on the ceiling. Turbulence from the spray gun, room drafts, and improper technique all increase that drift.
You should manage fan direction, nozzle pressure, and spray angle because overspray causes visible specks. So plan ceiling protection and proper technique to limit spread.
Who Benefits Most From These Tips
If you’re a DIY homeowner tackling ceilings, these tips help you avoid messy overspray and save time.
If you’re a pro painter, they’ll keep your lines sharp and your clients happy.
If you’re renting, they’ll help you protect the property and get your deposit back.
DIY Homeowners With Ceilings
Ceiling work can feel intimidating, but these spray-painting tips make the job manageable for DIY homeowners who’ve ceilings to tackle.
You’ll learn spray techniques that minimize drift and how wall preparation—cleaning, patching, and proper masking—cuts touchups.
With basic tools and careful taping, you’ll protect trim and fixtures, save time, and get professional-looking results without hiring help.
Professional Painters Needing Precision
Because you work to exacting standards and tight schedules, these spray-painting techniques help you control atomization, maintain edge definition, and cut rework time—so you can deliver flawless finishes faster and with less material waste.
You’ll adopt precision techniques and professional tips focusing on spray accuracy, paint control, advanced masking, equipment optimization, surface preparation, and expert insights to finish jobs efficiently and reliably.
Renters Preserving Property
When you need to refresh a rental without risking your deposit, these spray-painting tips help you cover walls cleanly, avoid overspray, and remove paint trails so the space looks professional when you move out.
You’ll follow renter agreements, respect lease considerations, and focus on wall preparation and paint colors that suit tenant rights and property maintenance.
Smart rental upgrades deliver aesthetic improvements without harming the unit.
Choose the Right Sprayer for Interior Walls
For interior walls, you’ll want to pick a sprayer type that fits the job—HVLP for fine control or an airless for faster coverage.
Pay attention to nozzle size, because the wrong tip will leave uneven coats or excessive overspray. Choosing the right combination saves time and gives a smoother finish.
Sprayer Type Selection
Picking the right sprayer makes the job faster and yields a much smoother finish than rolling or brushing; you’ll want to match the tool to your room size, paint type, and skill level.
Consider sprayer features and basic spray techniques to control overspray.
- HVLP: fine finish, less bounce
- Airless: fast coverage
- Cordless: portable
- Turbine: steady pressure
Nozzle Size Matters
One small change—choosing the right nozzle size—can make your sprayer lay down paint evenly without drips or heavy buildup.
You’ll use nozzle selection tips to match paint viscosity and surface texture. For interior walls, select ideal nozzle types like 0.013–0.017″ for latex and 0.009–0.011″ for thinner coatings.
Test on scrap board, adjust pressure, and maintain consistent overlap for smooth coverage.
Pick the Right Nozzle Size to Reduce Overspray
Choose a nozzle size that matches your paint’s viscosity and the surface you’re coating to cut overspray and improve control.
You’ll pick nozzle types for thinner or thicker paints and adjust the spray pattern to suit walls or trim.
Keep tips simple:
- Match nozzle to paint viscosity
- Narrow spray pattern for edges
- Wider for large flat areas
- Test on scrap before starting
Set Spray Pressure to Minimize Drift
Set your spray pressure lower to give you better control and less airborne drift.
Match the nozzle size to the paint viscosity so the atomization is smooth at that lower PSI.
Together, the right pressure and nozzle cut down overspray and create a cleaner finish.
Lower PSI For Control
Lowering the spray pressure gives you tighter control over the paint pattern and cuts down on airborne drift.
Start by dialing the PSI down a few points from the manufacturer’s recommendation and adjust as you go until the atomization looks smooth and the edges stay crisp.
Use a low pressure technique for precision control and follow these tips:
- Test on cardboard first
- Reduce pressure incrementally
- Watch for spatters
- Keep consistent distance
Match Nozzle To Paint
When you match the nozzle size to the paint’s viscosity and type, you’ll get a cleaner atomization and far less overspray drift. You should check nozzle compatibility charts, test spray patterns, and lower PSI as needed to control drift. Choose the smallest nozzle that still feeds paint smoothly for better control.
| Nozzle | Use |
|---|---|
| Small | Thin paints |
| Medium | Medium viscosity |
| Large | Heavy coats |
Match Paint Type: Low-Overspray Options
If you want to minimize overspray and get a cleaner finish, start by matching your paint type to low-overspray options like low-VOC acrylics, water-based enamels, or specially formulated low-atomization spray paints.
Choose based on low overspray paints and paint consistency to suit your sprayer.
Select low-overspray paints and match paint consistency to your sprayer for the cleanest, most controlled finish
- Low-VOC acrylics
- Water-based enamels
- Low-atomization sprays
- Hybrid low-overspray blends
Thin Paint to the Correct Viscosity and How Much
You’ll want to get your paint to the right consistency so it sprays smoothly and doesn’t clog or run.
Use a viscosity cup or flow test to measure thickness, then compare to the manufacturer’s target seconds.
Adjust thinning ratios gradually—add small amounts, test, and repeat until you hit the recommended range.
Achieve Proper Paint Consistency
Although spray systems vary, getting paint to the right viscosity is essential for smooth atomization and even coverage.
So you’ll need to thin acrylic, latex, or enamel to the manufacturer’s recommended ratio and test it in your gun.
Keep consistency steady by:
- Choosing proper thinning agents per paint type
- Following manufacturer ratios
- Testing spray pattern on cardboard
- Adjusting incrementally until spray is uniform
Measure Viscosity Correctly
1–2 quick tests will tell you whether your paint’s ready: measure viscosity with a viscosity cup or a handheld meter, thin to the manufacturer’s target (often 12–18 seconds in a Ford #4 cup for acrylics, but check your paint spec), then recheck after mixing.
Use viscosity measurement techniques to confirm flow, apply recommended paint thinning methods, and test spray pattern before starting.
Adjust Thinning Ratios
When the viscosity’s right, adjust thinning by small increments and recheck until the spray pattern’s consistent; you’ll prevent runs and overspray by testing then tweaking.
Use thinning techniques that match your sprayer and paint viscosity, and note ratios.
- Start with manufacturer’s ratio
- Add small solvent amounts
- Test spray on cardboard
- Record successful mix
Check and Set Spray Pattern Width
Wondering how wide your spray fan should be? You’ll set pattern width to match surface size and avoid ceiling overspray.
Use proper spray technique: start narrow for edges, widen for open areas. Keep consistent spray distance to maintain even coverage.
Adjust the nozzle incrementally, watching for feathered edges or pooling, and recheck height and angle before painting wall sections.
Test Spray on Cardboard Before You Start
Before you start on the wall, spray a few test passes on a piece of cardboard to confirm pattern, flow, and color match.
You’ll do paint testing and cardboard preparation to avoid surprises.
Try these checks:
- Hold sprayer distance and angle
- Watch for drips or sputters
- Verify color under room light
- Adjust pressure or nozzle settings before painting
Measure and Tape a Clean Line at the Ceiling
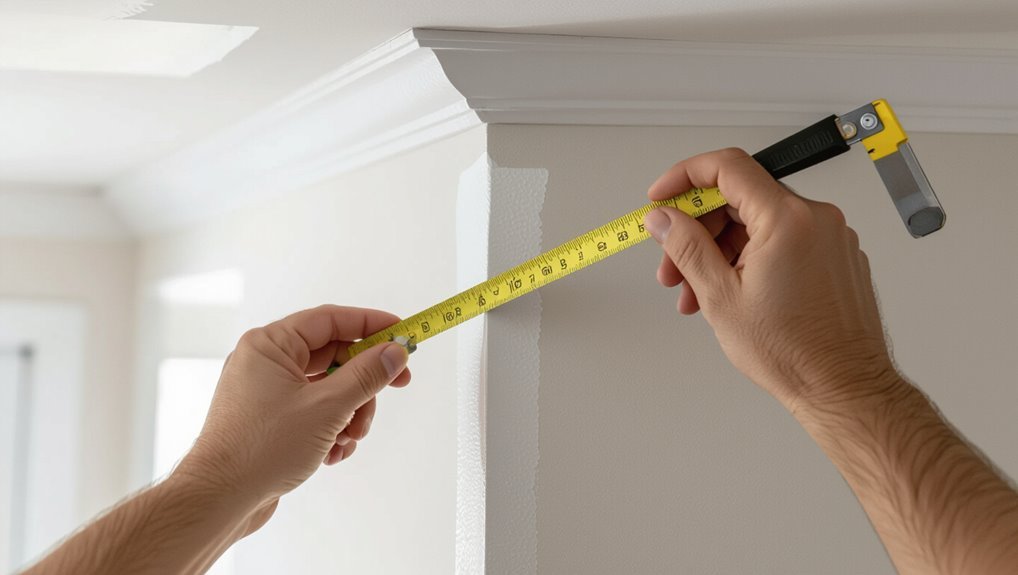
Before you tape, wipe the ceiling edge so dust and grease won’t lift the tape or cause bleed-through.
Pick a quality painter’s tape rated for delicate surfaces and press it firmly to create a tight seal.
Use a straightedge or measure along the ceiling to run a perfectly straight tape line before you spray.
Clean Ceiling Surface
Measure carefully and tape a straight, crisp line where the ceiling meets the wall to keep paint off the ceiling.
For ceiling preparation and surface cleaning, you’ll remove dust and grease so tape adheres and paint won’t bleed.
Use these steps:
- Vacuum or dust with a soft brush
- Wipe with mild detergent solution
- Rinse with clean water
- Let fully dry before painting
Choose Quality Painter’s Tape
Choose a high-quality painter’s tape that’s specifically designed for interior trim and delicate surfaces so you get a crisp line without damaging the ceiling. You’ll compare tape types, adhesion strength, tape width, and surface compatibility to minimize paint bleed and guarantee easy removal. Check removal ease ratings before you tape.
| Tape | Strength | Width |
|---|---|---|
| Delicate | Low | 0.94″ |
| General | Medium | 1.41″ |
| Heavy-duty | High | 2″ |
Create Straight Tape Edge
Start by marking a straight guideline along the ceiling where the wall paint should stop. Then apply painter’s tape directly on that line so the edge stays crisp. Measure carefully, press the tape edge, and follow these steps:
- Align tape to your pencil guideline
- Smooth with a plastic card for firm tape application
- Paint and wait to dry
- Perform tape removal slowly at a 45° angle
Mask the Ceiling With Tape Plus Paper or Film
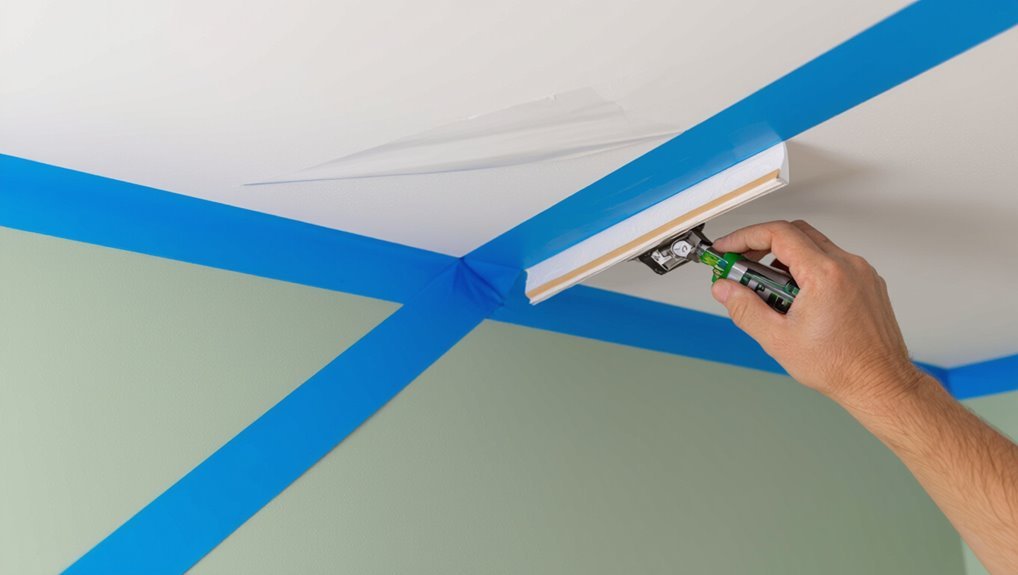
When you’re ready to protect the ceiling from overspray, run painter’s tape along the top edge of the wall and press it down firmly so the paint won’t bleed under; then attach masking paper or plastic film to the tape, smoothing it out to cover the ceiling area you want protected.
Choose tape types and masking materials for ceiling preparation, use precise tape application and film usage, rely on painter’s tools, and follow spray techniques for edge protection and coverage options.
Use Drop Cloths and Fabric Barriers
Before you spray, lay down drop cloths and hang fabric barriers to catch overspray and protect floors, furniture, and fixtures.
You’ll get drop cloths benefits and see fabric barriers effectiveness immediately. Secure edges, overlap seams, and keep barriers taut.
Use breathable cloth, weighted corners, and clips.
- heavyweight canvas drop cloth
- disposable plastic sheets
- fabric barrier panels
- grip clips and weights
Build a Quick Cardboard Shield for Edges
Measure and cut a strip of cardboard to fit the length of the edge you’re protecting, keeping the cuts straight for a snug fit.
Hold the shield in place and secure it with painter’s tape so it won’t shift while you spray.
This simple guard lets you spray confidently along trim and corners without overspray.
Measure And Cut Precisely
Cut a cardboard shield that fits snugly against the edge you’re protecting so overspray won’t sneak past your tape.
Measure twice, mark clearly, and use precision tools to score clean lines. Employ steady cutting techniques for smooth edges.
Then test-fit the shield before painting.
- Measure accurately
- Score, don’t tear
- Trim excess
- Test fit and adjust
Secure With Painter’s Tape
1 simple roll of painter’s tape and a snug cardboard shield will keep overspray off trim and adjacent walls; press the tape down firmly along the edge, align the cardboard so it sits flush, and smooth both tape and shield to eliminate gaps where paint can sneak through.
| Step | Action |
|---|---|
| 1 | Apply tape: tape application techniques |
| 2 | Position shield |
| 3 | Smooth seal |
| 4 | Paint |
| 5 | Remove: tape removal tips |
Install a Pole-Mounted Shield for Longer Runs
If you’re planning longer, uninterrupted runs, attach a pole-mounted shield to keep overspray off ceilings and adjacent walls; it gives you a steady, portable barrier that lets you focus on an even coat.
- Check pole shield design for coverage
- Follow simple installation tips for secure fit
- Make spray pattern adjustments to avoid gaps
- Consider material selection for durability and weight
Use Painter’s Pyramids and Risers Safely
Pick pyramid sizes that match the weight and footprint of your tools so they won’t wobble under load.
Place risers so your work platform is level and you’ll have secure footing while reaching high areas.
Tape or cover ceiling edges where the risers meet the wall to prevent accidental paint scuffs.
Choose Stable Pyramid Sizes
Anyone working with painter’s pyramids needs to match pyramid height and riser size to the job and the object you’re elevating; choosing stable sizes prevents tipping, uneven paint coverage, and accidents.
You’ll consider pyramid stability via size selection: base width, height ratio, material choice, and weight distribution.
Follow design principles for safe application method:
- Choose appropriate base width
- Verify height ratio
- Check material choice
- Balance weight distribution
Position Risers Correctly
You’ve chosen stable pyramid sizes, so now focus on placing the risers correctly to keep your work steady and safe.
Position risers under the piece’s center of gravity, spacing them evenly to maximize risers stability. Adjust risers height for a level working plane and lock them firmly.
Test weight distribution before spraying, and recheck connections periodically to prevent wobble or collapse.
Protect Ceiling Edges
Before you spray, cover and shield the ceiling edges where overspray and drips are most likely to reach; using painter’s pyramids and properly set risers keeps the workpiece elevated and reduces the chance of paint hitting trim or drywall.
Use ceiling protection and edge sealing with masking techniques and painter’s tape for overspray prevention, clean lines, spray control, shield application, ceiling preparation, edge masking.
- Set pyramids stable
- Tape and seal seams
- Angle shield toward spray
- Check riser height
Ventilate the Room: Fans, Intake, and Exhaust
When you’re about to spray paint, set up a clear airflow plan so fumes move out and fresh air comes in; position a box fan facing out of a window or door to serve as exhaust and open an opposite intake to draw clean air through the space.
Use simple ventilation techniques and arrange fans to optimize air circulation. Seal off adjacent rooms, run fans continuously, and avoid blocking flow.
Best Painting Order to Cut Passes and Overspray
If you want crisp edges and minimal wasted paint, start by cutting in all trim, corners, and ceilings with a steady hand or brush before moving to broad spray passes; that lets you control overspray and establish clean boundaries so your spray work only needs to fill in the field.
- Cut trim and corners first
- Mask with edge protection
- Use overlapping spray paint techniques
- Finish vertical passes last
Stand and Position Yourself for Less Drift
After you’ve cut in and blocked edges, set your stance to reduce drift and keep control of the spray pattern. You’ll use body movement and position adjustment to maintain spray angles, ideal stance, and hand positioning. Focus on drift control with subtle steps, micro adjustments, and distance management so your spray technique stays consistent.
| Feet | Shoulders |
|---|---|
| Wide | Square |
| Shift | Rotate |
| Step | Lean |
| Anchor | Relax |
Keep a Consistent Gun-to-Wall Distance
Keep the spray gun at an even distance from the wall so coverage stays uniform and you avoid runs.
Hold a simple guide—like a spacer or taped mark—to keep that gap consistent across each pass.
Practice smooth, steady motion until the distance and speed feel natural.
Maintain Even Distance
A steady 6–8 inch gap between the spray gun and wall gives you the most even coverage, so hold the gun at that distance and move it in smooth, controlled passes; varying the gap causes uneven buildup and visible stripes.
Keep focused on spray technique and distance control.
- Maintain posture
- Use steady speed
- Overlap passes
- Check from angles
Use A Guide Tool
If holding the gun at a steady 6–8 inches feels awkward or your arms tire, use a simple guide tool to lock in the distance and get consistent results.
Clamp a spacer or attach a stick to the gun to maintain that gap.
You’ll appreciate guide tool benefits: fewer runs, uniform coverage, and less ceiling overspray when using guide tools as a reliable reference.
Practice Smooth Motion
Start moving the gun in a steady, controlled sweep, keeping it about 6–8 inches from the wall so your coat lays down evenly without drips.
You’ll develop a smooth technique through consistent practice; stay relaxed, keep wrist movement fluid, and overlap passes slightly.
- Keep distance steady
- Move at uniform speed
- Don’t pause on spots
- Practice with scrap boards
Move the Spray Gun in Smooth, Even Strokes
Keep the spray gun level and glide it across the wall in steady, overlapping passes so each pass covers about 50% of the previous one.
You’ll maintain consistent distance and speed, part of good spray technique and wall preparation. Move smoothly from one end to the other, keeping wrist and elbow relaxed.
Avoid jerky starts or stops to prevent uneven coverage and drips.
Overlap Passes Correctly to Avoid Gaps and Feathering
Proper overlap keeps your finish seamless: aim to cover roughly half of the previous pass with each new one so you won’t leave thin spots or feathered edges.
Use this overlap technique and practice feathering control to get even coverage.
Tips:
- Keep consistent speed
- Maintain gun distance
- Watch wet edge
- Blend at ends to avoid lines
Stop Each Pass Without Spraying Toward the Ceiling
After you’ve overlapped passes correctly, learn to stop each sweep cleanly so you don’t spray paint onto the ceiling.
As you approach the top edge, ease trigger pressure, pause briefly, then release to cut the spray; this spray technique prevents a nasty blotch.
Pair it with proper wall preparation—protect trim and mask ceilings—so every pass ends sharply without stray mist or runs.
Feather Tight Corners With a Brush
When you reach tight corners where the sprayer can’t get a clean edge, switch to a brush and feather the paint out in short, light strokes so the shift blends with the adjacent sprayed area.
Use proper feathering techniques and match brush types to trim size.
- Use angled sash brush
- Light, short strokes
- Keep paint thin on brush
- Blend into spray edges
Backroll to Lock Paint and Reduce Misting
Once you’ve feathered tight corners with a brush, lock the sprayed finish in by backrolling—this helps press paint into the surface, evens out texture, and cuts misting so you get a smoother result. You’ll use the backroll technique for misting reduction, working wet-on-wet with a nap roller to finish.
| Step | Tool | Tip |
|---|---|---|
| 1 | Roller | Light pressure |
| 2 | Brush | Blend edges |
| 3 | Spray | Overlap panels |
| 4 | Dry | Inspect finish |
Aim the Spray Gun at the Correct Angle
- Aim the spray gun at the correct angle to limit drift and protect the ceiling. Keep these quick tips in mind:
- Hold the gun perpendicular for even coverage.
- Tilt slightly toward the wall where needed.
- Maintain consistent distance and motion.
- Adjust nozzle and pressure for tighter fan.
These spray gun angles help with controlling overspray and improve accuracy as you paint.
Technique for Textured vs. Smooth Walls
When you’re painting textured walls you’ll need to clean and mask differently than for smooth surfaces, since crevices trap dust and require more buildup.
Adjust your spray technique too — use a slightly higher pressure and slower passes for texture, and lighter, closer passes for smooth walls.
These prep and technique tweaks will help you get even coverage without runs or missed spots.
Prep Surface Differences
Because textured and smooth walls hold paint and hide flaws differently, you’ll prep them with distinct steps and tools.
Use proper surface preparation techniques for each painting surface materials type so paint adheres and looks even.
- Smooth: clean, sand, prime
- Textured: dust, touch-up high spots, use thicker primer
- Repair cracks separately
- Mask ceilings and trim tightly
Spray Technique Adjustments
Although the basic spray pattern is the same, you’ll adjust technique for textured versus smooth walls to get even coverage and avoid runs.
For textured surfaces, widen pattern width, increase wall distance slightly, and use short bursts with varied spray angle.
For smooth walls, keep consistent motion, steady trigger control, and closer wall distance.
Use ergonomics tips for gun handling and practice overspray techniques.
Handle Doorways and Trim Without Splatter
Start by taping and cutting in so you control every edge—mask doorframes, light switches, and baseboards with painter’s tape and use a trimmed brush to paint a clean line along trim before you spray.
Focus on doorway preparation and trim protection.
Then:
- Remove hardware and hinges
- Cover floors with drop cloths
- Use low-tack tape for delicate trim
- Spray away from edges in short bursts
Paint Safely Around Fixtures and Vents
Light switches, vents, and light fixtures are easy to damage or clog, so shut off power at the breaker, remove or mask covers, and seal vents with tape and paper before you spray. Use fixture protection and vent masking, practice controlled spray technique for overspray reduction, focus on paint containment and edge safeguarding.
| Item | Action |
|---|---|
| Switches | Mask |
| Vents | Seal |
| Fixtures | Remove |
Control Overspray Near Crown Molding
When you’re working near crown molding, run a high-quality masking tape along the edge to create a crisp barrier and press it firmly so paint can’t seep underneath.
Adjust your spray gun angle so the mist goes toward the wall and away from the molding, using shallower passes to reduce overspray.
Combine tight taping with controlled angles and you’ll cut cleanup and protect trim.
Masking Tape Techniques
Because crown molding sits where wall meets ceiling, you’ll need precise masking to control overspray and keep crisp lines; use proper masking tape application and timed tape removal techniques.
Follow these quick steps:
- Clean the molding before taping.
- Use low-tack painter’s tape snug to the edge.
- Press down the seal with a putty knife.
- Remove tape at 45° while paint’s tacky for best edge.
Spray Angle Control
After you’ve taped and sealed the crown molding, focus on your spray angle to keep overspray off the ceiling and molding. Use precise spray technique, angle adjustments, and distance management. Practice gun positioning, motion consistency, and spray pattern control for varying wall texture. Adopt painting angles and control methods for precision control.
| Tip | Purpose |
|---|---|
| Low angle | Deflect overspray |
| Short strokes | Consistent coverage |
| 6–12 in | Ideal distance |
| Test spray | Verify pattern |
Ideal Indoor Humidity and Temperature for Spraying
If you want even coverage and fast drying, aim to spray in a space that’s between 65–75°F (18–24°C) with relative humidity around 40–50%.
You’ll control humidity levels and the temperature range to reduce drips and overspray drift.
- Use a hygrometer and thermostat
- Ventilate slightly for consistent RH
- Pause if humidity spikes
- Keep HVAC steady during work
Best Time of Day for Indoor Spraying
When you spray indoors, choose a time when temperatures and humidity are steady—typically mid-morning to early afternoon—so paint flows consistently, dries predictably, and ventilation systems won’t be cycling unpredictably.
Pick periods with the best lighting so you can see coverage and avoid shadows. Make sure room temperature is within recommended range, keep vents steady, and plan work to minimize interruptions that alter airflow or light.
Use Tack Cloths to Remove Dust Before Spraying
Good lighting and stable airflow help you spot and manage dust, but even a tidy room can leave fine particles on walls that show up after spraying.
Use tack cloths for quick dust pickup; they’ll reduce prep time and improve finish.
Focus on tack cloths benefits and dust removal techniques:
- Wipe in one direction
- Fold to expose clean surface
- Replace when dirty
- Avoid over-rubbing
Clean and Maintain Your Sprayer During the Job
Keep your sprayer running smoothly by cleaning and checking it regularly during the job. Wipe exterior surfaces, flush the hose and gun between color changes, and strain paint to prevent clogs.
Follow sprayer maintenance tips: inspect seals, tighten fittings, and replace worn nozzles. Use proper cleaning techniques to avoid buildup and keep spray patterns consistent so you finish without interruptions.
Troubleshoot Drift: Common Causes and Fixes
1 common problem you’ll face is paint drift—fine mist carried by air that lands where you don’t want it.
You’ll diagnose drift factors like wind effects, paint properties, and poor surface preparation.
Adjust spray techniques, use masking options suited to ceiling materials, improve environmental controls and ventilation strategies, and follow safety measures.
- Check wind effects
- Adjust spray techniques
- Improve masking options
- Optimize ventilation strategies
Fix Accidental Ceiling Overspray Without Repainting the Wall
First, inspect the overspray to see how much paint landed on the ceiling and whether it’s wet, tacky, or fully dry.
Then choose an appropriate removal method—wiping with a damp microfiber for fresh spots, a mild solvent or rubbing alcohol for dried latex, or a plastic scraper for stubborn flecks—testing first in an inconspicuous area.
Work carefully so you remove the paint without damaging the ceiling texture or the wall below.
Assess The Overspray Area
Before you grab any tools, take a close look at the overspray to decide how to address it: note the paint type, how much area is affected, whether the ceiling finish is textured, and if the wall finish nearby could be damaged during cleanup.
Use quick overspray detection and plan ceiling preparation steps.
Consider:
- paint age
- coverage extent
- texture type
- nearby finishes
Remove Overspray Safely
Start by gathering the right supplies and choosing a test spot so you can remove overspray without damaging the ceiling or the adjacent wall.
Use gentle cleaners, a soft cloth, and plastic scraper; test a mild solvent if needed.
Work slowly with circular motions, rinse, and dry.
Follow overspray removal techniques and ceiling cleaning tips to avoid paint lift or texture damage.
Remove Overspray From Painted, Popcorn, and Textured Ceilings
Tackle overspray on painted, popcorn, or textured ceilings with care—these surfaces trap paint differently, so you’ll need the right approach for each to avoid damage.
Use proven overspray removal techniques and gentle ceiling paint solutions. Try:
Use gentle, proven overspray removal methods—soft brushes, mild detergents, and careful scraping for tough spots.
- Soft-bristled brush for textured areas
- Mild detergent and sponge for painted ceilings
- Plastic scraper for stubborn spots
Test small areas first to prevent harm.
When to Repaint the Ceiling vs. Spot-Cleaning
Check the ceiling’s overall paint condition first: look for widespread discoloration, peeling, or texture damage that suggests repainting.
If the issues are small and the paint is sound, determine whether spot-cleaning or targeted touch-ups will remove stains without noticeable patching.
Use this quick assessment to decide whether a full ceiling repaint or a simple clean-and-touch approach will save time and give the best result.
Assess Ceiling Paint Condition
Before you grab a roller, take a close look at the ceiling’s overall condition so you can decide whether a full repaint is necessary or if spot-cleaning will do.
Perform a quick paint assessment focusing on texture, discoloration, flaking, and previous ceiling paint quality.
Check for:
- peeling
- stains
- bubbling
- uneven sheen
Determine Spot-Clean Feasibility
If the issues are limited to small stains or a few flaky spots, you can usually spot-clean instead of repainting the whole ceiling.
However, widespread peeling, heavy discoloration, or texture damage means a full repaint is the safer bet.
Inspect closely, perform an overspray evaluation, and test spot clean techniques on an inconspicuous area.
If stains lift and texture remains intact, proceed with targeted cleaning.
Protect Furniture and Floors From Fine Mist
While you spray, cover nearby furniture and floors with taped-down drop cloths or plastic sheeting so fine mist can’t settle and stain; use painter’s tape to seal edges and weigh corners with heavy objects to prevent lifting.
Cover furniture and floors with taped drop cloths or plastic sheeting; seal edges with painter’s tape and weigh corners.
You should also:
- Create continuous protective barriers around work area
- Remove small items or bag them tightly
- Overlap sheets by several inches
- Check and retape edges periodically
Safety Gear: Respirators, Goggles, and Gloves
You’ll need proper safety gear—an NIOSH-rated respirator, splash goggles, and chemical-resistant gloves—to protect your lungs, eyes, and skin from paint fumes and solvents; choose a respirator with organic-vapor cartridges for solvent-based paints, snug-fitting goggles that seal around the eyes, and nitrile or neoprene gloves that resist permeation.
Follow safety standards, select appropriate respirator types, use protective equipment, guarantee proper ventilation, and observe eye safety, skin protection, paint hazards, and health precautions.
Child- and Pet-Safe Precautions During Spraying
Keep children and pets out of the work area and downwind of any overspray; close doors to adjacent rooms, post a clear warning sign, and seal gaps so curious little ones can’t wander in.
Keep kids and pets away—close doors, post warnings, and seal gaps to keep curious little ones safe from overspray.
You’ll prioritize child safety and pet safety with non toxic paint, ventilation tips, protective gear, space preparation, surface cleaning, mindful spraying, area containment, and steady spray technique.
- Lock doors and post signs
- Use non toxic paint and masks
- Improve ventilation and seal vents
- Clean surfaces and contain area
Reusable Masking and Shields That Save Time
Reusable masking and shields cut cleanup time and protect surfaces so you can focus on spraying efficiently; use magnetic, adhesive, or clip-on shields and washable drop cloths that you can reposition and reuse between coats.
You’ll choose shield materials for edges and corners, practice masking techniques for crisp lines, and swap reusable pieces between coats to save time, reduce waste, and keep ceilings spotless.
Estimate How Much Masking Material You’ll Need
Start by measuring each wall’s width and height and add lengths for windows, doors, and trim so you can calculate total linear feet of masking needed; always include at least 10–15% extra for overlap, errors, and allowances around corners.
Then use masking materials and simple quantity estimation to order supplies.
- Calculate wall perimeters
- Add openings and trim
- Include overlap allowance
- Round up rolls/packs
Budget Tools That Reduce Overspray Risk
A few inexpensive tools can dramatically cut overspray and save you time and cleanup: You’ll want budget friendly tools like a shield, tack cloths, and low-pressure sprayers to practice overspray reduction techniques and control spray pattern. Use the table below to compare quick picks.
| Tool | Purpose | Cost |
|---|---|---|
| Shield | Edge protection | Low |
| Tack cloth | Dust pick-up | Very low |
| HVLP gun | Controlled spray | Moderate |
When to Hire a Pro Instead of DIY Spraying
Using basic tools can cut overspray, but some jobs still call for a pro—especially when scale, complexity, or finish quality exceed what you can reliably manage.
You should hire when a professional assessment, cost evaluation, or project complexity and time constraints outweigh your experience level.
Consider safety considerations, quality expectations, and equipment availability.
Weigh safety, expected finish quality, and available equipment before deciding to tackle the job yourself or hire pros.
- Safety considerations
- Project complexity
- Time constraints
- Equipment availability
Pre-Spray Checklist to Follow Before You Pull the Trigger
Before you pull the trigger on the sprayer, run through a short checklist so you don’t create extra work or damage the space:
clear furniture, cover floors and trim with drop cloths and tape, test spray pattern on cardboard, adjust pressure and tip, confirm ventilation and lighting, wear protective gear, and review spray techniques and preparation tips so your finish’s clean and overspray stays off the ceiling.
Frequently Asked Questions
How Long Should I Wait Before Removing Ceiling Masking Tape?
Wait about 30–60 minutes for touch-dry paint, but remove ceiling masking tape within 24 hours to avoid damaging paint adhesion; if paint’s fully cured, you can peel it later, but don’t wait too long.
Can I Spray With an Open Window Only, No Fans?
Yes — you can, but think of the open window as a lone lighthouse guiding fumes away; use spray paint techniques that minimize mist, position yourself downwind, and follow ventilation tips to avoid buildup and drifting paint.
Will Spray Paint Affect My Smoke Detectors or Alarms?
Yes — spray paint effects can trigger or foul smoke detectors, so you should take smoke detector precautions: disable or cover detectors temporarily, ventilate well, and test or replace batteries after painting to guarantee alarms work properly.
How to Deal With Overspray on Light Fixtures and Chandeliers?
You’ll prevent overspray by using fixture protection: cover chandeliers and fixtures with plastic drop cloths or painter’s bags, secure with tape, remove delicate pieces if possible, and work from the correct distance and spray angle to minimize drift.
Can I Use a Consumer HVLP for Large Interior Walls?
Yes—you can, though like a cautious sailor you’ll need preparation: HVLP benefits include reduced overspray and finish control, but for Large wall techniques you’ll use larger nozzles, slower passes, multiple thin coats, and frequent masking.
