
What Is Textured Paint for Walls and When Should You Use It?
Textured paint mixes pigment, binders and aggregates to give your walls a tactile, depth-filled finish that hides flaws and stands up well in high-traffic areas. It’s thicker than regular paint, needs special tools and longer drying times, and can be harder to touch up later. Use it for accent walls, ceilings, or rooms where durability and visual interest matter; avoid it if you want perfectly smooth, easily refinished surfaces — keep going to learn practical tips and comparisons.
What Is Textured Paint for Walls
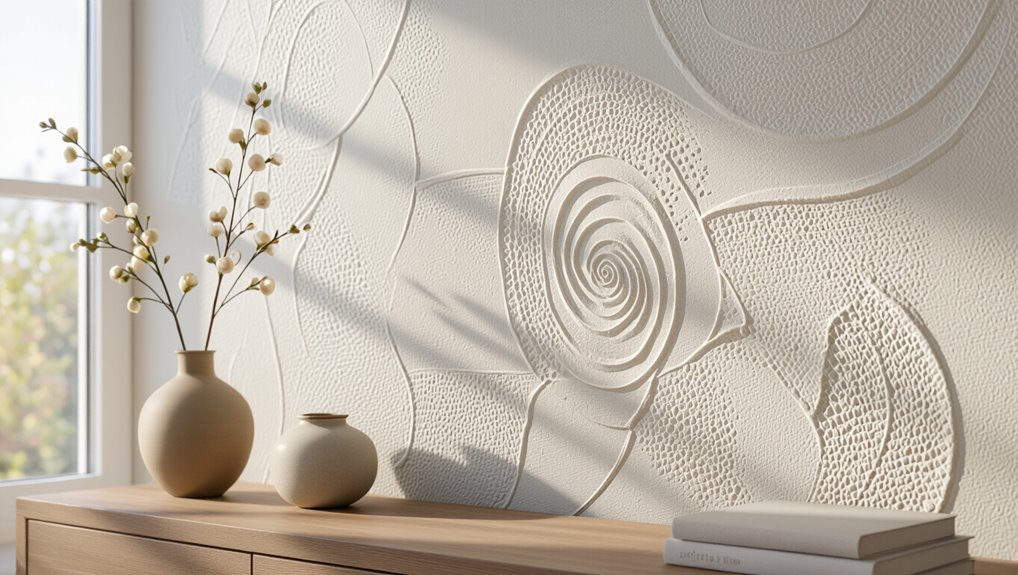
Textured paint for walls is a coating that combines pigments, binders, and aggregates or additives to create a tactile surface instead of a flat finish.
You’ll learn textured paint benefits like hiding imperfections and adding depth; you can apply it in varied textured paint applications—accent walls, ceilings, or high-traffic areas—to boost durability and visual interest while masking minor flaws and reducing maintenance needs.
Textured Paint vs. Regular Wall Paint
You’ll notice textured paint gives a more tactile, varied finish while regular wall paint stays smooth and uniform.
You’ll also find that applying textured paint often takes different tools and techniques and can hide surface flaws better.
Finally, you’ll weigh durability and maintenance—textured finishes can be tougher but trickier to repair than standard paint.
Texture And Finish Differences
Although both products cover walls, textured paint and regular wall paint deliver very different looks and tactile qualities: you get pronounced textured aesthetics versus smooth surfaces.
Textured paint hides imperfections, adds depth, and creates surface interest; regular paint emphasizes color fidelity and consistent sheen.
Choose based on room style, maintenance preferences, and desired finish variety—visual impact versus sleek, uniform appearance.
Application And Durability
When you apply textured paint, you’ll deal with thicker material, special tools like rollers with nap or trowels, and slower drying times, while regular wall paint goes on thinner, levels out more easily, and usually needs fewer coats.
These differences affect how long the finish lasts, how it resists scuffs and moisture, and how simple future repairs will be.
You’ll choose application techniques that suit substrate and desired look, and weigh longevity factors: textured surfaces hide wear but can trap moisture, while smooth paints clean easier and are simpler to touch up.
When to Choose Textured Paint: Pros and Cons
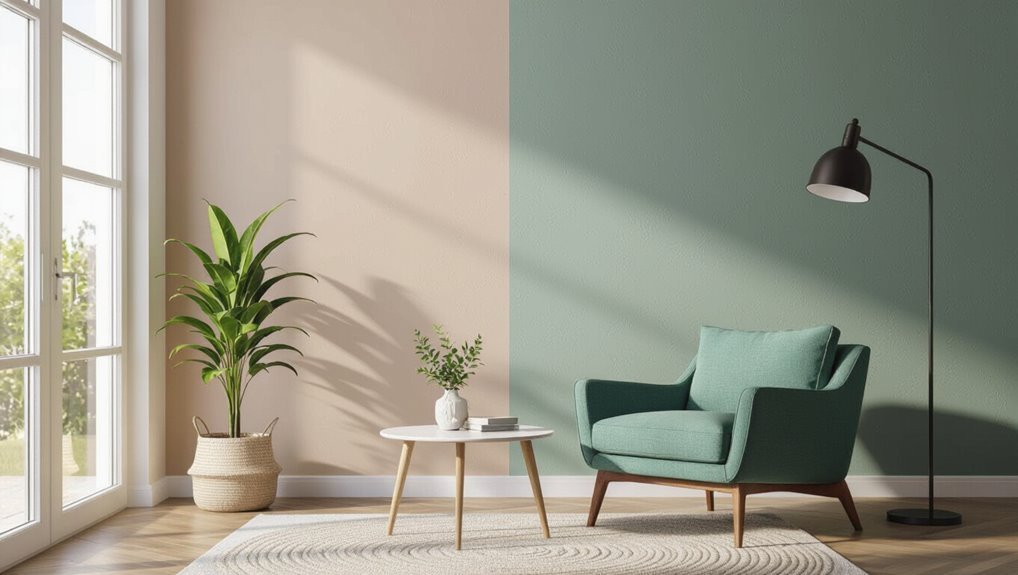
If you’re weighing textured paint for a room, consider both what you want to hide and what you want to highlight: textured finishes mask minor wall flaws and add depth, but they can complicate repairs and limit future color or sheen changes.
Weigh textured paint benefits and textured paint drawbacks:
- Hides imperfections
- Adds visual interest
- Harder to touch up
- Limits refinishing options
Common Materials and Additives in Textured Paint
Texture matters: manufacturers mix a base of latex or acrylic with fillers and binders to create body, then add aggregates like sand, mica, crushed walnut shell, or polymer beads to produce specific looks and tactile effects.
You’ll select additive types for grip, durability, or sheen; lightweight fillers reduce sagging while tougher materials increase impact resistance.
Know material benefits to match performance and texture.
Popular Textured Paint Finishes and How They Look
You’ll find several popular textured paint finishes—like knockdown, orange peel, sand, suede, and Venetian—that each produce a distinct visual and tactile effect, so you can pick one that suits the room’s style and traffic.
Use textured paint styles and decorative techniques to emphasize architecture or hide imperfections.
Use textured paint and decorative finishes to highlight architectural features or discreetly conceal wall imperfections.
- Knockdown
- Orange peel
- Sand
- Venetian
Best Rooms for Textured Paint (Durability and Cleaning)
For high-traffic areas like hallways and family rooms, textured paint can hide scuffs and stand up to frequent contact better than flat paint.
In moisture-prone spaces such as bathrooms and kitchens, choose washable, mold-resistant textured formulations to keep surfaces clean and intact.
We’ll compare durability and cleaning tips so you can pick the right texture for each room.
High-Traffic Areas
Hallways, entryways, kitchens and kids’ rooms get the most wear, so choosing a durable, easy-to-clean textured paint there makes a big difference.
You’ll value high traffic durability and reduced maintenance challenges.
Consider these benefits:
- Hides scuffs
- Resists fingerprints
- Withstands frequent cleaning
- Extends repaint intervals
Choose washable finishes and simple textures for longevity.
Moisture-Prone Spaces
Because moisture speeds up wear and invites mold, pick textured paints designed for bathrooms, laundry rooms and basements that are mildew-resistant and easy to wipe down.
You’ll value moisture resistance and choose finishes that shed water.
Follow installation guidelines carefully: seal surfaces, allow full drying between coats, and use proper ventilation.
That prevents peeling, staining, and mold while keeping textures durable and simple to clean.
Wall Surfaces Suitable for Textured Paint
Before applying textured paint, check the wall’s condition and material—smooth drywall, plaster, concrete, and brick each accept texture differently, so you’ll want to match the product and prep to the surface.
You’ll gain textured paint benefits by choosing proper textured paint techniques. Consider these surface specifics:
- Smooth drywall: prime, sand, thin texture
- Plaster: repair, key coat
- Concrete: etch, bond primer
- Brick: clean, mortar repair
Choosing Textures for Your Style: Rustic to Modern
When you pick a texture, think about how it will echo your room’s style and how much upkeep you’re willing to do; rough, heavy textures suit rustic looks and hide flaws, while smooth or subtle textures fit modern, minimalist spaces and are easier to clean.
Choose textures that boost rustic charm in cozy spaces or convey modern elegance in sleek rooms, balancing durability and maintenance.
How Texture Changes Light and Room Perception
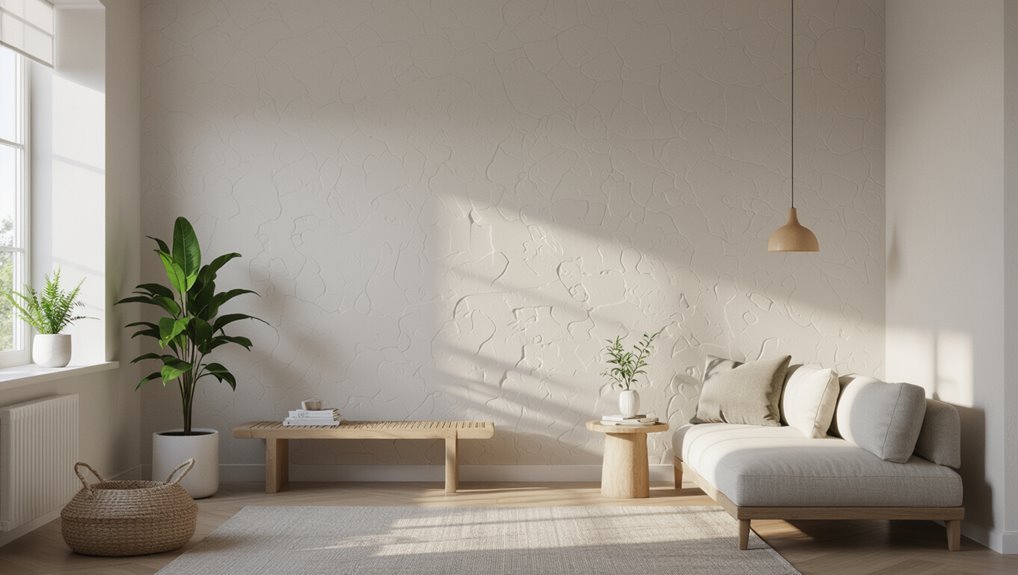
Once you’ve settled on a texture that matches your style, consider how that texture will interact with light and change how the room feels.
You’ll notice shifts in light reflection and spatial dynamics.
Try these tweaks:
- Use matte texture to soften glare.
- Add subtle ridges for depth.
- Choose glossy accents to bounce light.
- Vary texture scale to alter perceived size.
How Textured Paint Hides Flaws and Adds Durability
Because textured paint scatters light and creates visual complexity, it masks minor imperfections like hairline cracks, roller marks, and uneven patches so you don’t have to obsess over every flaw.
You’ll get effective flaw concealment while thicker formulations add a protective layer that resists scuffs and minor abrasions.
That durability enhancement extends surface life, reducing the need for frequent touch-ups or cosmetic repairs.
When Textured Paint Makes Cleaning or Repainting Harder
Textured paint can hide flaws, but it can also trap dirt in crevices, making walls look grim over time.
You’ll find spot cleaning harder because grime and stains sit in the texture instead of wiping off smoothly.
When you repaint, expect more prep—sanding, filling, or even stripping may be necessary to get a uniform finish.
Trapped Dirt Buildup
When you run a hand over a heavily textured wall, you’ll often find grime caught in crevices that regular cleaning won’t reach; those nooks trap dust, oils, and airborne particles, making stains more visible and harder to remove.
You should follow dirt prevention techniques and cleaning frequency guidelines to limit buildup:
- Dust weekly with a soft brush.
- Vacuum crevices monthly.
- Wipe with mild detergent.
- Recoat before stains embed.
Difficult Spot Cleaning
If a stubborn stain sits in a crevice, you’ll find that spot cleaning can be surprisingly tricky: abrasives, excess water, or harsh chemicals can damage the texture or cause uneven color. You’ll face difficult stains and ongoing maintenance challenges, so test cleaners gently, use soft brushes, and accept patience with spot work.
| Tool | Effectiveness |
|---|---|
| Soft brush | Moderate |
| Mild detergent | High |
| Vinegar mix | Low |
| Spot primer | Variable |
| Patience | Essential |
Harder Repaint Prep
Because the surface’s peaks and valleys trap dirt and paint, prepping textured walls for repainting takes more time and care than smooth surfaces do; you’ll need to sand selectively, patch with matching texture, and clean thoroughly to get an even finish.
- Assess texture consistency for repainting challenges.
- Strip loose paint.
- Spot-sand and feather edges.
- Match texture during surface preparation before priming.
How to Prep Walls Before Textured Paint
Start by clearing the room and protecting everything you don’t want textured paint on—cover floors, trim, and furniture with drop cloths and painter’s tape so you can work quickly and cleanly. Assess wall condition, repair cracks, fill holes, sand glossy areas, and clean grime. Prime as needed for good adhesion.
| Task | Purpose |
|---|---|
| Repair | Smooth surface |
| Sand | Promote adhesion |
| Clean | Remove contaminants |
| Prime | Uniform base |
Tools for Textured Paint Application
You’ll want to pick the right roller—thicker naps hold more textured compound for heavy patterns, while shorter naps suit lighter finishes.
For sculpted looks and sharp edges, you’ll reach for trowels and taping knives to shape and smooth the material.
Use the right combo of roller and blade to control texture, speed, and final appearance.
Roller Types Matter
Choosing the right roller can make or break your textured paint job, so know how nap length, material, and core affect finish and ease of application.
You’ll match roller types to texture and master simple application techniques. Consider:
- Short nap — smooth textures.
- Medium nap — subtle knockdown.
- Long nap — heavy texture.
- Foam — delicate finishes.
Trowels And Knives
While rollers lay the base, trowels and knives give you control over texture depth and pattern, letting you sculpt finish from smooth Venetian to rugged skip trowel.
You’ll use trowel techniques to build ribs, swirls, or buttery smooth layers, then refine edges with knife finishes.
Practice pressure, angle, and speed to match desired effect and correct mistakes quickly.
How to Apply a Basic Sand-Textured Finish
Start by preparing the room and your surface: clear furniture away, lay down drop cloths, and tape off trim and outlets so sand-textured paint goes only where you want it.
Use these sand textured techniques and application tips:
Use these sand-textured techniques and application tips to achieve an even, durable finish that’s easy to topcoat.
- Prime and mix sand paint thoroughly.
- Roll in even coats.
- Knock down peaks with a damp trowel.
- Let cure before topcoating.
How to Create Swirl and Skip-Trowel Effects
Before you start, make sure the wall is clean, dry, and patched, and gather a hawk or mixing pan, a stainless steel trowel, and your chosen textured compound or paint.
For swirls, work in small sections and use circular motions with the trowel or brush to form consistent arcs; for skip-trowel, load the trowel lightly and drag it in random overlapping strokes to leave thin, textured ridges.
Practice both techniques on a board first so you can adjust pressure and compound consistency for the look you want.
Preparing Surface And Materials
Although textured finishes can hide minor flaws, you’ll get the best swirl and skip-trowel results by preparing the surface and gathering the right materials first.
Focus on surface preparation and material selection before you start. Then:
- Clean and repair walls.
- Sand glossy areas.
- Choose plaster or texture mix.
- Select trowels and quality primer.
Proceed only when everything’s ready.
Technique For Swirl And Skip-Trowel
Apply the texture mix with a firm, consistent motion: load your trowel, press the compound onto the wall, then use sweeping arcs for swirls or short, interrupted strokes for a skip-trowel look.
Keep tool angle steady, vary pressure for depth, and overlap passes lightly.
Practice swirl techniques on a board, then switch to skip trowel methods for a staggered, rustic finish; feather edges as needed.
Drying and Curing Times for Textured Paint
When you finish rolling or troweling on textured paint, drying and curing start on two different clocks:
- Surface drying often takes hours; check tackiness.
- Recoat intervals depend on manufacturer — heed drying times.
- Full curing duration can be days to weeks; avoid heavy contact.
- Humidity and temperature speed or slow both processes, so control the environment.
How to Touch Up and Repair Textured-Painted Walls
Once the paint’s dry and cured enough to handle, you’ll probably notice small dings, missed spots, or areas where texture didn’t match—those are fixable without redoing the whole wall.
Use targeted touch up techniques: feather edges, match texture with a brush, roller, or stipple tool, and apply thin layers.
For larger flaws, sand lightly, fill, retexture, and use repair methods to blend and repaint.
Repainting Over Textured Paint Without Stripping
Before you grab a roller, assess the texture to see if it’s even and well-adhered so paint will cover predictably.
You can prep without stripping by cleaning, repairing loose areas, and lightly scuffing high points to improve adhesion.
When you paint, choose the right tools and technique—thick-nap rollers, compatible primer, and multiple thin coats—to preserve texture and get even coverage.
Assess Surface Texture
Although textured finishes can hide flaws, you still need to evaluate how pronounced the peaks and valleys are before repainting without stripping.
Perform a surface evaluation and texture assessment to decide if paint will level or emphasize texture. Check:
- Peak height
- Valley depth
- Adhesion
- Overall uniformity
If severe, stripping or smoothing might be required.
Prep Without Stripping
If the texture is sound and you’re keeping it, prepping correctly will make the new paint adhere and look its best; start by cleaning, repairing, and scuffing the surface.
Use targeted preparation techniques: wash with mild detergent, patch chips, sand glossy spots, and remove dust.
Follow with a compatible surface priming product to seal and promote adhesion before repainting.
Paint Application Tips
Start by choosing the right tools and paint so you can cover the texture evenly and avoid drips: use a thick-nap roller (3/4″ to 1″) or a textured roller sleeve to reach into crevices.
Keep a high-quality angled brush for edges and corners, and pick a paint formulated for textured surfaces—typically a thicker, higher-viscosity latex or an acrylic hybrid—to minimize runs and guarantee uniform coverage.
- Roll with consistent pressure.
- Brush cut-ins carefully.
- Work in small sections.
- Blend overlaps smoothly.
Focus on paint application and texture techniques to get even, durable results.
Cleaning and Maintenance Tips for Textured Surfaces
Clean textured walls gently but consistently to keep their finish and detail looking fresh; you’ll prevent dirt buildup and accidental damage by using the right tools and techniques.
Use soft-bristled brushes, microfibre cloths, and mild detergent for spot cleaning.
Establish a maintenance schedule—dust monthly, deep-clean annually—and test cleaning techniques on an inconspicuous area before treating larger sections.
Cost of Textured Paint: Materials, Labor, Complexity
Several factors determine what you’ll pay for textured paint—materials, labor, and pattern complexity being the biggest.
Several factors shape textured paint costs—materials, labor, and pattern complexity are the primary drivers.
You should perform a cost analysis and use budgeting strategies to avoid surprises. Consider:
- Material quality and quantity
- Primer and specialty additives
- Labor rates and time estimates
- Intricate patterns increasing hours
Plan contingencies and get multiple quotes to control final expenses.
DIY vs. Professional Textured-Paint Application
Now that you’ve mapped out materials, labor, and pattern complexity, decide whether you’ll tackle textured paint yourself or hire a pro.
Weigh DIY techniques against Professional expertise: compare Cost comparison, Time investment, Skill requirements, and Finish options.
Match Project scope to your ability and schedule, set clear Outcome expectations, and choose the route that balances budget, quality, and timeline.
Common Textured-Paint Mistakes to Avoid
One common pitfall is rushing prep—you’ll get uneven texture, poor adhesion, and visible flaws if you skip cleaning, patching, and priming the surface first.
Rushing prep leads to uneven texture, poor adhesion, and visible flaws—clean, patch, and prime first for best results.
Follow these texture application tips and avoid common texture pitfalls:
- Overloading tools
- Inconsistent pressure
- Ignoring drying times
- Skipping test patches
If you’re careful, you’ll achieve durable, consistent results without costly fixes.
Using Textured Paint for Feature Walls and Styling Ideas
Want a bold focal point without remodeling? Use textured paint on a feature wall to create visual interest and a clear room focal.
Combine paint layering and color contrast, add styling accents, and maintain texture balance for design cohesion. Embrace artistic expression while ensuring theme integration with furniture and accessories so the wall stands out without overpowering the space.
Textured Paint vs. Wallpaper and Panels: Which to Pick
Curious which option will give you the look and durability you need?
You’ll weigh textured paint benefits against wallpaper durability and panel installation.
Consider aesthetic appeal, cost comparison, design trends, surface preparation, and maintenance tips to match room use and skill.
Weigh aesthetics, costs, trends, prep, and upkeep to choose the best finish for your room and skill level.
Decide by priority:
- Durability
- Cost
- Maintenance
- Style
Frequently Asked Questions
Can Textured Paint Cause Mold or Mildew in Humid Rooms?
Textured paint itself won’t cause mold, but it can trap moisture and dirt, so you’ll need mold prevention and humidity control measures; use breathable primers, dehumidifiers, and proper ventilation to avoid mildew in humid rooms.
Can Textured Paint Be Used on Exterior Walls?
Yes — you can use textured paint on exterior walls; it’ll boost exterior durability and aesthetic appeal when you pick weatherproof formulas and proper sealing, but you’ll need correct application and maintenance to prevent moisture issues.
Are Textured Paints Safe for Children’s Rooms and Nurseries?
About 72% of parents prioritize low-VOC finishes, so yes — you can use textured paints in children’s rooms and nurseries if you choose low-VOC, non-toxic formulas; they’ll offer safety features and design benefits like durability and visual interest.
Can You Apply Textured Paint Over Wallpaper Without Removal?
You can, but you shouldn’t usually: textured finishes can hide seams, yet they may compromise wallpaper adhesion and trap moisture. You’ll often get a better, longer-lasting result by stripping wallpaper before applying textured paint.
Do Textured Paints Emit Strong VOCS After Application?
They usually emit low to moderate VOCs emissions, but some formulas release stronger fumes; you should pick low-VOC products, ventilate well during and after application, and follow application tips like wearing a mask and airing rooms thoroughly.
