
Do You Need to Remove Old Paint Before Repainting a Wall?
You don’t always have to remove old paint before repainting a wall—only when it’s loose, flaking, bubbling, contaminated, or incompatible with the new finish. If the coating is sound, you can clean, scuff, spot‑prime, and repaint. Do a quick three‑minute inspection and a tape adhesion test to check hold. Test for lead before aggressive removal. Use primers suited to the surface for best results, and keep reading to see how to decide between stripping, spot‑treating, or repainting.
Quick Answer: Do You Need to Strip Old Paint?
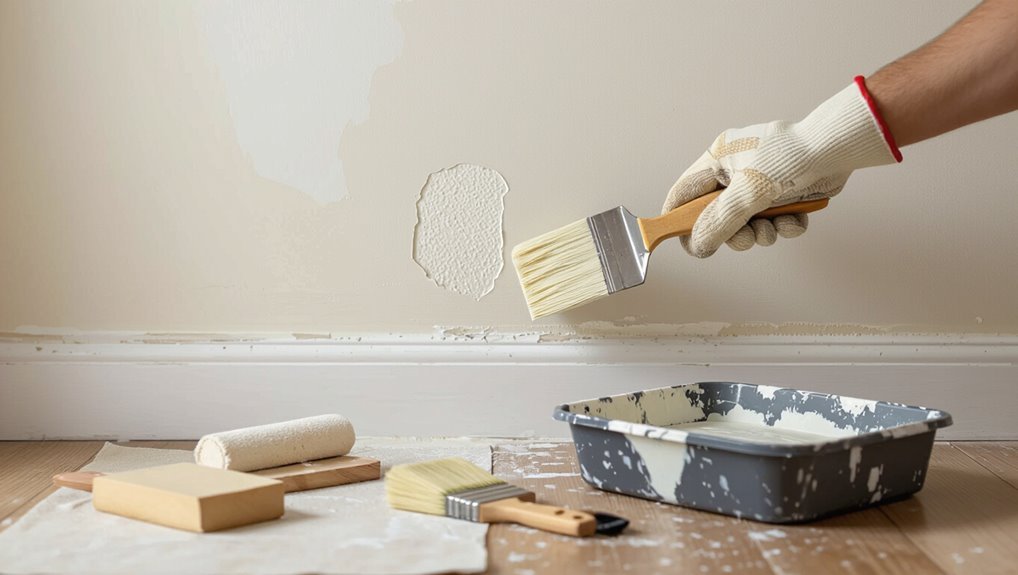
Wondering if you need to strip old paint before repainting? You usually don’t unless the existing coating is peeling, chalking, or compromises surface durability.
Light sanding and cleaning often suffice to promote adhesion and guarantee paint longevity. Strip only when the old layer’s failure would shorten the new finish’s life or when contaminants prevent proper bonding.
Quick Answer: When You Must Remove Old Paint
When should you strip old paint before repainting?
Strip it if paint is flaking, blistering, or poorly adhered; failing layers undermine paint durability and new coatings won’t bond.
Strip failing, flaking, or blistering paint — it won’t hold, and new coatings won’t properly bond.
Remove incompatible systems (oil over latex), lead-based paint, heavy mildew, or severely uneven surface textures that sanding can’t smooth.
Stripping guarantees a stable, clean substrate so your new finish lasts and performs as expected.
Quick Answer: When You Can Leave Paint in Place
If the existing paint is intact and firmly adhered, you can usually leave it in place and spot-treat only the areas that need attention.
You’ll also be fine when the old finish is compatible with your new paint and you’re doing cosmetic touchups rather than a full color change.
Just clean the surface, scuff as needed for adhesion, and proceed.
Intact, Well-Adhered Paint
In many cases you can repaint over an intact, well-adhered coat without stripping it first — as long as the old paint is clean, firmly bonded, and compatible with the new finish.
Check for peeling, chalking, or soft spots; if none, lightly sand and prime glossy areas.
Leaving sound paint saves time, can preserve paint longevity, and lets your aesthetic preferences guide color and sheen choices.
Compatible Existing Finish
Although you don’t always have to strip paint, you can leave an old coat in place when its finish is compatible with the new product you plan to use.
Check paint compatibility and surface types: glossy latex over glossy latex, or oil under oil.
Clean, scuff, and degloss as needed.
If finishes chemically match and adhere, you can save time by repainting without full removal.
Cosmetic Touchups Only
Sometimes you’ll only need to touch up a few small chips or scuffs rather than strip and repaint the whole surface; you can leave the existing paint in place when the damage is limited, the underlying coat is sound, and the new touchup product matches the original sheen and type.
For cosmetic repairs, prep the spot, feather edges, and blend carefully so wall aesthetics stay consistent without full repainting.
Inspect Paint Condition in 3 Minutes
You can assess most surfaces in about three minutes by doing a quick surface scan for obvious flaws.
Check for peeling or blistering paint, then test adhesion by pressing a fingernail or using tape to see if flakes lift away.
If paint peels or fails the adhesion test, you’ll need to remove loose material before repainting.
Quick Surface Scan
How can you tell quickly whether old paint needs removal? Do a fast surface assessment: wipe, press, and note texture, checking for firmness and paint compatibility with planned coating.
- Wipe: remove dust, reveal true finish.
- Press: test adhesion with fingertip.
- Scan: look for irregularities, chalking, or softness that signal prep or stripping.
Look For Peeling
Wondering if peeling paint will ruin your new finish? Check walls for flakes, bubbles, and loose edges by running a gloved hand over small areas.
Mark spots needing attention and plan appropriate paint removal techniques rather than full stripping every time.
Focus on targeted surface preparation methods—scraping, sanding, and spot priming—to guarantee sound patches before you repaint for a durable result.
Test For Adhesion
Want to know if old paint will hold up under a new coat?
Do a quick adhesion test to check paint durability: score a small X, press tape, and pull. If paint flakes, you’ll need to strip or sand. If it stays, you can prime and repaint.
Repeat across the wall to guarantee consistent adhesion tests and reliable paint durability.
Test Adhesion With the Tape Test
Curious whether the old paint will hold up? Use a tape adhesion test: press strong painter’s tape onto a small area, rub firmly, then pull sharply.
If flakes or strips come away, adhesion’s poor and paint durability is compromised. If tape stays clean, the coating’s likely sound.
Repeat across spots to check consistency before deciding whether to strip, sand, or simply repaint.
Identify Lead Paint Before You Start
Before you sand or scrape, check whether the old paint might contain lead. You can use a home lead test kit or hire a certified inspector to confirm it.
If lead is present, you’ll need to follow specific safety and removal rules to protect yourself and others.
Check For Lead Paint
How do you know if the old paint on your walls contains lead? You should assume older coatings might be lead paint and act to reduce health risks.
Use testing methods and follow safe practices and regulations compliance. Consider professional help if unsure.
- Home test kits
- Certified lab testing
- Licensed contractor inspection
Test Before Sanding
Want to sand safely? Test for lead before you begin sanding techniques that disturb old finishes.
Use an EPA-approved kit or hire a certified inspector to identify hazards. If lead’s present, follow containment procedures or avoid dry sanding to protect health and maintain paint adhesion.
Proper testing prevents contamination and guarantees your prep choices keep new coatings bonded and safe.
When Bubbling, Cracking, or Peeling Needs Full Removal
When paint is bubbling, cracking, or peeling across more than a small area, you’ll need to remove the failing finish down to a sound substrate before repainting to guarantee proper adhesion and a long-lasting result.
Inspect causes: bubbling issues, moisture impact, paint compatibility.
Remove loose paint, sand, clean. Restore substrate using repair techniques to fix cracking surfaces and adhesion problems rather than cosmetic fixes.
- Assess causes
- Remove failures
- Repair and prime
When Contaminated or Chalky Paint Requires Stripping
If paint feels chalky, looks powdery, or won’t clean up with a scrub, you’ll need to strip it back to a sound surface before repainting — contamination and chalking prevent new coatings from bonding and can show through fresh paint.
You should perform surface evaluation, consider paint types, select stripping techniques and removal methods, address adhesion issues, test for lead, control moisture effects, and follow prep essentials and environmental safety.
When Multiple Old Coats Cause Adhesion Failure
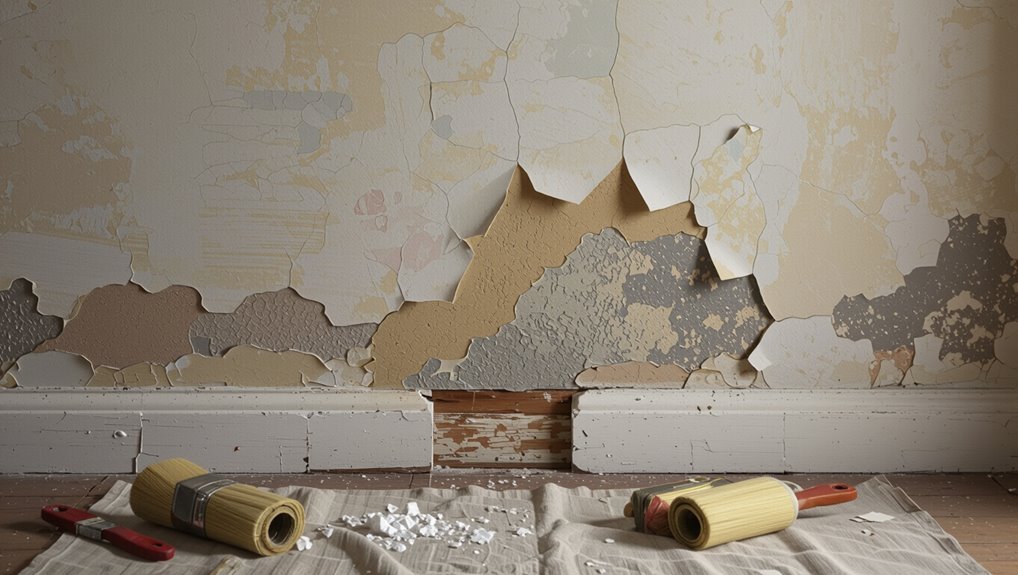
If you’re seeing large flakes where old layers are peeling away, multiple coat delamination is likely the culprit and you can’t just paint over it.
You’ll need to strip or remove the loose layers until you reach a stable substrate.
Prioritize solid adhesion by cleaning, sanding, and repairing the surface before applying new paint.
Multiple Coat Delamination
Because layers of old paint can lose their grip on each other over time, you’ll sometimes see large sections peel away as a single sheet rather than just flake. This is multiple coat delamination, and it signals an adhesion failure between successive paint layers.
You need to recognize multiple coat issues and how paint layer interactions cause broad peeling.
- Inspect extent.
- Remove loose sheets.
- Test adhesion.
Surface Prep Priorities
When multiple old coats are delaminating, prioritize actions that stop further peeling and create a solid base for new paint. You’ll do surface inspection, moisture evaluation, and assess paint compatibility. Use prep tools for surface cleaning, address paint layering and texture treatment, choose repair techniques to restore paint bonding, and match finish types for lasting results.
| Prep tool | Purpose |
|---|---|
| Scraper | Remove loose coats |
| Degreaser | Surface cleaning |
| Sander | Texture treatment |
| Primer | Paint bonding |
How Surface Types Change Your Approach (Drywall, Plaster, Wood, Metal)
Although the basic goal—sound adhesion and a smooth finish—stays the same, the steps you take depend heavily on the surface: drywall, plaster, wood, and metal each demand different prep and removal tactics.
Although the aim — strong adhesion and a smooth finish — remains, prep varies by surface: drywall, plaster, wood, metal.
You’ll adapt drywall preparation with patching and light sanding, use plaster considerations like crack repair, apply wood treatment for sanding/stain blocking, and follow metal care to remove rust and prime.
- Inspect
- Repair
- Prime
Why Glossy Finishes Need Sanding or Stripping
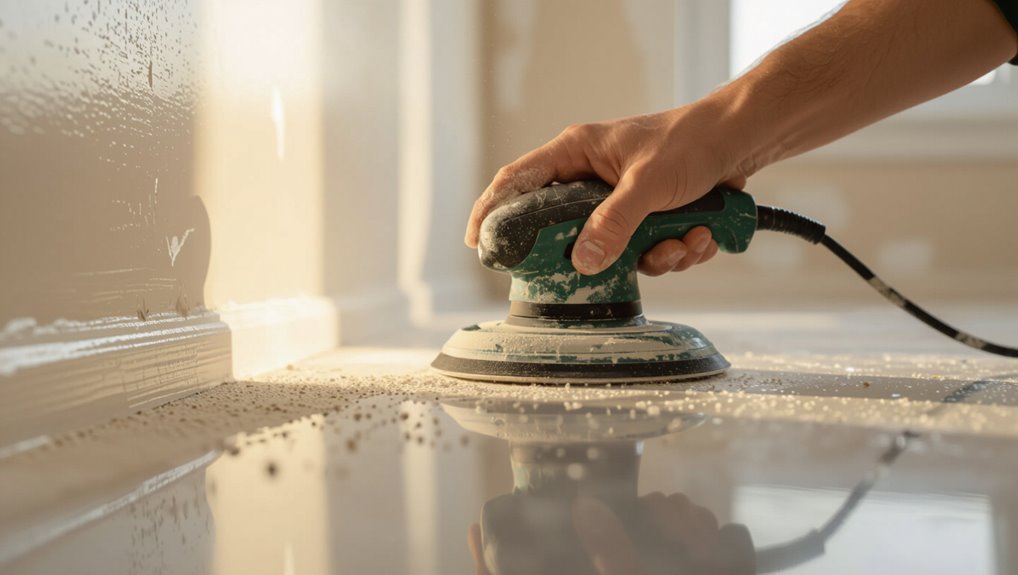
If you want new paint to stick and look smooth, you’ll need to scuff or strip glossy finishes first: their slick, nonporous surface repels fresh paint and causes peeling, flaking, or visible brush marks. You’ll sand or chemically strip glossy paint to improve surface adhesion, then clean, prime, and spot-fill for an even topcoat.
| Step | Purpose |
|---|---|
| Sand | Abrade gloss |
| Strip | Remove coating |
| Clean | Remove residue |
| Prime | Promote adhesion |
| Fill | Smooth defects |
How Moisture Damage Affects Repainting
Because moisture can lurk beneath paint layers for months, you’ll need to find and address any water damage before repainting; otherwise new coats will blister, peel, or trap mold.
Because moisture hides under paint for months, find and fix water damage before repainting to prevent blistering or mold
Do a quick damage assessment and note moisture effects so repairs last.
Then:
- Locate leaks and dry areas thoroughly.
- Remove compromised paint and treat mold.
- Repair substrate and seal before priming.
Treating Textured and Popcorn Ceilings Before Repainting
After fixing moisture issues and repairing the substrate, check textured or popcorn ceilings for loose or water-stained material before you paint.
Gently scrape loose bits, vacuum debris, and spot-prime stains with a stain-blocking primer.
For delicate ceiling textures, use a low-pressure sprayer or roller.
If popcorn paint is flaking extensively, consider professional removal to guarantee an even, durable finish.
Previous Oil or Varnish Coatings: Prep Steps Before Repainting
If your surface has a glossy sheen or stains that resist water, you’re likely looking at oil paint or a varnish layer that needs special handling.
You’ll want to test a small area with solvent and scrape to confirm the coating type before proceeding.
Once identified, scuff-sand, clean, and use a compatible primer to guarantee new paint bonds properly.
Identify Oil/Varnish Layers
Wondering whether that glossy finish is oil-based or varnish? Use simple oil paint identification and varnish testing so you know how to proceed.
- Rub a cotton swab with solvent; oil paints soften, varnish may tack.
- Scrape a small edge; oil layers chip differently than cured varnish.
- Note sheen and age; older varnish yellows, oil stays pigmented.
Proper Surface Preparation
When you’re working over previous oil paint or varnish, thorough surface prep makes the difference between a lasting finish and peeling trouble; start by removing any loose or flaking material, then clean, sand, and degrease the area so new coatings can bond properly.
Use preparation tools for surface cleaning, select adhesion methods compatible with paint types and paint finishes, follow safety precautions, address environmental concerns, apply repair techniques, color matching, and proper layering techniques.
When a Color Change Forces Deeper Prep
Because switching from a dark or saturated color to a much lighter one exposes every imperfection, you’ll need to do more than a quick wipe-down before repainting.
Switching from deep to much lighter paint reveals flaws—prep carefully beyond a simple wipe-down.
You’ll assess stains, texture differences, and adhesion, since color psychology demands true tones and paint durability affects finish.
Prioritize:
- Fill and sand visible flaws.
- Apply primer for coverage.
- Choose high-hide, durable paint.
Decide: Spot Repair vs Full Paint Removal
First check how widespread the damage is so you can tell if spot repairs will hold or if the whole surface needs stripping.
Also confirm whether the new paint is compatible with the old — mismatched systems can cause peeling even after patching.
Use those two facts to decide whether targeted fixes will be durable or a full removal is worth the effort.
Assess Damage Extent
Before you grab a scraper, evaluate how deep and widespread the damage is so you can choose between spot repairs or removing all the paint.
Use a damage assessment to guide repair strategies and decide if issues are isolated or systemic.
- Small chips/cracks — spot repair.
- Peeling in patches — targeted stripping.
- Widespread failure — full removal and prep.
Consider Paint Compatibility
If the new paint won’t bond to what’s already on your walls, you’ll waste time and get poor results, so check compatibility before deciding on spot repairs or full removal.
Evaluate paint types, surface conditions, and coating compatibility. Use proper prep methods, adhesion techniques, and primer selection to guarantee paint finishes adhere.
Consider color matching only after adhesion is secured; otherwise strip and recoating may be necessary.
Quick Fixes: Clean and Prime Only
Sometimes you don’t need to strip old paint — just clean and prime the surface to get a solid finish.
Sometimes you can skip stripping old paint — a good clean and proper primer delivers a durable, smooth finish.
You’ll improve paint longevity, address surface texture, and guarantee color compatibility with proper wall preparation and suitable primer types.
Use basic DIY techniques and painting tools to smooth and seal before applying new paint finishes.
- Clean thoroughly
- Sand lightly
- Prime appropriately
Tools for Removing Old Paint: Chemical, Heat, Mechanical
When cleaning and priming won’t give you the smooth, sound surface you need, you’ll want to remove the old paint completely.
Choosing between chemical strippers, heat tools, or mechanical methods depends on the paint type, substrate, and safety concerns.
You’ll weigh chemical removers, heat tools, and mechanical methods, follow safety precautions, consider paint compatibility, use proper surface preparation and stripping techniques, and note environmental impact.
Pros and Cons of Chemical Paint Strippers
Because chemical strippers dissolve paint rather than abrade it away, they can save you time and preserve delicate substrates like wood or trim that would be damaged by sanding.
You’ll weigh effectiveness comparison, project costs, and chemical safety; consider eco friendly options and surface preparation. User experiences guide application techniques and alternative methods.
- Pros: speed, preservation, lower dust
- Cons: fumes, disposal
- Tips: ventilate, test patch, follow label
Pros and Cons of Heat Guns and Infrared Removers
You can use a heat gun for fast, effective paint softening on trim and metal but it takes steady control to avoid scorching.
An infrared remover offers safer, more even heating that reduces fumes and fire risk, though it’s often pricier.
We’ll compare speed versus precision so you can pick the right tool for your project.
Heat Gun Effectiveness
1 key factor in deciding how to strip old paint is choosing between a heat gun and an infrared remover, since each method heats paint to soften it for scraping but works differently—heat guns blow hot air to blister the coating, while infrared units penetrate and loosen multiple layers without charring.
You’ll weigh heat gun techniques, safety precautions, heat settings, paint types, surface preparation, efficiency comparisons, tool alternatives, and removal strategies.
- Use correct heat settings and removal strategies.
- Prioritize safety precautions and surface preparation.
- Compare efficiency, paint types, and tool alternatives.
Infrared Remover Safety
Infrared removers heat paint differently than heat guns, so you’ll need to adjust safety measures and techniques accordingly.
You should wear eye and skin protection, ventilate well, and monitor temperatures to prevent scorching.
Infrared benefits include gentler, deeper heat that reduces charring and dust.
For infrared safety, keep flammables away, use thermal probes, and follow manufacturer guidelines to avoid hidden hazards.
Speed Versus Precision
Which tool works best for your job depends on whether you prioritize speed or precision:
You’ll weigh speed benefits of heat guns against precision challenges of infrared removers. Choose based on surface, detail, and lead concerns.
- Heat gun — fast, aggressive, risks scorching.
- Infrared — gentler, slower, better for layers.
- Combo — balance speed and control, use caution.
Pros and Cons of Sanding and Power Tools
When you’re prepping for a repaint, deciding between hand sanding and power tools comes down to balancing control, speed, and surface risk: hand sanding gives you precision on edges and delicate trim, while power sanders and grinders cut through old finishes fast but can gouge soft wood or strip too aggressively if you’re not careful.
| Tool | Benefit | Caution |
|---|---|---|
| Hand | control, sanding techniques | slow, sanding dust |
| Orbital | sanding efficiency, tool selection | heat, finish damage |
| Grinder | fast removal, sanding methods | power tool safety, tool maintenance |
Safe Lead‑Paint Removal Methods and Rules to Follow
If you suspect your home has lead-based paint, treat removal as a safety task—not a DIY afterthought—and follow strict, tested methods to protect yourself and others.
You’ll need certified guidance for lead paint safety and proper paint removal techniques. Follow these rules:
- Hire a licensed abatement pro.
- Seal and ventilate work zones.
- Use HEPA cleanup and waste disposal.
Protecting Surrounding Areas During Stripping
Before you start stripping, cover floors and furniture with heavy-duty drop cloths or plastic sheeting to catch paint chips and dust.
Tape and mask trim, switches, and fixtures so they stay clean and functional during the work.
Taking these steps now will save you time and prevent damage later.
Cover Floors And Furniture
Because stripping paint can fling chips, dust, and solvent, you’ll want to fully shield floors and furniture with durable, properly secured coverings.
Use appropriate floor protection and furniture covering as part of prep materials, drop cloths, dust barriers, and safety gear. Move items and adjust furniture arrangements to keep clean surfaces and limit paint spills.
- Use heavy drop cloths.
- Tape seams.
- Elevate valuables.
Mask Trim And Fixtures
Masking trim and fixtures keeps stripping debris and chemicals off surfaces you want to keep pristine.
Use painter’s tape, craft paper, and plastic sheeting to secure edges; test tape on hidden spots first. Apply masking techniques methodically so paint stripper doesn’t seep under tape.
Remove or cover hardware for fixture protection, label parts, and replace tape after drying to maintain clean lines and safe surfaces.
Dust Control and Ventilation Best Practices
When you’re sanding or stripping old paint, control dust and keep air moving to protect your health and the finish; use HEPA vacuums, tack cloths, and temporary barriers to contain debris, and run exhaust fans or open windows to flush airborne particles outside.
- Choose equipment selection for dust management and personal protective gear.
- Use air circulation, surface protection, and preparation techniques.
- Follow safety precautions, cleanup strategies, health considerations, and efficiency tips.
Choosing the Right Primer for Old Paint Surfaces
Now that you’ve controlled dust and secured ventilation, pick a primer that bonds to the old finish and fixes the problems you found—stain-blocking for tannin bleed, high-adhesion for glossy surfaces, or rust-inhibiting metal primers.
You’ll choose among primer types based on substrate and existing paint, and you’ll follow surface preparation steps like degreasing and light sanding so the primer adheres and the new coat performs as designed.
Prep Patched Areas Before Repainting
Before you repaint, make certain patched spots are smooth, clean, and properly feathered into the surrounding surface so the repair disappears under the new coat.
You’ll focus on patch preparation, surface cleaning, and repair techniques to guarantee paint adhesion, texture matching, primer selection, color blending, and finish compatibility.
- Remove debris, clean, and dry.
- Feather and match texture.
- Prime and blend before topcoat.
How to Sand for a Smooth Paint‑Ready Surface
Start by sanding the patched and surrounding areas until they’re uniformly smooth and level with the existing surface.
Use progressive sanding techniques — start coarser, finish finer — to blend edges and remove ridges.
Sand lightly across primer and old paint to create a keyed surface without over-sanding.
Aim for a consistent, smooth finish so paint lays down evenly and hides repairs.
Clean Glossy or Dirty Surfaces for Adhesion
Once the patched and sanded areas are smooth, tackle any glossy or dirty surfaces so new paint will stick.
Once patching and sanding are smooth, address glossy or dirty surfaces so new paint will adhere properly.
You’ll use surface cleaning and gloss assessment to judge surface condition, then apply proper cleaning methods to reduce grime effects and perform stain removal.
Follow adhesion techniques during paint preparation:
- Degrease with TSP alternative.
- Scuff glossy areas.
- Rinse and dry thoroughly.
Which Paint Types Bond Well to Existing Paint?
You can often put oil-based paint over existing latex, but you’ll need proper prep like cleaning and scuffing to guarantee a reliable bond.
Eggshell and satin finishes usually adhere well to most existing paints with light sanding, while high-gloss surfaces require more thorough abrading or a bonding primer for best results.
Follow those simple steps and you’ll avoid adhesion problems when repainting.
Oil Over Latex Compatibility
Although oil-based paint can physically stick to a cured latex finish, it often won’t perform well without proper preparation. Oil tends to yellow, chip, or peel when applied directly over glossy or poorly cleaned latex.
You should assess paint compatibility, surface preparation, adhesion issues, finish types, drying times, and adjust application techniques before switching.
- Scuff and clean
- Use bonding primer
- Test a small patch
Eggshell And Satin Adhesion
Eggshell and satin finishes generally bond well to most existing paints, but adhesion depends on the underlying paint’s sheen, cleanliness, and age.
You’ll usually get good results over flat or semi-gloss if you clean, scuff, and prime glossy or aged surfaces.
Test a small area to spot adhesion issues before committing.
Choose compatible paint finish and proper prep to avoid peeling.
High-Gloss Bonding Tips
When switching to a high-gloss finish, remember that adhesion depends largely on the type and condition of the existing paint.
So you’ll want to identify what’s already on the surface before you roll or brush. Use proper bonding techniques and prep for high gloss durability.
- Sand glossy or chalky surfaces.
- Use primer suited to old and new binders.
- Spot-test solvent compatibility.
When to Use an Adhesion‑Promoting Primer
Wondering if an adhesion‑promoting primer is necessary? You should use one when adhesion factors — like slick old finishes, glossy trims, or metal surfaces — threaten paint bond.
Choose primer types matched to substrate: bonding primers for glossy or smooth areas, and specialty primers for metal or plastic.
They’ll improve coverage and durability so your new paint actually sticks and lasts.
How Many Coats You’ll Likely Need After Prep
Typically, you’ll need two coats of finish paint after proper prep, with a third coat in specific situations — like drastic color changes, porous surfaces, or high-traffic areas — to guarantee even coverage and durability.
Typically two finish coats after good prep—add a third for big color shifts, porous surfaces, or heavy-wear areas.
You should consider coating thickness and paint durability when deciding.
- Two coats for standard walls.
- Third coat for color shifts or porous substrates.
- Extra coat where durability is critical.
Cost and Time: Patch/Prime vs Full Removal
Although full paint removal can give you a flawless base, patching and priming usually saves you time and money for small areas or sound surfaces. You’ll spend less labor and materials upfront, but choose full removal when peeling, multiple layers, or lead concerns demand it.
Do a cost analysis and plan time management: patch/prime is quicker and cheaper, full removal raises expenses and schedule risk.
When to Hire a Pro for Removal or Prep
If your home has extensive lead paint, structural issues, or moisture damage, you’ll want a pro to handle removal and prep to protect your health and the building.
Professionals also save time and bring the expertise and gear needed for safe, code-compliant work.
If you’re short on time or unsure how to assess risks, hiring a contractor is usually the smarter choice.
Extensive Lead Paint Risk
When you’re dealing with large areas of old paint that could contain lead—peeling exterior siding, multiple layers inside an older home, or flaking trim—call a certified professional before you start scraping or sanding.
You’ll need professional testing and inspection guidelines followed to reduce health risks and meet painting regulations for historical homes, ensuring renovation safety and overall home safety.
- Hire certified tester
- Require containment
- Verify clearance
Structural Or Moisture Damage
Because water and structural problems can hide beneath paint, call a professional before you start stripping or repainting if you see signs like soft or sagging wood, widespread bubbling or blistering, dark stains, persistent dampness, or recurring mold—these indicate underlying rot, framing damage, or leaks that simple sanding won’t fix.
A pro will assess structural integrity, repair framing, and install proper moisture barriers to prevent recurrence.
Time Constraints And Expertise
Facing a tight deadline or tackling complex paint removal? You’ll need honest time management and a clear skill assessment to decide.
If you can’t finish properly or lack tools, hire a pro.
- Extensive lead or asbestos concerns — pro required.
- Large-scale stripping with limited time — pro recommended.
- Precision prep for high-end finishes — pro advised.
Common Mistakes That Cause Paint Failure After Repainting
If you skip proper prep or rush the job, your fresh paint can fail fast—peeling, blistering, or uneven coverage usually trace back to common avoidable mistakes.
You should address surface imperfections, use correct preparation techniques, and control environmental factors.
Choose application methods and paint layering wisely, guarantee moisture prevention, consider texture considerations, nail color matching, and finish with careful finishing touches to preserve paint durability.
Troubleshooting Adhesion Problems After Repainting
You’ve addressed the usual prep mistakes, but paint can still lift or peel—now you need to pinpoint why adhesion failed and how to fix it.
Use focused troubleshooting techniques for adhesion challenges:
- Check substrate cleanliness, sand glossy spots, and remove contaminants.
- Test moisture content and primer compatibility; strip or recoat where needed.
- Perform an adhesion pull or tape test, then correct with proper primer and paint.
Maintenance Schedule and Tips to Avoid Future Stripping
Because regular upkeep prevents most peeling, set a simple maintenance schedule and stick to it: check annually, clean gently, touch up chips, and log maintenance reminders so you won’t forget future inspections. Be proactive; small fixes stop big stripping.
| Month | Task | Emotion |
|---|---|---|
| Jan | Inspect | Relieved |
| Apr | Clean | Calm |
| Jul | Touch-up | Confident |
| Oct | Record | Secure |
Environmental Rules for Disposing Stripped Paint
How should you handle stripped paint so it doesn’t harm people or the environment?
You must follow local environmental regulations and treat waste as hazardous when required.
For safe paint disposal, do this:
- Confirm whether the paint is hazardous under local environmental regulations.
- Use designated hazardous-waste collection or licensed disposal services.
- Never pour, burn, or mix paint into regular trash or drains; seal containers tight.
Quick Checklist to Decide Whether to Remove Old Paint
If you’re deciding whether to strip old paint, run through a quick checklist that balances safety, adhesion, and cost: inspect for lead or asbestos, test adhesion, and note flaking.
Consider substrate damage, timeline, and disposal rules.
Match paint removal techniques to condition, factor in ventilation and PPE, and prioritize surface preparation essentials like cleaning, sanding, and priming before you start.
Decision Flowchart: Strip, Spot‑Treat, or Repaint Over
Now that you’ve run through the checklist — checking for lead, testing adhesion, and noting flaking — use a simple decision flowchart to pick between stripping, spot‑treating, or repainting over the old finish.
Follow surface preparation essentials and match paint removal techniques to condition: full strip for widespread failure, spot‑treat for localized flaws, or clean and repaint when adhesion’s good.
- Strip
- Spot‑treat
- Repaint
Frequently Asked Questions
How Long Should I Wait After Stripping Before Repainting?
You’ll wait about 24–48 hours after stripping before repainting; it feels like forever, but proper paint drying and surface preparation take time. Make sure the substrate’s fully dry, cleaned, and sanded before applying primer and paint.
Can I Paint Over Mildew After Cleaning?
Yes—you can paint over mildew after thoroughly cleaning and drying the surface; you’ll want mildew prevention products plus a mold-resistant primer, then choose paint types rated for bathrooms or exteriors to resist future growth and moisture.
Will Wallpaper Residue Affect New Paint Adhesion?
Yes — wallpaper residue will affect new paint adhesion. You’ll need thorough surface preparation to remove glue and smooth fibers; adhesion factors like cleanliness, porosity, and primer choice determine whether paint will bond properly and last.
How Do I Match Texture When Repairing Small Areas?
You match texture by using texture tools and repair techniques: feather joint compound, dab or spray to mimic pattern, blend edges, let dry, sand lightly, then prime and paint so the patched area disappears.
Are Heat Guns Safe Near Electrical Wiring?
Think of a cautious gardener pruning near a beehive: you shouldn’t. You’ll avoid heat gun safety mistakes by keeping distance from wiring, turning power off, using insulation tools, and watching for electrical hazards to prevent sparks or damage.
