
Why Are There Bubbles in My Paint and How Do I Stop It From Happening?
You’re seeing bubbles because moisture, heat, trapped solvents, poor surface prep, or incompatible layers prevented proper adhesion and curing. Bubbles often come from damp substrates, high humidity, painting in too-hot conditions, or applying paint too thickly so gases can’t escape. Scrape, sand, prime and repaint thin coats after confirming the surface is dry and compatible with your primer and paint. Follow simple prep and environment checks so this doesn’t recur — keep going and you’ll find detailed fixes and prevention tips.
Who Is This Guide For?
Who struggles with paint bubbles? You do if you prep hurriedly, skip paint preparation, or ignore surface inspection.
This guide fits DIYers, renters, and pros who want reliable results without rework. You’ll get clear steps to spot trouble, fix common mistakes, and prevent bubbling before it starts.
Follow concise, practical advice tailored to your skill level and project scope.
Quick Answer: Why Paint Bubbles Form
When paint bubbles, it’s usually because moisture, heat, or trapped solvents force air or vapor out of the coating or substrate faster than the paint can cure.
You’ll also see bubbling when poor surface adhesion or incompatible layers trap gases, or when extreme temperatures change paint texture during drying.
Preventive measures focus on controlling moisture, temperature, and proper surface prep before painting.
Quick Fixes: Repair Small Interior Paint Bubbles (Step‑By‑Step)
Start by gathering a few basic tools—putty knife, sandpaper, primer, matching paint, a small brush or roller, and a clean cloth—so you can repair small interior paint bubbles quickly and cleanly. Scrape, sand, clean, prime, and repaint using paint application tips and bubble prevention techniques to reduce recurrence.
| Step | Action | Tip |
|---|---|---|
| 1 | Scrape | Don’t force |
| 2 | Sand | Feather edges |
| 3 | Clean | Remove dust |
| 4 | Prime | Seal well |
| 5 | Paint | Thin coats |
Identify Paint Bubbles Vs. Other Defects
Although paint bubbles can look like other finish problems, you can tell them apart by their feel, pattern, and cause.
Although paint bubbles may resemble other flaws, you can distinguish them by touch, pattern, and underlying cause.
You’ll use paint bubble characteristics to do a quick defect comparison so you can decide whether to repair or inspect further.
- raised, hollow spots
- irregular blister patterns
- soft vs. brittle texture
- localized vs. widespread
- beneath-coat separation
Common Causes of Paint Bubbles on Interior Walls
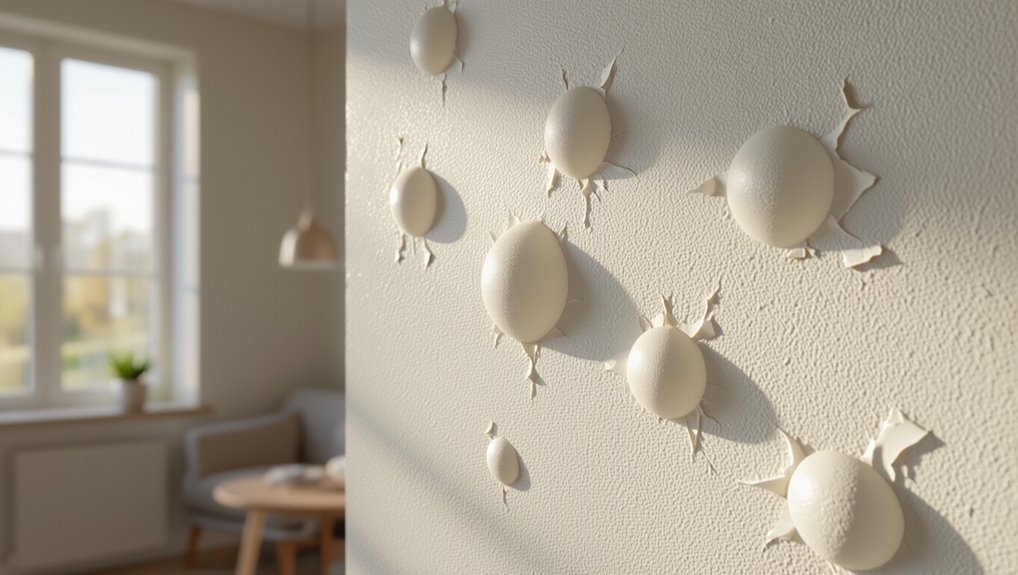
If moisture, heat, or aging affects your walls, paint will often lift and form bubbles; understanding these triggers helps you pinpoint the right fix.
Interior bubbling often stems from trapped moisture, poor ventilation, wet substrates, or applying new paint over dirty or damp surfaces.
Low paint quality, improper primer use, and rapid temperature changes also cause lifting.
Addressing these prevents bubbles and supports bubbling prevention.
Common Causes of Paint Bubbles on Exterior Surfaces
When your exterior paint bubbles, it’s usually because water, heat, or surface problems are forcing the coating to detach from the substrate; common culprits include trapped moisture from leaks or ground dampness, poor surface preparation like dirt or loose old paint, applying paint over wet or unprimed surfaces, and heat-driven expansion that breaks the bond.
- Failed paint adhesion
- Trapped contaminants
- Incompatible coatings
- Rapid temperature changes
- Movement at joints
You should address bubble formation by cleaning, priming, and ensuring compatibility before repainting.
Surface Moisture and Condensation as a Bubble Trigger
If you paint over a cold exterior surface, condensation can form between the substrate and the coating and cause bubbles as the paint cures.
Trapped moisture layers from recent rain or damp materials will expand and lift the film, especially if you seal them before they dry.
Poor ventilation slows drying and lets humidity build up, so you should guarantee surfaces are warm, dry, and well-ventilated before painting.
Cold Surface Painting
Because cold surfaces encourage condensation, painting onto them often traps moisture beneath the coating and creates bubbles, so you need to recognize and prevent this common pitfall.
- Check cold surface effects before you start.
- Monitor temperature fluctuations and avoid painting during swings.
- Measure moisture levels; wait until dry.
- Improve ambient warmth to aid paint adhesion.
- Use low-humidity conditions and warm primers to reduce risk.
Trapped Moisture Layers
Although it’s easy to overlook, trapped moisture—whether from surface dampness or condensation—creates a hidden layer that breaks paint adhesion and forms bubbles as the coating cures.
You should test surfaces for dampness, dry thoroughly, and install or repair moisture barriers where needed.
Use primers made for damp-prone areas and follow manufacturer instructions for bubble prevention to guarantee a smooth, lasting finish.
Poor Ventilation Drying
Poor ventilation can trap humid air against fresh paint, letting surface moisture and condensation form after you’ve applied a coat.
- Check room humidity before painting.
- Use fans and open windows for air circulation.
- Run dehumidifiers where needed.
- Time coats to avoid overnight condensation.
- Make ventilation improvements like vents or temporary exhaust.
If you don’t control moisture, bubbles’ll form and ruin the finish.
Painting Over Dirty or Oily Surfaces
If you paint over greasy or dirty surfaces without proper prep, you’ll get bubbles and adhesion failures.
Start by testing for contaminants and follow a clear degreasing protocol—clean, rinse, and allow to dry completely.
Proper surface prep, including sanding or solvent wiping when needed, guarantees the new coat bonds and stays bubble-free.
Surface Degreasing Steps
Start by removing loose dirt and grease with a stiff brush or a dry cloth so cleaners can reach the surface; neglecting this step leaves contaminants that cause adhesion problems.
- Perform surface inspection for contamination sources.
- Choose cleaning agents suited to substrate preparation.
- Apply degreasing methods (solvent or detergent).
- Rinse and dry thoroughly.
- Verify grease removal before priming to guarantee paint adhesion.
Contaminant Testing Methods
After you’ve removed loose dirt and degreased the area, confirm the surface is truly clean by running simple contamination tests before priming or painting.
Use a white cloth wipe to reveal contaminant sources, perform a water beading check, and try solvent swabs.
These testing techniques quickly show oils, waxes, or residues so you can address them and prevent bubbles forming under new coatings.
Proper Surface Preparation
Prepare the surface thoroughly before you touch a brush—painting over dirt or oil almost guarantees adhesion failure and bubbles.
Do a substrate assessment, then focus on surface cleaning and repair. Follow these steps:
- Remove grease with solvent or detergent
- Degrease, rinse, and dry fully
- Sand glossy spots for profile
- Patch and prime porous areas
- Reassess substrate before painting
Incompatible Primer and Paint Combinations
When you apply a primer that’s chemically incompatible with your chosen paint, the finish can blister, peel, or fail to adhere properly, creating bubbles that ruin the surface.
Check primer types and match solvent- or water-based primers to your paint. You should test adhesion with a small patch, follow manufacturer compatibility charts, and never layer oil over latex without a proper bonding primer.
Thick Coats: Why Applying Paint Too Thickly Causes Bubbles
When you slap on a coat that’s too thick, solvent vapor can get trapped beneath the surface and form bubbles as it tries to escape.
Your brush or roller can seal that trapped air and solvent in, making the problem worse.
Heat or direct sun then speeds outgassing, popping or expanding those bubbles as the paint cures.
Trapped Solvent Vapor
If you lay on paint too thickly, solvents trapped beneath the surface vaporize as the top skin forms and push up bubbles, leaving craters or blisters in the finish.
You’ll see this when solvent evaporation raises vapor pressure under the film.
To prevent it, you should:
- Apply thinner coats
- Slow drying with proper temperature
- Thin compatible paint
- Stir gently
- Allow flash-off time
Brush Marks Seal Air
Along with solvent vapor, another common culprit is air trapped under your brushwork: heavy, sloppy strokes can leave raised ridges that seal pockets of air against the drying film, and those pockets expand or escape as bubbles and blisters.
Use proper brush technique, apply thinner coats, and avoid overworking wet layers.
Choose compatible sealant types and let each coat cure fully to prevent trapped air.
Heat Speeds Outgassing
Even on a warm day, applying paint too thickly traps solvent and air beneath the surface. As the film heats up, those trapped gases expand and force their way out as bubbles.
You’ll see outgassing effects amplified by heat impact.
Prevent this by:
- thin coats
- longer flash times
- cooler conditions
- proper ventilation
- slow drying additives
Trapped Solvents or Air in the Substrate
When you see small, blister-like bumps forming under a fresh coat, trapped solvents or air in the substrate are often the cause; solvents released from underlying layers or pockets of air can’t escape and push the paint away as they expand.
You should remove contaminated layers, allow surfaces to fully dry, sand smooth, and use a primer to prevent trapped air and solvent issues before recoating.
High Heat and Direct Sun During Painting
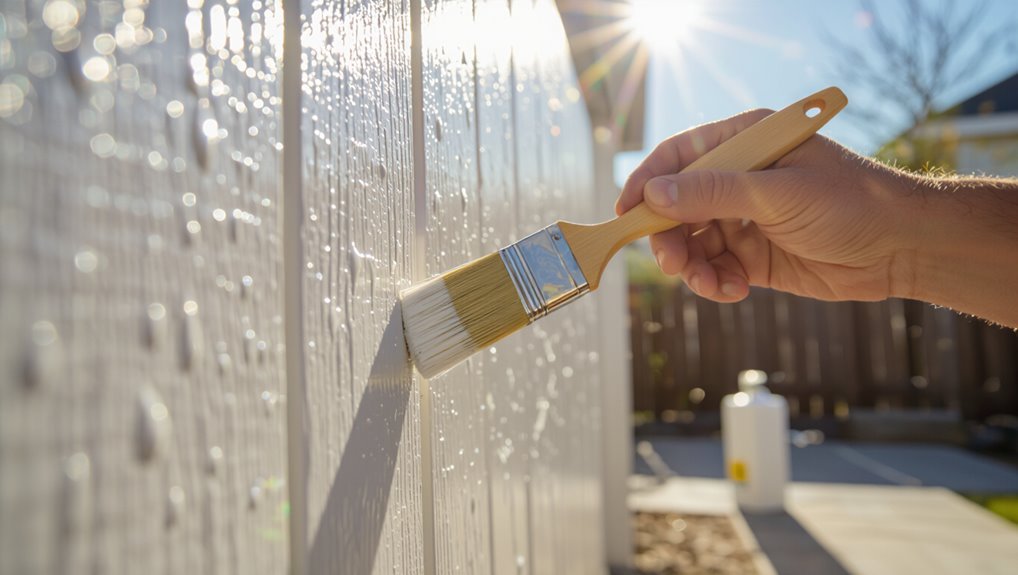
If you paint in high heat or direct sun, the coating can cure so fast that bubbles form before it levels out.
You’ll also risk overheating the surface, which can trap gases or cause the finish to blister.
Move to shaded areas or work during cooler hours to prevent these problems.
Paint Cures Too Fast
Although sunny, sweltering conditions might seem ideal for quick drying, painting in high heat or direct sun can make the finish cure too fast, causing bubbles, blistering, and adhesion problems you’ll have to fix later.
- Work in shade or cooler hours.
- Use slow-evaporation paint or adjust with paint additives.
- Thin coats dry more evenly.
- Don’t rush recoats.
- Monitor humidity and temperature.
Surface Overheating
Because direct sun and hot surfaces raise the substrate temperature well above ambient, paint can skin over before it wets out, trapping vapor and causing bubbles and blisters. You should avoid painting in high heat or use surface insulation and heat reflection techniques to keep temps down. Cool mornings, shading, and misting help prevent blisters.
| Measure | Benefit |
|---|---|
| Shade | Lowers surface temp |
| Misting | Cools surface |
| Insulation | Stabilizes temp |
| Reflective film | Reduces heat gain |
Cold Temperatures and Slow Curing Problems
When temperatures drop, paint and coatings cure more slowly, and you’ll see bubbles form or persist because solvents and moisture can’t evaporate or react at the expected rate.
You’ll want to address cold temperature effects with these slow curing solutions:
- Warm the workspace before painting.
- Use low-temperature formulæ.
- Thin coats dry faster.
- Allow extra cure time.
- Use portable heaters safely.
Humidity’s Role in Blistering and Bubbling
If humidity climbs while you’re painting or curing, trapped moisture can react with solvents or the coating film itself and form blisters or bubbles that lift the finish.
You should monitor humidity levels and weather conditions before paint application, improve surface preparation, and use moisture barriers when needed.
Environmental impact and air quality affect drying times, so schedule work for stable conditions to prevent bubbling.
Poor Ventilation and Solvent Entrapment
Poor ventilation lets solvent vapors build up under and within a wet coating, so the trapped gases form bubbles as the film skins over and the solvent tries to escape.
- Use ventilation strategies: fans, cross-vent, exhaust
- Match drying to solvent types and concentration
- Reduce humidity and temperature swings
- Apply thinner coats; allow longer flash-off
- Avoid sealed spaces until full cure to prevent entrapment
Old Paint Layers Hiding Adhesion Failures
Because multiple old paint layers can mask underlying adhesion problems, you mightn’t spot delamination until a new coat starts to fail. The older films can bridge cracks and hold loose areas in place, giving a false sense of a sound substrate.
Inspect by sanding to reveal hidden adhesion failure, check paint compatibility between layers, and remove unstable films so new paint bonds properly and bubbles don’t follow.
Paint Bubbles on Metal: Rust and Causes
When paint bubbles on metal, rust is often the hidden culprit beneath the film, and you’ll usually see bubbling where corrosion has lifted the coating from the substrate.
You should address rust promptly and focus on proper metal preparation and rust prevention.
- Remove loose paint and rust
- Clean surface thoroughly
- Use rust converter if needed
- Prime with metal primer
- Apply compatible topcoat
Wood Movement and Tannin Bleed Issues
When you paint wood, seasonal expansion and contraction can crack the finish and create tiny bubbles where moisture gets trapped.
You’ll also need to watch for tannin bleed, which can stain topcoats unless you seal the surface first.
Use a proper primer and allow for movement to prevent both bubbling and discoloration.
Wood Expansion Effects
If you’re working with wood, expect it to move as humidity and temperature change. That movement can crack paint, lift bubbles, or force tannins through the finish.
You’ll manage wood moisture to protect paint adhesion and reduce bubbling by controlling environment and prep:
- Acclimate wood before finishing
- Seal end grain properly
- Use flexible primers
- Allow proper drying time
- Monitor indoor humidity
Tannin Stain Prevention
Wood’s natural movement not only stresses paint but can also push tannins—dark, water-soluble wood extractives—through finishes and leave brownish stains. You should use surface treatments and sealers, test primers that block tannin stains, and follow preventive measures to preserve paint adhesion.
| Step | Product | Benefit |
|---|---|---|
| 1 | Sealer | Blocks tannins |
| 2 | Primer | Improves adhesion |
| 3 | Topcoat | Durability |
| 4 | Maintenance | Prevents bleed |
Plaster, Drywall, and Joint Compound Sources of Bubbles
Although plaster, drywall, and joint compound look smooth at a glance, they can hide moisture, loose material, and trapped air that later cause paint to bubble.
Even-smooth plaster and drywall can conceal moisture, loose material, and trapped air that later make paint bubble.
You should use inspection methods and repair techniques to prevent plaster bubbles and drywall issues. Focus on surface preparation, moisture control, and paint adhesion:
- Check for soft spots
- Sand and clean
- Replace damaged compound
- Use primer
- Control humidity
Mold and Mildew Causing Paint Separation
If you spot bubbling paint, check for surface mold growth that’s breaking the paint’s bond.
You’ll also want to take into account moisture trapped behind the paint from leaks or poor ventilation, which can force paint to separate.
Address the source, clean any mildew, and improve drying and ventilation to prevent it from coming back.
Surface Mold Growth
When moisture stays on painted surfaces, mold and mildew will start breaking the paint’s bond to the substrate, causing bubbling, peeling, and discoloration.
You’ll often spot fuzzy or slimy growth in damp corners, near vents, or where leaks aren’t addressed.
- Clean with mold-safe detergent.
- Dry thoroughly after washing.
- Use mold prevention primers.
- Apply proper surface treatment.
- Improve ventilation to deter regrowth.
Moisture Behind Paint
Surface mold on paint is often a visible sign of a deeper problem: moisture trapped behind the coating can feed unseen mold and mildew that pry the paint off the wall from the substrate outward.
You’ll notice bubbling, flaking, and loss of paint adhesion where moisture effects concentrate.
Address the source, remove compromised coating, and dry the substrate before repainting to restore proper adhesion.
Preventing Future Mildew
Because mold thrives where moisture lingers, preventing future mildew starts by keeping surfaces dry and well-ventilated. You should eliminate water sources, improve airflow, and use mildew-resistant paints and primers so spores never get the foothold that causes paint to bubble and peel.
- Fix leaks promptly
- Increase ventilation
- Use dehumidifiers
- Choose mildew-resistant coatings
- Inspect and clean regularly
Practice mildew prevention as part of paint maintenance.
Inspect the Surface to Find the Root Cause
Although you might be enthusiastic to repaint, take time to inspect the area closely to identify why bubbles formed in the first place. Look for surface imperfections, old peeling, and contaminants that harm paint adhesion. Note loose flakes, bubbles, and residue, and scrape or sand as needed before priming.
| Issue | Cause | Action |
|---|---|---|
| Flake | Poor adhesion | Scrape |
| Bubble | Contaminant | Sand |
| Residue | Dirt/oil | Clean |
| Crack | Movement | Fill |
Simple Tests to Check for Moisture Content
Now that you’ve identified flakes, bubbles, and residue, check for moisture before you repaint — wet substrates will ruin any cleanup effort.
- Use a moisture testing probe for wood or drywall.
- Try a plastic sheet test: tape, wait 24 hours.
- Measure humidity with a hygrometer indoors.
- Look for condensation or musty odors.
- Delay painting until moisture testing and humidity measurement are within spec.
How to Test Paint Adhesion Quickly
Before you repaint, do a quick adhesion check so you don’t waste time on a failing finish: scrape a small area, score a grid with a utility knife, then press and peel tape (100% adhesion testing).
Observe flakes or lifting. Try a solvent rub on an inconspicuous spot to see softening.
These quick methods reveal poor bond so you can prep or strip before repainting.
When Do Bubbles Indicate Structural Moisture Problems?
If you see paint bubbling near baseboards, don’t ignore it — that often points to rising damp from the foundation.
Peeling paint over damp plaster is another strong sign that moisture is trapped in the wall, not just a surface flaw.
And if blistering shows up after rainfalls, you should suspect water intrusion and investigate the source before repainting.
Paint Bubbling Near Baseboards
When you notice paint bubbling near baseboards, it’s tempting to blame a bad paint job, but those blisters can also flag serious moisture problems that need prompt attention.
You should check baseboard materials and paint adhesion, and act fast:
- Look for soft wood or swelling
- Smell moldy or damp air
- Measure wall moisture
- Inspect exterior grading
- Call a pro if widespread
Peeling Over Damp Plaster
While small blisters on plaster are often just a finish failure, peeling paint over damp plaster can signal deeper moisture moving through walls and compromising structure.
You should treat bubbling that recurs, follows a pattern, or coincides with soft, crumbling plaster as a red flag that needs investigation.
Inspect for moisture infiltration, address damp conditions, repair plaster damage, and restore paint adhesion only after the substrate is dry.
Blistering After Rainfalls
Peeling over damp plaster often signals internal moisture, but blistering that appears or worsens after rain deserves its own scrutiny because it can point to water entering from outside rather than just a localized finish failure.
You should watch for blistering effects and assess rainfall impact:
- Exterior seal failures
- Cracked render or flashing
- Poor guttering
- Rising splashback
- Trapped cavity moisture
Tools and Materials You’ll Need to Fix Bubbling
You’ll need a handful of specific tools and materials to fix bubbling effectively: use a tools checklist and thoughtful material selection to prep properly. Basic items include scraper, sandpaper, primer, brush, cleaner, and safety gear. Refer to the quick table below for a compact overview.
| Tool | Purpose |
|---|---|
| Scraper | Remove bubbles |
| Sandpaper | Smooth edges |
| Primer | Seal surface |
| Brush | Recoat paint |
Repairing Large Blisters and Peeling Exterior Paint
After gathering your scraper, sandpaper, primer, brush, cleaner, and safety gear, tackle large blisters and peeling areas methodically: cut or lift loose paint back to a solid edge, remove unstable material, and clear dust and debris so repairs bond properly.
Gather tools, remove loose paint to a solid edge, clean debris, and prep surfaces for lasting repairs.
- Perform surface preparation and moisture inspection.
- Document bubble causes.
- Use adhesion testing.
- Choose repair techniques.
- Confirm paint compatibility before priming and repainting.
Best Ways to Remove Bubbles Without Damaging the Substrate
Start by prepping the area so you’re working on a clean, dry surface that’s free of loose paint and contaminants.
Carefully pop any small bubbles and press out trapped air without gouging the substrate.
Finish by sanding smooth and feathering the edges so repairs blend seamlessly before repainting.
Surface Preparation First
Surface prep matters: if you want bubbles gone without wrecking the substrate, you’ll need to remove loose paint, lift trapped moisture, and smooth the surface before re-coating.
- Check surface texture; sand or profile for grip.
- Use proper cleaning techniques; degrease and dry.
- Perform adhesion testing before full application.
- Choose paint selection suited to substrate.
- Monitor environmental factors like humidity and temperature.
Gentle Bubble Popping
Once you’ve prepped the area and confirmed there’s no underlying moisture or adhesion failure, you can remove paint bubbles with minimal risk to the substrate.
Use gentle techniques: prick tiny bubbles with a fine needle, squeeze out trapped air, and press paint flat with a soft spatula.
Clean residue, allow full cure, then touch up only where needed to preserve bubble aesthetics.
Smooth Sanding Finish
If you’ve already confirmed the substrate is sound, smooth sanding is the best way to remove remaining bubbles without causing damage; you’ll work progressively with fine abrasives, light pressure, and the right block to level the paint without cutting into the underlying material.
- Start with 320–400 grit to feather edges
- Use a flat sanding block for even pressure
- Keep strokes consistent and light
- Clean dust between passes
- Finish with 600–800 grit for final finish quality and proper sanding techniques
Choosing the Right Primer After Repairs
Wondering which primer will give your repaired wall the best protection and adhesion?
Choose a primer matched to your Repair Techniques and substrate: high-build bonding primer for patched drywall, stain-blocking for water or smoke damage, and oil-based or shellac primers for stubborn stains.
Prioritize Primer Selection that seals, promotes adhesion, and dries fully before topcoat application to prevent future bubbling and guarantee durability.
Repainting Tips to Avoid Re‑Bubbling
Before you paint, prep the surface thoroughly so dust, loose paint, and moisture won’t trap air.
Use the right application—proper tools, thin even coats, and correct techniques—to prevent bubbles from forming.
Make sure conditions are ideal for drying: moderate temperature, low humidity, and enough time between coats.
Surface Preparation First
Although it might be tempting to skip straight to painting, preparing the surface is the step that actually prevents bubbles from forming; you’ll need to clean, sand, and repair any defects so the new coat can adhere evenly.
- Check surface cleanliness and substrate integrity.
- Do a moisture assessment and note environmental factors.
- Choose primer selection for paint compatibility.
- Adjust surface texture for adhesion strength.
- Confirm drying conditions and application techniques.
Correct Paint Application
Now that the surface is cleaned, repaired, and primed, apply the paint in ways that prevent trapped air and solvent vapor from causing new bubbles.
Use gentle paint techniques: thin, even coats and steady strokes. Choose appropriate application methods—brush, roller, or sprayer—matched to paint type.
Avoid overworking the film; sand lightly between coats and remove dust to guarantee smooth, bubble-free results.
Proper Drying Conditions
When you paint, give coatings the right environment to cure so trapped solvents and moisture can’t re‑bubble the film.
You should manage humidity control and respect drying time before recoating. Follow these steps:
- Work at recommended temperature
- Use dehumidifiers or fans
- Allow full drying time
- Thin coats rather than thick
- Test a small patch before repainting
How to Thin and Mix Paint Correctly
If your paint’s too thick it won’t level properly and will trap air, so you’ll need to thin and mix it with care to avoid bubbles and uneven coverage.
Adjust paint viscosity sparingly using manufacturer-recommended thinner, stir slowly with a flat paddle, and use proper mixing techniques to avoid whipping air.
Strain before use and test on a scrap surface to confirm consistency.
Temperature and Humidity Windows for Painting
Choose a time to paint when the temperature and humidity fall within the manufacturer’s recommended window, because environmental conditions control drying rate, adhesion, and the chance of bubbles or blushing.
You’ll manage temperature control and humidity effects by noting:
- best conditions and temperature ranges
- humidity levels and weather impacts
- seasonal considerations and climate considerations
- environmental factors indoors vs outdoors
- ideal painting timing and monitoring tools
How to Prep Different Surfaces Before Painting
Before you paint, clean and degrease the surface so contaminants won’t trap air or prevent adhesion.
Patch holes, sand rough spots, and remove loose material to create a smooth base.
Then apply the right primer for the substrate so the paint bonds evenly and reduces bubbling.
Clean And Degrease Surfaces
1 essential step in prepping any surface is cleaning and degreasing it thoroughly so paint can bond properly.
You’ll remove contaminants to prevent bubbles by using proper surface cleaning and degreasing techniques. Follow simple steps:
- Wipe loose dirt with a dry cloth
- Wash with mild detergent
- Rinse thoroughly
- Use a citrus or solvent degreaser for oils
- Dry completely before painting
Repair And Sand Imperfections
Fix dents, gouges, and rough spots so paint lays flat and won’t trap air or lift later. You’ll fill holes with appropriate putty, let it cure, then use progressive sanding techniques—start coarse, finish fine—to blend repairs.
Sand dust off thoroughly. Smooth, consistent surfaces reduce trapped pockets and improve bubble prevention by eliminating edges and voids where air can collect beneath fresh paint.
Prime For Proper Adhesion
When you’ve smoothed repairs and removed dust, sealing the surface with the right primer guarantees new paint will stick rather than lift or form bubbles.
You’ll choose primer types based on substrate, perform adhesion tests, and follow manufacturer directions.
- Bare wood: oil or bonding primer
- Glossy surfaces: degloss + bonding
- Metal: rust-inhibitor primer
- Drywall: acrylic primer
- Previously painted: adhesion-promoting primer
Paint Product Choices That Resist Bubbling
Although surface prep matters, choosing the right paint can cut bubbling risks dramatically.
Although prep helps, picking quality, flexible paint—like acrylic latex—greatly reduces bubbling risks.
Pick high‑quality paint types labeled for durability and flexibility; acrylic latex often fares well indoors.
Match application techniques to product specs—recommended thinning, brush/roller nap, and drying times—so solvents evaporate properly.
Use paints with anti‑foam additives or formulated for low VOC release to reduce trapped gases and surface defects.
When to Use a Breathable or Moisture‑Tolerant Paint
Choosing the right paint lowers bubbling risk, but you’ll also want to contemplate how moisture moves through the substrate—especially in basements, older masonry, or damp-climate exterior walls.
Pick breathable paint when vapor must escape; choose high moisture tolerance for splash or humid areas.
Consider:
- Porous brick or stone
- Unheated basements
- Humid bathrooms
- Coastal exteriors
- Previously damp patches
Tackling Bubbles on Metal, Wood, and Masonry
When you’re fighting bubbles on metal, wood, or masonry, start with proper surface prep—clean, sand, and remove rust or loose mortar so coatings can bond.
Match your primer to both the substrate and the topcoat to prevent adhesion failures and chemical reactions.
Finally, control temperature, humidity, and application technique to avoid trapping moisture or solvent that causes blisters.
Surface Preparation Essentials
Proper surface prep prevents most paint bubbles, so you should always start by evaluating and addressing the specific substrate—metal, wood, or masonry—before you touch a brush or roller.
Focus on surface cleaning and moisture testing, then follow steps:
- Remove rust, loose paint, and efflorescence
- Sand smooth and feather edges
- Patch cracks and holes
- Guarantee full drying
- Use appropriate cleaners and primers
Primer And Paint Compatibility
Once the surface is clean, dry, and patched, you’ll want to match primers and paints to the substrate to stop bubbles before they start. Choose primer types for metal, wood, masonry; guarantee paint adhesion and perform compatibility testing after surface preparation.
| Substrate | Recommended Primer |
|---|---|
| Metal | Epoxy/etching |
| Wood/Masonry | Alkyd/latex |
Environmental And Application Controls
Although temperature, humidity, and application speed often go unnoticed, you’ll stop most bubbles by controlling them: keep metal cool to prevent solvent boil, avoid painting wood or masonry in high humidity to reduce trapped moisture, and apply thin, even coats at the manufacturer’s recommended speed to minimize entrapment and flashing.
- Check environmental factors before starting
- Prep surfaces thoroughly
- Use proper application techniques
- Maintain steady drying conditions
- Avoid overthinning solvents
Preventive Maintenance to Stop Future Bubbling
If you want to stop future bubbling, commit to a regular upkeep routine that keeps surfaces clean, dry, and well-sealed. Use preventive strategies like timely touch-ups, humidity control, and routine Surface inspections to spot problems early. Check seals, caulking, and ventilation monthly so small issues don’t become blisters.
| Task | Frequency |
|---|---|
| Inspect seals | Monthly |
| Touch-ups | As needed |
| Clean & dry | Weekly |
Document Paint Damage for Contractors or Insurance
After you’ve kept up with inspections and fixes, start documenting any paint damage clearly so contractors or insurers can assess the problem fast.
Use consistent damage assessment and follow documentation tips to speed claims and repairs.
Include:
- Date and location of bubbles
- Clear photos from multiple angles
- Measurements and surface type
- Notes on moisture or causes
- Repair attempts and invoices
When Should You Call a Pro Instead of DIY?
When bubbles are widespread, deep, or tied to structural moisture, call a pro — DIY fixes can mask bigger problems and end up costing you more.
You should get a professional assessment if bubbles recur, cover large areas, or follow leaks.
Respect DIY limitations: minor isolated blisters you can sand and repaint, but anything suggesting rot, mold, or ongoing moisture needs expert diagnosis and repair.
Cost Factors for Paint Bubble Repair Projects
Because several variables affect the scope of work, the price for repairing paint bubbles can vary widely.
You should do a cost analysis and plan repair budgeting before starting.
Consider these factors:
- Area size and severity
- Surface preparation needs
- Materials and paint quality
- Labor versus DIY choices
- Hidden damage or moisture remediation
That’ll help you estimate realistic costs and timelines.
Common Mistakes That Cause Repeat Bubbling
If you skip proper surface prep, use incompatible products, or rush drying times, you’ll often see bubbles come back; these common mistakes let moisture, solvent, or poor adhesion reintroduce the exact conditions that caused bubbling in the first place.
You should do a thorough surface evaluation, choose compatible coatings, control humidity and drying, and follow bubbling prevention steps so the issue doesn’t recur.
Quick Checklist to Follow Before Your Next Paint Job
Before you touch a brush, run through a compact checklist to catch the small things that cause big problems: inspect and repair the surface, confirm substrate compatibility, test for moisture and contaminants, choose the right primer and paint, and set drying conditions that match the product specs.
- surface inspection: clean, sand, repair
- paint prep: choose product recommendations
- surface types: confirm compatibility
- application techniques: follow guidelines
- environmental factors: control drying times and humidity
How to Read Product Labels to Prevent Bubbling
When you learn to read paint labels closely, you’ll spot the details that prevent bubbling—drying times, recommended substrates, temperature and humidity ranges, and surface prep instructions all matter. You’ll use label comprehension to guide product selection, check application methods, and confirm cure times so you won’t trap moisture or apply in unsuitable conditions.
| Item | Check | Why |
|---|---|---|
| Dry time | Read | Prevents trapping |
| Temp range | Verify | Avoids failures |
| Substrate | Match | Guarantees bond |
| Prep | Follow | Removes contaminants |
| Method | Use | Correct application |
Troubleshooting Guide: Bubble Scenarios and Fixes
Although bubbling can look the same on the surface, you’ll diagnose and fix each case differently by identifying the cause—trapped moisture, solvent off-gassing, poor adhesion, or application errors—and then choosing the specific remedy that addresses that root problem.
- Check substrate moisture and dry thoroughly.
- Strip and sand delaminated areas.
- Thin and stir paint to prevent off-gassing.
- Use proper paint application techniques and climate control.
- Follow bubble prevention tips and recoat only when ready.
Frequently Asked Questions
Can Wallpaper Residue Beneath Paint Cause Bubbling Later On?
Can leftover wallpaper paste cause bubbling later on? Yes — if you skip thorough wallpaper removal, residual adhesive prevents proper paint adhesion, so your paint won’t bond well and you’ll get bubbles; you’ll need full cleaning and priming first.
Do VOC Levels in Paint Affect Bubble Formation?
Yes — VOC effects can influence bubbling: if high-VOC solvents evaporate too fast, you’ll trap gases as paint film forms. You’ll manage this by choosing appropriate paint chemistry, slower solvents, and proper ventilation and application conditions.
Will Spray Painting Always Reduce Bubbling Risk Versus Brushes?
“An ounce of prevention is worth a pound of cure.” You won’t always avoid bubbles with spray painting; proper spray technique and paint consistency matter, and you should control surface prep, humidity, and application to minimize bubbling risk.
Can Previous Oil-Based Stain Blocking Cause Future Bubbles?
Yes — oil based products can cause future bubbles if not fully compatible or cured; you’ll need thorough surface preparation, sanding, and proper primer selection to guarantee new coatings adhere and don’t trap solvents or cause blistering.
Are Heat Guns Safe for Drying Bubbles on Exterior Siding?
By golly, you shouldn’t: heat guns can scorch siding and blister paint, so you’ll avoid using them for paint drying on exteriors. Use warm air, low heat, proper surface prep and bubble prevention techniques instead.
