
Can You Put Wainscoting on Textured Walls? What You Need to Do First
Yes — you can put wainscoting on textured walls, but you’ll need to prep the surface so panels sit flat and seams look neat. First assess the texture height and adhesion: light texture may just need light sanding and cleaning, mid-level texture often benefits from skim coating, and heavy texture usually calls for removing texture or installing furring strips. Clean, prime, and test a small area, and keep going to learn tips for joints, adhesive, and trim placement.
Quick Answer: Can You Put Wainscoting on Textured Walls?
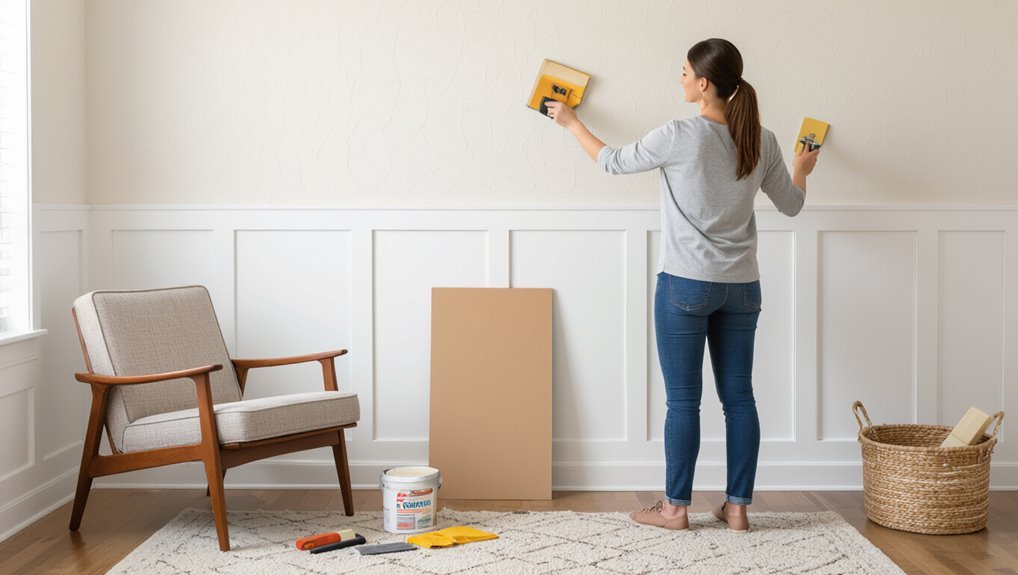
Yes—you can put wainscoting on textured walls, and it’s a common retrofit that smooths and elevates a room’s look.
You’ll plan wainscoting installation around textured wall considerations: inspect adhesion, level high spots, and decide whether to skim-coat or furr out the surface.
With proper prep, you’ll achieve neat seams, secure panels, and a polished finished appearance that hides old texture.
Who This Guide Helps (Homeowners, DIYers, Pros)
Whether you’re a homeowner, a weekend DIYer, or a pro, this guide helps you match the project to your skill level.
You’ll figure out which tools and materials you’ll need and what tasks you can handle versus when to call a contractor.
It also helps you estimate the timeline and budget so you can plan the job realistically.
Assess Skill Level
Wondering if you can tackle wainscoting on textured walls? You should do a quick skill assessment based on your DIY experience and comfort with measuring, cutting, and finishing.
Be honest about patience and time.
- Read instructions
- Review tricky cuts
- Estimate prep work
- Consider patching skills
- Know when to hire pro
Tools And Materials
After sizing up your skills and knowing what cuts or repairs might slow you down, figure out the specific tools and materials you’ll need so you don’t get stuck mid-project.
Whether you’re a homeowner, DIYer, or pro, prioritize tools selection: measuring tools, level, saw, nailer, caulk gun.
Choose material options—MDF, solid wood, or PVC—matching finish, durability, and wall texture for reliable results.
Timeline And Budget
Plan for a realistic timeline and budget before you pick up tools: a simple DIY wainscoting install on textured walls can take a weekend, while a full-room, custom wood job for a homeowner or pro may span several days to a week depending on prep, drying times, and paint.
Balance budget considerations and timeline expectations:
- Assess skill and tools
- Estimate prep time
- Price materials and trim
- Factor drying/curing
- Add contingency funds
Decide: Remove Texture, Skim, Sand, or Use Furring Strips?
You’ll need to choose whether to strip the texture off completely, skim coat for a smooth finish, or shim out the wall with furring strips.
Removing texture gives the cleanest result but is labor‑intensive; a skim coat is faster if the surface is mostly sound.
Furring strips let you bypass unevenness and create a solid, flat substrate for the wainscoting.
Remove Texture Completely
Removing the texture completely gives you a smooth, stable surface that makes installing wainscoting far easier and yields the cleanest final look.
You’ll use texture removal techniques and follow wall preparation essentials to avoid adhesion problems and gaps.
- Protect floors and trim
- Score and mist stubborn areas
- Scrape with the right tools
- Repair gouges and seams
- Prime before installing
Skim Coat Smoothly
One clean skim coat can save you hours later by smoothing texture enough for tight wainscoting seams without fully stripping the wall—decide whether to skim based on how deep the texture is, how level the surface reads, and how much thickness your moulding needs. Use proven skim coat techniques for a smooth application; sand light high spots before priming.
| Situation | Action |
|---|---|
| Light orange peel | Skim thin |
| Heavy knockdown | Skim thick |
| Minor highs | Sand then skim |
| Cracks | Patch then skim |
| Uneven flats | Multiple coats |
Shim With Furring Strips
If the texture is too deep to skim easily or you want to avoid the dust and drying time of a full skim, furring strips give you a fast, reliable way to create a flat substrate for tight wainscoting seams.
You’ll attach strips, shim low spots, and test with a level for proper wall leveling and neat furring strip installation.
- Locate studs
- Cut strips
- Shim as needed
- Screw through strips
- Check level
How Wall Texture Types Affect Wainscoting Choices
Because textures change how trim sits and how paint reads, you’ll want to match your wainscoting style to the wall finish before you start measuring.
Smooth plaster suits raised panels; heavy orange peel or knockdown pairs better with simple board-and-batten.
Choose wainscoting materials that tolerate sanding or adhesive gaps, and plan wall preparation to fill high spots, secure fasteners, and guarantee clean, stable surfaces for a tight finish.
Measuring Texture Depth and Pattern
Before you cut any boards, measure the texture’s depth and repeat pattern so your wainscoting panels sit flush and the seams stay tight.
Use simple texture measurement techniques and tools while evaluating wall irregularities to plan shims, backer, or sanding.
Follow these steps:
- Tape measure for peak-to-valley depth
- Straightedge across pattern
- Grid marks for repeat
- Small level for bow
- Photograph irregularities for reference
When You Must Remove Texture Before Wainscoting
If the texture is deep or heavily raised, you’ll need to remove it so the wainscoting sits flat and seals properly.
You should also strip texture if the wall surface is crumbling, soft, or has loose patches that would prevent secure attachment.
Addressing these issues first prevents gaps, squeaks, and future failures of the trim.
Deep Or Heavy Texture
When wall texture is thick or pronounced, you’ll need to strip it down to a smooth substrate before installing wainscoting. Heavy texture prevents panels and trim from sitting flat, causes gaps, and makes seams hard to seal.
You’ll remove deep texture to guarantee adhesion and clean lines.
- Inspect texture depth
- Test adhesion on a scrap
- Sand or skim coat
- Repair imperfections
- Prime before install
Compromised Wall Integrity
Heavy texture isn’t the only reason to strip a wall — compromised wall integrity can force you to remove texture before installing wainscoting. If drywall is crumbling or moisture has weakened surfaces, you’ll address wall durability first to avoid installation challenges. Remove texture, repair studs or backing, and guarantee a solid, flat substrate before fitting panels.
| Issue | Action |
|---|---|
| Crumbling drywall | Replace/repair |
| Moisture damage | Dry/replace |
| Weak studs | Reinforce |
| Uneven surface | Level/skim coat |
When to Skim Coat Instead of Removing Texture
Because stripping textured walls can be messy, time-consuming, and sometimes damaging, you’ll often find skim coating is the smarter choice—especially when the texture is firmly adhered and the underlying drywall is sound.
You’ll use skim coat techniques to smooth surfaces while weighing textured wall considerations.
- Assess adhesion and damage
- Choose joint compound type
- Apply thin, even coats
- Sand between layers lightly
- Prime before wainscoting
When Light Sanding Is a Viable Option
You can opt for light sanding when the texture is minor, firmly adhered, and not hiding damage that needs repair.
First assess the surface by feeling for high ridges and tap-testing for loose areas, then mark spots that need filling or skimming.
Before installing panels, wipe down, vacuum dust, and spot-prime any repaired areas so the wainscoting will sit flat and bond properly.
When Sanding Is Safe
If the texture is shallow and the old paint is firmly adhered, light sanding can safely smooth edges and improve adhesion without damaging the wall.
You’ll want to test a small, inconspicuous spot first to confirm the finish holds up. Use gentle sanding techniques and follow safety precautions.
- Wear a dust mask
- Use fine-grit paper
- Sand with light pressure
- Vacuum debris frequently
- Recheck adhesion after sanding
Surface Texture Assessment
When evaluating whether light sanding is appropriate, examine the texture’s depth, pattern, and how strongly the existing paint bonds to the substrate. These factors determine whether sanding will smooth edges without exposing bare drywall or removing texture.
You should test small areas across different surface types, note texture impact on adhesion, and avoid sanding where texture is pronounced or paint flakes. Choose sanding only where it refines, not removes.
Prep Steps Before Paneling
Before installing wainscoting, make sure the textured wall is clean, stable, and lightly abraded only where testing showed sanding would smooth edges without exposing drywall or removing texture.
You’ll perform careful surface preparation, avoiding full texture removal unless necessary. Follow these steps:
- Clean dust and grease
- Patch loose areas
- Test light sanding spots
- Seal exposed paper
- Primer before mounting
When Furring Strips Are the Best Solution
Although textured walls can be charming, they often make it hard to get wainscoting flat and secure, so you’ll want to contemplate furring strips when the texture is thick, uneven, or prevents tight joints. Use furring strips for reliable backing during wall preparation. They level surfaces, create a fastening plane, and hide irregularities.
| Benefit | Result |
|---|---|
| Leveling | Flat panel fit |
| Fastening | Secure attachment |
| Gap hiding | Clean joints |
| Insulation | Improved cavity |
| Speed | Less prep time |
Comparing Costs: Skim Coat vs Sanding vs Furring Strips
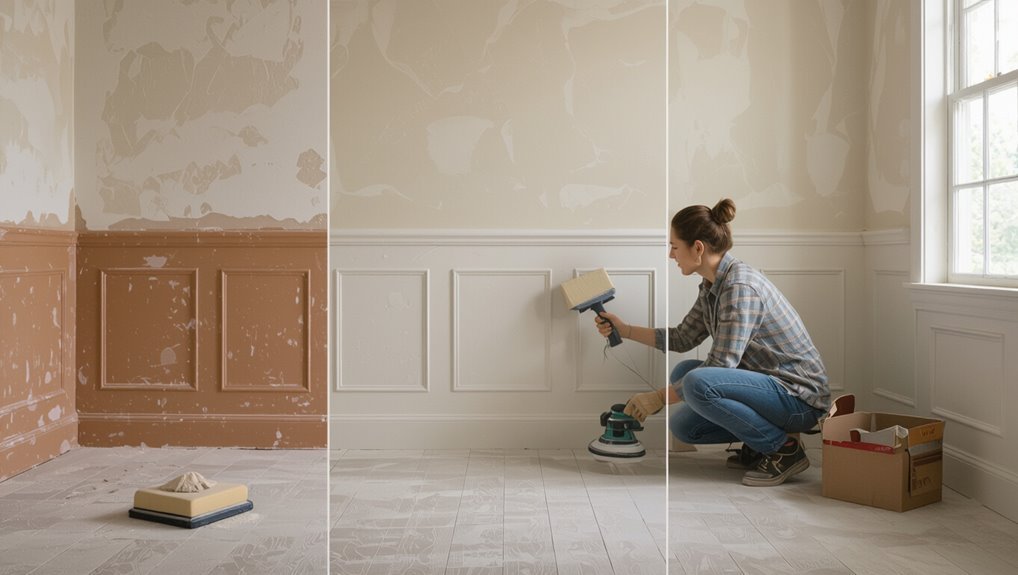
Pick the right approach by weighing labor, materials, and long-term value:
Skim coating usually costs more in labor but yields a seamless finish ideal for visible wainscoting.
Sanding can be cheapest if texture is light but risks uneven results and dust cleanup.
Furring strips add material cost and slightly increase thickness at the baseboard but save time on prepping rough textures and give a more reliable, durable substrate.
Furring strips raise material cost and baseboard thickness but speed prep and create a sturdier, more reliable substrate
- cost comparison of materials
- labor vs material tradeoffs
- installation methods for each
- durability and finish quality
- cleanup and resale impact
Time and Disruption: Timelines for Each Method
Having weighed costs, labor, and finish, you’ll also want to contemplate how each prep method affects project timeline and household disruption.
Skim coating adds drying and curing days but speeds installation later; sanding is faster but noisy and dusty, needing strict disruption management.
Furring strips take moderate time, minimal mess, and deliver the best timeline efficiency if framing’s straightforward and access is clear.
Choosing Materials: MDF, Wood, PVC, Engineered Panels
Material choice shapes not just the look of your wainscoting but its durability, cost, and how much prep and maintenance you’ll face.
- Consider MDF benefits for smooth, paint-ready panels.
- Choose Wood alternatives for warmth and refinishing.
- Pick PVC durability in moist rooms and low upkeep.
- Evaluate Engineered options for stability and lighter weight.
- Match material to wall texture, budget, and expected lifespan.
How Panel Profile Affects Visible Texture
Because panel profiles determine how light and shadow play across a textured wall, they’ll change how pronounced that texture looks up close and from across the room.
You should pick panel styles with edges and relief that either mask or highlight bumps; shallow, flat profiles minimize texture visibility while deep, ornate profiles emphasize it.
Check texture compatibility before committing.
Tools Checklist: Measuring to Finishing
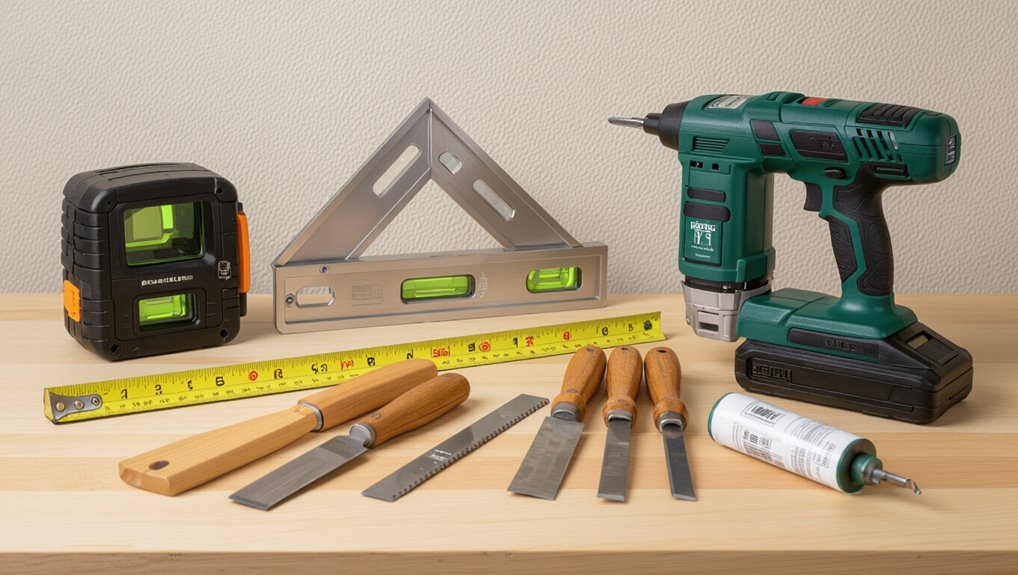
You’ll want accurate measuring tools first—tape, level, and a laser guide—to get clean lines on textured walls.
Then gather cutting and fastening gear like a miter saw, coping tools, and finish nails or screws.
Finish with sanding, caulk, paint supplies, and a thorough cleanup plan to seal the job.
Accurate Measuring Tools
Accurate measuring tools make the difference between a clean, professional-looking wainscoting installation and a frustrating round of gaps and miscuts, so gather them before you start cutting.
You’ll rely on precise tools to transfer lines and verify plumb on textured walls.
- measuring tape
- laser level
- carpenter’s square
- pencil and scrap block
- stud finder
Cutting And Fastening
Start by laying out your cuts and fasteners before you touch the saw—good planning keeps mistakes to a minimum on textured walls.
Measure twice, mark panels, and choose cutting techniques: miter for corners, coping for profiles, and a fine-tooth blade for clean edges.
Select fastening methods: pressure-fit where possible, finish nails into studs, and adhesive for extra hold on uneven surfaces.
Finishing And Cleanup
When the panels are in place and fasteners are set, gather your finishing tools so you can work efficiently: a tape measure and pencil for final checks, a caulk gun with paintable silicone for sealing gaps, a small putty knife and wood filler for nail holes, a sanding block (fine grit) for smooth edges, painter’s tape and drop cloths to protect surfaces, and a quality brush or small roller plus matching paint or stain for touch-ups.
- Check joints for texture compatibility
- Caulk seams and wipe excess
- Fill holes and sand smooth
- Tape off and paint trim
- Remove drop cloths, inspect finishing touches
Prepping Textured Walls for Glued (Adhesive) Wainscoting
Before you apply adhesive wainscoting over a textured wall, you’ll need to assess and smooth the surface so the panels bond evenly and stay put. Check texture compatibility, choose adhesive options, and clean the wall. Sand high spots, fill deep valleys, and prime.
| Step | Action |
|---|---|
| 1 | Clean |
| 2 | Sand |
| 3 | Fill |
| 4 | Prime |
| 5 | Test bond |
Prepping Textured Walls for Mechanically Fastened Wainscoting
If your wainscoting will be attached with screws or nails, you’ll focus on creating a solid, level substrate and locating structural backing so panels stay secure without cracking or popping off the wall.
Do a texture assessment, strip loose texture, repair drywall, mark studs, and plan wall preparation before fastening.
- Inspect texture and adhesion
- Remove loose material
- Patch and sand
- Locate studs
- Prime substrate
Install Furring Strips on Uneven Textured Walls (Step‑by‑Step)
Start by screwing vertical furring strips to the wall so you create a flat, consistent surface that will support your wainscoting panels.
Measure and mark studs, shim where texture prevents full contact, and fasten strips with long screws into framing.
Check level continuously during furring strips installation.
Afterward, perform a quick wall texture evaluation to confirm uniformity before mounting panels.
Skim Coating to Create a Flat Substrate (Step‑by‑Step)
Whether you used furring strips or plan to skim over the original texture, skim coating gives you a smooth, uniform surface for wainscoting panels.
You’ll prep, mix, apply, feather, and finish using proven skim coat techniques and thorough surface preparation.
- Clean and remove loose texture
- Prime problem spots
- Mix joint compound to consistency
- Apply even coats with a trowel
- Feather edges and cure fully
Light Sanding for Low‑Profile Textures (Step‑by‑Step)
First check the texture height so you know if light sanding will be enough or if you need more leveling.
Pick a fine sanding grit (120–220) that removes high points without gouging the drywall.
Finish by vacuuming and wiping the wall so the surface is clean and ready for primer or adhesive.
Assess Texture Height
How high is the texture compared to the profile of your planned wainscoting? You’ll do a quick texture assessment to confirm wainscoting compatibility before sanding.
Check edges, peaks, and valleys, then decide if light sanding will level high spots without removing texture character.
- Inspect visually and by touch
- Measure peak height
- Compare to molding depth
- Mark trouble areas
- Note adhesion concerns
Choose Sanding Grit
Now that you’ve marked high spots and compared texture height to your molding depth, pick a sanding grit that will shave peaks without flattening the texture.
For low‑profile textures, start with 120–150 grit for light material removal; switch to 180–220 grit for smoothing.
Use controlled sanding techniques, light pressure, and a sanding block to maintain evenness.
Your grit selection preserves texture while reducing interference.
Clean And Prep
1. You’ll do light sanding on low‑profile texture, then focus on wall cleaning and surface priming before installing wainscoting.
Follow this step‑by‑step rhythm:
- Remove dust with a vacuum and tack cloth.
- Sand high spots gently with 120–150 grit.
- Wipe down with mild cleaner; let dry.
- Spot‑prime patched areas.
- Apply full primer coat for even adhesion.
Using Adhesive Correctly on Textured Surfaces
Because textured walls won’t let adhesive contact the entire panel edge, you’ll need to choose and apply products that bridge gaps and maintain constant pressure.
You’ll select adhesive types suited for uneven substrates—construction adhesive or heavy-duty caulk—and follow surface preparation: clean, degrease, and roughen high-gloss textures.
Apply bead patterns to span peaks and valleys, press panels firmly, and use clamps or temporary supports until cured.
Sealing Seams and Gaps to Prevent Later Cracking
When you seal seams and gaps properly, you’ll stop small movements and temperature changes from turning into visible cracks later on; you should prep surfaces, choose flexible caulk, and do seam sealing and gap filling before painting.
Seal seams and gaps first—prep surfaces, use flexible caulk, and finish after it cures to prevent future cracks.
- Clean and dry joints
- Use painter’s tape for straight beads
- Apply flexible acrylic caulk
- Tool seams smooth
- Prime and paint after cure
Trim and Molding Choices That Hide Texture Flaws
If you want to mask uneven texture without reworking the whole wall, choose trim and molding profiles that draw the eye away from flaws and create clean sightlines.
Pick simple, bold trim styles—thicker baseboards, wide chair rails, and tall stiles—to cover irregularities.
Layer moulding profiles for shadow and depth, and position joints where texture is least noticeable to keep lines crisp and intentional.
Painting Techniques to Disguise Residual Texture
Once your trim and molding have redirected attention from major bumps, paint becomes the tool for refining what still shows through.
Use painting techniques that minimize sheen and blur shadows so texture disguises read subtle, not sloppy. Focus on even coats, directional brushing, and thin glazes to soften contrast.
- Matte or low-luster finish
- Thin, even coats
- Cross-hatch brushing
- Feathered edges
- Glazing for depth
Fitting Wainscoting at Corners, Outlets, and Baseboards
Measure carefully and cut with intent: fitting wainscoting at corners, around outlets, and above baseboards means you’ll be juggling miters, back-bevels, and precise notches so panels sit flush and look intentional. You’ll plan corner fitting, map outlet placement, allow baseboard integration, and make finish adjustments for gaps and paint.
| Task | Tool | Tip |
|---|---|---|
| Corners | Miter saw | Test fit |
| Outlets | Router | Template |
| Baseboards | Shims | Reveal |
| Finish | Caulk | Sand |
| Inspect | Level | Repeat |
How to Test a Small Area Before Committing
Start by choosing a small, inconspicuous section of wall—about a 2×2-foot area—so you can trial materials and techniques without committing to the whole room.
Use test area methods to check adhesion, paint match, and texture compatibility.
Try:
- Adhere a scrap panel
- Caulk and sand a seam
- Prime and paint
- Apply trim pieces
- Inspect after 24 hours
Common Mistakes That Cause Gaps, Bulging, or Popping
If you skip proper surface prep, the adhesive won’t bond and you’ll get gaps or bulging as the textured wall settles.
Using the wrong fasteners or driving them too shallow (or too deep) also leads to popping and loosened panels.
Fixing these two mistakes up front prevents most of the fit-and-finish problems you’ll encounter.
Improper Surface Preparation
When you skip proper cleaning, leveling, or priming, the trim won’t sit flush and you’ll get gaps, bulges, or nails that pop later; textured walls hide loose joint compound, paint skim coats, and bumps that prevent a tight bond.
So spend time removing dust, loose paint, and high spots before you attach the wainscoting.
- Check for surface inconsistencies
- Remove dust and loose paint
- Sand high spots smooth
- Prime for adhesion to avoid improper adhesion
- Fill voids and let dry completely
Incorrect Fastening Techniques
Drive fasteners carefully: using the wrong nails, wrong spacing, or inconsistent depth will leave your wainscoting with visible gaps, bulges, or nails that pop later. You’ll choose proper fastening methods tied to solid wall preparation, drive consistently, and check for snags. Correct technique prevents frustration and extra repair.
| Feeling | Fix |
|---|---|
| Frustration | Refasten |
| Embarrassment | Adjust |
| Anxiety | Inspect |
| Relief | Secure |
| Pride | Finish |
When to Call a Pro: Signs You Should Hire a Contractor
Because textured walls can hide problems that make wainscoting tricky, call a contractor once you spot major unevenness, water damage, or structural issues that DIY fixes won’t safely solve.
Consider contractor experience and project complexity when deciding. You’ll save time and avoid mistakes.
- Severe unevenness
- Active moisture or mold
- Structural cracks
- Electrical/plumbing behind wall
- Lack of tools or skills
Frequently Asked Questions
Will Wainscoting Affect My Home’s Resale Value?
Yes — wainscoting can boost resale value if you match modern design and current resale trends; you’ll appeal to buyers seeking polished, classic details, but avoid overly ornate styles that might clash with contemporary preferences.
Can Wainscoting Be Installed Over Wallpapered Textured Walls?
About 70% of homeowners prefer smooth walls, so yes—you’ll usually need wallpaper removal for reliable wainscoting installation; you can sometimes shim or use backer board, but removing wallpaper gives the cleanest, longest‑lasting result.
Do Building Codes Limit Wainscoting Thickness in Stairwells?
Yes — you can, but you’ll need to follow safety regulations and consider stairwell dimensions; local codes may limit wainscoting thickness so it won’t obstruct handrails, clearances, or egress, so check your jurisdiction’s requirements.
Can Radiant Heating Behind Walls Complicate Installation?
Yes — like a maze hiding warmth, radiant heating can complicate installation: you’ll face installation challenges, avoid damaging pipes or mats, coordinate clearances, maybe consult plans, and use adhesives or fasteners suited for heated walls.
Will Wainscoting Trap Moisture and Cause Mold Behind Panels?
If you install wainscoting improperly it can trap moisture and encourage mold growth, but you can prevent that by adding a moisture prevention barrier, ensuring ventilation, using mold-resistant materials, and sealing gaps to let walls breathe.
