
How to Rag Paint a Wall: A Beginner’s Guide to This Classic Technique
You can transform flat paint into soft, textured walls by applying a translucent glaze with a torn rag. Prep thoroughly: clean, patch, sand, and prime. Mix one part paint to four parts glaze, work in 3×3-foot sections, and dab or twist the rag with controlled pressure, blending edges as you go and stepping back often. Feather near trim and keep joins wet to avoid lines. Follow the steps below and you’ll gain practical tips, time estimates, and troubleshooting advice.
What Search Intent Does This Guide Satisfy?

What do readers coming to this guide want to accomplish?
You’re likely tracking search trends for rag painting basics, looking for clear steps, materials, and outcomes.
Your user motivations include learning whether the technique fits your skill level, estimating time and cost, and finding troubleshooting tips.
This guide targets practical how-to intent, not deep history or advanced decorative variations.
Quick Answer: Rag Painting in Six Steps
You’ll start by prepping the surface—clean, sand, and prime so the glaze bonds properly.
Then mix your paint glaze to the right consistency for good coverage and working time.
Finally, apply the rag technique with controlled dabbing and blending to build the texture you want.
Prep The Surface
Surface prep sets the foundation for a successful rag-painted wall, so clear the room, remove switch plates and outlet covers, and wash the wall with mild detergent to remove grease and dust.
You’ll focus on surface cleaning and wall priming before painting.
- Patch holes and sand smooth.
- Clean residue and allow to dry.
- Apply primer evenly and let cure.
Mix Paint Glaze
Now that the wall’s primed and dry, it’s time to mix the glaze you’ll use for the rag effect.
Measure glaze to paint ratio for a translucent glaze consistency—usually one part paint to four parts glaze or adjust to taste.
Test a small patch to check opacity and practice color mixing: blend base and accent hues until you get the subtle contrast you want.
Apply Rag Technique
Start by working in a manageable section, about 3×3 feet, so you can control texture and blend edges before the glaze skins over.
You’ll rag paint with controlled pressure, rotating the rag to vary pattern and avoid obvious repeats. Keep color theory in mind—contrast and harmony guide choices.
- Load rag lightly
- Press, lift, rotate
- Blend edges smoothly
Which Room and Look Should You Pick?
Which room will best show off a rag-painted wall—your cozy living room, a bold dining area, or a serene bedroom?
Consider color schemes that reinforce the room ambiance you want: warm neutrals for comfort, deep tones for drama, or soft pastels for calm.
Match texture intensity to furniture and lighting, and pick a focal wall to maximize impact without overwhelming the space.
Choose Base vs. Glaze Colors for Rag Painting
Once you’ve picked the room and the mood, pick your base and glaze colors to build that effect—your base sets the field and the glaze adds texture and depth.
Choose colors for color harmony and plan finish selection for sheen contrast.
Consider:
- Base: dominant, calm tone.
- Glaze: translucent, slightly darker or warmer.
- Test swatches together.
Best Rags for Rag Painting (Cotton, Linen, Tees)
Texture matters: the rag you pick shapes the pattern and ease of application, so choose one that matches your desired look and comfort.
For subtle, refined effects use linen; for absorbent, forgiving results pick cotton or old tees.
Test rag types to see how each drags, lifts, or stamps glaze.
Try different rags—each one drags, lifts, or stamps glaze uniquely; test to discover the effect you want.
Consider durability, lint, and how fabric choices affect texture and control.
Tools and Materials You Actually Need
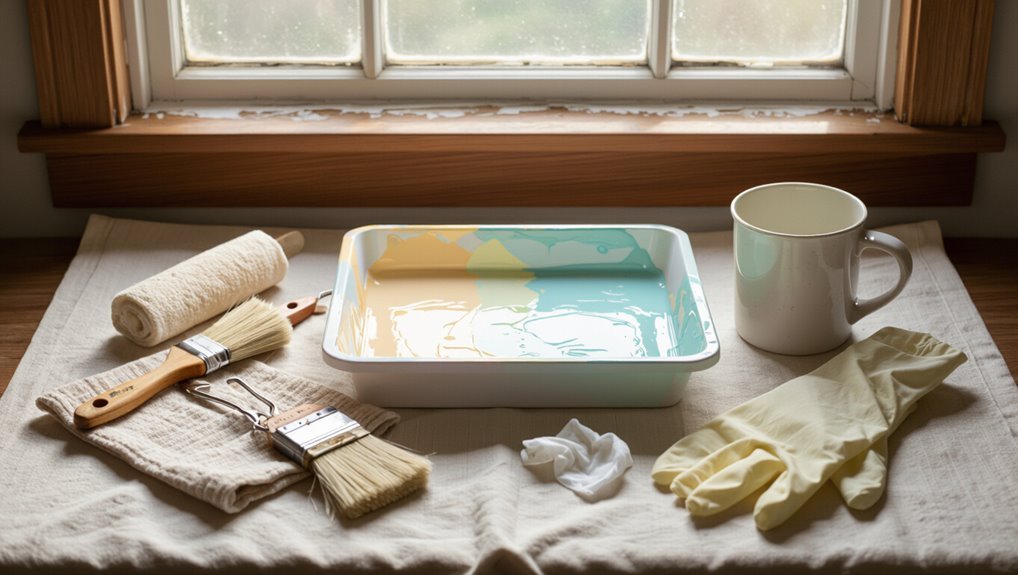
After you’ve decided on the rag that gives the look you want, gather a short list of tools and materials that make the job faster and cleaner.
You’ll need basics and a few extras for neat results:
- Quality roller, tray, and brush selection for edges.
- Drop cloths, painter’s tape, gloves.
- Two paints for testing color combinations and a stirring stick.
Test Colors and Sheens on Samples
Start by painting several 12-inch squares on sample boards or spare drywall and try each paint at the sheen you plan to use so you can see how color and gloss interact under your room’s light.
For accurate color selection and sheen testing, view samples at different times and angles, note true drying tones, and pick the combination that complements room lighting and texture.
Prep Walls for a Smooth Rag Surface
Now that you’ve confirmed the color and sheen that work in your light, get the wall surface ready so the rag technique lays down smoothly.
Remove dust, repair dents, and sand glossy areas to control wall texture and guarantee the paint finish adheres.
Then:
- Clean with mild detergent.
- Fill holes and sand.
- Prime glossy or patched spots before ragging.
Mix Glaze to the Right Consistency
Mix one part latex paint to four parts glaze (or adjust to a 1:3–1:5 range) so the mixture spreads translucent enough to show the base coat without running.
You’ll test glaze consistency on cardboard, adjusting ratio for opacity and flow.
Use gentle stirring and slow folding as mixing techniques to avoid bubbles.
Strain if needed, then work in small batches to maintain even results.
Hold and Move the Rag: Technique Tips
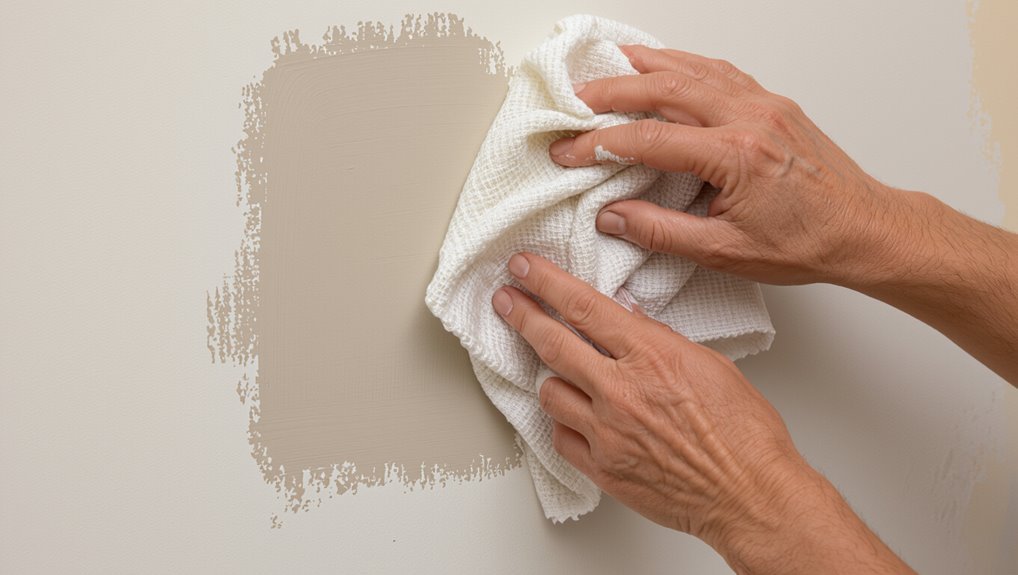
Grip the rag loosely between your thumb and first two fingers so it stays flexible and you can control pressure without tiring your hand.
Use these simple moves to explore rag technique and create texture variations:
- Dab lightly for soft depth.
- Twist and press for denser texture.
- Glide with folded edges for streak control.
Adjust pressure and angle as you work.
Subtle Ragging: Step-by-Step Technique
Before you start ragging, make sure the wall is clean, dry, and primed so the glaze will adhere evenly.
You’ll load the rag lightly and work in small, overlapping sections to build a soft, layered effect.
Keep your movements consistent and step back often to check the subtlety of the texture.
Preparing The Surface
Although subtle ragging thrives on soft texture, you’ll need a clean, smooth surface to make those irregularities read as intentional rather than sloppy.
Use these surface preparation techniques and note wall texture considerations:
- Clean walls, remove grease and dust.
- Fill dents, sand until even.
- Prime with a bonding primer, let cure.
You’ll be ready to rag paint confidently.
Applying The Ragging Technique
Start by loading a clean, soft rag with a thin, even amount of glaze—too much will pool and read as blotchy, too little won’t build the subtle texture you want.
Work in small sections, pressing and twisting to create varied ragging patterns. Step back often to assess balance and adjust pressure.
Blend edges gently. Test color combinations on scrap before committing.
Dramatic Ragging: Step-by-Step Technique
When you want a bold, textured finish, dramatic ragging gives you layered depth with surprisingly simple steps—gather your tools, prep the wall, and work in small sections so the effect stays controlled.
You’ll honor rag painting styles and ragging history while creating contrast.
Follow steps:
- Load rag, blot excess.
- Press, twist for texture.
- Step back, adjust tones.
Blend Seams and Keep Patterns Consistent
When you finish a section, feather the edges smoothly so seams almost disappear.
Keep the rag folds and pressure consistent so the pattern matches from panel to panel.
If a shift looks off, blend with light, controlled strokes until it reads as one surface.
Feathering Edges Smoothly
Although rag painting relies on bold texture, you’ll get the most natural look by feathering edges carefully so seams vanish and patterns flow.
Use feathering techniques and edge blending to soften joins and keep rhythm.
- Light pressure: lift as you stroke.
- Overlap slightly: avoid hard lines.
- Step back: check continuity and adjust.
Match Rag Patterns
After feathering your edges so seams fade, focus on matching rag patterns so the texture reads as one continuous surface.
You’ll align tones and strokes, repeating key color combinations and matching pattern variations at overlap points.
Work from a wet edge, step back often, and adjust pressure to recreate adjacent motifs.
Consistency keeps the wall looking intentional and hides joins effectively.
Layering for Depth and Secondary Colors
If you start with a light base and build successive, translucent layers, you’ll create rich depth and introduce subtle secondary colors where paints overlap.
You’ll control color combinations and texture contrasts by varying pressure and rag type.
- Layer thin washes for nuance.
- Blend warm over cool for secondary hues.
- Step back, adjust opacity for balance.
Rag Painting Around Corners and Trim
Before you start ragging near corners and trim, tape and mask carefully to protect sharp lines and surfaces.
Use a torn rag or light pressure to feather edges so the texture blends without hard seams. That way you’ll keep the look soft and controlled while avoiding paint on the trim.
Taping And Masking
Start by protecting every edge you’ll rag-paint near: tape off trim, baseboards, windows, and ceiling lines so you can work confidently to the corner without smudging adjacent surfaces.
Use precise taping techniques and masking tips to keep lines clean. Follow these steps:
- Press tape edges firmly.
- Mask large areas with paper.
- Remove tape while paint’s tacky.
Feathering At Edges
Feathering the edges when rag painting around corners and trim keeps your finish soft and seamless, so you can blend the textured glaze into adjacent surfaces without harsh lines.
Work wet-to-wet, lightly dabbing toward trim with a clean rag. Use small strokes for edge blending, feathering techniques to taper color, and step back often to correct gaps, ensuring a natural, cohesive flow.
Rag Painting Ceilings and Tight Spots
Working on ceilings and tight spots calls for shorter strokes and a slightly different approach than wall ragging because you’ll be working overhead and around obstacles; use ceiling techniques and tight spot strategies to stay controlled.
- Use a grab bar or step stool for stability.
- Work in small sections with a compact rag.
- Keep glaze thin to avoid drips and overwork.
Drying Times Between Glaze Passes
After you’ve finished a section on the ceiling or around a fixture, give the glaze time to set before making another pass—rushing leads to lifting, streaks, or muddy color.
Check tackiness by touch; wait until slightly tacky for blending, fully dry for separate layers. Use drying techniques like gentle airflow and low heat.
Space glaze application passes 30–60 minutes, longer in cool or humid conditions.
Fix Common Mistakes and Quick Fixes
If your rag finish ends up with uneven texture, you can blend it by lightly reworking the area with a damp rag and matching glaze.
For fresh smudges, wipe immediately with a soft cloth and feather the edges to hide the mark.
If the flaw’s set, sand gently and touch up with the same glaze technique to match the surrounding finish.
Uneven Texture Fixes
When your rag-painted wall shows inconsistent texture, don’t panic—most issues have quick, effective fixes you can do yourself.
Use simple repair techniques to tackle texture variation fast:
- Feather edges with a damp rag to blend excess buildup.
- Lightly sand high spots, then re-rag with diluted paint.
- Reapply thin glazes where coverage is patchy, matching pattern and pressure.
Paint Smudge Remedies
Because smudges happen even to careful painters, it’s useful to know quick, targeted fixes that won’t require redoing the whole wall. You can lift fresh smudges with a damp sponge, sand dry blemishes lightly, then retouch. Practice paint smudge prevention and simple cleaning techniques to avoid repeat errors.
| Problem | Quick Fix |
|---|---|
| Fresh smudge | Dab with damp sponge |
| Dry smudge | Lightly sand & retouch |
Troubleshoot Spots, Streaks, and Sheen
Spotty patches, streaks, or uneven sheen can ruin a fresh rag-painted finish, but you can fix most issues by identifying the cause—too much paint on the rag, inconsistent pressure, or drying too fast—and correcting your technique before the next pass.
- Lightly rework streaks with a damp rag for streak removal.
- Even pressure prevents new spots.
- Use glaze or matte spray for sheen adjustment.
Protect and Seal a Rag-Painted Wall
After your rag-painted finish looks right, protect it with a clear topcoat so the texture and color stay true and resist wear.
Choose a compatible water- or oil-based clear coat, testing in a small area.
Apply thin, even coats with a synthetic brush or roller, sanding lightly between coats.
These sealing techniques provide durable wall protection and simplify future cleaning without altering sheen.
Estimate Time and Paint Quantities
You’ll want to map out a project time breakdown so you know how long prepping, ragging, and sealing will take.
Calculate paint coverage needed by measuring wall area and checking the paint’s spread rate, then add a bit extra for touch-ups.
Don’t forget to list tools and extras—rags, trays, tape, and protective gear—so you’re ready once you start.
Project Time Breakdown
When you’re planning a rag‑painting project, map out each phase so you can set realistic time blocks and buy the right amount of paint.
Estimate 1–2 hours for prep per room (furniture, masking, priming), 2–4 hours for base coats to dry and cure, and 3–6 hours for the ragging technique itself on an average 10×12 room, adjusting for wall texture and your speed.
- Prep time and project duration
- Base coats and drying
- Ragging, labor, estimated costs
Paint Coverage Needed
Now that you’ve planned timing and labor, figure out how much paint you’ll actually need so you don’t run short mid‑project.
Measure wall square footage, subtract windows/doors, and check your chosen paint’s coverage per gallon.
Account for primer plus two thin ragging coats.
Consider paint finish options and color blending techniques—glossier finishes spread farther; darker blends may need extra coats.
Buy a little extra for touchups.
Tools And Extras
Tools and extras make the difference between a smooth rag‑painting day and one full of stops and trips to the store, so gather supplies that match your estimated time and paint needs.
Plan paint quantities for coverage and test rag paint techniques and color combinations.
- Rags, gloves, trays
- Sample pots, tape, drop cloths
- Extra primer, a spare gallon, timers
Budget-Friendly Supply Alternatives and Tips
If you don’t want to spend much but still want great rag-painted results, you can substitute a few inexpensive items without sacrificing quality. Use budget friendly materials like old T-shirts, thrift-store rags, and diluted latex paints; explore creative alternatives like sea sponges or paper towels for texture.
| Hope | Warmth | Pride |
|---|---|---|
| Soft | Cozy | Joy |
| Cheap | Bright | Calm |
| Simple | Honest | Proud |
| Home | Light | Smile |
When to Hire a Pro or Change Finish
When a rag-painted wall isn’t giving the look you want or the surface has major imperfections, consider hiring a pro or switching to a different finish; they’ll spot structural issues, advise on durable coatings, and deliver cleaner results faster than DIY attempts.
- Hire a pro painter for repairs, texture problems, or large rooms.
- Ask about finish options: washables, scrubbable, or matte.
- Switch to glaze, venetian plaster, or a simple repaint if needed.
Frequently Asked Questions
Can Rag Painting Be Used Outdoors on Exterior Walls?
Yes — you can rag paint exterior walls if you choose weather-resistant paint and sealers; you’ll boost exterior durability and weather resistance by prepping surfaces, using exterior-grade products, and applying a protective clear coat for long-lasting results.
Will Ragging Work Over Textured or Popcorn Ceilings?
Yes—you can rag over textured or popcorn ceilings, but you’ll need careful ceiling preparation; you’ll sand loose bits, prime, and test ragging techniques on a small area so the glaze catches texture without flaking or pooling.
Can I Rag Paint Over Wallpaper Without Removing It?
Yes — you can, if you enjoy surprises: smooth, vinyl-coated wallpaper often accepts ragging, but porous or peelable types won’t. Test for paint adhesion, prime if needed, and remove loose, bubbled paper before starting.
How Do I Childproof or Pet-Proof a Rag-Painted Room?
Seal the finish with a clear, non-toxic topcoat for child safety and pet safety, secure furniture and trim, use corner guards, keep paint tools locked, and choose low-VOC products so kids and pets won’t inhale or touch hazards.
Are There Eco-Friendly or Low-Voc Glaze Options?
A local café switched to ECOS water-based glazes and cut smells dramatically; you can choose eco friendly glazes and other low voc options, read labels, test a sample, and ventilate while you work.
