
How to Remove Black Smoke Stains From Painted Walls Without Damaging the Surface
You can remove black smoke stains without harming paint by starting gently: vacuum loose soot with a soft-brush attachment, then test a hidden spot with diluted dish soap or a 1:3 vinegar solution. Work top-to-bottom with a microfiber cloth and light blotting—avoid scrubbing. Use TSP sparingly on durable finishes and rinse thoroughly to prevent streaks. For stubborn marks, spot-prime and touch up; continue for tips on finishes, tools, and tougher remediation.
What This Guide Covers
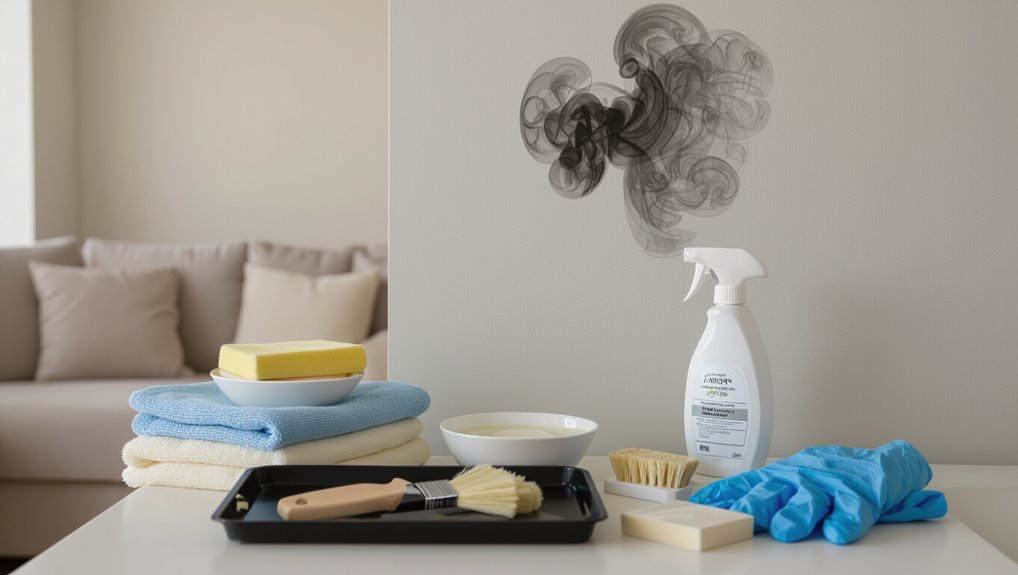
While dealing with smoke-stained walls can feel overwhelming, this guide walks you step-by-step through evaluating damage, choosing the right cleaners and tools, and safely removing soot without harming paint or finishes.
You’ll learn practical cleaning methods, how to assess surface versus deep staining, when to test cleaners, and paint care tips to preserve sheen and color so you can restore walls confidently.
Quick Answer: How to Remove Black Smoke Stains Without Damaging Paint
First check what finish your paint has—flat, eggshell, satin, or semi-gloss—to know how much scrubbing it can handle.
Then pick a mild cleaner like diluted dish soap or a trisodium phosphate alternative and test it on a hidden spot.
Work gently with a soft cloth and rinse often to remove smoke without stripping the paint.
Assess Paint Finish
Before you start scrubbing, identify the paint finish on your wall—flat, eggshell, satin, semi-gloss, or gloss—because each reacts differently to cleaning and you’ll avoid damage by matching your method to the finish.
Check sheen and test a hidden spot to gauge paint durability and colorfastness. That informs your approach, preserves finish, and makes ongoing wall maintenance predictable and safer.
Choose Gentle Cleaners
Pick cleaners that lift soot without stripping paint or leaving a dull patch: mild dish soap or a pH-neutral cleaner diluted in warm water, a vinegar solution (1 part white vinegar to 3 parts water) for light marks, or a commercial soot-specific cleaner labeled safe for painted surfaces.
Test first, work gently with a soft cloth, prefer eco-friendly options, and follow proven stain removal techniques to protect finish.
How to Identify True Smoke Soot Versus Residue or Scorch Marks
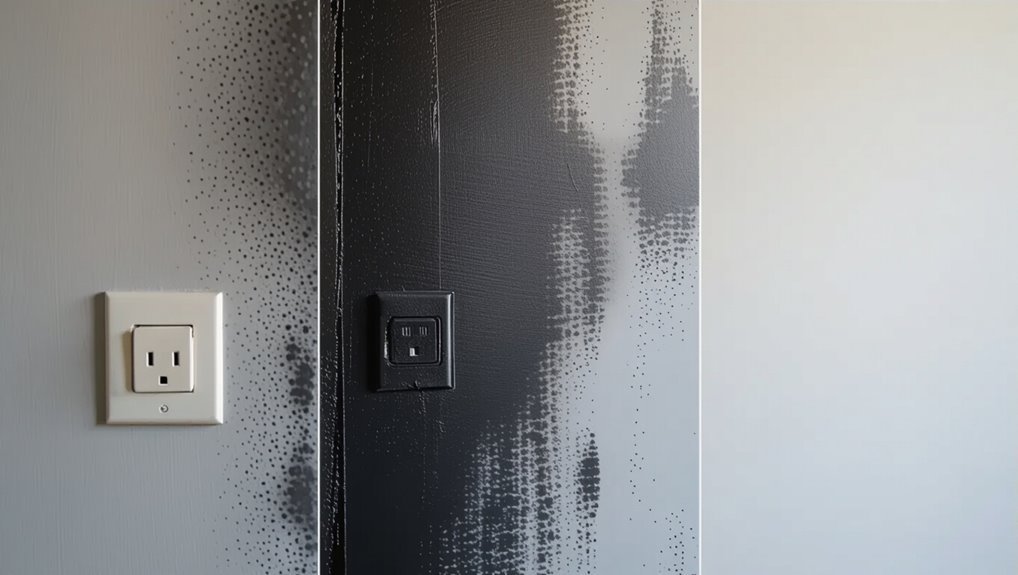
You’ll spot true smoke soot by its fine, powdery texture compared with the streaky or melted look of residue and scorch marks.
Check for a lingering smoky odor—soot usually smells like burned material while residue may have chemical or greasy scents.
Lightly rub a hidden area or test with a damp cloth to see if the mark smears (soot) or is fused to the paint (scorch).
Visual Texture Differences
When you’re trying to tell whether a mark on your wall is true smoke soot, simple visual cues will give you the quickest clues: true soot looks powdery, layered, and uneven in visual texture, while residue or scorch marks sit flat, fused, or glossy.
Check paint compatibility—soot often dusts off, but fused discoloration resists cleaning and may indicate heat damage to the finish.
Smell And Odor Tests
Visual cues give you a quick read, but smell often seals the diagnosis: true smoke soot usually carries a persistent, acrid odor that lingers even after surface dusting, while scorch marks and fused residue tend to have little to no residual smoke smell or a single sharp burnt plastic/chemical scent.
You’ll sniff closely, note persistence, then plan smell removal and odor neutralization methods accordingly.
Surface Reaction Checks
Because true smoke soot reacts differently to touch and cleaning solutions than simple residue or scorch, you’ll use a few small tests to tell them apart.
Check surface compatibility and observe chemical reactions carefully.
- Light dry rub: smudges soot
- Damp cloth: transfers fine particles
- Solvent spot: minimal paint lift
- Heat test: scorch won’t powder
- Smell: soot smells burned
Which Paint Finishes Are Most and Least Forgiving When Cleaning

Although paint type mightn’t be the first thing you think about when tackling smoke stains, it makes a big difference in how easy cleaning will be.
You’ll find gloss and semi-gloss offer better paint durability and resist scrubbing; eggshell and satin tolerate mild cleaning techniques.
Flat or matte finishes are least forgiving—they absorb stains and can scuff, so clean very gently or consider repainting.
How to Test a Small Paint Spot Before Full Cleaning
Pick a hidden spot like behind furniture to test so any change won’t be obvious.
Apply a small amount of your chosen cleaner with a soft cloth, using gentle pressure.
Wait a few minutes and inspect for any finish change before treating the whole area.
Choose A Hidden Spot
Before you start scrubbing, find a discreet spot—behind a piece of furniture, inside a closet, or near a baseboard—to test the cleaner and paint reaction on a small area about an inch square.
Use hidden techniques and simple cleaning tips to avoid surprises:
- Choose an inconspicuous area
- Test with designated cleaner
- Wait for full drying
- Check for discoloration
- Note results before proceeding
Apply Cleaner Sparingly
Start with a dime-sized drop of your chosen cleaner on the test spot and work gently outward with a soft cloth so you can see how the paint reacts without soaking it.
Let it sit briefly, then blot—don’t rub.
If the finish holds, proceed using minimal solution and circular cleaning techniques.
This preventive measures step limits damage and guides safe full cleaning.
Inspect For Finish Change
When you’ve confirmed the cleaner doesn’t soak through, inspect the test spot closely for any change in sheen, color, or texture so you can avoid damaging the rest of the wall.
Check these before proceeding:
- Look for gloss loss that signals reduced paint durability.
- Compare color under natural light.
- Feel for tackiness or roughness.
- Note edge lifting.
- Record time and product for finish maintenance.
Essential Safety Steps Before You Start Cleaning Smoke Stains
Because smoke can leave toxic residues and fragile surfaces behind, take a few safety steps before you clean:
Wear proper safety gear — gloves, goggles, and an N95 or better mask — and protect nearby furniture.
Open windows and use fans for ventilation tips to clear fumes.
Turn off HVAC to avoid spreading soot, and keep pets and children out of the area until work’s done.
Tools You’ll Need for Safe Soot and Smoke Removal
With safety gear in place and the area ventilated, you’ll want a compact toolkit that keeps soot from spreading and protects both you and the surfaces you’re cleaning.
Use these items to preserve paint integrity while choosing gentle cleaning supplies.
- HEPA vacuum with soft brush
- Microfiber cloths
- Soft-bristled brush
- Disposable gloves and masks
- Plastic sheeting and painter’s tape
Gentle Household Cleaners That Work on Smoke Stains
You can tackle fresh smoke stains with simple soap and warm water, which lifts surface soot without harsh chemicals.
For tougher marks, make a baking soda paste (mix baking soda with a little water) and gently rub the stain, then wipe clean.
Test either method on an inconspicuous spot first to protect the paint.
Soap And Warm Water
Start by mixing a few drops of mild dish soap into a bowl of warm water and testing a hidden spot to guarantee the paint won’t lift.
You’ll notice soap benefits and that water temperature matters. Gently wipe stains, rinse, and dry.
Follow steps:
- Soft cloth
- Light pressure
- Small sections
- Rinse frequently
- Air dry
Baking Soda Paste
Mix baking soda with a little water to form a thick paste, test it on an inconspicuous spot, then apply gently to the smoke stain using a soft cloth or sponge. You’ll see baking soda benefits: mild abrasion and odor lifting. Rinse, pat dry, repeat if needed. Use gentle paste application to avoid paint damage.
| Texture | Action |
|---|---|
| Thick | Apply |
| Soft | Rub |
| Damp | Rinse |
| Light | Dry |
Commercial Soot-Cleaning Products Worth Trying
Products made for soot removal cut through smoke residues faster than household cleaners, so they’re worth a look if you’re dealing with stubborn black stains.
Products made for soot removal cut through smoke residues far faster than household cleaners — ideal for stubborn black stains.
You’ll find commercial products focused on stain removal, gentle on paint when used per instructions.
Try:
- Dry sponge soot eraser
- Soot-specific liquid cleaner
- Enzymatic residue remover
- Low-odor degreaser
- Professional-grade aerosol cleaner
Cleaning Solutions and Mixes to Avoid on Painted Walls
Those commercial soot cleaners can be very effective, but you’ll want to avoid several common DIY mixtures and harsh solutions that will damage painted walls.
Don’t use straight bleach, undiluted ammonia, or abrasive scrubs. Ignore cleaning myths like vinegar-only cures for all stains.
Always test for paint compatibility in an inconspicuous spot and opt for gentle pH-neutral cleaners or manufacturer-recommended products instead.
How to Dry-Clean Soot With a Vacuum and Brush Attachment
Start by gently vacuuming the soot with a soft-brush attachment to lift loose particles without rubbing them deeper into the paint.
Use careful vacuum techniques and steady strokes; don’t press hard. For effective soot removal, follow these tips:
- Test suction on an inconspicuous spot
- Work top-to-bottom
- Replace or empty the filter often
- Use a low setting
- Brush lightly, then reassess
Step-By-Step: How to Use a Soot Sponge (Dry-Cleaning Sponge) Effectively
Before you start, put on gloves, a mask, and old clothes so you don’t spread or inhale soot.
Hold the soot sponge lightly and work in gentle, overlapping strokes to lift residue without rubbing the stain deeper.
Replace the sponge surface or use a fresh one as soon as it stops picking up soot to avoid re-soiling the wall.
Gather Proper Protective Gear
1 essential item you’ll need is proper protective gear—gloves, a fitted respirator or mask rated for fine particles, and safety goggles—because working with a soot sponge stirs up stubborn soot and tiny particulates you don’t want to inhale or get on your skin.
- Wear nitrile gloves
- Use a fitted respirator
- Put on safety goggles
- Dress long sleeves
- Keep a trash bag handy
Follow safety precautions and inspect gear before starting.
Use Light, Gentle Strokes
Work slowly and use light, gentle strokes so the sponge lifts soot without rubbing it deeper into the paint or drywall.
Start at an outer edge and move inward with gentle pressure, keeping strokes short and consistent.
Don’t scrub; pause to wipe the sponge on a clean cloth to check progress.
If residue remains, repeat gently until the stain fades.
Replace Sponge As Needed
Keep an eye on the sponge’s surface and swap it out as soon as it’s clogged with soot, because a saturated sponge will smear rather than lift stains.
You’ll preserve paint by rotating fresh sponge types and following careful cleaning techniques:
- Inspect surface frequently
- Tear off dirty layer
- Replace when resistance increases
- Keep extras handy
- Match sponge type to finish
How to Lift Smoke Stains With Mild Detergent and Water
Start by mixing a few drops of mild dish detergent into a bucket of warm water so you’ve got a gentle cleaning solution that won’t damage paint or wallpaper.
Dip a soft cloth, wring well, and wipe stains in small sections. Use mild detergent methods and test a hidden spot.
Mind water temperature considerations—too hot can soften paint; use warm, not boiling, water.
How to Use Trisodium Phosphate (TSP) Safely and When to Skip It
If mild detergent and water don’t lift the soot, you can turn to trisodium phosphate (TSP) as a stronger cleaner—but only with care.
You should follow safety precautions and consider TSP alternatives when appropriate.
- wear gloves and eye protection
- ventilate the room well
- test a hidden spot first
- dilute per label instructions
- skip TSP on delicate or lead-painted surfaces
How to Remove Greasy Smoke Residue With a Degreaser
Pick a degreaser formulated for painted walls or a mild citrus-based product so you don’t strip the finish.
Test it on a hidden spot first to check for discoloration or softening, then apply with a soft cloth or sponge.
Rinse the area with clean water and dry completely to prevent streaks and residue.
Choose The Right Degreaser
Because greasy smoke residue bonds to oils and soot, choosing the right degreaser makes the difference between lifting stains and smearing them around.
You should know degreaser types and application methods so you work safely and effectively.
- water-based for mild film
- solvent-based for heavy soot
- citrus for light grease
- enzyme for organic residue
- commercial restorers for stubborn stains
Test On A Hidden Area
Before you tackle the whole wall, test the degreaser on an out-of-sight spot—like behind a baseboard or inside a closet—so you can check for color change, finish damage, or lingering residue.
Do hidden testing with the product diluted as recommended, wait the specified time, and inspect under good light.
Confirm surface compatibility before proceeding to broader cleaning to avoid paint harm.
Rinse And Dry Thoroughly
Once you’ve wiped away the loosened grease, rinse the area thoroughly with clean water to remove any degreaser residue that can attract dirt or damage the finish.
Use proper rinse techniques and drying methods to protect paint. Follow these steps:
- Rinse top-to-bottom with a soft cloth
- Change water often
- Blot excess moisture
- Air-dry briefly
- Finish with a soft towel
How to Apply Diluted Vinegar or Ammonia Safely on Paint
When treating paint with diluted vinegar or ammonia, test a hidden spot first and work in small sections so you can control exposure and avoid damage.
Wear gloves and eye protection, guarantee ventilation, and never mix ammonia with bleach.
For vinegar safety, use a 1:4 vinegar-to-water mix; for ammonia application, dilute to about 1 tablespoon per cup water and blot gently.
How to Use Baking Soda Paste for Stubborn Smoke Marks
Mix a thick baking soda paste by combining baking soda with just enough water to make a spreadable, gritty paste. Then apply it to stubborn smoke marks with a soft cloth or sponge and let it sit for 10–15 minutes to lift soot without scrubbing the paint.
- Gently wipe residue
- Rinse with clean water
- Pat dry with a towel
- Repeat if needed
- Test hidden area first
How to Clean Textured and Popcorn Walls Without Damage
When you tackle textured or popcorn walls, start with gentle dry cleaning like soft brushes or a microfiber duster to lift loose soot without abrading the surface.
If stains persist, use a safe wet cleaning method—lightly dampen a sponge with a mild detergent solution and blot gently rather than scrubbing.
Test any cleaner on an inconspicuous spot first to make sure it won’t damage the texture.
Gentle Dry Cleaning
Although you can’t scrub popcorn or textured walls the way you’d smooth drywall, you can remove black smoke stains safely using gentle dry-cleaning methods; start by testing a hidden spot, then use soft tools like a dry sponge, microfiber cloth, or a soot sponge to lift soot without tearing the texture.
- Work top to bottom
- Tap, don’t rub
- Use light pressure
- Change tools often
- Replace contaminated sponges
Safe Wet Cleaning
If you’re dealing with textured or popcorn walls that won’t come clean with dry methods, wet cleaning can safely remove remaining soot and stains if you proceed gently and test first; use mild detergent or vinegar solutions, apply with a soft sponge, and blot rather than scrub.
Try eco friendly options like diluted castile soap. Follow gentle cleaning techniques, work in small sections, and rinse lightly.
How to Clean Semi-Gloss and Gloss Paint Without Streaks
Want to keep semi-gloss and gloss walls looking smooth and streak-free? Use gentle cleaning techniques suited to that paint finish and avoid over-wetting.
Keep semi-gloss and gloss walls smooth and streak-free with gentle, minimally wet cleaning tailored to the finish.
- Dust first with a microfiber cloth
- Mix mild detergent with warm water
- Wring mop or cloth thoroughly
- Clean top-to-bottom in straight strokes
- Dry immediately with a clean, lint-free towel
You’ll protect sheen while removing smoke stains without streaks.
How to Clean Flat and Matte Paint Without Removing Pigment
Because flat and matte paints hide imperfections with a low sheen, you’ll need a gentler touch when cleaning them so you don’t lift pigment or leave shiny spots; start with dry dusting, then test a mild detergent solution in an inconspicuous area.
Use soft sponges, minimal moisture, and gentle blotting. Proper cleaning techniques preserve paint durability and prevent color loss while removing smoke residue.
How to Treat Smoke Stains Around Windows, Trim, and Ceilings
When smoke leaves dark streaks around windows, trim, and ceilings, tackle those areas first because soot and nicotine cling to edges and crevices more than flat wall surfaces; focus on careful, gentle cleaning.
Don’t soak window treatments; test cleaners on trim materials.
Use:
- Vacuum edges with brush
- Dry-wipe moldings
- Mild detergent solution
- Soft sponge strokes
- Rinse and pat dry
How to Clean High or Hard-to-Reach Smoke-Stained Areas Safely
When you tackle high or hard-to-reach smoke stains, prioritize safe ladder placement by setting it on a stable surface and keeping your hips between the rails.
Use extendable cleaning tools so you can work from the floor or a sturdy step without overreaching.
Move slowly and reposition the ladder or tools as needed to maintain balance and control.
Safe Ladder Placement
If you’re tackling smoke stains up high, set your ladder on firm, level ground and lock its spreaders or hinges before climbing.
You’ll practice ladder safety and maintain height awareness while cleaning.
Follow these quick checks:
- Inspect ladder for damage
- Wear non-slip shoes
- Keep three points of contact
- Don’t overreach; move ladder
- Have a spotter when possible
Extendable Cleaning Tools
After you’ve secured your ladder and checked safety basics, reach high or awkward spots without climbing by using extendable cleaning tools designed for walls; they let you keep both feet on the ground while you remove smoke residue from ceilings, crown molding, and the tops of doorways. Use extendable mops for wet cleaning and telescoping dusters for dry dusting.
| Tool | Use |
|---|---|
| Extendable mop | Wet stains |
| Telescoping duster | Dry soot |
How to Deal With Layered or Heavy Soot Buildup
Because heavy soot layers are more than surface grime, you’ll need a slightly different, more careful approach than you use for light stains.
Use gentle, stepwise soot removal methods and layered soot solutions to avoid damage.
Try this sequence:
- Dry-vacuum low suction
- Soft-bristled brush
- Mild detergent wipe
- Trisodium phosphate alternative
- Rinse and blot gently
How to Remove Nicotine Yellowing Versus Black Smoke Soot
While both nicotine yellowing and black smoke soot discolor walls, they come from different residues and require different cleaning approaches.
How to Remove Stove or Candle Soot From Walls
If you’ve got stove or candle soot on your walls, start with a quick dry cleaning using a soft brush or a dry sponge to lift loose particles without smearing.
For stubborn buildup, you’ll need a targeted deep soot removal method—like a trisodium phosphate solution or a commercial soot cleaner—followed by rinsing.
Always test your chosen cleaner in an inconspicuous spot and wear gloves to protect your skin.
Quick Dry Cleaning
Grab a dry sponge or microfiber cloth and tackle stove or candle soot as soon as you notice it, since quick dry cleaning removes loose particles without spreading oily residue; gently wipe in light, overlapping strokes from top to bottom, checking frequently so you don’t grind soot into the paint.
- Use light pressure
- Work top-to-bottom
- Replace cloth often
- Don’t use water
- Ventilate room
Use quick cleaning techniques for smoke stain prevention.
Deep Soot Removal
Move from quick surface cleaning to a deeper approach when soot won’t come off with a dry cloth; deep soot removal uses the right cleaners and techniques to lift oily residue and stubborn carbon without damaging paint.
You’ll test a hidden spot, use mild degreasers or trisodium phosphate alternatives, work gently with soft sponges, and rinse thoroughly.
Follow soot removal techniques and smoke stain prevention to avoid repeats.
How to Clean After a Small Fire Versus After Prolonged Smoke Exposure
While a small kitchen fire usually leaves localized soot and a few scorched spots, prolonged smoke exposure soaks into paint, drywall, and fabrics and calls for a different cleanup strategy; you’ll need quicker, gentler actions for the former and more thorough, often professional, steps for the latter.
- Prioritize fire safety: ventilate and power down
- Vacuum loose soot gently
- Use dry-cleaning sponges for walls
- Deep-clean fabrics; launder or replace
- Hire pros for widespread smoke damage and odors
When to Consider Repainting Instead of Continued Cleaning
If repeated cleaning still leaves visible discoloration, paint bubbling, or lingering odor, it’s time to contemplate repainting rather than continuing to scrub—you’ll save time and get more reliable, long-term results.
When cleaning won’t remove stains, bubbling paint, or odors, consider repainting for faster, longer-lasting results.
Assess repainting considerations: surface damage, odor source, and patching needs.
Do a quick cost analysis versus ongoing cleaning supplies and labor.
Choose repainting when durability and appearance outweigh temporary fixes.
How to Choose Primer and Paint That Hide Residual Smoke Stains
When you’re covering residual smoke stains, pick a primer with strong stain‑blocking power to seal in odors and prevent bleed‑through.
Choose a paint with high coverage and opacity so you need fewer coats and get an even finish.
Together, the right primer and paint save time and hide stubborn discoloration more effectively.
Primer Stain-Blocking Strength
Because smoke stains can seep into drywall and trim, you’ll need a primer with real stain-blocking power rather than a basic latex undercoat.
Choose based on primer types and stain adhesion, then test a small area.
- Oil-based or shellac for tough stains
- High-hide, bonding formulas
- Quick-dry options for speed
- Low-odor for indoor use
- Check manufacturer stain ratings
Paint Coverage And Opacity
Although a primer needs to block stains, you’ll want paint and primer that provide strong coverage and high opacity to hide any residue left behind.
Look for products labeled “high-hide” or “full-coverage” and check their hiding rating (hiding power or contrast ratio) so you know how many coats you’ll need.
Choose high paint quality for lasting stain prevention, pair with a compatible high-hide primer, and apply recommended coats.
How to Prep Walls for Repainting After Smoke Damage
Start by evaluating the damage so you know exactly what needs cleaning and repair before you grab paint.
Begin by assessing the damage so you can identify cleaning and repair needs before painting.
You’ll focus on wall preparation and informed paint selection. Follow steps to clean, degloss, prime, and sand for adhesion, then choose stain-blocking primer and finish paint.
- Remove soot with trisodium
- Degloss glossy areas
- Sand rough spots
- Apply stain-blocking primer
- Repaint with suitable finish
Spot-Repair Techniques for Small Stained Areas
When you’re dealing with a small black smoke stain, treat it like a localized repair: clean the area, isolate the stain, and use targeted products so you don’t have to repaint the whole wall. Use gentle spot cleaning techniques, dab with detergent or trisodium phosphate, rinse, and dry. For stubborn marks, apply a stain-blocking primer before repainting.
| Step | Product | Action |
|---|---|---|
| 1 | Mild detergent | Clean |
| 2 | Soft cloth | Dab |
| 3 | TSP | Treat |
| 4 | Water rinse | Rinse |
| 5 | Primer | Seal |
How to Blend Touch-Ups So Repaired Spots Don’t Show
When you touch up a repaired spot, match the paint sheen to the surrounding wall so light doesn’t reveal the patch.
Use a light, feathering motion with your brush or roller to blend the edges into the existing finish.
Work in thin layers, letting each dry before adding more so the repair fades seamlessly.
Match Paint Sheen
A perfect color match won’t hide a repair if the paint’s sheen differs, so check and match the finish before you touch up; satin, eggshell, flat, and semi-gloss all reflect light differently, which makes patched areas stand out even with identical pigment.
- Identify paint sheen types on your wall.
- Buy the same finish.
- Test a small area.
- Use consistent rollers.
- Let cures fully before judging.
Feather Brush Strokes
Although matching color and sheen gets you most of the way there, you’ll still need to feather your brush strokes so the repaired spot melts into the surrounding wall; use light, overlapping strokes that taper out from the repair, keeping paint thinner at the edges to avoid a visible ridge.
Use feather brush techniques and feather brush applications: work outward, lift pressure, blend edges, and check in varied light.
How to Protect Fixtures and Floors During Smoke Stain Cleaning
Because smoke-cleaning can scatter soot and cleaning solutions, you’ll want to shield fixtures and floors before you start; cover light fixtures, vents, and electrical outlets with plastic and tape, and lay down drop cloths or plastic sheeting over floors, trim, and furniture to catch drips and abrasive residue.
Before cleaning smoke damage, shield fixtures and floors with taped plastic and drop cloths to catch soot and drips.
- Use plastic for fixture protection
- Tape edges tightly
- Overlap floor coverings
- Protect furniture legs
- Dispose of soiled sheets safely
How to Manage Odors After Removing Smoke Stains
Once you’ve removed the visible soot, you’ll still need to tackle lingering smoke odors that can cling to walls, upholstery, and HVAC systems.
Start by airing out the space, then use targeted cleaning and odor-neutralizing methods to prevent the smell from returning.
You’ll clean fabrics, wash walls with mild solutions, and apply odor neutralization techniques like enzyme sprays.
Schedule regular ventilation for long term odor prevention.
How to Use Activated Charcoal, Ozone, or Air Purifiers Safely
After you’ve cleaned surfaces and fabrics, tackle lingering smoke odors with targeted air treatments: activated charcoal absorbs smells, ozone generators break down odorous molecules, and air purifiers with HEPA and activated-carbon filters continuously trap particles and neutralize VOCs.
After cleaning, remove lingering smoke with charcoal, ozone (vacant rooms), and continuous HEPA + carbon air filtration.
- Use charcoal absorption in bowls, out of reach.
- Run HEPA/carbon purifiers continuously.
- Follow ozone generation safety: vacant rooms.
- Ventilate after treatments.
- Check filter replacement schedules.
When Should You Call a Professional Smoke Remediation Service?
If the smoke damage is extensive, smells persist despite DIY treatments, or structural materials (like drywall or insulation) are compromised, call a professional smoke remediation service to guarantee thorough cleanup and safety. You should seek a professional assessment when health symptoms, widespread staining, or unclear contamination levels appear.
| Sign | Severity | Action |
|---|---|---|
| Odor | High | Call |
| Stains | Widespread | Assess |
| Symptoms | Present | Urgent |
How Professionals Remove Soot Differently: Containment, Tools, and Disposal
If you hire pros, you’ll see they seal off the area to stop soot from spreading and protect unaffected rooms.
They’ll use specialized tools—HEPA vacuums, chemical sponges, and dry-cleaning agents—that you probably don’t have.
They’ll also bag and dispose of contaminated materials to prevent recontamination.
Professional Soot Containment
Containment’s the cornerstone of professional soot removal: technicians isolate affected rooms, seal vents and doorways, and set up negative air machines so soot doesn’t spread to clean areas.
You’ll notice how soot removal techniques and professional cleaning equipment minimize cross-contamination.
Follow pros’ steps:
- Create perimeter barriers
- Shut HVAC and seal ducts
- Use negative air flow
- Bag and label debris
- HEPA-vacuum before disposal
Specialized Cleaning Tools
Now that you’ve seen how containment stops soot from spreading, you’ll notice the next big difference is the gear pros bring into the room.
You’ll use specialized sponges for dry soot lift, HEPA vacuums, soft-bristle brushes, and controlled damp wiping with eco-friendly cleaners.
You’ll bag contaminated materials, label waste, and follow disposal rules to prevent recontamination and protect surfaces.
Cost Comparison: DIY Cleaning Versus Professional Remediation
When weighing costs, you’ll find that DIY cleaning usually saves money upfront but can leave hidden expenses, while professional remediation costs more initially yet often prevents long-term damage and health risks.
- DIY strategies vs professional costs: effectiveness comparison, time investment
- Risk assessment and safety protocols
- Cleaning techniques and material considerations
- Long term solutions and outcome expectations
Common Mistakes That Damage Paint While Cleaning Soot
If you rush into scrubbing soot without the right materials or technique, you’ll often do more harm than good—abrading or staining paint, spreading soot, or embedding oils and smoke residues deeper into the surface.
Don’t use harsh abrasives, overly concentrated cleaners, or soak walls; they strip finish and set stains.
Follow proper cleaning techniques, test discreetly, and prioritize paint preservation to avoid irreversible damage.
How to Avoid Streaks, Halos, and Water Marks When Cleaning
You’ve prevented paint damage by avoiding aggressive scrubbing, but improper rinsing and drying can still leave streaks, halos, and water marks that ruin the result.
- Work top-to-bottom to control drips.
- Use minimal moisture and mild cleaning techniques.
- Rinse with clear water, wiping immediately.
- Dry with microfiber in overlapping strokes.
- Blend edges while damp for streak prevention tips and consistent finish.
How to Safely Remove Stains From Painted Trim and Baseboards
Painted trim and baseboards take a lot of abuse, but you can lift most stains without damaging the finish by using gentle cleaners, soft tools, and patient technique.
Use mild detergent or trisodium phosphate alternatives on a microfiber cloth, testing inconspicuously first. Work in small sections, rinse, and dry immediately.
Follow trim cleaning techniques and safe removal tips to avoid scuffs or paint loss.
How to Treat Metal Fixtures and Electrical Outlets After Smoke Exposure
When smoke has settled on metal fixtures and electrical outlets, act promptly to prevent corrosion and lingering odors by disconnecting power and evaluating surfaces before cleaning.
You should follow concise steps for Smoke exposure, Metal treatments, Electrical safety, Fixture cleaning, Residue removal, and Odor control:
- Cut power; test with meter.
- Wipe loose soot gently.
- Use mild detergent for metal.
- Replace damaged outlets.
- Apply odor-neutralizing treatment.
How to Document Smoke Damage for Insurance or Rental Claims
Why start documenting smoke damage now?
You should photograph every stained wall, fixture, and affected room from multiple angles, date-stamp images, and note odors or soot levels.
Photograph every stained wall, fixture, and room from multiple angles; date images and note odors or soot levels.
Keep receipts for cleaning or repairs, log communications with landlords or insurers, and save contractor estimates.
Clear, organized documenting damage meets most insurance requirements and speeds claim approvals, so act promptly and thoroughly.
Preventive Steps to Reduce Future Smoke Staining
Because preventing smoke stains is far easier than scrubbing them out later, start with simple changes to how you control smoke and airflow in your home.
Use these steps to limit residue, add wall protection, and create a smoke barrier:
- Ventilate while cooking or smoking
- Use exhaust fans and HEPA filters
- Seal gaps around vents
- Install washable paint or panels
- Keep doors closed to contain smoke
Best Cleaning Schedule After Ongoing Light Smoke Exposure
If you’ve had light but ongoing smoke exposure, set a regular cleaning schedule to prevent stains from settling and becoming harder to remove; aim for surface dusting and spot-cleaning once a week, a gentle wash of walls every month, and a deeper cleaning every three months.
Stick to that cleaning frequency, adjust after unusual events, use mild cleaners, test a hidden spot, and document results.
Quick-Reference Decision Flow: Clean, Touch Up, or Repaint?
Now that you’ve got a cleaning rhythm, it helps to know when a spot needs more than routine care: a quick-reference decision flow will tell you whether to clean, touch up, or repaint.
Use targeted cleaning techniques, consider smoke prevention measures, then follow this checklist:
- Small, surface soot — clean gently
- Stain persists — spot-prime and touch up
- Texture damage — repair first
- Widespread discoloration — repaint
- Recurring stains — investigate source
Product Roundup: Cleaners and Tools Recommended for Each Paint Type
When you’re choosing cleaners and tools for soot and smoke stains, match the product to the paint finish and surface condition: low‑sheen and flat paints tolerate gentler, low‑pH cleaners and soft sponges, while semi‑gloss and gloss finishes handle stronger degreasers, melamine sponges, and light scrubbing.
Textured or porous surfaces need brush cleaners and stain-blocking primers before repainting.
Also consider paint compatibility, recommended cleaning frequency, and test patches.
Troubleshooting: What to Do If Stains Return or Worsen
Even with the right cleaners and tools, soot or smoke stains can come back or get worse, so you’ll want a clear troubleshooting plan.
- Reclean gently; test a hidden spot first.
- Check ventilation and sources; fix leaks or vents.
- Repaint with stain-blocking primer if needed.
- Follow stain prevention tips to reduce recurrence.
- Schedule future maintenance strategies to monitor and act quickly.
Printable Cleanup Checklist for Removing Black Smoke Stains From Painted Walls
If you’re ready to tackle soot, this printable cleanup checklist will help you work through each step methodically so you don’t miss anything important.
Use gloves, vacuum edges, test cleaners, wipe with gentle detergent, rinse, and dry.
Wear gloves, vacuum edges, spot-test cleaners, gently wash with mild detergent, then rinse and dry thoroughly.
Note stain prevention tips, repaint only if needed, and schedule regular paint maintenance.
Track supplies, time, and follow-up inspections to guarantee stains don’t return.
Frequently Asked Questions
Can Smoke Stains Cause Long-Term Paint Deterioration Even After Cleaning?
Yes — you’ll risk long-term paint deterioration if residues remain; thorough cleaning techniques and prompt action support paint preservation, but stubborn smoke chemicals can degrade binders and color over time, so inspect and retouch when needed.
Will Cleaning Smoke-Stained Walls Affect Indoor Air Quality Temporarily?
Absolutely — cleaning can temporarily worsen indoor air quality, like a mini tornado, as residues and particles become airborne; you’ll notice temporary effects, so ventilate well and use air purification to restore fresh air quickly.
How Do I Remove Smoke Stains From Wallpapered or Vinyl-Covered Walls?
You gently test a hidden area, then use mild stain removal techniques—vacuum, soft sponge with diluted detergent or vinegar solution, blotting not rubbing—follow wallpaper care instructions, rinse, dry, and call a pro if damage appears.
Can Pets or Children Safely Occupy Rooms During Smoke Stain Cleanup?
You shouldn’t leave pets or children unsupervised; you’ll need to relocate them during strong chemical use, guarantee good ventilation, use pet-safe cleaners when possible, and maintain constant child supervision to prevent exposure or ingestion.
Are There Eco-Friendly Commercial Products That Effectively Remove Soot?
Yes — you can find eco-friendly commercial products that work, but you’ll also want natural alternatives and gentle cleaning techniques; choose biodegradable degreasers, enzyme cleaners, or soda-based soot removers, testing surfaces first to avoid damage.
