
How to Paint Where the Wall and Ceiling Meet Without Messy Lines
Use a quality 2–2.5″ angled sash brush, load only the lower third of the bristles, and cut in with short, controlled strokes while keeping a light wrist to feather the paint toward the ceiling. Work in small sections, roll the wall while the cut‑in is still wet to blend, and keep a steady hand or use a straightedge for tight spots. Clean and prep surfaces, protect floors, and follow these steps and you’ll get crisp seams — keep going for tips on tools and fixes.
Quick Step-by-Step: Paint a Crisp Wall–Ceiling Seam Without Tape
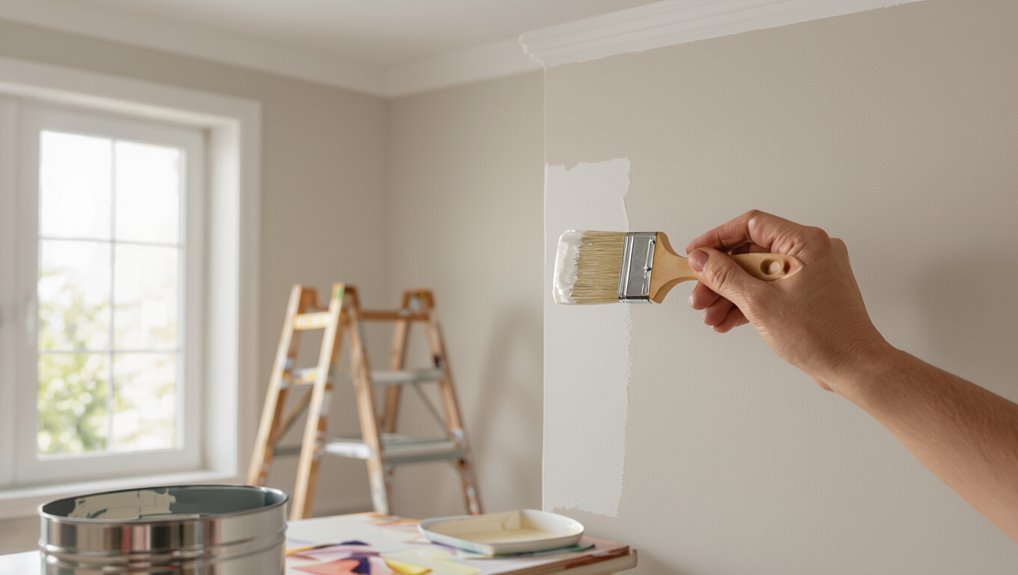
Start by cutting in the ceiling edge with a steady hand and the right brush—an angled sash brush about 2 to 2.5 inches wide works best—so you can form a clean line without tape.
Work in short strokes, load the brush properly, and maintain a light wrist. Use consistent cutting techniques and pause to check edge precision; feather the paint into the wall for a seamless finish.
Choose: Full Cut‑In Tutorial vs Quick Refresher
Need a full walk‑through or just a quick refresher? Decide based on time and confidence: pick the full cut‑in tutorial if you need stepwise painting techniques, tool guidance, and detailed wall preparation.
Choose the quick refresher when you just want a concise checklist and a few tips to steady your hand.
Both aim for a clean seam without tape.
Why the How‑To Answer Works (What Success Looks Like)
When you follow this how‑to, you’ll get a crisp, invisible seam between ceiling and wall because the steps focus on consistent brush angles, controlled paint load, and deliberate cutting motions that minimize mistakes.
You’ll notice success indicators: straight, even lines, no bleed, and matching texture. These outcomes mean you’ve achieved seamless shifts, saved touchups, and can confidently call the job finished.
Which Tools You Need for a Crisp Edge
To get crisp edges, you’ll need the right paint-edging tools—edging brushes, angled trim brushes, and a quality edger or shield make cutting in much easier.
Prep and protection matter just as much: tape, drop cloths, and properly cleaned surfaces keep lines sharp and prevent drips.
I’ll walk you through which tool to use when and how to prep for a clean finish.
Paint-Edging Tools
Although clean edges come down to steady hands and good technique, the right tools make the job far easier and faster.
You’ll want a slim angled brush for cutting in, a high-quality paint roller for larger areas to maintain consistent edge quality, a corner edger for tight junctions, and a steady hand shield or straightedge to guide precise strokes without smudging.
Prep And Protection
Good prep makes crisp edges possible, so clear the work area, remove or cover furniture, and tape trim and adjacent surfaces with a quality painter’s tape.
You’ll focus on surface preparation and paint protection, using the right tools to prevent bleed and protect floors and fixtures.
- Painter’s tape
- Drop cloths
- Edge brush or pad
- Sanding sponge
Why Brush Quality Matters for Cutting‑In
Precision matters when you cut in, and the brush you choose makes that precision possible. You’ll notice cleaner lines with proper brush bristle types and careful brush size selection—synthetic for latex, natural for oil, small for corners, larger for straight runs. Choose a comfortable handle and firm ferrule to control paint flow.
| Feature | Benefit |
|---|---|
| Bristle type | Paint compatibility |
| Size | Control vs coverage |
Best Rollers and Nap Sizes for Ceiling‑Adjacent Walls
When painting walls next to the ceiling, you’ll want a roller that gives smooth control—choose a smaller-diameter or trim roller for tighter corners and a standard frame for open areas.
Match nap height to your wall texture: 1/4″–3/8″ for smooth surfaces, 3/8″–1/2″ for light texture.
Using the right combo cuts touch-ups and helps you keep a crisp line where wall meets ceiling.
Roller Type Matters
Because the right roller helps you control paint near ceilings, choosing the correct type and nap size matters more than you might think.
You’ll use roller selection and roller techniques to avoid drips and uneven edges. Pick tools for smooth control, then practice light pressure and short strokes.
- Microfiber for smooth walls
- Foam for crisp edges
- Angled frame for reach
- Low‑shed covers
Nap Height Guide
Pick the right nap and you’ll control how much paint the roller lays down near the ceiling, which matters more than you might expect for clean lines and minimal touch‑ups.
Choose shorter naps (1/4″–3/8″) for smooth ceilings and tight edges; use 1/2″–3/4″ for slightly textured walls.
Consider nap thickness considerations and compare roller nap choices to balance coverage and edge control.
Choosing Paint Finish and Color Near the Seam
Although seams are narrow, they draw the eye, so you’ll want finishes and colors that minimize contrast and make the shift feel intentional.
Choose hues using color psychology to set mood, pick a ceiling sheen slightly flatter than the wall for subtle separation, and prioritize finish durability where touch occurs.
- Soft neutrals
- Low-sheen ceiling
- Durable wall finish
- Test samples first
Prep: How Surface Prep Prevents Drips and Jagged Edges
1 step of clean, solid prep prevents a world of drips and jagged edges when you paint: clean, sand, and smooth the surface so paint goes on evenly and edges feather instead of pooling.
Use targeted surface preparation techniques—dust, degrease, and sand high spots—so your brush or roller glides. That prevents paint drips and gives crisp, controlled seams without extra touchups.
How to Clean and Repair Cracks at the Seam Before Painting
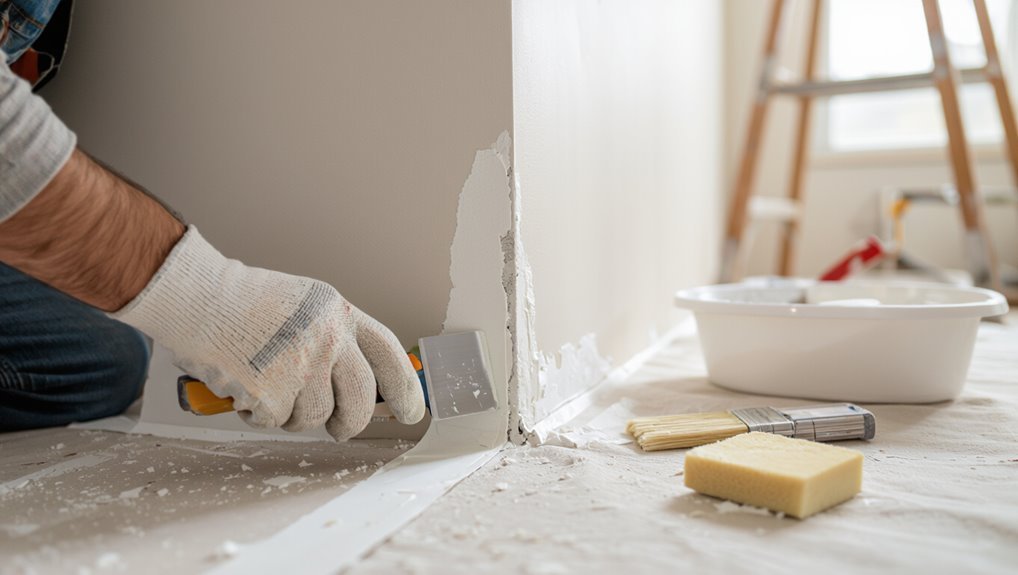
Start by closely inspecting the seam for gaps, loose material, or hairline cracks so you know what needs attention.
Next, clean out dust and debris with a brush or vacuum to guarantee filler will bond.
Finally, fill and smooth cracks with appropriate caulk or joint compound, let it dry, and sand for a seamless finish.
Inspect The Seam
Before you paint, inspect the seam where the wall meets the ceiling for dust, loose tape, or hairline cracks—these small issues can telegraph through paint and ruin a clean finish.
Do a seam inspection to confirm visual alignment and note gaps. Then choose repair steps.
- Check for loose tape
- Look for gaps or cracks
- Assess joint alignment
- Mark areas to fix
Clean Out Debris
Clear away loose dust, paint flakes, and any old caulk so you can see the full extent of cracks or gaps at the seam.
Use a stiff brush, vacuum, or compressed air for debris management, then wipe with a damp cloth to guarantee surface cleanliness.
Let the area dry completely before proceeding, checking again for hidden particles or loose material that could affect adhesion.
Fill And Smooth Cracks
Inspect the seam closely for cracks, gaps, or separated caulk, then remove any remaining loose material so filler can bond properly.
You’ll do crack filling with a quality filler, press it into gaps, and use smoothing techniques to feather edges. Sand lightly when dry, wipe clean, and repaint.
- Use flexible caulk for movement
- Apply filler with a putty knife
- Sand with fine grit
- Clean dust before paint
How to Remove Dust and Grease for Better Adhesion at the Seam
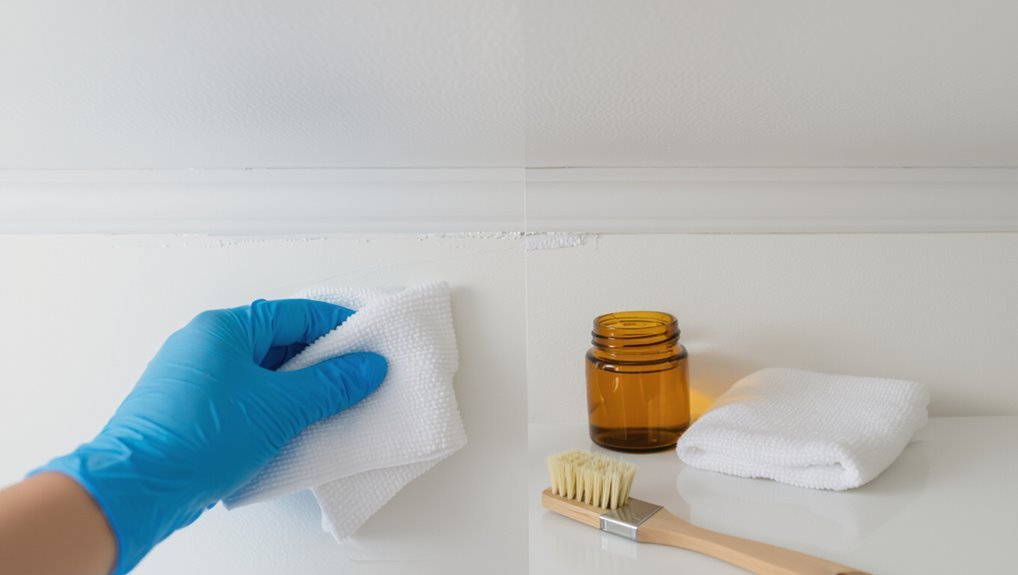
Wipe the seam area thoroughly to remove dust, dirt, and grease so your filler and tape can stick properly; use a vacuum or a damp microfiber cloth for loose particles, then a mild degreaser or trisodium phosphate solution on any oily spots, rinsing and letting the surface dry completely before you proceed.
Use targeted dust removal techniques and grease cleaning methods, then test adhesion with a small patch.
How to Pick Ladder Height and Set Up Safely
Before you start painting, pick a ladder tall enough so you can work without overreaching—your shoulders should stay below the top rung.
Set the ladder on firm, level ground and lock any spreaders or safety features.
Check the angle and footing each time you move it so the ladder stays stable while you work.
Choose Proper Ladder Height
Getting the right ladder height keeps you steady and prevents strain while you paint ceilings and high walls. You’ll choose a ladder that lets you reach comfortably without overreaching.
Prioritize ladder stability and follow basic safety measures.
- Pick height so your shoulders are below top step
- Use extension ladder for tall rooms
- Check load rating
- Inspect for defects before use
Secure Ladder Placement
Now that you’ve picked the right ladder height, make sure you set it on firm, level ground and angle it correctly so it won’t slip while you work.
Check feet for stability, lock spreaders, and test gently before climbing.
Maintain ladder stability by keeping your hips within rails, avoid overreaching, and use safe positioning—have a spotter or anti-slip pads for added security.
How to Hold the Brush for Steady Cutting‑In Strokes
One simple grip can make your cutting‑in strokes steadier: hold the brush like a pencil, pinching it between your thumb and index finger with the heel of your hand lightly braced against the wall or trim for support.
Hold the brush like a pencil, pinching between thumb and forefinger, heel braced for steadier, controlled cutting‑in strokes.
Use this brush grip for steady strokes and control.
- Keep wrist relaxed
- Move shoulder, not elbow
- Use short, smooth passes
- Rest between lines
How to Load Paint Onto the Brush for Controlled Lines
With your brush held like a pencil and your hand braced, load paint in a way that keeps the tip controlled and prevents blobs along your cut line.
Dip only the lower third of bristles, wipe excess on the can rim, and comb through with the brush edge.
These paint brush techniques and paint loading methods guarantee consistent flow, precise lines, and fewer drips.
How to Position Your Body and Arm to Steady Your Hand
Stand sideways to the wall so your movements stay parallel to the surface.
Brace your elbow lightly against your hip to create a steady pivot point. That posture will help you control the brush for cleaner lines.
Stand Sideways To Wall
Face the wall at a slight angle so your shoulder and forearm form a stable line with the brush or roller; this lets you guide strokes smoothly and keeps your hand from wobbling.
Use proper wall positioning and body alignment to control movement. Stand with feet staggered and knees soft, reach with your torso, and keep your wrist neutral.
- Staggered feet
- Soft knees
- Torso reach
- Neutral wrist
Brace Elbow Against Hip
After you’ve aligned your body sideways to the wall, brace your elbow lightly against your hip to steady each stroke. Use firm elbow support and clear body alignment so your wrist moves, not your shoulder. This reduces wobble and keeps a crisp trim line.
| Tip | Position | Benefit |
|---|---|---|
| Elbow | Against hip | Stability |
| Wrist | Flexible | Control |
| Shoulders | Relaxed | Endurance |
| Eyes | On line | Accuracy |
Make the First Anchor Stroke Along the Seam
Begin by positioning your brush so its bristles touch the seam where the wall meets the ceiling.
Then drag a steady, confident stroke to lay down the first strip of paint. You’ll use an anchor technique to establish stroke consistency and a reference line.
Keep pressure even and don’t overload the brush.
- steady hand
- even pressure
- thin load
- confident motion
Follow With Smooth Short Strokes for a Straight Edge
1. You’ll follow the anchor with smooth short strokes, keeping the brush nearly vertical for edge precision.
Use a controlled brush technique: reload sparingly, press lightly, and move in short overlapping strokes away from the ceiling.
Focus on steady wrist motion and consistent pressure so the line stays crisp.
Pause to inspect and correct any tiny gaps before the paint dries.
How to Feather the Brush to Avoid Ridges
To avoid ridges, soften the brush stroke at the edge of your paint with a light touch.
Use a gentle, feathery motion to blend the wet paint into the surrounding area.
Keep your wrist loose and lift gradually so the line fades smoothly.
Soften The Brush Stroke
If you want your paintwork to look smooth and professional, feathering the brush is the key technique for softening visible ridges where strokes overlap.
You’ll use gentle pressure, angled bristles, and short follow-up strokes to blend edges. Practice brush techniques and edge blending to avoid lines.
- Reduce pressure near edges
- Use angled brush
- Lightly drag outward
- Rework before skin dries
Light Feathering Motion
Start each stroke with a light touch and finish by feathering the bristles outward so the paint thins at the edges—this gentle drag blends new paint into the surrounding film and prevents raised ridges where strokes overlap.
Use a consistent feathering technique, vary brush angles slightly as you glide, and pause to reload lightly.
You’ll see smoother shifts and no buildup along the trim.
How to Cut‑In Using Angled Sash Brushes
Grab an angled sash brush and steady your hand—cutting in with this tool gives you the control to paint clean edges along ceilings, corners, and trim without tape.
Use angled brush techniques and cutting in strategies: feather outward, load sparingly, keep wrist steady, and follow a straight sightline.
Practice short strokes for consistency.
- Feather outward
- Load sparingly
- Keep wrist steady
- Short, consistent strokes
When to Use an Edger Tool for Faster Straight Lines
When you’re painting large rooms or need consistently straight lines around trim, an edger tool speeds the job and reduces touchups.
You’ll get cleaner edges than freehand cutting and spend less time masking.
Use an edger when speed and uniformity matter, especially on long runs or multiple rooms.
When To Use
Wondering whether an edger tool will save you time and improve your lines? Use it when you want quicker, consistent edges and when to tape feels like overkill for small rooms.
Avoid it on heavily textured ceilings or uneven joints; know when to avoid and switch to careful brushwork.
- Small rooms or tight schedules
- Smooth walls and ceilings
- Complex trim or texture
- Precise touch-ups only
Edger Tool Benefits
If you liked the idea of skipping tape in small rooms, an edger tool can be the next step for faster, straight lines along ceilings and trim.
You’ll appreciate edger tool advantages when you need consistent control, less masking, and quicker touch-ups. Use it for narrow spaces, quick color changes, or when efficient painting matters.
Practice keeps edges crisp and reduces cleanup time.
When to Use a Shim or Handle Extender to Reach High Seams
Before you start rolling at ceiling height, decide whether a shim or a handle extender will give you the control and reach you need to finish seams cleanly.
Choose shim selection for slight angle tweaks; pick extender benefits for height and leverage. Use steady pressure and test reach before painting.
- Assess ceiling height
- Test balance
- Match tool to seam
- Secure attachments
What to Paint First: Ceilings vs Walls for Best Edges
Start with the ceiling so any drips or overlaps get covered when you tackle the walls.
Then cut in the wall edges where the ceiling meets the wall for crisp lines.
Finish by blending your cut-ins with a roller to even out texture and color.
Paint Ceiling First
When you paint the ceiling first, you give yourself cleaner edge control and fewer touch-ups on the ladder later.
You’ll focus on ceiling preparation, use efficient painting techniques, and avoid smudging fresh wall paint. Start high, work outward, and let the ceiling fully dry before tackling walls.
- Use proper lighting
- Roll in consistent strokes
- Address drips immediately
- Keep tools clean
Cut In Wall Edges
After the ceiling’s dry, move to cutting in the wall edges to get crisp lines where walls meet trim, corners, and the ceiling.
You’ll work steadily with a quality angled brush, steady wrist, and small controlled strokes.
Use proper cutting techniques for straight lines, feather paint carefully toward the ceiling, and check edge precision as you go so touchups stay minimal and clean.
Blend With Roller Finish
Roll the freshly cut-in edges with your roller while the trim lines are still wet so the brush and roller coatings blend seamlessly; this prevents lap marks and gives you an even sheen from wall to ceiling.
Use roller techniques and precise blending methods to feather edges and match texture.
- Light, continuous passes
- Match nap and pressure
- Work small sections
- Keep paint wet-edge
How to Balance Wet Edges for a Seamless Transition
Because paint dries at different rates, you’ll need to plan your working sections and overlap wet edges carefully so seams disappear as you blend.
Start at a corner, work in manageable strips, and keep a wet edge by matching drying times.
Use wet edge techniques like back-rolling and light feathering for seamless shifts.
Move steadily; pause only to reload and blend immediately.
How to Prevent Paint Bleed From the Ceiling Onto the Wall
To prevent ceiling paint from bleeding onto the wall, you’ll want to use painter’s tape correctly and press it down firmly along the seam.
Run a dry brush or a putty knife over the tape to create a tight paint line, and then seal the tape edge first with a thin coat of the ceiling color.
Once that seal dries, you can paint the wall confidently without worrying about bleed-through.
Use Painter’s Tape Properly
When you want a razor-sharp edge between ceiling and wall, apply painter’s tape carefully and press it down firmly along the seam so paint can’t seep underneath.
Use crisp tape application techniques, seal the edge with a thin coat of ceiling color, and follow tape removal tips for clean lines.
- Smooth surface first
- Press edges with a tool
- Seal with same-color paint
- Remove at 45°
Apply Tight Paint Lines
A tight paint line keeps your ceiling color off the walls and gives a finished look, so start by creating a firm barrier with properly applied tape and a sealed edge of ceiling paint to block bleed.
Then work slowly with a steady hand, using angled brushes and edge techniques to cut in.
Remove tape at a 45° angle while paint is tacky for the cleanest result.
Seal Tape Edge First
Now that you’ve set tight lines with tape and a sealed ceiling edge, seal the tape edge itself to stop paint bleed from the ceiling onto the wall.
Press tape firmly, run a putty knife along the edge, paint a thin seal coat of ceiling color, then paint the wall.
Use proper tape application techniques and follow tape removal tips.
- Press tape firmly
- Use a putty knife
- Seal with thin coat
- Remove while damp
How to Prevent Drips When Painting Near the Wall–Ceiling Seam
Anyone painting near the wall–ceiling seam wants clean lines and no drips, so take a few simple steps to control excess paint and gravity.
Work with a loaded brush, not overloaded, and use short strokes toward the seam for drip control and edge precision.
Keep a damp rag handy to wipe the brush heel, pause between coats, and inspect for runs before they set.
Fix Small Slip‑Ups Immediately and Invisibly
If you catch a stray mist while the paint’s still wet, wipe it gently with a damp cloth so it doesn’t set.
Then feather out any hard edges with a lightly loaded brush to blend the repair into the surrounding finish.
Finally, touch up small spots with thin, even coats so the seam looks seamless.
Wipe Wet Mistakes
Catch slip-ups while the paint’s still wet so you can fix them invisibly.
Use clean wet wipes and gentle pressure for quick mistake correction, keeping edges crisp. Dab, don’t smear, then smooth with a fingertip or small brush.
Keep a cup of water and spare cloth nearby for repeated passes.
- Use lint-free wet wipes
- Blot excess paint
- Rinse cloth often
- Work small areas
Feather Out Edges
When a brush or roller leaves a hard line, feathering the edge right away hides the slip-up so it blends with the surrounding paint; lightly drag a dry, slightly loaded brush or a damp sponge from the wet area into the already-painted surface to soften the shift.
Use quick feathering techniques, stroke gently toward the painted side for subtle edge blending, and step back to confirm uniformity.
Touch Up Seamlessly
Mistakes happen fast, so fix small slip-ups immediately before the paint skins over—dip a fine artist’s brush or the corner of a small roller into fresh paint, blot off excess, and tap lightly over the flaw to blend it into the surrounding finish.
Use simple touch up techniques for seamless blending so corrections vanish.
- Work while paint is wet
- Match sheen and color
- Feather edges gently
- Step back and inspect
Fix Jagged Edges After Paint Dries
Although it’s disappointing to see jagged edges after the paint dries, you can clean them up quickly with a few precise steps.
Lightly sand the uneven areas with fine-grit paper, wipe away dust, and apply a thin coat of matching paint to smooth paint lines.
Use a steady hand and small brush strokes. Let dry, then sand and repeat until you fix jagged edges.
Touch Up With a Micro Brush for Perfect Lines
Grab a micro brush—its small tip makes a big impact on crisp edges.
Keep a steady hand by bracing your wrist and using short, controlled strokes.
With the right technique you’ll clean up jagged lines without redoing whole sections.
Small Brush, Big Impact
When your roller leaves a fuzzy edge or you spot tiny chips along trim, a micro brush lets you fix those flaws without repainting the whole wall.
You’ll use small brush techniques to add impactful details that blend seamlessly. Practice precise dabs, thin paint loads, and quick feathering to match texture and color.
- Dab, don’t drag
- Use minimal paint
- Match stroke direction
- Blend edges smoothly
Steady Hand Techniques
If you want razor‑clean lines, steady your wrist and make deliberate, short strokes with the micro brush so each touch-up blends into the surrounding paint.
You’ll practice steady hand exercises like tracing fine lines and pausing between strokes.
Use brush control techniques: grip near the ferrule, rest your pinky on the wall, and work slowly to correct tiny drips and feather edges.
Use a Thin Artist’s Brush for Precision Correction
A thin artist’s brush gives you control for those tiny touch-ups where rollers and standard brushes fall short—you’ll correct paint bleeds, clean up edges, and restore fine trim without repainting whole sections.
Use artist brush techniques and precision painting tips to steady strokes, thin loads, and feather edges.
- Choose a fine synthetic brush
- Load sparingly
- Anchor your hand
- Paint short strokes
Blend Touch‑Ups on Textured Walls So They Disappear
Match the texture before you match the color: on textured walls you’ll need to replicate the surface pattern as well as the paint tone so your touch-up blends into the surrounding finish.
Use stippling, rolling, or dabbed compound to mimic peaks and valleys.
Stipple, roll, or dab compound to recreate the wall’s peaks and valleys for an invisible blend.
Feather edges, match sheen, and work small.
These texture blending techniques guarantee a seamless repair that disappears from normal viewing distance.
When to Use Painter’s Tape for Seams (And When Not To)
When you want razor‑sharp lines at corners or where trim meets paint, use painter’s tape to get clean edges.
If the surface is uneven, textured, or you need to feather in touchups, skip the tape so you can keep paint flexible and avoid peeling.
We’ll cover how to decide which approach fits each seam.
Tape For Clean Edges
Painter’s tape can make the difference between a crisp seam and a ragged paint line, but you don’t always need it.
Use tape types suited to your surface and master tape application to avoid bleed. Apply and remove at correct angles and timing.
- Choose low-tack for fresh drywall
- Use medium for textured surfaces
- Seal edges with a brush
- Remove slowly after paint skins
Skip Tape For Flexibility
Although tape can save time on crisp seams, you don’t always have to use it—especially when flexibility matters. You’ll skip tape when surfaces aren’t perfectly straight or when you prefer freehand control.
Embrace flexibility benefits: quick touch-ups, fewer sharp edges, and easier texture blending. Use steady brush or angled brush paint techniques to maintain clean lines without adhesive, saving time and avoiding damage.
Apply and Remove Tape Without Peeling Paint
1 simple trick will save you a lot of touch-ups: apply and remove tape so it protects edges without lifting dried paint.
You’ll focus on correct tape application to preserve paint adhesion and avoid peeling. Press firmly, seal the edge with a putty knife, paint to the tape, wait until tacky, then remove at a 45° angle.
Focus on proper tape application: press edges, seal with a putty knife, paint to the tape, wait tacky, then remove.
- Press edges firmly
- Seal with tool
- Wait until tacky
- Remove slowly
When Low‑Tack Tape Is the Smarter Choice
If you’re working on delicate surfaces or recently painted trim, low‑tack tape lets you protect edges without risking the finish.
Choose quality low tack tape benefits like gentle adhesion and clean removal.
Press tape down with a plastic card, keep angles tight, and remove slowly while paint’s tacky for best results.
These tape application techniques minimize damage and crisp lines.
Paint Crown Molding and Profiles Near the Seam Cleanly
Painting crown molding and profiles cleanly near the seam takes steady hands and the right technique. Start by cutting a precise angle with a sash brush and work from the molding toward the ceiling to control paint flow.
Cut a precise sash-brush angle and paint from molding toward the ceiling for clean, controlled seams.
Use crown molding techniques and profile painting tips to keep lines crisp.
- Load brush sparingly
- Paint small sections
- Feather edges outward
- Check under light
Handle Uneven Seams or Irregular Ceilings
When ceilings or seams aren’t perfectly straight, work with the irregularities instead of trying to hide them with thick paint; use a flexible caulk to fill gaps, sand gently where needed, and apply thin coats so you don’t build up uneven texture. You’ll address uneven surfaces and irregular angles by prepping, caulking, sanding, and painting patiently.
| Hope | Calm | Pride |
|---|---|---|
| Repair | Smooth | Align |
| Breathe | Focus | Finish |
| Small | Care | Big |
| Restored | Loved | Done |
Paint Around Light Fixtures and Vents Near the Seam
Start by turning off power and removing or masking the fixture so you can work safely and access the seam around vents or lights.
Use steady, small brushes and painter’s tape to protect fixtures; try light fixture techniques like feathering edges and thin coats for clean lines.
For vent painting, remove grilles if possible and paint carefully with a small brush.
- Use small angled brush
- Tape edges tightly
- Feather paint strokes
- Reinstall fixtures after dry
How Humidity and Temperature Affect Cutting‑In
Although you won’t notice it immediately, humidity and temperature change how your cut‑in lines behave: high humidity slows drying and can make edges bleed, while high heat speeds drying and can cause lap marks or brush drag.
You’ll adapt technique: slow strokes in high humidity to reduce bleeding, and lighter, quicker strokes with thinner load in heat.
Note humidity impact and temperature effects.
Pick Drying Times to Avoid Smudging Edges
Because paint edges stay soft for a while, pick times to work that let each cut‑in dry enough to resist smudging before you roll or tape next to it.
Use drying techniques that match your paint and room conditions to prevent edge smudging.
- Check manufacturer dry times
- Space stages for tack‑free edges
- Use fans or dehumidifiers
- Test a small edge first
Work Safely With High Ceilings and Vaulted Spaces
When you’re painting high ceilings or vaulted spaces, plan your access, fall protection, and lighting before you lift a brush or ladder—those steps cut risks and save time.
Use proper safety gear, secure scaffolding or an extension ladder, and test ladder stability on level ground.
Work with a partner, keep tools tethered, and take frequent breaks to stay focused and steady while reaching overhead.
Paint in Tight Corners and Alcoves Neatly
After you’ve secured safe access and steady footing for high areas, turn your attention to tight corners and alcoves where brushes and rollers need more control.
Work patiently, use angled brushes, and protect adjacent surfaces. For neat alcove painting, try:
- Use a sash or angled brush for corners
- Cut in with minimal paint on the brush
- Use thin foam for shallow recesses
- Keep a clean rag for touch-ups
Manage Multiple Coats Without Softening Edges
If you work methodically and respect drying times, you can apply several coats without blurring the crisp lines you cut, keeping edges sharp between passes.
Let each layer cure fully, control paint thickness with thin, even applications, and feather from the wall toward the ceiling.
Check edge visibility under good light, sanding lightly if needed, then recoat—never overload the brush or roller.
Get Professional Results on a Budget
Because you don’t need pro rates or fancy tools to get crisp, long-lasting results, focus on a few high-return choices: buy quality brushes and a good roller cover, prep surfaces thoroughly, invest in a decent primer, and use proper tape and drop cloths.
Use budget friendly techniques and cost effective materials to get clean lines and durable finishes.
- Choose quality brushes
- Sand and clean surfaces
- Use affordable primer
- Protect floors and trim
When to Call a Pro for Tricky Seams
When a seam between drywall sheets or where ceiling meets wall shows gaps, uneven tape, or repeated cracking, call a pro—these issues often signal structural movement, poor previous repairs, or hidden moisture that a novice repair can’t reliably fix.
You should hire a pro painter for persistent seam challenges, mold risk, or tricky access. They’ll assess, stabilize, and finish so your paint holds.
Estimate Time and Materials for a Seam‑Focused Job
Start by measuring the length and height of every seam you’ll address so you can calculate tape, mud, and primer needs accurately.
Use time estimation to plan drying and sanding windows, and apply material selection to pick tape width, joint compound, primer, and caulk.
Estimate labor hours per seam and total.
- Tape widths
- Mud quantity
- Primer coverage
- Drying time
Maintain Brushes and Tools for Consistent Edges
Keep your brushes and tools sharp and clean so your edges stay crisp and predictable. You’ll practice regular brush maintenance: wash, reshape, and store bristles after each use to prevent splaying.
Choose brushes by bristle type and size for tool selection precision. Keep a dedicated angled sash brush and a quality trim tool nearby, replacing worn pieces promptly to maintain consistent, controlled cutting‑in.
Troubleshoot Common Cutting‑In Mistakes and Fixes
With well‑kept brushes and the right trim tool, you’ll still run into common cutting‑in errors, so it helps to know how to spot and fix them quickly.
Use precise cutting in techniques, steady hands, and small corrective strokes to repair edges.
- Repaint thin lines to blend
- Feather excess paint outward
- Wipe smudges immediately
- Use a fine brush for gaps
Inspect the Seam for a Flawless Final Pass
Before you declare the job done, walk the seam with fresh eyes and steady light so you can spot any gaps, ridges, or thin spots that will show once the paint dries.
Do a careful seam inspection, feeling for bumps and looking for missed coverage.
Make a measured final pass with a fine brush or roller, smoothing edges and touching thin areas until the line reads crisp.
Protect Floors and Furniture While Cutting‑In
1 simple protective layer can save hours of cleanup: lay down drop cloths and move or cover furniture out of the cutting‑in zone so paint splatter and stray brush strokes never reach them.
You’ll use Floor protection and Furniture covering to keep edges clean, tape seams, and create a clear workspace before cutting‑in.
- Secure drop cloths
- Wrap small items
- Tape seams tight
- Keep a clean rag nearby
Frequently Asked Questions
How Do I Match Sheen Differences Between Ceiling and Wall Paint?
You match sheen differences by choosing compatible sheen types and adjusting technique: use intermediary paint finishes, sand and prime glossy areas, feather edges with a brush, and apply consistent finish coats so lighting and texture blend without obvious contrast.
Can I Use a Spray Gun Near the Seam Without Overspray Problems?
Yes — you can use a spray gun near the seam if you use a precise spray technique and proper overspray control, like low pressure, narrow fan, masking, and tack cloths; you’ll minimize drift and protect adjacent surfaces.
How Do Pets’ Fur Affect Edges and How to Prevent Contamination?
Pet fur sheds constantly, so you’ll get edge contamination unless you control it. Keep pets out, vacuum and lint-roll surfaces, use tack cloths before painting, and cover nearby furniture to prevent stray hairs from ruining edges.
Will Priming Only the Seam Improve Adhesion and Hide Stains?
Yes—you’ll improve adhesion and block some stains by priming only the seam, but you’ll limit protection, limit coverage, and limit durability; use adhesion techniques and stain blocking primer, feather edges, and finish full coats for best results.
What’s the Best Way to Repair Popcorn or Textured Ceilings Before Painting?
You should remove loose popcorn, patch holes with joint compound, sand, and skim-coat for a smooth finish, or explore textured ceiling options like reapplying texture or using popcorn ceiling repair kits before priming and painting.
