
What to Apply Before Painting a Wall for a Perfectly Smooth Finish
You should clean, repair, sand, and prime the wall so paint will stick and lay on smoothly. Start by washing dirt, grease, or mildew, then fill holes, cracks, and gouges with spackle or joint compound. Sand from coarse to fine grit for a flat surface and remove all dust with a tack cloth. Use a stain-blocking or bonding primer suited to your substrate, apply thin even coats, and let it dry fully—keep going and you’ll get detailed steps and tips.
Why Wall Prep Prevents Paint Failures
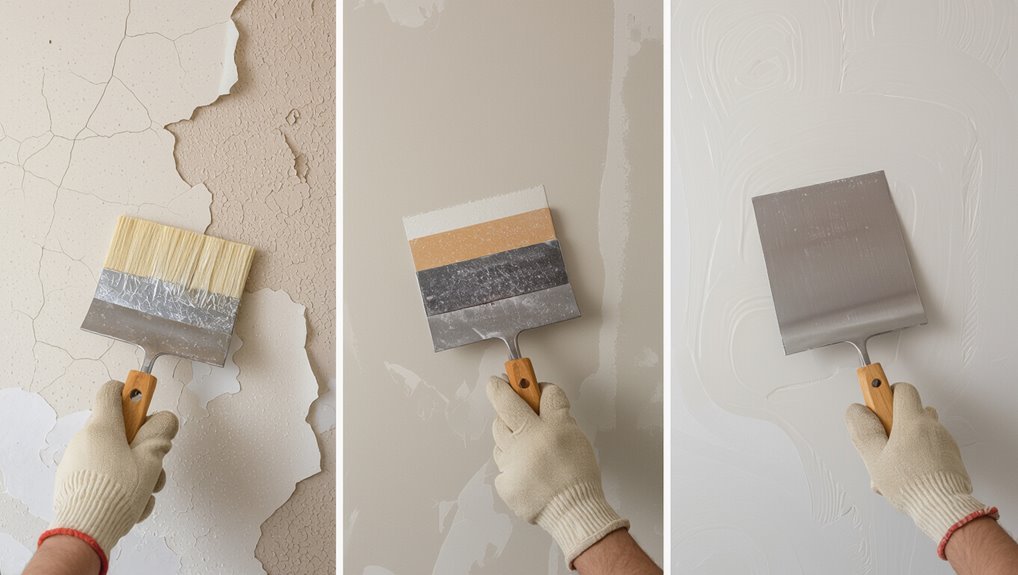
Because paint only sticks to a clean, stable surface, proper wall prep prevents common failures like peeling, blistering, and uneven coverage.
You remove dust, grease, and loose material, smooth irregular wall texture, and repair holes so paint adhesion bonds uniformly.
You’ll sand, fill, prime, and clean; these steps stabilize substrate moisture and profile, ensuring a durable, even finish without premature failures.
Quick Answer: When to Prep Walls
Now that you know how prep prevents failures, here’s the quick answer: prep walls any time the surface is dirty, damaged, stained, or was previously painted with glossy or peeling paint.
You should also prep when changing wall texture or switching between wall materials (drywall, plaster, masonry).
Prep guarantees adhesion, hides flaws, and prevents stains bleeding through, so you get an even, lasting finish.
When Can You Skip Paint Prep?
When can you skip paint prep? You can skip prep only for small, flawless sections with matching paint and no moisture or peeling; otherwise do basic quick fixes. Consider these simple scenes:
| Surface | Condition |
|---|---|
| Spot patch | Smooth, dry |
| Touch-up | Same color |
If doubts remain, don’t skip prep—minor prep prevents bigger problems.
Tools and Supplies to Gather First
Toolkit ready? Gather essentials: paint roller, primer tray, paintbrush sizes, drop cloths, and painter’s tape.
Use a wall scraper and sanding block to prep surfaces, plus cleaning solution to remove grime. Protect yourself with safety goggles and a dust mask.
Keep extras handy: spare roller covers, trim brushes, mixing sticks, and rags for tidy, efficient prep.
Safety and Ventilation During Prep
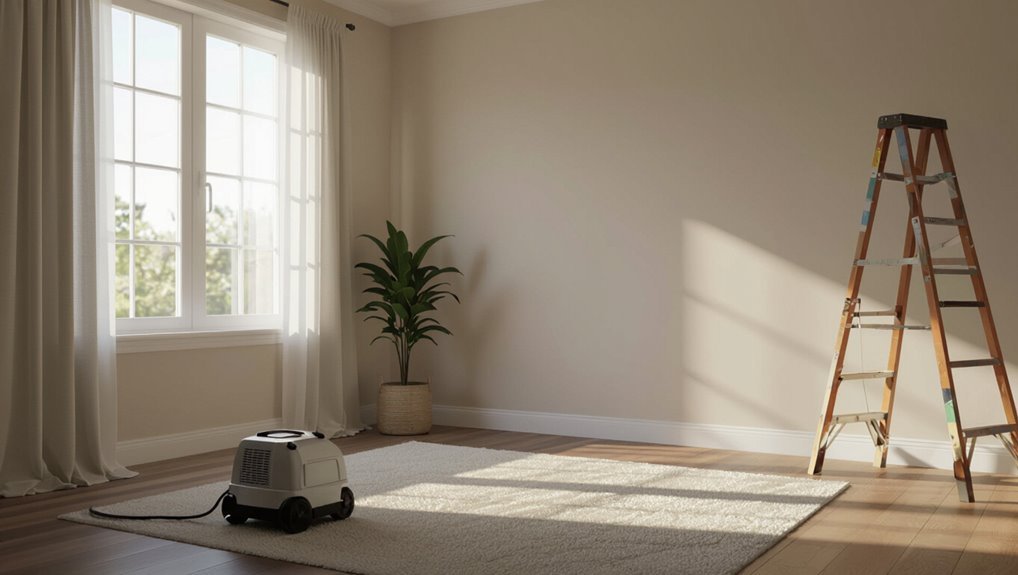
Because paint prep stirs up dust and fumes, take safety and ventilation seriously before you start: wear a respirator or mask, safety glasses, and gloves; seal off vents and cover furniture.
Use fans and open windows as ventilation techniques, run an exhaust fan if possible, and work in shifts to limit exposure.
Follow safety measures for ladder use and electrical tools.
How to Clean Walls for Paint
Start by removing dust, cobwebs, and grease so the paint will stick and look even. You’ll use basic wall cleaning techniques and surface preparation methods to prep properly.
Follow steps:
- Dust walls with a microfiber cloth.
- Vacuum corners and ceilings.
- Wipe with a mild detergent solution.
- Rinse and let dry completely before sanding or priming.
Removing Grease and Mildew Safely
After rinsing away soap and letting the wall dry, tackle any stubborn grease spots and mildew before you sand or prime. Use a degreaser for grease removal and a mild bleach solution for mildew treatment; wear gloves, ventilate, and blot—don’t scrub hard. Repeat spot-cleaning, rinse, and dry thoroughly.
| Tool | Result |
|---|---|
| Degreaser | Lifted stain |
| Bleach mix | Killed mildew |
How to Test Surface Adhesion
Before you paint, you’ll want to check that the finish will stick.
Try a tape adhesion test by pressing strong tape to the surface and pulling it off to see if any paint comes away.
For a tougher check, make a small crosshatch cut, apply tape over it, and pull to assess adhesion strength.
Tape Adhesion Test
If you want to know whether a surface will hold paint, do a simple tape adhesion test:
- Clean area, let dry.
- Apply recommended tape types (painter’s or low-tack) firmly.
- Press for 30–60 seconds, then pull back sharply at 180°.
- Inspect for coating or primer removal; repeat in multiple spots for reliable adhesion testing.
Crosshatch Pull Test
When you need a quick, reliable check of paint or primer adhesion on a small area, use the crosshatch pull test: score a grid of fine cuts through the coating, apply standardized tape over the grid, then peel it back to see how much coating comes away with the tape.
You’ll evaluate adhesion importance directly; this simple testing techniques step prevents adhesion failures before you paint.
When to Seal Stained or Tannin-Rich Spots
Because tannin stains and other stubborn discolorations can bleed through paint, you should spot-seal any stained or tannin-rich areas before priming the whole wall.
Use a stain blocking primer for wood tannins and nicotine; choose moisture sealing products for damp spots.
Steps:
- Clean area
- Dry fully
- Apply spot sealer
- Sand lightly and recheck before priming
How to Repair Hairline Cracks
Start by evaluating the crack: clean the area with a damp cloth, then run your fingernail or a utility knife along the line to remove loose particles and slightly widen the crack so filler can grip.
Choose appropriate repair materials, apply a thin bead, smooth with a damp putty knife, and sand lightly when dry.
Use hairline crack techniques to prevent reappearance and prime before painting.
Filling Holes: Spackle vs Joint Compound
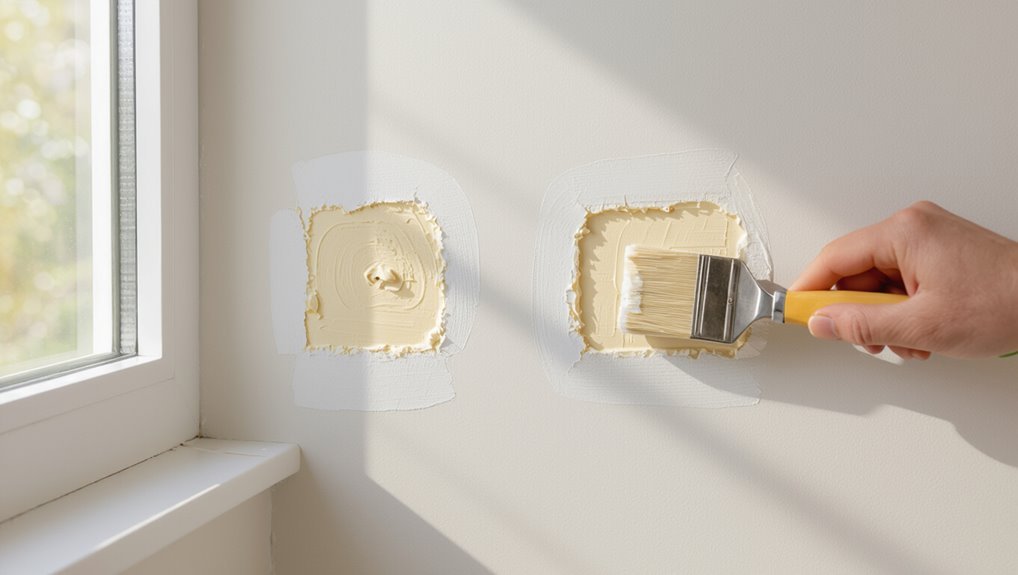
If you’re patching small dings or larger gouges, pick the right product—spackle for tiny holes and quick fixes, joint compound for broader repairs and smoothing seams—so your wall holds paint evenly and lasts.
- Use spackle advantages: fast drying, minimal sanding.
- Choose joint compound differences: better for layering.
- Match texture before paint.
- Sand, prime, then paint.
Patching Larger Drywall Damage
Repair larger drywall damage by cutting back to solid material, installing a support patch, and rebuilding the surface so it blends with the surrounding wall.
You’ll measure, cut a backing or use a mesh patch, secure gypsum board, tape seams, and apply compound in thin layers.
Follow drywall patching techniques for feathered edges and sanding.
These large damage solutions restore structure and guarantee a smooth paint-ready finish.
When to Skim-Coat Uneven Walls
When walls show waves, visible joint lines, or rough patches that sanding and spot-putty can’t hide, you’ll want to skim-coat to get a truly flat, paint-ready surface.
Use skim coating techniques as uneven wall solutions when texture varies or light highlights flaws.
Follow steps:
- Clean surface.
- Mix thin joint compound.
- Apply full-surface coat.
- Feather and cure before priming.
How to Sand for a Smooth Surface
Start by evaluating the wall’s texture and the areas you’ll sand so you know what grit and tools to use; heavy ridges need coarse paper and a sanding block or pole sander, while skim-coated or lightly patched spots finish best with fine grit and a soft pad. Use proper sanding techniques and sanding tools to blend edges, work lightly, and remove dust.
| Area | Tool |
|---|---|
| Ridges | Block |
| Patches | Pad |
| Corners | Sponge |
| Large areas | Pole sander |
Best Sandpaper Grit for Each Step
Start with coarse grits to remove old paint and smooth out major imperfections.
Then switch to finer grits to create a smooth, paint-ready surface.
You’ll use something like 80–120 grit for heavy work and 150–220 grit for finishing.
Follow each step with a quick wipe to check your progress before priming.
Coarse Sanding Grits
Though coarse grits feel aggressive, they’re essential for stripping old finishes, smoothing rough patches, and shaping filler quickly; pick 40–80 grit for heavy removal, then move up to 100–120 grit before switching to finer grits for final smoothing.
- Use 40–60 for paint/filler removal.
- Use 60–80 for shaping wood or compound.
- Practice safe sanding techniques.
- Consider grit selection for power vs. hand sanding.
Fine Finishing Grits
After rough shaping with coarse grits, you’ll switch to finer sandpaper to close scratches and smooth the surface for primer or paint.
Use 220–320 fine grit for final smoothing, or 400–600 between coats on delicate finishes.
Hold sandpaper lightly, follow sanding techniques that keep strokes consistent and with the grain where possible.
Clean dust thoroughly before priming.
Tack Cloths and Dust Removal Tips
Before you roll on paint, grab a tack cloth to pick up the fine dust that regular wiping misses — it’s sticky, lint-free, and designed to lift particles without leaving residue.
Use tack cloths usage and dust removal techniques to guarantee adhesion. Quick steps:
- Wipe in one direction.
- Replace when dirty.
- Lightly brush corners.
- Finish with a microfiber pass.
Masking, Taping, and Protecting Trim
When you’re ready to paint, mask and tape trim carefully to protect edges and get crisp lines—use painter’s tape rated for your surface, press the edges down firmly, and cover adjacent floors or furniture with drop cloths or plastic sheeting.
Use proper masking techniques and tape types for trim protection, focus on edge sealing and corner precision to prevent paint bleed, guarantee full surface coverage, then timely tape removal.
Choosing the Right Primer (Wall Type)
Since different wall materials absorb and hold paint differently, pick a primer formulated for your surface—drywall, plaster, masonry, or previously painted surfaces—to guarantee proper adhesion and uniform coverage.
Match your primer to the surface—drywall, plaster, masonry, or painted walls—for proper adhesion and even coverage
Choose primer types based on porosity and finish. Consider:
- Latex for drywall and painted walls
- Alkyd for stained or hard-to-seal surfaces
- Masonry primer for concrete
- Bonding primer for glossy or slick wall materials
How Many Coats of Primer Are Needed?
Before you start priming, assess the wall for stains, repairs, and porosity so you know how much coverage you’ll need.
Choose a primer formulated for your surface—stain-blocking, high-build, or bonding—since that affects whether one coat will do or if you need more.
Apply each coat at the manufacturer’s recommended thickness and wait the specified dry time before adding another.
Surface Condition Assessment
Assessment starts with your eyes and hands: inspect the wall for stains, gloss, uneven patches, and porous or chalky areas that affect adhesion.
You’ll judge how many primer coats based on surface imperfections and wall texture. Consider:
- Small repairs only
- Slightly porous areas
- Heavy staining or patching
- Dramatic texture changes
Decide coats accordingly to guarantee uniform coverage and adhesion.
Primer Type Selection
After you’ve judged the wall’s condition and the scope of repairs, pick a primer type and the number of coats that match those findings. You’ll choose between primer types for stain-blocking, adhesion, or sealing; consider primer benefits and coverage. Light repairs often need one coat; porous or stained surfaces need two.
| Condition | Recommended Coats | Purpose |
|---|---|---|
| Bare drywall | 1 | Seal |
| Stained wall | 2 | Block |
| Glossy surface | 1–2 | Improve adhesion |
Coat Thickness And Timing
When you’re deciding how thick to apply primer and how many coats to use, think about surface porosity, existing finish, and the primer’s coverage rate — these tell you whether one coat will suffice or if you need two or more.
- Test porosity to set coat consistency.
- Use one coat on sealed surfaces.
- Apply two thin coats for absorption or stains.
- Respect drying duration between coats for best adhesion.
Why Use a Stain-Blocking Primer
Because stains can bleed through fresh paint and ruin your finish, you should use a stain-blocking primer to seal problematic surfaces first.
Because stains can bleed through fresh paint, seal surfaces first with a stain‑blocking primer to protect your finish.
You’ll stop tannin, nicotine, water, and ink stains from reappearing while improving adhesion.
Consider primer types—oil-based, shellac, and water-based stain blockers—matching them to the stain source and topcoat.
That guarantees uniform color and long-lasting coverage.
Primers for Glossy or Painted Surfaces
If your wall is glossy or already painted, you’ll want to scuff sand it first to give the new primer something to bite into.
Use a high-bond primer formulated for slick surfaces so the topcoat will adhere and resist peeling.
For very shiny finishes, treat the area with a deglossing solution before priming to save time and effort.
Scuff Sanding First
Start by scuff sanding glossy or previously painted surfaces so primer and new paint will grip properly.
You’ll prep surfaces using scuff sanding techniques and choose ideal sanding materials for even abrasion.
Follow steps:
- Clean surface.
- Lightly sand with fine-grit.
- Wipe dust away.
- Inspect for gloss-free, uniform texture before priming.
High-Bond Primer Use
A high-bond primer gives painted or glossy surfaces the adhesion they often lack, so you’ll get a reliable base that prevents peeling and promotes even topcoat coverage.
Choose a primer suited to your substrate, follow manufacturer’s instructions, and use proper application techniques—thin, even coats with a brush or roller.
The high bond advantages include improved durability, reduced sanding, and better paint uniformity.
Deglossing Solution Application
Glossy surfaces can resist new paint, so you’ll often use a deglossing solution to chemically dull the sheen and promote primer adhesion.
Use proper deglossing techniques and deglossing tools, then prime.
- Clean surface
- Apply deglosser with cloth
- Rinse/dry thoroughly
- Spot-sand glossy spots, then apply primer
When to Use Sealers or Shellac
If the surface has stains, tannin bleed, smoke damage, or persistent odors, you’ll want to seal it before painting; sealers or shellac block those contaminants and give paint a stable base.
Choose sealer types based on stain severity and substrate — shellac application is fast and effective on wood and odor issues, while solvent or waterbased primers suit larger areas.
Follow cure times.
Applying Primer for Even Coverage
When you want an even, durable finish, start by choosing a primer suited to the surface and paint type. Then apply it in thin, consistent coats using the right tools—brush for edges, roller for flats, and a sprayer for large or textured areas.
- Prep surface: clean, sand, repair.
- Use correct primer application techniques.
- Maintain thin, overlapping passes.
- Respect primer drying times before topcoat.
Alternatives to Primer for Quick Jobs
Although you won’t get the same stain-blocking power as a full primer, for small, low-traffic jobs you can skip it and use alternatives that save time—like tinted paint, bonding primers in a spray can, or stain-blocking additives—so long as you prep the surface, spot-prime problem areas, and accept a shorter lifespan or slightly uneven coverage.
Use paint alternatives as quick fixes: scuff, clean, and test adhesion.
Prepping Textured Walls vs Smooth Walls
Because textured and smooth walls demand different prep, you’ll want to adjust your approach before you paint:
- For textured wall techniques, clean dust with a brush and vacuum crevices.
- Repair deep gouges with flexible patching compound.
- For smooth wall strategies, sand glossy spots and wipe with a damp cloth.
- Prime textured areas with thicker coat; use standard primer on smooth surfaces.
Prepping Plaster Walls: Special Steps
If your plaster has hairline cracks, you’ll want to fill them with a suitable filler and sand smooth before anything else.
After repairs are cured and dust-free, apply a bonding primer designed for plaster to guarantee even adhesion.
These steps keep paint from peeling and give you a consistent finish.
Repair Hairline Cracks
Start by widening and cleaning hairline cracks so your repair will bond and stay put.
Use these wall repair essentials and hairline crack techniques to restore plaster quickly:
- Score and dust out the crack.
- Apply flexible filler into the gap.
- Smooth flush with a putty knife.
- Sand lightly after drying, wipe clean, then inspect for rework.
Prime With Bonding Agent
Once you’ve filled and sanded hairline cracks, prep the plaster for primer by removing dust and ensuring the surface is slightly absorbent; then apply a bonding agent to give new paint something to grip. You’ll gain bonding benefits: improved adhesion, reduced peeling. Use proper application techniques—brush, roller, or spray—following manufacturer dry times for consistent, long-lasting results.
| Step | Tip |
|---|---|
| 1 | Clean surface |
| 2 | Test absorbency |
| 3 | Stir product |
| 4 | Apply evenly |
| 5 | Observe dry time |
Prepping Concrete and Masonry Interiors
Concrete and masonry walls need different prep than drywall: you’ll first remove dirt, efflorescence, and loose mortar with a stiff brush or pressure washer, then repair cracks and fill joints so paint bonds evenly.
Consider these steps:
- Confirm concrete curing time before sealing.
- Use compatible masonry sealing products.
- Patch cracks with cementitious repair.
- Prime with a masonry or bonding primer.
Dealing With Wallpaper Residue and Glue
Start by scraping off any loose paper so you’re working on a solid surface.
Use a warm water and detergent solution or a commercial adhesive remover to dissolve remaining glue, then rinse and let the wall dry.
Finally, apply a stain-blocking primer to seal any residues and guarantee good paint adhesion.
Remove Loose Paper
Peel away any loose paper by working from a corner and pulling gently at a 45-degree angle; if it tears, score the surface lightly and continue removing flakes until only firmly adhered backing remains.
Use wallpaper removal best practices and basic adhesive techniques as you prep.
- Inspect for loose edges
- Pull at 45° angles
- Score torn areas
- Sweep away debris
Dissolve Remaining Adhesive
After you’ve removed the paper, dissolve the leftover glue so the new paint will stick and the wall will look smooth.
Use warm water with a mild detergent or a commercial wallpaper remover, apply with a sponge, and scrub gently.
Test adhesive removal techniques on a small area, rinse thoroughly, and let dry.
Consider adhesive residue solutions like vinegar mixes for stubborn spots.
Prime Before Painting
Once you’ve dissolved and rinsed away wallpaper glue, prime the surface to seal any remaining residue and create an even base for paint.
You’ll improve paint adhesion and enjoy primer benefits like uniform sheen and stain blocking.
Follow these steps:
- Choose a stain-blocking primer.
- Patch and sand imperfections.
- Apply two thin coats.
- Sand lightly between coats.
Handling Mold and Water Damage Safely
If you spot mold or water damage on a wall, don’t paint over it—address the source and contamination first.
You’ll perform a water damage assessment, dry the area, and fix leaks.
Clean mold with appropriate cleaners or call a pro for extensive growth.
Use proper cleaners to remove mold — or hire a professional if the infestation is widespread.
After remediation, use mold prevention techniques like improving ventilation and dehumidifying to keep walls dry before priming and painting.
Best Practices for High-Traffic Walls
Because high-traffic walls take more wear, you’ll want durable finishes and smart prep to keep them looking good longer.
Focus on high traffic zones and durability considerations when choosing materials.
Do these steps:
- Repair dents and sand smooth.
- Apply high-build primer.
- Use washable, scrubbable paint.
- Add corner guards or chair rails for protection and easy maintenance.
How Humidity and Temperature Affect Prep
After prepping repairs and choosing durable finishes for high-traffic walls, don’t overlook how humidity and temperature will affect your work—these conditions change drying times, adhesion, and finish performance.
You’ll monitor humidity effects: high moisture slows drying and can cause blistering; low humidity speeds curing and risks cracking.
Watch temperature influences too—cold slows chemical cure, heat accelerates it—adjust timing and ventilation accordingly.
Choosing Paint Grade After Proper Prep
When you’ve finished prep and accounted for humidity and temperature, pick a paint grade that matches the room’s use and your performance needs; higher-grade formulations give better hiding, durability, and washability, while economy grades save money but may need extra coats and touch-ups.
After prep and considering humidity and temperature, choose a paint grade that suits the room’s use and performance needs.
You should also consider paint finish and surface texture to optimize appearance and maintenance:
- High-traffic — durable gloss
- Bedrooms — satin
- Textured walls — thicker body
- Budget — multiple coats
Cost and Time Estimates for Wall Prep
Before you start, get a quick estimate of material costs—drop cloths, primers, fillers, and sandpaper can add up.
Plan how long each step will take: cleaning, patching, sanding, priming, and drying often require different blocks of time. That way you won’t be surprised by expenses or schedule overruns.
Estimated Material Costs
A few basic materials will cover most wall-prep jobs, and knowing their typical costs and how long they take will help you budget and schedule the project.
Use material budgeting and cost comparison to pick supplies that balance price and performance. Estimate quantities for primer, filler, sandpaper and tape.
- Primer
- Filler
- Sandpaper
- Painter’s tape
Time Required Per Step
Estimate about 1–3 hours for basic wall prep on a single room wall, depending on damage and surface type. You’ll plan tasks to optimize time management and step efficiency, prioritizing repairs, sanding, priming, and cleanup. Use this quick guide:
| Task | Typical Time | Priority |
|---|---|---|
| Repair holes | 30–60 min | High |
| Sanding | 20–40 min | High |
| Priming | 30–60 min | Medium |
| Cleanup | 10–20 min | Low |
Common Mistakes That Ruin a Finish
When you rush through prep or skip steps, the paint can blister, streak, or peel and you’ll end up redoing the job sooner than you expected.
Rushing prep leads to blisters, streaks, and peeling—fix it right the first time to avoid costly rework.
You must address surface imperfections and choose the right primer to protect your paint finish.
Common mistakes include:
- Skipping sanding
- Ignoring dust
- Using wrong primer
- Painting in poor conditions
Final Wall-Prep Checklist Before First Coat
Before you load your brush, do a final surface-cleanliness check to remove dust, grease, and loose particles.
Patch and sand any imperfections so the first coat goes on smooth and adheres evenly.
Finish by applying the appropriate primer or seal coat to guarantee uniform coverage and long-lasting results.
Surface Cleanliness Check
Although you’ve already fixed cracks and sanded rough spots, do a final surface cleanliness check to make certain dust, grease, and loose particles won’t ruin the first coat.
Inspect for surface damage, wipe walls with appropriate cleaning solutions, and guarantee full dryness before painting.
- Vacuum/sweep
- Degrease stubborn spots
- Tack cloth wipe
- Dry and re-inspect
Patch And Sand Imperfections
Patch any holes, dents, and nail pops so your first coat lays on an even surface.
Choose patch types suited to depth—spackle for small dings, joint compound for larger repairs—and apply smoothly. Let dry fully, then use progressive sanding techniques: start with medium grit, finish with fine.
Clean dust with a tack cloth so imperfections won’t telegraph through your paint.
Primer And Seal Coat
Once you’ve filled and smoothed imperfections, seal the surface with a primer to guarantee even adhesion, uniform sheen, and true color from your topcoat.
You’ll perform a careful primer application and, if needed, a separate seal coat for porous areas.
Steps:
- Clean and dry surface
- Tape edges
- Apply primer evenly
- Sand light, wipe dust before topcoat
Frequently Asked Questions
Can I Paint Over Lead-Based Paint Safely Without Testing First?
No, you shouldn’t paint over lead-based paint without testing first; you’ll risk lead paint safety and exposure. Get a test kit or professional inspection, then use proper painting techniques and containment if remediation is needed.
How Long Should I Wait After Priming Before Applying Topcoat?
You should usually wait 24 hours after priming before applying the topcoat, though drying time varies by primer types, temperature, and humidity; fast-dry primers can be ready in a few hours, while oil-based primers often need longer.
Will Oil-Based Vs Latex Primer Affect Paint Color Appearance?
Yes — primer types can affect paint color appearance; you’ll get better color consistency with a primer that matches your paint base. Oil primers and latex primers interact differently with topcoats, altering sheen and depth subtly.
Can Low-Voc Primers Prevent Paint Yellowing Over Time?
Yes — you can reduce yellowing: you’ll limit yellowing factors by choosing appropriate primer types (low‑VOC acrylic or stain‑blocking primers), guarantee proper surface prep, and avoid oil‑based primers that’re more prone to yellow over time.
Is It Necessary to Remove Old Caulk Before Painting Trim?
You don’t have to, but you should remove old caulk before painting trim for the best adhesion and neat lines. Caulk removal and trim preparation prevent peeling, guarantee clean seams, and let new caulk bond properly.
