
Do You Have to Texture Drywall? When It’s Required and When It’s Optional
You don’t have to texture drywall unless your local code, approved plans, or a specific wall/ceiling assembly requires it. Inspectors may fail you if smooth replaces a mandated finish. Texture’s often needed for sound control, fire-rated requirements, or exterior areas, and it can help mask minor discoloration. You can usually keep it smooth when drawings specify it and joints are tight and properly skimmed. To match existing walls, test and replicate the pattern closely—keep going for more practical guidance.
When Code Requires Textured Drywall
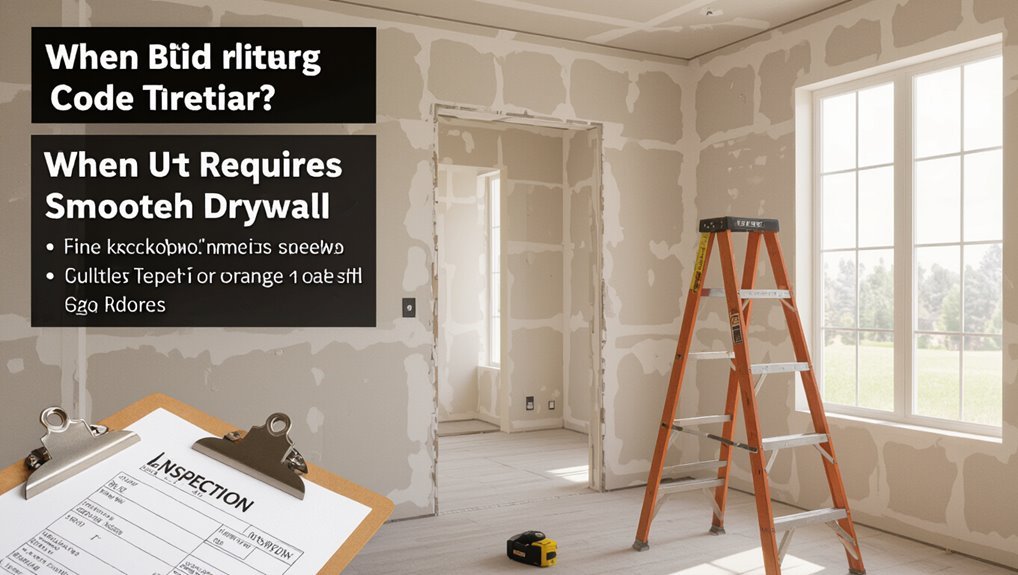
If your local building code or the plans call for a specific finish, you’ll need to install textured drywall where required. You must follow those standards to maintain code compliance, because inspectors often verify wall and ceiling textures during walkthroughs.
Read the architectural finish schedule, then match the specified pattern, such as knockdown, orange peel, or skip trowel, in the designated areas. Don’t substitute a smoother skim coat just to save time, since it may fail inspection.
If your project includes sound control, fire-rated assemblies, or exterior-rated surfaces, textured finishes can be mandatory, so confirm details before hanging board.
When You Can Skip Texture for Smooth Walls
You can skip texture when the approved drawings and finish schedule specify a smooth wall finish, such as for interior areas that aren’t part of sound-control, fire-rated, or exterior assemblies.
Follow the finish specs exactly, because inspectors expect the chosen level of smoothness. You’ll still prep thoroughly for a clean base and tight joints to maximize smooth wall benefits, like easier painting and a more uniform look.
Follow the finish specs exactly—inspectors expect the specified smoothness, and tight joints ensure easier painting and a uniform look.
Consider texture alternatives like level-5 skim coats or compound smoothing systems.
- Verify code/plan exclusions
- Use joint treatment per schedule
- Apply skim coat uniformly
- Spot-prime and inspect under light
How to Match Existing Wall Texture
Matching existing wall texture starts with identifying the finish type and its roller or sprayer pattern, because the wrong texture depth and stipple size will telegraph through the repair. Use matching techniques: match texture types by sight, then test on scrap. Focus on surface preparation—scrape loose compound, feather edges, and prime if needed. Choose application methods that replicate the original: roll, brush, or spray with the same nozzle and pressure. Try these repair strategies, then check aesthetic considerations under daylight:
| Area | Texture types | Application methods |
|---|---|---|
| Patch | Orange peel | Roll |
| Corner | Knockdown | Spray |
| Ceiling | Popcorn | Sponge |
| Door | Smooth | Float |
| Hall | Lace | Knockdown |
Use Texture to Hide Joint Compound Flaws
When you’ve got joint compound flaws, you can use texture to match the pattern to the imperfections and make them less noticeable.
Feather your edges smoothly so the seam fades into the surrounding wall instead of showing a hard line.
Then apply the texture consistently over the repaired area to blend everything together.
Match Texture To Imperfections
Use the right drywall texture to disguise joint-compound flaws without redoing the entire surface. You can match the pattern to what’s wrong, letting texture benefits work fast: low spots, ridges, and slight flashing blend in when your texture applications match the existing finish.
Test first on scrap, then adjust your spray distance or knockdown pressure so the repair area accepts the same peaks and voids as surrounding walls. Focus on the flaw type, not just the room style.
- Identify ridges vs. pinholes
- Choose smooth, knockdown, or stipple
- Control trowel/spray thickness
- Feather texture edges sparingly
Feather Edges For Seam Hiding
Feathering your texture edges gives you a clean change so the seam stops telegraphing through the finish. You use feathering techniques to taper joint compound, then you apply texture lightly across that fade. Keep your passes consistent so the eye can’t catch ridges. Use seam blending to level tool marks before the texture sets.
| Step | Goal |
|---|---|
| Skim wide | Hide ridges |
| Taper thin | Kill hard edges |
| Dampen sweep | Smooth shifts |
| Prime/coat | Equalize absorbency |
Choose Texture for Lighting and Glare
When you choose drywall texture for glare control, you reduce reflections from windows and bright fixtures.
Match the finish to your room lighting—brighter spaces can show surface sheen more easily.
A properly selected texture also softens shadows and cuts down on hotspots for a more even look.
Pick Texture For Glare Control
Selecting the right drywall texture matters because it shapes how light reflects across your walls and ceilings.
If you want glare reduction, pick textures that break up harsh reflections instead of amplifying them. Consider these texture options:
- Smooth/Level-5 for low glare only when lighting stays indirect.
- Knockdown to soften hotspots while keeping coverage easy to maintain.
- Orange peel for fine sparkle control in bright rooms.
- Skip trowel for stronger glare reduction with a more dramatic surface.
Choose the texture options you can blend cleanly, and confirm the sheen compatibility before rolling paint.
Match Finish To Room Lighting
Match your drywall finish to how light behaves in each room, because texture controls whether glare turns into harsh hotspots or stays soft and even.
When you choose finish options, factor in the lighting impact from windows, recessed cans, and pendants. In bright rooms with strong side lighting, use a slightly more forgiving texture so reflections don’t spike.
For dimmer spaces or top-lit hallways, keep finishes smoother to preserve crisp shadows. If you use glossy paint, you’ll amplify glare—so lean toward textures that visually diffuse light.
In kitchens and bathrooms, balance humidity-ready finishes with glare management.
Reduce Hotspots With Texture
Texture can either calm or create glare, so choose it with your room lighting in mind. When you reduce hotspots with texture, you scatter light instead of reflecting it straight off smooth drywall.
Focus on your fixtures’ angles: glare often hits glossy finishes and sharp edges first. Use texture benefits to your advantage by matching the sheen level to where you sit most.
- Test a small patch under each light.
- Opt for a flatter texture in bright, direct areas.
- Avoid heavy peaks near recessed lighting.
- Seal and paint consistently to lock in hotspot reduction.
Ceiling Texture: Rules Differ From Walls
Because ceilings sit under different lighting and gravity than walls, you can’t treat texture like it’s one-size-fits-all.
You’ll need to plan ceiling texture rules around visibility: overhead light makes subtle trowel marks, ridges, and roller lines stand out fast.
Many builders require ceilings to be textured when they hide joint compound, fasteners, or paper seams after installing drywall, especially on large spans.
Unlike wall texture, ceiling texture usually must cover imperfections more evenly to prevent sag shadows and flashing.
If your ceiling already meets a smooth, paint-ready level, you can often keep it untextured.
Blend Patch Jobs With Matching Texture
When you patch drywall, your job isn’t just to hide the repair spot—it’s to make the surface disappear under real lighting.
Start by matching the existing sheen and knockdown pattern, then use texture blending techniques to feather edges instead of leaving a hard border.
Prime and sand so your patch accepts texture evenly, and test spray distance on scrap before you commit.
Use these patch job strategies:
- Measure existing texture size and direction.
- Apply thin passes, not a heavy coat.
- Recreate surface texture timing while compound is workable.
- Blend with a light final knockdown.
Can Texture Hide Water Stains on Drywall?
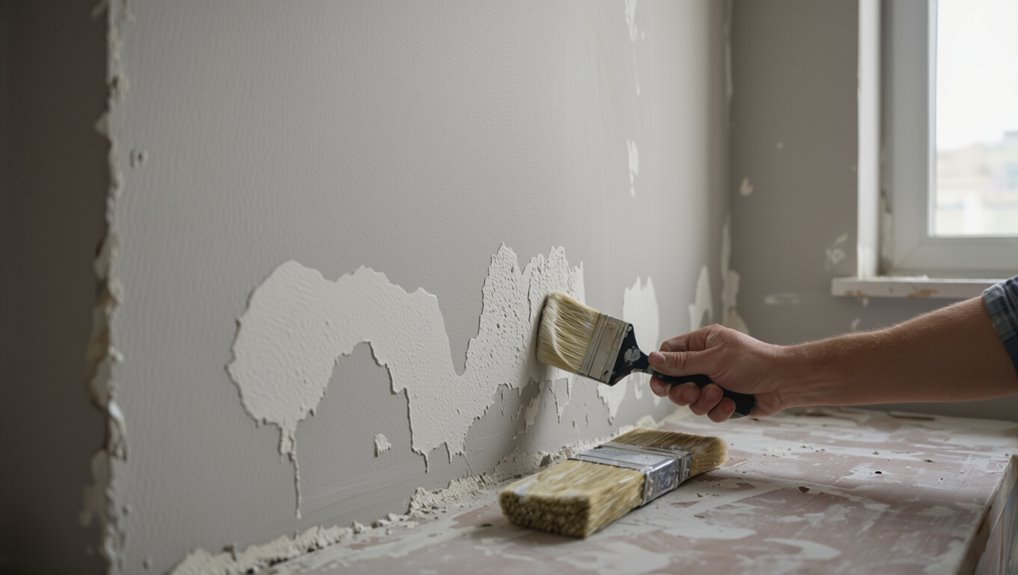
Yes—new drywall texture can sometimes make water stains less noticeable, but it won’t reliably fix the root problem.
You might think patching and retexturing will mask water stains, because shadows and raised patterns break up discoloration. However, texture effectiveness varies with stain size, depth, and how much moisture already penetrated the paper or drywall core.
If you don’t stop the leak and seal properly, stains can bleed back through new paint and texture.
For best results, you remove damaged material, dry everything fully, then prime with a stain-blocking sealer before repainting and matching texture.
Texture Drywall for Settling Gaps in New Builds
Even in a brand-new build, you’ll often see hairline cracks and tiny seams as framing settles and drywall dries.
Even in a brand-new build, hairline cracks and tiny seams often appear as framing settles and drywall dries.
When those settling gaps show up, you might choose texture drywall to blend minor movement without chasing every microscopic change. Texture helps your finish look uniform while the structure stabilizes in new builds.
Before you commit, confirm gaps aren’t active leaks or structural damage.
Focus on these steps:
- Let joint compound cure fully before texturing.
- Feather edges so lines vanish under the pattern.
- Match existing texture type and swirl size.
- Touch up spots after the final coat dries.
Prevent Cracks With Proper Prep Before Texture
Before you apply any texture, prep your drywall like it’s going to be judged up close—because cracks start where the surface wasn’t ready.
First, fill joints and fastener holes with compound, then smooth feathered edges so no ridges telegraph later. Let everything cure fully, sand flat, and wipe dust away; loose grit wrecks crack prevention.
Check for paper tears, bulges, or loose tape, and repair them immediately.
Prime when needed to lock the surface, improve bond strength, and support even build.
Finally, confirm straight, dry, solid surface preparation before you texture.
Pick a Texture Style That Fits Your Space
You should match the room’s existing style so the finish feels intentional.
Choose smooth if you want a clean look, or go patterned if you’re adding character and hiding minor imperfections.
Then consider light and shadows—brighter spaces and flatter textures read differently than darker rooms with heavier patterns.
Match Existing Room Style
Matching your existing room style starts with choosing a drywall texture that complements the space you already have. You’ll want texture types and design preferences to blend with nearby walls, ceilings, and archways.
Start by inspecting what’s already there, then copy the visual “language” so repairs don’t scream.
- Identify the current finish, sheen, and height consistency.
- Match light reflection by testing a small patch.
- Keep patterns aligned with doorways, crown lines, and trims.
- Choose the same level of subtlety to respect your design preferences.
Choose Smooth Vs Patterned
So, should you go smooth or opt for a patterned drywall texture? First, look at your room’s vibe. If you want clean lines, choose smooth finishes; they make furniture, trim, and artwork feel crisp, and they’re easier to touch up.
Go patterned only when the space needs personality or extra hiding power for minor imperfections. Select textured patterns that match your decor—subtle knockdown suits modern looks, while stronger swirls add warmth.
Before committing, tape a sample section, view it in normal daylight, and check how the texture will be maintained over time.
Consider Light And Shadows
Light and shadows make drywall texture feel dramatically different from one room to the next, so start by imagining how daylight and lamps will land on the walls.
As you pick a finish, you shape light reflection and shadow play, not just the look. Choose your texture based on how it catches highlights and hides imperfections.
Use these checks as you plan:
- Track morning vs evening light angles.
- Test gloss and sheen in place.
- Match texture scale to room distance.
- Adjust for window glare and lamp placement.
Knockdown vs Skip-Trowel: Which Hides Better?
Knockdown or skip-trowel—what better hides drywall imperfections? If you want smoother masking, use knockdown: it blends highs and tool marks, giving strong knockdown benefits through a broken, flattened pattern.
You’ll still need solid surface preparation, tight installation techniques, and careful joint sanding to avoid shadows.
For tighter control, choose skip trowel applications; they create deliberate peaks that catch light, so texture comparisons depend on the wall lighting and your aesthetic choices.
Think about maintenance considerations too: both need touch-ups, but texture durability favors whichever stays consistent.
Plan for patching before you paint.
Orange Peel, Swirl, Stomp, and Other Textures
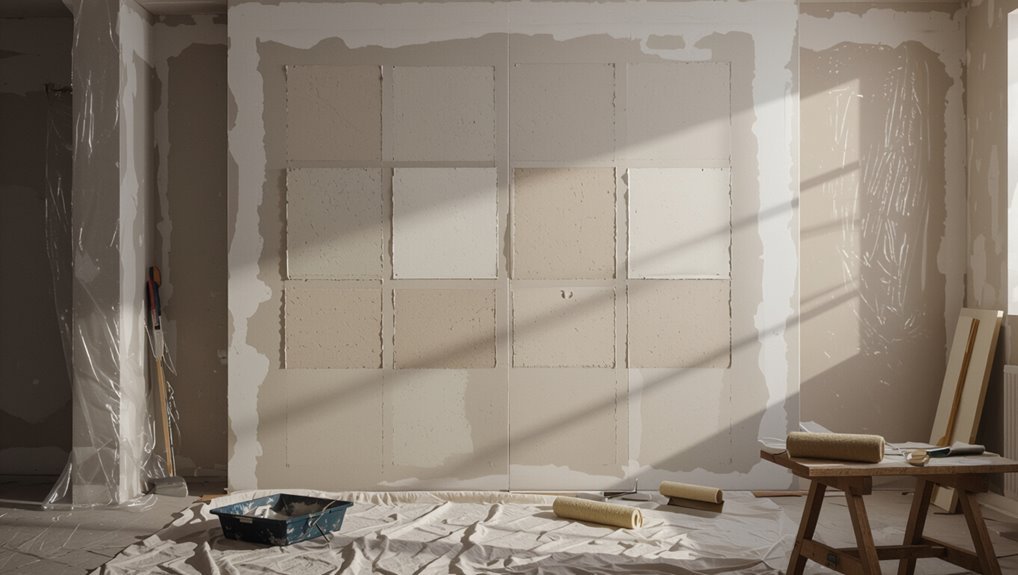
Once you’ve chosen your compound approach, the next step is picking the finish texture itself—orange peel, swirl, stomp, and more—because each one responds differently to lighting and drywall flaws.
You’ll pick texture styles for how shadows land, not just for looks. Use texture techniques to control thickness, and match texture applications to room traffic.
For texture benefits, rough patterns hide minor imperfections faster than tight finishes. Keep texture tools ready, then plan texture maintenance: clean dust, touch up dings, and reseal stains.
Stay aware of texture trends, but choose texture finishes that suit your space.
- Orange peel for subtle concealment
- Swirl for drama and direction
- Stomp for heavy coverage
- Use consistent caulk edges for clean lines
Smooth Walls: Skim Coat vs Light Texture
When smooth walls matter, you’ve got two solid options: a skim coat or a light texture.
Choose a skim coat if you want a near-perfect finish with crisp details and minimal visibility of imperfections.
Choose a light texture if you want subtle camouflage that helps hide minor flaws under everyday lighting.
When Smooth Walls Matter
If you want a truly clean finish, you need to choose the right smooth-wall approach—either a skim coat or a light texture—based on how your room will be used and how tight you want the visual finish to look.
When smooth walls matter, you’re protecting smooth wall benefits like crisp edges and easier cleaning, while supporting design aesthetics in bright, reflective spaces.
Pick light texture when scuffs, daily traffic, or imperfect drywall are likely.
Pick smoother coverage when you want showpiece walls.
- Hallways with high foot traffic
- Kitchens near splash zones
- Living rooms with bold lighting
- Ceilings above seating areas
Skim Coat For Perfect Finish
A skim coat gives you the smooth, near-seamless drywall surface you’re after when smooth walls matter but the existing panels or previous patchwork won’t fully cooperate. You’ll chase a crisp smooth finish by feathering compound thinly over joints, screw pops, and minor waves, then sanding once cured. These skim coat benefits help you level the wall so paint lays evenly.
| Area | Goal | Result |
|---|---|---|
| Joints | Hide lines | Clean surface |
| Patches | Blend edges | Uniform sheen |
| Screws | Lock and seal | No bumps |
Choose skim coating when light marks must disappear.
Light Texture For Camouflage
Light texture can hide minor imperfections so your wall doesn’t need a perfectly uniform skim coat across every inch.
You can choose smooth walls with skim coating, or you can switch to light texture for camouflage where walls show seams, patches, or slight waviness.
Use light texture benefits when you want forgiving coverage and faster blending after repairs.
Consider these light texture applications:
- Feather seams after joint compound cures.
- Lightly coat over skim areas with pinholes.
- Add subtle knockdown to soften sanding marks.
- Match existing ceilings to reduce visual contrast.
Reduce Sheen Mismatch With Flat Finish Options
To cut down sheen mismatch, choose a flat-finish system that matches your existing drywall and primer conditions. You’ll get flat finish benefits by minimizing reflective glare, which helps seams and patched areas visually blend.
Prioritize sheen consistency: select the same paint line, sheen level, and recommended dry time as the surrounding walls. If the original surface uses a primer with strong stain-blocking, use a compatible primer first so the topcoat doesn’t look shiny in spots.
When you spot a difference, skim or lightly sand only the high areas, then re-prime and paint to unify the finish.
How Humidity Affects Texture Drying and Bond
When humidity’s high, you’ll notice texture dries slower, so timing for sanding and recoats changes.
If moisture gets into the surface or compound, it can weaken or delay the joint bond you need for a solid finish.
You can control results by matching your drying window and keeping materials and walls dry.
Humidity Slows Texture Drying
High humidity slows texture drying because it keeps moisture from leaving the joint compound and drywall surface at the rate your texture needs.
You’ll notice the humidity effects as longer waits between coats and more sag risk before set. Keep an eye on drying conditions: warm, dry air helps, while muggy rooms stall.
If you trap moisture with closed doors or plastic, your texture may feel cool and rubbery.
To manage this, do the following:
- Use fans for gentle airflow.
- Run a dehumidifier when RH rises.
- Avoid wet cleanup right before texturing.
- Plan cure time based on measured humidity.
Moisture Impacts Joint Bond
Moisture changes how well your joint compound bonds, not just how fast it dries. When the air stays humid or the room runs cold, the mud takes longer to set and can trap water, weakening joint adhesion.
You’ll notice hairline cracking or pinholes if the surface still holds moisture. If you texture over damp paper or fresh spackle, moisture effects can prevent the compound from gripping the drywall’s pores, leaving a brittle, sandy skin.
You should check dryness, improve ventilation, and avoid mopping floors right before finishing. Let joints cure fully before coating.
Temperature Range for Consistent Texture Drying
To get consistent texture results, you need to control the room temperature during drying.
Keep drywall within safe temperature thresholds so the mix sets evenly and you avoid soft spots.
Watch your temperature along with humidity control; warm, stable conditions support drying consistency, while cold slows cure and can dull texture detail.
Plan texture timing around predictable heat so each wall portion dries at the same pace.
Use these checks as you work:
- Maintain 60–80°F if possible.
- Avoid dips below 55°F.
- Don’t exceed 90°F.
- Ventilate steadily, not violently.
Texture Tools: Rollers, Sprayers, and Trowels
The right texture tools help you control coverage, thickness, and pattern. Use rollers for quick, even texture application; choose nap length to match your desired texture finishes, then apply with steady pressure using proven roller techniques.
If you need speed, pick the right sprayer types: hopper, hopperless, or airless, and keep your distance consistent so the spray pattern stays uniform.
For tight corners and custom looks, switch to trowel methods—spread, comb, or swirl the mud to shape texture options.
Afterward, practice texture maintenance by cleaning tools immediately, and adjust tools as the mix stiffens.
Best Primer Before You Texture Drywall
Before you texture drywall, prime the surface so your mud bonds evenly and your finish doesn’t soak in or flash dry unevenly.
You want the right primer for the best texture methods, especially on patched spots and new drywall paper. Use a quality drywall primer that seals fast and stays receptive for compound.
- Spot-prime repairs before coating.
- Apply a stain-blocking primer if you have marks.
- Choose bonding primer for smooth, glassy surfaces.
- Roll on an even coat; let it dry fully, then texture.
Follow primer recommendations from your product label for consistent results.
Apply Texture Drywall Without Overworking Compound
Start by mixing your mud to the proper consistency so it spreads smoothly without dragging.
Embed the texture into the surface with a single pass, then stop—don’t keep reworking the same spot.
When you feather, only lightly blend the edges to avoid buildup and a rough, uneven finish.
Use Proper Mud Consistency
When you mix and hold your mud at the right consistency, your texture goes on cleanly without fighting the material. Aim for a smooth, creamy flow that supports controlled mud application.
If it’s too thick, you’ll tug and get ridges; if it’s too thin, the texture runs and loses peaks. Use consistency tips: remix after settling, check with a margin trowel, and adjust with small water additions.
Maintain steady pressure as you spray or roll.
- Target yogurt-like thickness
- Keep a damp sponge nearby for tools
- Test on scrap before finishing
- Stir often to prevent separation
Embed Texture Without Extra Work
A clean texture finish comes from embedding the pattern into the surface, not from wrestling the compound. Use the right roller or sprayer settings, and keep a steady distance so you don’t overload.
Apply thin, even coats: you’re building the texture, not filling low spots with extra mud. Work in sections, feathering only by controlling your passes, not by reworking wet material.
If you see ridges, stop and adjust your spray, then continue. Follow texture application tips like loading the tool consistently.
For texture maintenance advice, let it dry fully before sanding or painting, and protect edges from scuffs.
Lightly Feather Edges Only
Lightly feather only the texture edges as you apply the next section, using light passes to blend the pattern without digging into it.
You want clean gradations, not ridges. Use your tool just enough to smooth compound at the perimeter, then stop. If you press harder, you’ll overwork the base and dull the texture, forcing more repairs later.
Focus on proven feathering techniques and tight edge blending:
- Load minimal compound on the edge of your trowel.
- Sweep in two or three quick, light arcs.
- Match the existing nap and peaks.
- Let it set, then touch up only gaps.
Avoid Lap Marks, Trowel Lines, and Ridges
To keep your drywall finish smooth, you need to prevent lap marks, trowel lines, and ridges before they set up.
Plan your texture application techniques so each pass blends while material stays workable. Load your trowel consistently, then keep pressure even to avoid sharp trowel lines.
Work in manageable sections; overlap each swipe lightly and feather edges immediately. Don’t overbuild ridges—use less compound and refine with controlled, gentle passes.
If you see build-up, stop, clean the tool, and reblend. Choose texture finish options that match your surface and skill level.
How Long to Wait Before Checking Texture Dry
You should wait until the texture has fully set before you check it—usually within about 15 to 30 minutes, depending on humidity and airflow.
Look for a surface that’s no longer cool or tacky, and make sure it doesn’t smear or transfer under a light touch.
If it still feels wet or looks glossy, give it more time before you judge the texture.
Typical Dry Time Window
- Aim for 24 hours before any inspection.
- Add 6–12 hours in humidity or cooler rooms.
- Improve airflow, but avoid blasting directly on fresh texture.
- If you used thicker coats, extend the window.
Signs Texture Is Ready
Before you start checking, give the texture enough time to set so it won’t smear or pull away from the wall.
For texture drying, wait at least 10–20 minutes, but judge readiness by feel and look. Lightly touch a hidden area first: the surface should feel firm, not tacky, and the pattern shouldn’t deform.
Watch edges—when ridges stop leveling and the sheen dulls, you’re close. If you see moisture, gloss, or smearing, give it more time.
For best texture readiness, press gently on a seam; it should hold its shape and resist fingerprints.
Sanding Texture: When It Helps (and When It Hurts)
Sanding can help you smooth out raised ridges and blend fresh patchwork into existing texture, but it can also ruin the very pattern you’re trying to match if you take too much off.
Use sanding techniques to knock down high spots, then stop before flattening valleys; that’s where texture advantages come from. Watch for sanding mistakes: once you erase the profile, your texture application won’t line up.
- Lightly skim-treat shifts
- Check with a straightedge by feel
- Vacuum often to prevent grit scratches
- Stop as soon as the sheen matches nearby areas
Can You Paint Over Texture for a Uniform Look?
Yes—you can paint over drywall texture, and you can usually get a more uniform look if you prepare the surface correctly and choose the right approach. You’ll need to clean dust, spot-fill dips, and lightly sand ridges to soften harsh texture finishes, without flattening everything. Then use painting techniques that control how paint bridges grooves: prime first, especially over repairs, and apply thin, even coats with a roller plus a brush for edges.
| Step | Goal | Result |
|---|---|---|
| Clean | Remove dust | Better adhesion |
| Prime | Seal texture | Even absorbency |
| Light sand | Reduce peaks | Smoother sheen |
Paint Choices That Make Texture Less Noticeable
What paint choices help you hide drywall texture without turning your walls into a full skim-coat project?
Start with low-sheen paint finishes; they visually soften texture types and reduce glare across uneven wall patterns.
Next, focus on color selection—lighter, neutral tones usually downplay shadows, while bold design trends can exaggerate bumps.
Choose lighter, neutral tones to soften shadowy texture—bold, high-contrast colors can make drywall bumps look even more pronounced.
Use consistent texture applications: choose similar nap direction and skim only when needed.
- Pick flat or matte sheen levels for maximum texture hiding.
- Use mid-to-light colors to blur contrast and shadow.
- Match paint finishes across rooms for uniform aesthetic preferences.
- Test on your texture applications before committing.
Texture Drywall for Bathrooms, Kitchens, and Basements
Bathrooms, kitchens, and basements need texture drywall that matches their moisture, heat swings, and humidity levels so you don’t end up with peeling, cracking, or a finish that telegraphs every flaw.
Use moisture resistance drywall and plan surface preparation to prevent bubbles and stains. Choose texture types that support aesthetic appeal while balancing maintenance considerations.
For bathrooms, humidity effects demand tight sealer coats and controlled sanding. In kitchens, handle grease with durable finishes and smart design choices.
In basements, stabilize temperature, then follow proven installation techniques. Apply joint compound using consistent application methods for reliable room functionality.
Fix Textured Drywall: Blend Repair vs Retexture
After you’ve selected the right texture and planned for moisture and humidity, you still need the right repair approach when something chips, cracks, or stains.
If the damaged area is small, you’ll usually use blend techniques: feather compound edges, sand smooth, then match the surrounding finish.
For larger failures, retexture the whole section so peaks and valleys align.
Use these repair methods to decide:
1) Evaluate size and depth of damage
2) Test scrap to match sheen and profile
3) Spot-blend for hairline cracks
4) Retexture when pattern shifts or spans seams
What to Ask a Contractor Before They Texture
Before anyone textures your drywall, ask the contractor how they’ll verify the existing surface, since their prep and material choices determine whether the finish stays consistent over time.
Confirm they’ll check moisture, flatness, and drywall paper readiness, then document any repairs before texturing.
Confirm moisture, flatness, and drywall-paper readiness—then document and repair issues before texturing for consistent results.
In your contractor communication, require details on product type, primer use, and whether they’ll do a test patch in your exact room lighting.
Ask which texture options match your current style, or if they’ll blend seamlessly for spot fixes.
Also ask about cleanup, drying time, and how they prevent flashing or uneven texture.
Texture Drywall vs Smooth Skim Coat: Cost
When you’re comparing texture drywall to a smooth skim coat, cost comes down to how much prep work you need and what finish you’re aiming for.
Your texture cost comparison should factor labor time, material waste, and rework risk from uneven walls. A skim coat usually costs more upfront because you’ll spend extra hours sanding, feathering, and priming.
Still, smooth finish benefits can reduce future paint issues and touch-ups.
- Wall condition and patching needs
- Desired sheen and lighting exposure
- Equipment, materials, and disposal fees
- Number of coats required for durability
Frequently Asked Questions
What Happens if I Texture Drywall Without Priming First?
If you texture drywall without priming first, your texture adhesion can fail: compound won’t bond well to paper-faced drywall, causing peeling, cracking, or “flashy” patches. You’ll struggle with drywall preparation, and finish coats may look uneven and need extra sanding.
Can I Texture Over Painted Drywall Safely?
Yes, you can texture over painted drywall safely if paint’s sound and scuffed for grip. Lightly clean, degloss, then use compatible texture types and application techniques. Prime if peeling, chalking, or glossy, so your finish bonds and won’t crack or flake.
How Long Should Textured Walls Cure Before Sanding or Patching?
Let textured walls cure at least 24–48 hours before sanding or patching, longer if humid or thick. Test hardness gently; then use light sanding techniques, a pole sander for flats, and spot-repair with feathered edges.
Will Texture Crack When the Drywall Joints Expand or Shrink?
Yes, texture can crack if joint movement outpaces your finish, like a cracked sidewalk. When drywall expands or shrinks, stress concentrates at seams; proper joint tape, setting compounds, and good texture durability reduce cracking and keep it looking smooth.
Do I Need Special Paint to Fully Cover Dark Drywall Patches?
You don’t always need special paint, but for full dark patch coverage and strong paint adhesion, prime first with a stain-blocking primer. After sealing, use your finish paint. This prevents bleed-through and helps patches blend evenly.
Conclusion
So, do you *have* to texture drywall? Sometimes—codes, fire ratings, or specific finish requirements might force your hand. Other times, you can skip it and go smooth with a proper skim coat, if you’re okay with showing every tiny imperfection. If you already have texture, match it or prepare for the “spot-the-spot” game. And yes, contractors will always have opinions—so ask, price it, then move on.
