Can Polyurethane Be Applied Over Latex Paint? Guide
Yes — you can apply polyurethane over latex paint if you prep properly and pick the right product. Let the paint fully cure (usually 7–30 days), clean and degrease the surface, then sand lightly to promote adhesion. Use water-based polyurethane for minimal yellowing or oil-based for extra durability, apply thin even coats, and sand between coats. Test a small area first to confirm compatibility, and keep tools and conditions clean for best results; more tips follow below.
Quick Answer: Can You Put Polyurethane Over Latex Paint?
Yes—you can put polyurethane over latex paint, but you need to prep the surface first.
You’ll sand lightly, clean thoroughly, and verify the paint is fully cured.
For successful polyurethane application, test a small area to confirm latex paint compatibility and adhesion.
Use appropriate brushes or foam applicators, apply thin coats, and allow recommended drying times between coats for durable, even protection.
When Polyurethane Is the Right Choice for Latex-Painted Surfaces
When you need extra durability, moisture resistance, or a smoother, more washable finish, polyurethane is a good choice over latex paint—especially on high-traffic furniture, tabletops, trim, and floors where scuffs and spills are likely. You’ll pick polyurethane when durability matters, finishes need protection, and latex paint compatibility is confirmed; these polyurethane benefits extend lifespan and ease maintenance.
| Surface | Benefit | When to Use |
|---|---|---|
| Tabletop | Scratch resistance | High use |
| Trim | Washability | Frequent cleaning |
| Floor | Moisture guard | Entryways |
How Long to Cure Latex Paint Before Sealing
Before you seal latex paint with polyurethane, let the paint fully cure rather than just dry to the touch; curing gives the paint film time to harden and chemically stabilize so the sealer bonds properly and doesn’t trap solvents or cause bubbling.
Typically wait 7–30 days depending on humidity, temperature, and product; check manufacturer’s curing time and confirm latex paint drying feels hard before applying polyurethane.
When Not to Apply Polyurethane Over Fresh Latex Paint
If the latex paint hasn’t fully cured, don’t seal it with polyurethane—you’ll trap solvents, risk bubbling, and compromise adhesion.
Also avoid applying polyurethane over tacky, newly recoated, or contaminated surfaces.
Check application timing and verify paint compatibility; if labels conflict or the finish still softens under a fingernail, wait.
Rushing leads to peeling, discoloration, and costly refinishing.
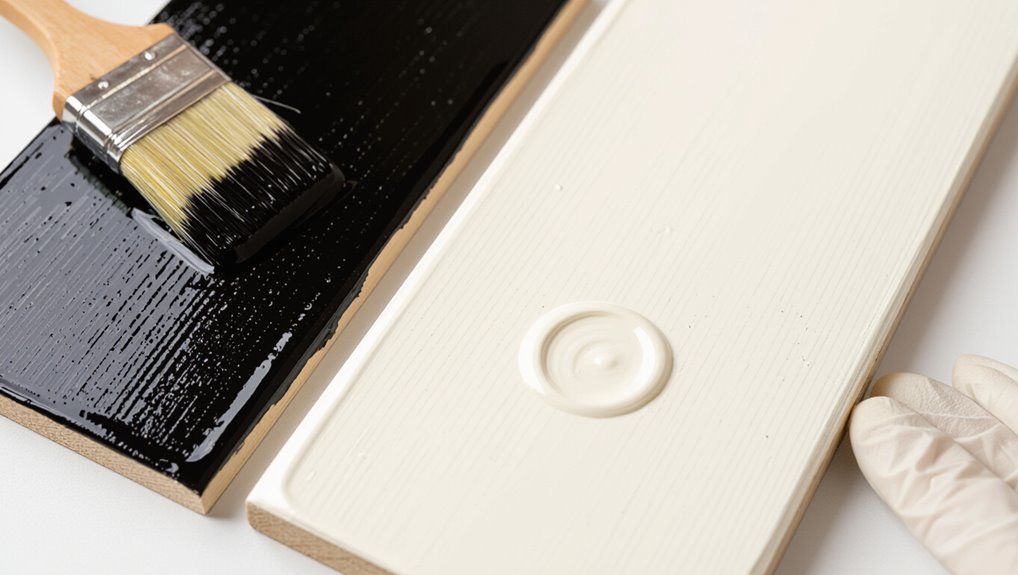
Differences Between Water-Based and Oil-Based Polyurethane
Although both protect painted surfaces, water-based and oil-based polyurethanes differ in drying time, odor, yellowing, and durability.
You’ll prefer water-based for quick dry, low odor, and minimal yellowing—water based benefits that suit light colors.
Oil-based gives richer amber tones but longer cure and stronger fumes—oil based drawbacks you should weigh.
- Fast vs slow
- Low vs high odor
- Clear vs amber
How to Choose Water- Versus Oil-Based Polyurethane for Latex
When choosing between water- and oil-based polyurethane for latex paint, think about the color, drying time, and the space where you’ll be working.
You’ll prefer water based benefits if you need clear, fast-drying, low-odor protection in living areas.
Choose oil based despite oil based drawbacks only when you want extra durability and don’t mind ambering or longer cure times.
How Latex Paint Finish Affects Polyurethane Bonding
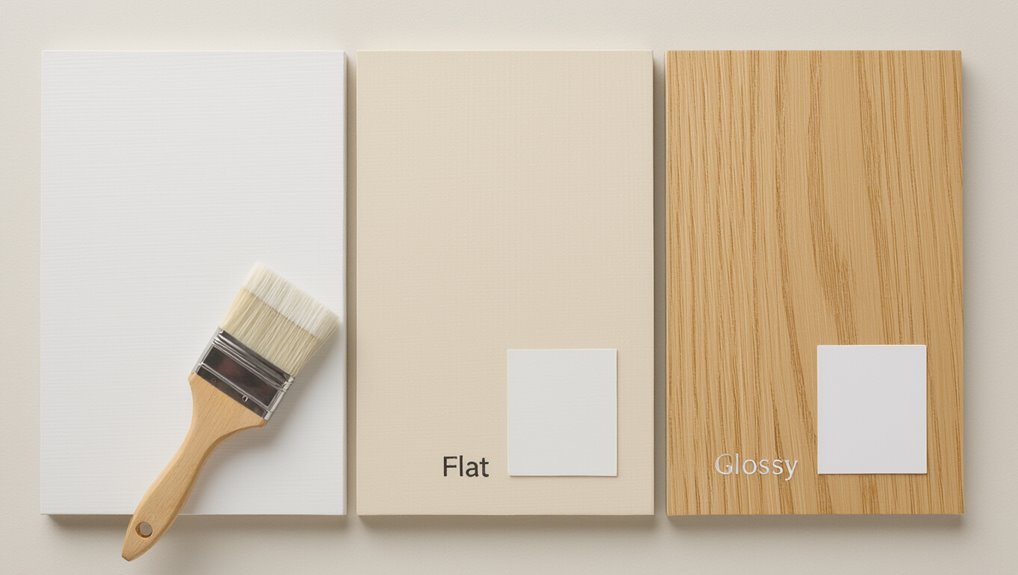
The sheen of your latex paint changes how well polyurethane sticks—glossier finishes are harder and may need more sanding.
You should also check surface texture, since rough or uneven areas can trap bubbles or cause adhesion failures.
Addressing both sheen and texture before you coat will give you a smoother, longer-lasting finish.
Sheen Level Impact
Sheen level matters because it changes how latex paint cures and how polyurethane adheres. You’ll notice sheen variations affect surface hardness and gloss, influencing finish compatibility with clear coats.
Assess before sealing so adhesion lasts.
- Satin/semi-gloss: better bonding, wipe-clean.
- Eggshell/matte: may need light abrasion.
- High-gloss: often requires scuffing for reliable adhesion.
Surface Texture Importance
Texture matters because it changes how polyurethane grabs onto latex paint: smooth, glossy surfaces offer less mechanical bite, while slightly rough or textured finishes provide more tooth for the clear coat to lock into.
You should examine surface appearance and plan light sanding to introduce consistent texture variation. That improves adhesion, reduces peeling risk, and guarantees an even, durable finish when you apply polyurethane.
Supplies You Need Before Sealing Latex Paint With Polyurethane
Before you start sealing, gather the right surface preparation tools—sandpaper, tack cloths, and a mild cleaner—to guarantee a smooth, clean base.
You’ll also want protective gear like gloves, a respirator, and eye protection for safe application.
Finally, choose the correct polyurethane (oil- or water-based) and confirm it’s compatible with your latex paint finish.
Surface Preparation Tools
You’ll want a small kit of reliable tools before you seal latex paint with polyurethane: fine- and medium-grit sandpaper, a sanding block, tack cloths or microfibre rags, a good-quality synthetic-bristle brush or foam applicator, a clean paint tray, and nitrile gloves.
Focus on surface preparation and smart tool selection to guarantee smooth adhesion and finish.
- Inspect and clean
- Sand progressively
- Remove dust
Protective Gear Needed
One set of basic protective gear will keep you safe and your finish clean when sealing latex paint with polyurethane: nitrile gloves, a respirator or mask rated for organic vapors (especially for oil-based polyurethane), safety glasses, and long sleeves to protect skin and clothing.
You should follow safety precautions, use proper protective equipment, ventilate the area, and keep a fire extinguisher nearby for solvent-based products.
Polyurethane And Paint Types
Now that you’ve got your protective gear sorted, let’s look at the materials that actually affect how polyurethane performs over latex paint.
You’ll choose supplies that guarantee polyurethane durability and proper latex compatibility. Consider these essentials:
- High-quality water-based polyurethane for good adhesion and low yellowing.
- Dewaxed latex primer to improve bonding.
- Fine-grit sandpaper and tack cloth for smooth, clean surfaces.
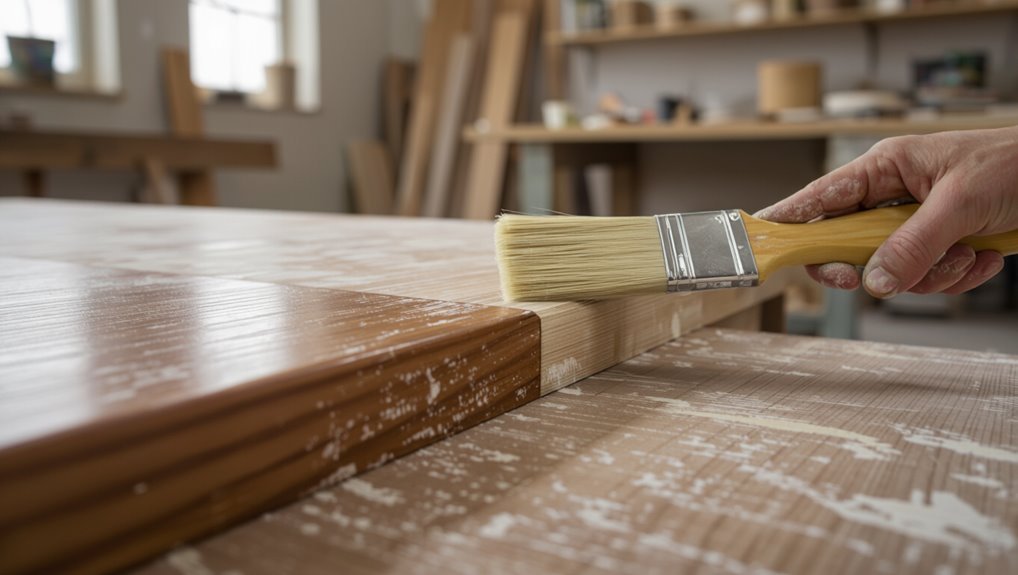
Surface Prep for Latex-Painted Furniture and Cabinets
Good surface prep makes the difference between a durable polyurethane finish and one that peels or bubbles; start by cleaning, repairing, and deglossing the latex-painted piece so the topcoat can bond.
You’ll test paint compatibility with a solvent or adhesion tape, sand lightly to scuff gloss, fill chips, remove grease, and vacuum dust.
Proper prep maximizes furniture durability and guarantees a lasting, smooth finish.
Step-by-Step Prep for Latex-Painted Walls and Trim
Before applying polyurethane to latex-painted walls and trim, you’ll clean the surface thoroughly to remove grease, dirt, and mildew.
After each coat dries, sand lightly between coats to promote adhesion and smoothness.
Finally, remove all dust with a tack cloth or vacuum so the finish lays down perfectly.
Clean Surface Thoroughly
Start by removing dust, grease, and grime so the polyurethane will bond evenly to your latex paint.
Use proper cleaning techniques to eliminate surface contaminants before finishing. Clean systematically, rinse, and let dry fully.
- Vacuum or wipe to remove loose particles.
- Degrease with mild detergent solution.
- Rinse with clean water and dry thoroughly.
Sand Lightly Between Coats
Light sanding between polyurethane coats helps create a smooth, durable finish by knocking down tiny dust nibs and promoting adhesion to the underlying latex paint.
Use fine-grit (220–320) sanding techniques, sanding lightly and evenly across the surface.
Don’t dig into the paint; just scuff for coat bonding.
Wipe or blow off residue before applying the next thin polyurethane layer.
Remove Dust Completely
After you’ve lightly sanded between coats, remove every bit of dust so the polyurethane bonds cleanly to the latex paint.
You’ll use targeted dust removal techniques and effective cleaning to avoid bumps or hazes.
Follow this concise checklist:
- Vacuum with brush attachment, then tack cloth the surface.
- Wipe with a damp microfiber cloth; let fully dry.
- Inspect under bright light; re-clean any missed spots.
Sanding: Grit Selection and Technique for Latex Paint
Prepare your surface by choosing the right grit and sanding technique for latex paint; doing so secures adhesion and a smooth finish before you apply polyurethane.
Use sanding techniques that start with 220–320 grit for smoothing cured latex, then finish with 400–600 grit for a silky profile.
Sand lightly with the grain, keep pressure even, and remove dust thoroughly before sealing to confirm proper polyurethane bonding.
Sanding Between Coats: When and How
While the first coat levels and bonds, you’ll sand between subsequent coats to remove dust nibs, smooth raised grain, and promote mechanical adhesion for the next layer.
Use light pressure and fine grit; follow proper sanding techniques and observe sanding intervals for cure times.
- Sand lightly with 220–320 grit.
- Clean thoroughly after sanding.
- Recoat within recommended intervals.
Deglossers Versus Sanding on Latex-Painted Surfaces
When you’re deciding between a liquid deglosser and sanding over latex paint, think about the surface condition and your tolerance for dust: deglossers dissolve the finish and cut shine without abrasion, while sanding physically roughs the surface to create tooth for the new coat.
You’ll choose deglossing methods for delicate trim or quick jobs and sanding techniques for heavy gloss, repairs, or uneven areas.
Cleaning Before Polyurethane: Remove Dust, Grease, and Silicone
Before you apply polyurethane, remove all surface dust with a tack cloth or microfiber to guarantee a smooth finish.
Next, degrease the area with a suitable solvent—like mineral spirits or a dedicated cleaner—and wipe it dry.
Finally, check for and remove any silicone or wax contamination with a silicone remover so the polyurethane will adhere properly.
Remove Surface Dust
Start by wiping the surface to remove dust, pet hair, and loose particles that will show under a clear polyurethane coat.
For effective surface cleaning and dust removal, work systematically and gently so you don’t scuff the paint.
Then use a tack cloth for final pickup.
- Dry wipe
- Soft brush
- Tack cloth
Degrease With Solvent
After you’ve removed dust and picked up stray fibers, tackle oils and silicone that will cause finish defects.
Use appropriate solvent types—like denatured alcohol, mineral spirits, or lacquer thinner—choosing one compatible with your latex paint. Apply small amounts on a clean cloth and test first.
Employ targeted cleaning methods: wipe in straight strokes, change cloths often, and allow full evaporation before applying polyurethane.
Wipe Away Silicone
Scrub away any residual silicone contamination so your polyurethane will lay down smoothly and bond properly.
You’ll perform silicone removal and surface cleaning with a lint-free cloth and a solvent recommended for paint-safe silicone. Wipe thoroughly, rinse if needed, and let dry.
Follow these steps:
- Remove loose dust, then wipe solvent.
- Target greasy spots next.
- Rewipe and air-dry completely.
Quick Adhesion Tests to Try First
Because adhesion can vary with surface and product, you should run a couple of quick tests before applying polyurethane over latex paint.
Try two simple adhesion methods: tape pull and small patch brushing. Use representative test surfaces—edges, hidden panels, and trim.
Wait full cure, then check for lifting, tackiness, or peeling. Record results to choose correct prep or primer.
Applying Polyurethane Over Chalk Paint or Milk Paint (Differences)
While both chalk paint and milk paint can take a topcoat, they behave differently under polyurethane, so you’ll need to adjust your approach depending on which you used.
- Chalk paint: usually porous; sand lightly, use water-based poly for clarity.
- Milk paint: may be flaky if unbonded; seal with shellac or primer first.
- Test a small area to confirm adhesion and finish before full application.
Applying Polyurethane Over Latex Paint: Brush vs Roller vs Sprayer
When you apply polyurethane over latex paint, your tool choice changes the finish and effort: a brush gives control but can show strokes, a roller speeds coverage but may add texture, and a sprayer delivers the smoothest result with more prep.
You’ll weigh brush pros and cons, use roller tips and tricks to minimize stipple, and follow sprayer technique and prep for even coats.
Pick the method that matches your skill, surface, and desired sheen.
Brush Application Pros Cons
Brushes give you the most control when applying polyurethane over latex paint, letting you work into corners and build thin, even coats without splatter.
You’ll use precise brush techniques and focused application strategies to avoid runs and visible strokes.
- Pros: control, minimal splatter, edge work.
- Cons: slower, visible brush marks if rushed.
- Tips: use high-quality synthetic bristle, thin coats.
Roller Application Tips Tricks
If you liked the control a brush gives for edges, a roller will speed up large, flat areas and hide small brush strokes for a smoother finish.
Use high-density foam or short-nap rollers, work in thin, even coats, and maintain a wet edge.
Focus on roller techniques like light pressure and consistent overlap. These application strategies reduce bubbles and guarantee uniform polyurethane coverage.
Sprayer Technique And Prep
Set up your sprayer and work methodically: spraying delivers the fastest, most even polyurethane coats over latex paint, but it demands careful prep and technique to avoid runs, overspray, and texture issues.
You’ll adjust sprayer settings, control application distance, and prep surfaces for consistent results.
- Masking and tack-rag cleanliness
- Test fan, pressure, tip size
- Maintain steady overlap and distance
Best Brush Types for Water- and Oil-Based Polyurethane
Choosing the right brush makes applying polyurethane smoother and helps you get an even, durable finish whether you’re using water- or oil-based formulas.
For water-based use synthetic bristle brushes; for oil-based choose natural or high-quality flagged bristles. Match brush types to finish and practice smooth, long strokes.
Use proper application techniques: maintain a wet edge, avoid overbrushing, and keep dust out of the work area.
How Many Coats of Polyurethane Do You Need Over Latex?
How many coats you need depends on the level of protection and sheen you want: for most interior latex-painted surfaces two coats of polyurethane provide good durability.
Three coats give added resistance to wear in high-traffic areas, and a single coat may suffice only for low-use items or testing.
Use proper coating techniques and mindful application timing to avoid runs.
- Two: standard
- Three: heavy use
- One: trial
Drying and Recoat Times for Water-Based Polyurethane
Expect each coat of water-based polyurethane to dry to the touch in 30–60 minutes, though full cure takes longer.
You’ll usually be able to recoat within 2–4 hours, but follow the product’s recoat window to avoid adhesion issues.
Temperature, humidity, and coat thickness all change drying times, so adjust scheduling accordingly.
Dry Time Per Coat
- Thin coats speed curing.
- High humidity slows drying.
- Warm, ventilated areas improve results.
Recoat Window Guidelines
When you’re planning coats, the recoat window—the safe time range to apply another layer without harming adhesion—depends on temperature, humidity, and product specifics; water-based polyurethane often allows a light recoat in 2–4 hours under ideal conditions, with a full recoat and sanding recommended after 6–8 hours or as directed by the manufacturer.
Check recoat timing on the label, assess surface expectations, and test a small area.
Factors Affecting Drying
Several key factors will determine how fast water-based polyurethane dries and when you can safely recoat: temperature, relative humidity, air movement, coat thickness, and the substrate’s porosity.
You’ll monitor drying conditions and environmental factors to schedule recoats. Consider:
- Warm, dry, ventilated spaces speed cure.
- Thick coats or porous wood extend tack time.
- High humidity stalls solvent release; wait longer.
Drying and Recoat Times for Oil-Based Polyurethane
Although oil-based polyurethane takes longer to set than water-based varieties, you’ll find its durability worth the wait; tack-free times usually range from 6 to 8 hours, with light sanding and recoating recommendable after 8 to 24 hours depending on temperature and humidity.
You should use proper drying techniques—good ventilation and moderate heat—and follow recommended recoat intervals to avoid trapping solvents or causing adhesion issues.
How Sheen Changes After Polyurethane Over Latex Paint
If you apply a polyurethane topcoat over latex paint, expect the surface sheen to deepen and become more uniform.
Water-based polyurethanes typically add a clear, less ambered gloss, while oil-based versions impart a warmer, slightly ambered richness that can raise a satin to a semi-gloss or gloss level.
Water-based poly adds a clear, crisp gloss; oil-based brings a warmer, slightly ambered richness.
You’ll notice sheen types shift; consider sheen variations:
- Subtle lift in low sheens.
- Increased color warmth with oil-based.
- Clear, crisper gloss with water-based.
How to Avoid Brush Marks and Orange Peel on Latex Surfaces
Anyone working with latex paint wants a smooth, factory-like finish, and avoiding brush marks or orange peel comes down to surface prep, the right tools, and technique. Sand lightly, clean dust, use quality brushes for controlled brush application, and choose proper roller technique with thin, even coats. Test on scrap and sand between coats for glassy results.
| Fear | Hope | Relief |
|---|---|---|
| Streaks | Smoothness | Pride |
| Blemish | Confidence | Calm |
Edge and Detail Techniques for Painted Trim and Molding
Before you apply polyurethane, make sure trim edges are sharply prepped by sanding and wiping away dust so the finish sits cleanly.
Use steady, light strokes or edging tools to keep lines crisp where trim meets walls or ceilings.
For molded details, mask or float the brush to protect crevices and avoid buildup that will obscure profiles.
Prep Sharp Trim Edges
When you’re prepping trim for a polyurethane topcoat, sharp, clean edges make the difference between a professional finish and an amateur one; use sharp edge techniques and trim preparation tips to remove drips, sand seams, and guarantee adhesion.
Follow these focused steps:
- Sand lightly with fine grit for smooth changes.
- Clean dust with a tack cloth.
- Feather thin paint ridges before sealing.
Technique For Crisp Lines
Edges matter — to get crisp lines on trim and molding you’ll work deliberately: mask selectively, use the right brush or edging tool, and pull steady, confident strokes so paint lays down cleanly without buildup. You’ll practice application techniques, feather edges, and remove tape while paint’s tacky for crisp edges.
| Tool | Use |
|---|---|
| Angled brush | Tight corners |
| Foam pad | Smooth runs |
| Painter’s tape | Masking |
| Razor | Clean edges |
| Small roller | Even finish |
Protecting Molded Details
Preserve the profile of molded trim by working deliberately along its contours: mask narrow recesses, use small angled brushes for beads and flutes, and apply thin, controlled coats so paint doesn’t pool in crevices.
You’ll protect molded details with careful sanding and selective polyurethane. Use preservation techniques that respect edges and relief.
- Feather edges
- Brush into grooves
- Thin, multiple coats
Temperature and Humidity Limits When Applying Polyurethane
If you’re applying polyurethane over latex paint, pay close attention to temperature and humidity because they directly affect drying time, film formation, and adhesion.
For temperature considerations, work between 50–85°F (10–29°C); avoid extremes that prevent cure or cause blushing.
Humidity effects: keep relative humidity below about 70% to prevent slow drying, cloudiness, or poor adhesion—aim for 40–60% when possible.
Ventilation and Personal Protective Equipment for Polyurethane
You should plan airflow to move fresh air through the room and carry solvent fumes away from your breathing zone.
Use fans and open windows to create cross-ventilation and aim for at least several air exchanges during and after application.
Wear an appropriate respirator (NIOSH-rated organic vapor cartridge or a P95 for particulates) when ventilation alone can’t keep fumes low.
Room Airflow Planning
Because polyurethane emits strong fumes and fine spray particles, plan airflow before you start so vapors don’t build up and you can breathe safely.
You’ll set ventilation strategies and guarantee airflow circulation to move contaminants out. Follow these steps:
- Open windows and run window fans to force air through the room.
- Use exhaust fans aimed at outdoors.
- Create a one-way flow from clean to dirty zones.
Appropriate Respiratory Protection
1 essential safeguard is choosing the right respiratory protection before you start spraying or brushing polyurethane, since ventilation alone won’t remove all vapors and fine particulates.
You should wear a respirator rated for organic vapors and particulates, plus goggles and gloves.
Assess respiratory hazards, monitor air, and replace cartridges per manufacturer guidance.
Proper protective equipment keeps you safe and compliant.
Common Mistakes That Cause Peeling or Lifting
Skip surface prep and you’ll often be chasing peeling or lifting later. You need peeling prevention habits: clean, scuff, and guarantee paint is cured.
Skip surface prep and you’ll chase peeling later — clean, scuff, and be sure the paint is fully cured.
Common lifting causes include dirty surfaces, incompatible coatings, and moisture.
- Dirty or oily surface
- Applying too soon or over fresh latex
- Using solvent-based primers or poly without compatibility checks
Troubleshooting Bubbles and Blisters in Polyurethane Topcoats
When bubbles or blisters appear in your polyurethane topcoat, they usually point to trapped air, solvent outgassing, or moisture—issues you can address with targeted troubleshooting.
Start by sanding between coats, degreasing surfaces, and applying thinner coats in proper humidity.
For bubbles troubleshooting, remove defects with light sanding and recoat; for blisters prevention, guarantee full cure of underlying latex and avoid high heat or rapid drying.
What to Do If Polyurethane Wrinkles Over Latex Paint
If your polyurethane wrinkles over latex paint, it’s usually because the solvent in the topcoat softened the paint film, causing it to shrink and buckle.
You’ll want to stop applying more coats, let everything dry thoroughly, and assess whether the wrinkling is limited to the surface or has penetrated the paint layers.
- Sand smooth affected areas, testing depth.
- Recoat only when fully cured.
- Use proper application techniques and wrinkle prevention methods.
Fixing Uneven Sheen and Streaks After Polyurethane
If you notice brush marks or streaks in the dried polyurethane, you can often level them by lightly sanding the surface with fine-grit paper and recoating.
For uneven sheen, rub the area with a scuff pad to blend high-gloss spots into satin or apply another thin, even coat to restore uniformity.
Work carefully and test a small area first so you don’t over-sand or create new inconsistencies.
Leveling Brush Marks
Because polyurethane can lay down differently than latex, you may end up with visible brush marks, streaks, or variations in sheen that catch light and draw the eye.
Use proper brush technique and simple leveling techniques to blend and reduce marks.
Try these steps:
- Lightly sand between coats to flatten ridges.
- Thin the polyurethane for smoother flow.
- Work wet edges and maintain consistent strokes.
Evening Sheen Variations
1 common issue after applying polyurethane over latex is uneven sheen—patchy gloss or dull streaks that show up once the finish cures.
You can correct gloss variations by lightly scuffing with fine sandpaper, cleaning dust, then applying a thin, even additional coat or using a polishing pad to blend.
Test in an inconspicuous spot and work slowly to achieve consistent evening sheen.
How to Restore Adhesion on Old, Worn Latex Paint
When old latex paint starts to flake, chalk, or peel, you can restore adhesion by removing loose material, cleaning the surface, and creating a profile that fresh polyurethane will grip to.
Use adhesion techniques and surface conditioning to guarantee lasting bond.
Steps:
- Sand and scrape to remove failed paint and roughen glossy areas.
- Degrease and rinse; let fully dry.
- Prime bare spots before topcoating.
How Polyurethane Affects Future Repainting or Refinishing
After you’ve restored adhesion and applied polyurethane, know that that clear coat will change how future repainting or refinishing behaves: it creates a slick, durable surface that slows primer and new paint from bonding unless you prepare it properly.
You’ll need to scuff, clean, and use a compatible primer. Consider test patches to confirm adhesion and anticipate the refinishing impact on timelines and materials.
Comparing Durability: Polyurethane Versus Other Sealers Over Latex
Although polyurethane gives you a tough, long-lasting clear film, you should compare it to other common sealers—like acrylic topcoats, shellac, and wax—because each one performs differently over latex paint in abrasion resistance, yellowing, moisture protection, and ease of recoat.
For a clear durability comparison and sealer effectiveness summary, consider:
- Polyurethane: best abrasion, resists moisture.
- Acrylic: less yellowing, easier recoats.
- Shellac/wax: easier repair, lower long-term protection.
Eco-Friendly Alternatives to Polyurethane for Latex-Painted Surfaces
If you want a greener finish over latex paint, you can choose from several low-VOC and natural sealers that still protect color and resist wear.
You can use water-based low-VOC clear coats, plant-oil varnishes, and shellac alternatives labeled as eco friendly sealers.
These natural finishes offer reasonable durability, dry quickly, and keep indoor air healthier while preserving your painted surfaces.
Cost and Time to Seal a Room With Polyurethane
Sealing a typical 12×12 room with polyurethane will usually take you a day or two and cost between $50 and $200 in materials, depending on the product type and how many coats you apply.
You should weigh cost considerations and time estimates before starting.
- Prep: sanding, cleaning (time and minor supplies).
- Application: coats, dry time.
- Finish: touch-ups, ventilation.
When to Call a Pro for Polyurethane Application
When you’re weighing whether to tackle a polyurethane job yourself or hire a pro, consider the project’s complexity, your skill level, and the consequences of mistakes; stubborn imperfections, large surfaces, or high-value finishes usually call for a professional.
You should call a pro when you want reliable polyurethane benefits, lack experience with surface prep or spraying, or need expert advice to avoid costly errors and guarantee durable results.
Quick Checklist Before You Apply Polyurethane Over Latex Paint
Before you grab a brush, run through a quick checklist to make sure the latex paint is ready: confirm the paint is fully cured (usually 2–4 weeks), clean the surface of dust and grease, sand lightly to dull gloss, remove sanding residue, fix any chips or imperfections, and choose a compatible water- or oil-based polyurethane.
Before you paint, ensure latex is cured, cleaned, lightly sanded, repaired, and matched with the right polyurethane.
- Test adhesion methods on a small area.
- Use proper application techniques: thin, even coats.
- Allow full dry time between coats.
Frequently Asked Questions
Will Polyurethane Yellow on Light-Colored Latex Paint Over Time?
Yes — it can yellow over time. You’ll see yellowing factors like UV exposure, oil-based polyurethane, and age; check paint compatibility, use water-based clear coats and UV-resistant finishes to minimize discoloration on light paint.
Can Polyurethane Trap Moisture and Cause Bubbling on Basement Walls?
Yes—you can trap hidden dampness with polyurethane, like sealing a basement’s sigh. If walls have moisture damage or poor paint adhesion, coatings can bubble and peel, so fix leaks and dry surfaces before sealing.
Does Polyurethane Change VOC Levels or Indoor Air Quality Long-Term?
Yes — polyurethane can raise VOC emissions and indoor pollutants initially, but once cured you won’t have persistent off‑gassing; choose water‑based low‑VOC formulas and ventilate during application to minimize long‑term indoor air impacts.
Can I Use Polyurethane Over Latex-Painted Children’s Toys or Baby Furniture?
Yes — you can, but prioritize safety concerns: use low-VOC water-based polyurethane, guarantee thorough curing, sand between coats, apply thin even layers, ventilate well, and test a small area on toys or baby furniture first.
How Does Polyurethane Affect Slip Resistance on Painted Floors?
Polyurethane can reduce slip resistance by creating a smoother surface, but it boosts paint durability. You can restore grip by adding non-slip additives or textured finishes, ensuring safer, longer-lasting painted floors.
Conclusion
Yes — you can apply polyurethane over latex paint, but only after it’s fully cured and properly prepped. Let the paint cure at least 7–30 days depending on brand and conditions, sand lightly, clean off dust, and choose a compatible water- or oil-based polyurethane. Remember, “haste makes waste”: rushing risks tacky finishes or peeling. If you’re unsure about prep, ventilation, or product choice, call a pro to avoid costly rework.