Can You Paint Frp Wall Panels? Complete Guide
Yes—you can paint FRP wall panels, but only with proper prep, testing, and the right products. You’ll need to scuff-sand glossy areas, clean thoroughly with detergent and solvent, perform an adhesion tape test, and use a primer made for nonporous fiberglass before epoxy, acrylic, or polyurethane topcoats. Allow extended recoat and cure times and watch for damage that means replacement. Follow the steps and tips below and you’ll know when to paint, repair, or replace.
Can You Paint FRP Wall Panels? (Quick Yes/No + Caveats)
Yes—you can paint FRP (fiberglass reinforced plastic) wall panels, but with important caveats: you must perform an FRP paintability assessment first — check surface profile, cleanliness, and existing coating.
You’ll choose proper primers and follow recommended application techniques: scuff-sand, clean, prime with epoxy or solvent-based primer, then topcoat with compatible paint.
Skipping steps risks adhesion failure and peeling.
When to Paint FRP vs. Replace Panels
Look closely at the surface: small scratches and yellowing you can sand and repaint, but deep cracks, delamination, or mold often mean replacement.
Consider cost efficiency by comparing repair materials and labor to the price and downtime of new panels.
We’ll weigh those factors so you can choose the most practical option.
Assess Surface Damage
Before you decide to paint, take a close look at the FRP surface for cracks, delamination, deep gouges, or areas where the textured gel coat has worn through—these issues often mean replacement is the safer choice.
For surface evaluation, perform a thorough damage assessment: probe soft spots, tap for hollowness, and measure paintable area.
If structural integrity’s compromised, don’t paint—replace.
Evaluate Cost Efficiency
Start by comparing the total out‑of‑pocket costs: get quotes for both repainting (surface prep, primer, paint, labor or rental tools) and full panel replacement (materials, labor, disposal). Do a budget analysis to weigh cost benefits, lifespan, and downtime. Use this quick comparison:
| Option | Key factors |
|---|---|
| Repaint | Lower upfront, shorter lifespan |
| Replace | Higher upfront, longer term |
| Hybrid | Spot replace + paint |
How to Test FRP for Paint Adhesion
Before you paint FRP, you’ll want to check how the surface responds to prep by scuffing and cleaning a small area to see if the finish changes or flakes.
Then perform an adhesion tape test: press a strong tape onto the area, pull it off sharply, and inspect for coating or fiber removal.
If the surface holds up with minimal lift, you can proceed with painting; if not, plan for additional surface prep or replacement.
Surface Preparation Test
Anyone planning to paint FRP should verify adhesion with a simple surface preparation test: clean a small area, abrade lightly, apply your chosen primer and paint, and inspect after full cure for peeling or blistering. You’ll perform surface cleaning, then adhesion testing on a discreet spot. Record results and adjust prep if paint fails.
| Step | Action |
|---|---|
| 1 | Clean |
| 2 | Abrade |
| 3 | Prime |
| 4 | Paint |
| 5 | Inspect |
Adhesion Tape Test
How well will your paint stick to FRP?
Perform adhesion testing by cutting a small crosshatch into a cleaned, cured area, then press a strong tape application over it.
Pull the tape off sharply; inspect for flaking or lift. If paint stays, adhesion’s good. If it peels, sand, clean, or use a primer designed for FRP before repainting.
Tools and Materials for Painting FRP Panels
While FRP panels are durable, you’ll need the right tools and materials to get a paint job that lasts and looks professional.
Gather suitable paint types (epoxy, acrylic, or polyurethane), primer formulated for plastic, fine-grit sandpaper, tack cloths, quality brushes, rollers with low nap, and a sprayer if using spray application methods.
Use masking tape and respirator for safety.
Best Cleaners to Remove Grease and Contaminants From FRP
Why start with a thorough degrease? You’ll need effective cleaners for grease removal and contaminant identification.
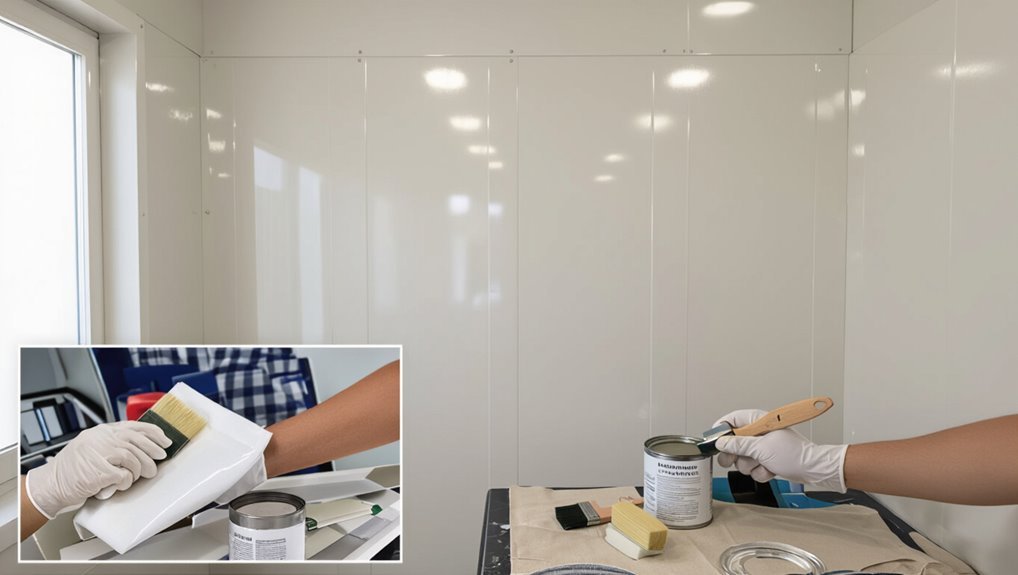
Use a mild detergent solution for light oils, a citrus-based degreaser for stubborn film, and isopropyl alcohol for final wipe-downs.
Test cleaners on a hidden spot first. Wear gloves, rinse thoroughly, and let panels fully dry before priming or painting to guarantee adhesion.
How to Sand FRP Without Damaging the Backing
Before you start sanding, confirm the panel’s face is the only surface you’ll abrade and mark the edges so you don’t touch the backing.
Use light, even pressure with fine-grit sandpaper, move along the grain, and keep the sander flat.
Employ sanding techniques like hand-sanding near edges, mask backing with tape or cardboard for backing protection, and inspect frequently.
Which Primers Bond to Smooth FRP Surfaces?
Which primers will actually stick to smooth FRP?
You’ll want primers formulated for non-porous plastics—etching or adhesion-promoting primers and urethane or epoxy-based primers.
Proper primer selection guarantees strong adhesive bonding to the slick FRP surface.
Selecting the right primer ensures durable adhesion to slick FRP surfaces, preventing peeling and finish failure.
Clean and scuff first, then apply per manufacturer instructions.
Test a small area to confirm tack and compatibility before finishing the entire panel.
Best Paints for FRP: Acrylic, Epoxy, or Enamel?
Wondering which paint type will give you the best finish and durability on FRP?
You’ll choose based on use: acrylic paint offers broad color options and easy cleanup, epoxy paint delivers superior paint durability and chemical resistance for high-traffic areas, while enamel paint gives hard, glossy finish types ideal for moisture-prone spots.
Match primer, specified wear, and desired sheen to get lasting results.
Prep Checklist: Cleaning, Sanding, and Masking FRP
Start by giving the FRP a thorough clean. Then sand and mask the area so paint will adhere and edges stay neat.
You’ll use gentle cleaning techniques—mild detergent, warm water, and a soft brush—to remove grease and grime. Follow with light sanding methods using fine-grit paper to scuff the surface.
Mask trim and adjacent areas with quality tape and drop cloths before priming.
How to Apply Primer Evenly on FRP
Once the surface is clean, sanded, and masked, you’ll apply a bonding primer made for glossy plastics or FRP to guarantee paint sticks and won’t peel. Use thin, even coats, maintain wet edges, and check surface compatibility. Follow drying times and light sand between coats.
| Step | Tool | Tip |
|---|---|---|
| 1 | Brush | Cut in edges |
| 2 | Roller | 4–6 mm nap |
| 3 | Spray | 6–8″ distance |
| 4 | Sand | 400 grit |
Painting Technique for a Smooth, Uniform FRP Finish
Before you paint, make sure the FRP is clean, sanded lightly, and wiped of dust so the primer and paint will bond evenly.
For the finish, use a spray-and-roll method: spray a thin, even mist to cover textured areas, then back-roll with a foam roller to level and remove overspray.
Work in consistent overlapping passes and keep wet edges to avoid lap marks.
Surface Preparation Steps
A few careful prep steps will make the difference between paint that peels and a lasting, smooth FRP finish.
You’ll clean panels thoroughly to remove grease and contaminants—surface cleanliness importance is critical.
Sand lightly to scuff gloss, repair chips, and prime with a compatible adhesion primer.
Inspect for panel durability considerations, ensuring fasteners and seams are sound before painting.
Spray And Roll Technique
Now that your FRP is clean, scuffed, repaired, and primed, you’ll get the smoothest, most durable finish by combining spray and roll methods. Use spray techniques for even base coats and roll methods to back-roll for texture control and coverage. Work wet-on-wet, overlap passes, and keep a steady pace for uniform results.
| Step | Tool | Tip |
|---|---|---|
| 1 | Spray gun | Low pressure |
| 2 | Roller | Short nap |
| 3 | Masking | Protect edges |
| 4 | Dry time | Follow label |
| 5 | Finish | Inspect evenly |
How to Match or Recreate FRP Texture After Painting
When you’re repainting FRP and want the finish to blend seamlessly, matching the original texture is as important as color.
Assess the existing pattern, test texture replication with skim coats or adjustable-spray settings, and choose fillers that respect paint compatibility.
Practice on scrap FRP, feather edges, and use stippling or light rolling to recreate peaks and valleys until the surface matches before full application.
How Long to Wait Between Coats and Final Cure Times
Because FRP’s nonporous surface slows solvent evaporation, you’ll usually wait longer between coats than on drywall or wood—follow the paint manufacturer’s recommended recoat window (often 2–4 hours for touch-up, 8–24 for full recoats) and always check tack-free and adhesion before applying the next layer.
- Monitor drying times at room temperature and humidity.
- Allow full curing duration per product (often 7–30 days).
- Avoid stress or cleaning until cure is confirmed.
Troubleshooting: Peeling, Blistering, and Uneven Sheen
Even with proper drying and cure times, you may still see problems like peeling, blistering, or an uneven sheen on FRP panels; these issues usually point to surface contamination, poor adhesion, trapped moisture, or incompatible products.
For peeling issues, strip loose paint, sand glossy areas, clean thoroughly, and use proper primers.
For blistering solutions, eliminate moisture sources and switch to compatible, breathable coatings to restore adhesion.
Cleaning and Maintaining Painted FRP Walls Long-Term
You’ll keep painted FRP looking its best by using routine gentle cleaning—mild detergent, soft cloths, and non-abrasive sponges work well.
Avoid harsh scrubbing or solvent-based cleaners that can damage the finish, and protect high-traffic areas with mats or bumpers.
Consider applying a compatible long-term protective coating or periodic touch-ups to preserve gloss and resist stains.
Routine Gentle Cleaning
When you keep up with a simple, gentle cleaning routine, painted FRP walls stay attractive and durable for years.
You should set a cleaning frequency, use gentle techniques, and avoid harsh abrasives. Wipe spills promptly with mild soap and water, rinse, and dry.
Perform monthly light cleans and deeper quarterly checks to catch buildup early.
- Mild soap and water
- Soft cloths or sponges
- Gentle, circular motions
Preventing Surface Damage
Because painted FRP panels resist moisture but can still scuff and stain, you should adopt preventative habits that reduce long-term surface damage and cutting down on repairs. Use gentle cleaners, soft cloths, and targeted spot care. Apply simple surface protection methods and practical damage prevention techniques.
| Action | Frequency |
|---|---|
| Spot clean | As needed |
| Gentle wash | Monthly |
| Inspect seams | Quarterly |
Long-Term Protective Coatings
Keeping up gentle cleaning and routine inspections will only get painted FRP so far; to preserve finish and fend off stains or wear you should consider long-term protective coatings.
You’ll apply protective sealants or clear coats designed for FRP to create long lasting finishes. Check compatibility, recoat intervals, and UV resistance to extend life.
- Choose a marine-grade clear coat
- Test adhesion first
- Recoat every 3–5 years
Typical Cost and Time Estimate for Repainting FRP Panels
A typical repaint of FRP (fiberglass-reinforced plastic) wall panels will cost you between $1.50 and $4.50 per square foot for materials and basic labor, with most small jobs landing around $2–$3 per square foot; expect higher rates if panels need heavy prep, repairs, or specialty coatings. Use this cost breakdown and time estimate to plan.
| Task | Cost/ft² | Time |
|---|---|---|
| Light prep & paint | $1.50–$2.50 | 1–2 hrs/100 ft² |
| Moderate prep | $2–$3.50 | 2–4 hrs/100 ft² |
| Repairs/specialty | $3–$4.50+ | 4+ hrs/100 ft² |
Frequently Asked Questions
Can Painted FRP Panels Be Refinished With Textured Roller Effects Later?
Yes—you can refinish painted FRP panels later using textured roller refinishing techniques; you’ll prep and scuff the surface, apply suitable primer, then use a textured roller and compatible paint to achieve durable, consistent texture effects.
Will Painting FRP Affect Fire Resistance or Building-Code Compliance?
About 70% of coatings can alter surface behavior, so you shouldn’t assume painting FRP won’t change fire resistance; you’ll need to verify coating ratings and consult building codes to maintain compliance before proceeding.
Can I Paint FRP Panels in Cold or High-Humidity Conditions?
You shouldn’t paint FRP panels in cold or high-humidity conditions; temperature considerations and humidity effects slow curing, cause poor adhesion, blistering, or clouding. Wait for recommended temp and relative humidity ranges to guarantee a proper, durable finish.
Are There Eco-Friendly or Low-Voc Primer/Paint Options for FRP?
Yes — you can choose eco friendly options and low voc paints; pick water-based acrylic primers and epoxy hybrids labeled low-VOC, follow manufacturer instructions, and guarantee proper adhesion with scuffing and a compatible bonding primer for lasting results.
Can Painted FRP Be Painted Again Years Later Without Full Prep?
You can, but don’t expect miracles: light scuffing and cleaning usually suffice, yet over time color retention and surface adhesion can suffer, so you’ll often need spot sanding and primer to guarantee a durable, fresh finish.
Conclusion
You can paint FRP — but only if you prep it right. Picture yourself scrubbing away grease, sanding glossy texture, and testing a small patch; every step decides if your paint will cling or peel. If it sticks, you’ll watch a dull panel transform under even coats into a smooth, durable finish. If it fails, replacement may be next. Ready to try? Take your time now, and you’ll either reveal success… or a costly lesson.