
Can You Paint a Knockdown Ceiling Without Losing the Texture?
Yes — you can paint a knockdown ceiling without losing its texture if you take care. Use a stain‑blocking primer, thin even topcoats, and tools that don’t overwork the surface like a low‑pressure sprayer or short‑nap roller. Avoid heavy brushing, excessive pressure, or high‑sheen paints that highlight or flatten peaks. Prepare and repair first, let everything fully dry, and apply thin layers, checking as you go; keep going to learn step‑by‑step tips and fixes.
Can You Paint a Knockdown Ceiling Without Losing the Texture? Quick Answer
Yes—you can paint a knockdown ceiling without losing the texture.
You’ll keep the finish if you use a roller or sprayer with light, even coats and avoid heavy brushing or saturating the texture.
It’s not possible to preserve it if you sand aggressively, apply thick coats, or use the wrong tools.
One-sentence direct answer
You can paint a knockdown ceiling without losing its texture if you use the right tools and a light, even coat that doesn’t overwork the surface.
You should roll or spray thin, avoid heavy brushing, and let each coat dry fully.
With proper technique and patience, you’ll refresh color and seal the surface while preserving the distinctive knockdown pattern.
Short summary of when it’s possible and when it’s not
Although textured ceilings can be delicate, you can usually paint a knockdown ceiling without losing the texture if you take precautions and use the right techniques.
You’ll succeed when you use low-pressure spray or a nap roller, thin coats, and gentle touch.
Avoid high-pressure sprayers, heavy rollers, or thick paint that can flatten peaks.
Repair loose texture before painting.
What Is a Knockdown Ceiling and Why Texture Matters
A knockdown ceiling gets its look from applying joint compound or texture mix in splatters and then smoothing the peaks with a wide knife to leave flattened islands of texture.
You’ll usually see it sprayed with a hopper gun or troweled on with mud and finished with a knockdown knife or drywall knife.
Homeowners keep the texture because it hides imperfections, reduces visible seams, and adds a soft, dimensional style to a room.
Definition and how knockdown texture is created
When you look up at a knockdown ceiling, you’ll see flattened, mottled patterns that give walls depth without overwhelming the room; the effect’s made by spraying a watered-down joint compound or texture mix onto drywall, letting it set briefly, then dragging a wide knife or trowel over the peaks to “knock down” the texture into those characteristic flattened shapes.
You get a subtle, forgiving finish that hides imperfections and adds visual interest.
Common materials and tools used to apply knockdown texture
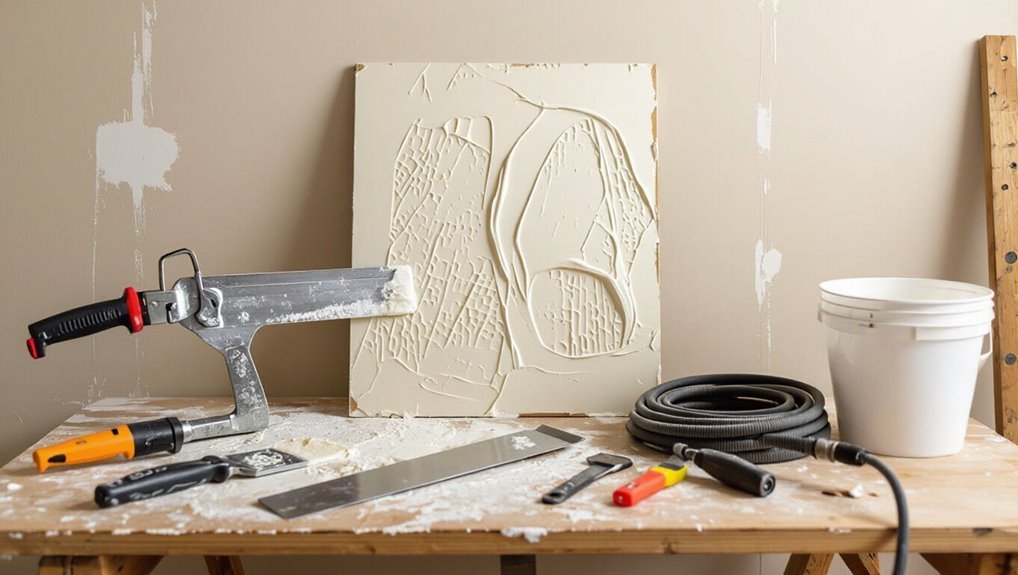
Tools and materials matter because they’ll determine how even your knockdown texture turns out and how much prep you’ll need to do.
You’ll use joint compound or premixed texture, a hopper gun or texture sprayer for larger areas, a drill mixer for consistency, stainless taping knives or knockdown knives to flatten peaks, and protective plastic, drop cloths, and respirator for cleanup and safety.
Functional and aesthetic reasons homeowners keep texture
You’ve picked the right materials and gear, and now it helps to understand why homeowners choose to keep textured ceilings in the first place.
Texture hides imperfections, reduces echo, and can disguise minor cracks or stains so you don’t need constant repairs.
Aesthetically, knockdown adds depth and character, letting you match architectural style while keeping maintenance low and resale appeal intact.
Factors That Determine Whether Texture Will Be Preserved
Whether the knockdown texture stays intact depends a lot on factors like its age and current condition, the paint sheen and formulation you pick, and how you apply it — roller, brush, or sprayer.
You’ll also need to take into account surface prep and any existing damage, plus environmental conditions such as humidity and temperature.
Keep these in mind before you start so you can choose the right products and technique to preserve the texture.
Age and condition of the existing texture
The age and condition of your knockdown texture play a big role in deciding whether you can preserve it during painting.
If the texture is old, brittle, cracked, or flaking, you’ll need repairs or consolidation before painting to avoid loss. Fresh, well-bonded texture holds up better.
Inspect for moisture damage, loose areas, and previous repairs so you can address issues first.
Type of paint (sheen and formulation)
Because paint choice affects how a knockdown texture looks and holds up, pick both the sheen and formulation with care: flatter sheens hide irregularities and minimize sheen highlights on peaks, while eggshell or satin can make texture more noticeable.
Likewise, water-based acrylics flex with temperature and humidity and resist yellowing, whereas oil-based or alkyd paints can add weight, slow drying, and sometimes soften older texture or show brush/roller marks.
Choose a high-quality acrylic flat or matte for preserving depth and avoiding sheen hotspots; use tinted primer if patchy areas need uniformity.
Application method (roller, brush, sprayer)
Now that you’ve chosen paint that won’t flatten or spotlight the knockdown peaks, pick an application method that protects the texture’s depth.
Use a high-nap roller to hug peaks and valleys, back-rolling to remove excess.
Reserve an airless sprayer for even coverage on large areas, keeping pressure moderate.
Avoid brushing across ridges; touch up sparingly to preserve contrast and dimension.
Surface preparation and existing damage
If you want the knockdown texture to survive repainting, start by evaluating and preparing the surface so paint only seals—not fills—those peaks and valleys.
Inspect for cracks, holes, flaking paint, water stains and loose texture. Remove debris, scrape loose material, spot-prime bare or stained areas, and patch only deep damage.
Smooth repairs minimally so the original relief remains intact.
Environmental conditions (humidity, temperature)
After you’ve addressed surface defects and spot-primed, check the room’s humidity and temperature before repainting so the knockdown texture holds up.
Paint when humidity is 40–60% and temperature is within the paint manufacturer’s recommended range, usually 50–85°F. High humidity or cold slows drying, causing sagging or flattening.
Use dehumidifiers or heaters to maintain ideal conditions for proper film formation.
Step-by-Step Process to Paint a Knockdown Ceiling Without Losing Texture
Before you start painting, inspect the ceiling closely and document any cracks, flaking, or water damage so you know what needs repair.
Clean away dust, cobwebs, and grease, then prime with a product suited for textured surfaces to guarantee adhesion without filling the knockdown pattern.
Finally, pick the right paint sheen—flat, eggshell, or satin—based on how much light and washability the room needs to preserve the texture.
Step 1 Inspect and document the ceiling
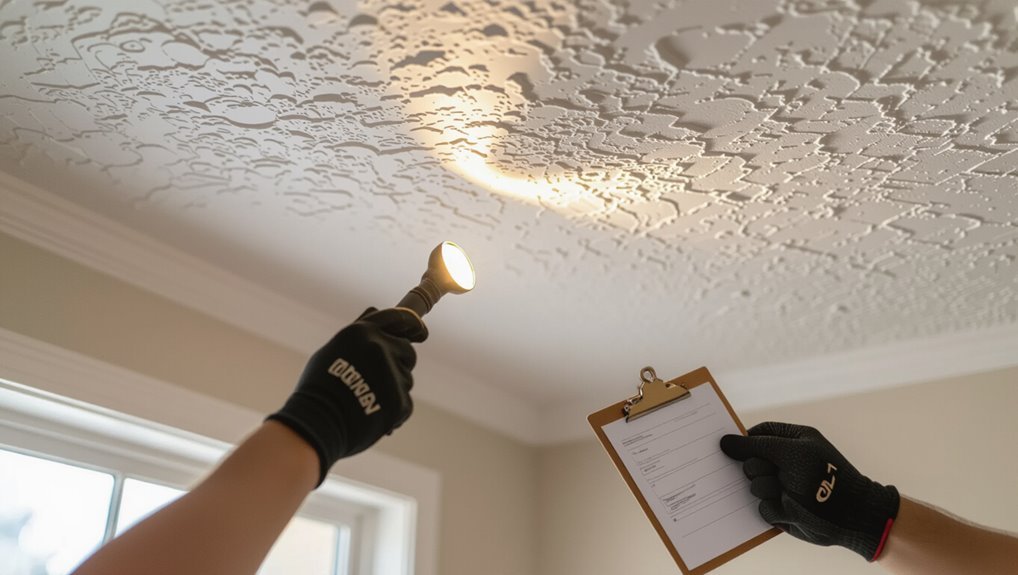
Start by carefully scanning the entire ceiling to note cracks, stains, loose texture, and areas where previous repairs are visible. You’ll want a clear record of problems before you touch paint.
Photograph each issue, mark locations on a sketch or floor plan, and note dimensions and severity. That documentation guides materials, time estimates, and whether a pro’s needed, saving surprises later.
Step 2 Repair cracks, flaking, and water damage
Tackle cracks, flaking, and water damage methodically so you preserve the knockdown texture while making the ceiling sound and paint-ready.
Remove loose material, cut out rotten drywall if needed, and let any damp areas fully dry.
Apply flexible joint compound or patching plaster, feather edges to match surrounding texture, sand lightly when cured, and prime stained spots with a stain-blocking primer before painting.
Step 3 Clean the surface (dust, cobwebs, grease)
Clear away dust, cobwebs, and any grease so paint will adhere evenly and the knockdown texture won’t get obscured.
Use a soft-bristle brush or vacuum with a brush attachment, working gently along the texture.
For greasy spots, wipe with a damp cloth and mild degreaser, then rinse and dry.
Let the surface fully dry before moving to the next step.
Step 4 Prime the ceiling: which primer to use and why
1 important step before painting is priming the ceiling, because the right primer seals the porous texture, guarantees even topcoat coverage, and helps hide stains without filling in the knockdown pattern.
Use a high-quality, stain-blocking latex primer or an oil-based primer for heavy stains.
Apply thin, even coats with a roller designed for textured surfaces and allow full drying between coats.
Step 5 Choosing the right paint (flat vs. eggshell vs. satin)
Now that the primer’s sealed and dried, pick a finish that preserves the knockdown texture while giving the look you want. Flat hides imperfections best; eggshell adds slight sheen and cleanability; satin is more durable but highlights texture. Choose based on durability versus subtlety.
| Finish | Best for |
|---|---|
| Flat | Concealing texture |
| Eggshell | Light sheen, easy cleaning |
| Satin | Durability, washable surfaces |
Step 6 Select the best application method (roller type, nap length, sprayer settings)
Choose tools that lay paint evenly without flattening the peaks—your method will determine how well the knockdown texture reads after painting.
Use a low‑spin sprayer on thin coats for even coverage, or a short‑nap (3/8″) microfiber roller to reach crevices without packing.
Avoid thick rollers or heavy spray pressure; test on a scrap piece to confirm finish before starting the ceiling.
Step 7 Proper painting technique to preserve texture (pressure, overlap, drying time)
Work deliberately to protect the peaks and valleys of the knockdown texture: maintain light, consistent pressure whether you’re rolling or spraying, overlap each pass by about 30% to avoid missed spots, and let thin coats dry fully before adding more so the paint won’t bridge or flatten the pattern.
Move steadily, keep tools loaded but not dripping, and pause between coats until the surface feels dry to the touch.
Step 8 Apply touch-ups and second coat guidance
As the first coat cures, take a methodical pass to spot any thin areas, drips, or flattened peaks and mark them so you can address them systematically.
Light feathering or a targeted touch-up with a brush or mini-roller will restore texture without overworking the surface.
After touch-ups, wait recommended dry time, then apply a thin, even second coat using the same pressure and overlap to preserve pattern and avoid pooling.
Step 9 Post-paint inspection and finishing
Once the paint’s fully dry, do a careful room-by-room inspection to catch missed spots, drips, or uneven texture so you can correct them before they become permanent.
Use a bright, angled light or a flashlight held low to reveal subtle inconsistencies and mark areas that need touch-ups.
Repaint small areas with a feathered brush, blend edges, remove tape, clean up, and recheck for uniform coverage and texture.
Tools, Materials, and Cost Estimates
You’ll need a clear checklist of tools and materials—rollers with nap suited to textured surfaces, angled brushes, extension poles, drop cloths, painter’s tape, primer, and ceiling paint—so you can shop efficiently and avoid mid-job runs.
Expect a DIY job to take a weekend and cost mostly for materials ($50–$200), while hiring a pro typically saves time but raises the bill to a few hundred to over a thousand dollars depending on room size and prep.
Below I’ll break down specific items, quantities, and more precise time and cost estimates.
Complete tools and materials checklist
1 essential step before you raise a ladder is gathering every tool and material you’ll need so the job stays smooth and safe.
You’ll want quality supplies to protect texture and finish. Pack essentials, safety gear, and touch-up items before you start.
- Drop cloths and painter’s tape
- Ladder and sturdy shoes
- Low-pressure sprayer or roller
- Breathable mask and goggles
- Patch compound and small brushes
Estimated time and cost ranges for DIY vs. professional
Expect a weekend and a few hundred dollars if you do a knockdown ceiling yourself, versus a day or two and $300–$800 (or more) for a pro depending on ceiling size and prep needs.
DIY saves labor but adds time: prep, taping, spraying/rolling, dry time, cleanup.
Professionals work faster, use commercial sprayers, and charge for masking, repairs, and travel—budget accordingly.
Common Mistakes That Cause Texture Loss
Watch out for a few common mistakes that can flatten or wash out your knockdown texture.
Using high-sheen paint, over-rolling or pressing too hard, skipping primer on patched areas, picking the wrong roller nap or sprayer pressure, and painting in unsuitable temperature or humidity all cause texture loss.
Addressing those issues up front will help you preserve the ceiling’s look.
Using high-sheen paint that highlights or smooths texture
Pick a paint sheen that works with texture, not against it. You shouldn’t use glossy or semi-gloss finishes on a knockdown ceiling because they reflect light and emphasize imperfections, making peaks look smooth or shiny.
Choose flat or low-sheen ceiling paint to preserve shadowing and depth.
Test a small area first to confirm the appearance before painting the entire ceiling.
Over-rolling or excessive pressure
Once you’ve chosen a low-sheen paint to preserve shadow and depth, be careful how you apply it: over-rolling or pressing too hard with a roller will flatten the knockdown peaks and erase the texture you worked to create.
Use a light touch, thin even coats, and a nap roller suited for textured surfaces. Let each coat dry fully before a gentle second pass.
Painting without priming damaged areas
If you skip priming over patched or damaged areas, the new paint can soak in unevenly and make those spots stand out or lose texture; prime guarantees consistent absorption so your knockdown peaks stay visible and blend with the surrounding surface.
Don’t assume minor repairs won’t show—use a quality primer on patches, feather edges, then paint. That preserves texture and uniform appearance.
Using the wrong roller nap or sprayer pressure
A roller with too short a nap or a sprayer set at excessive pressure will flatten your knockdown peaks and leave the ceiling looking dull and uneven.
Choose a thick-nap roller (3/4″–1″) for gentle coverage and adjust sprayer pressure low to medium.
Test on a scrap board, apply thin even coats, and keep tools moving to preserve texture without overworking the surface.
Painting in poor environmental conditions
When you paint in very cold, hot, humid, or breezy conditions, the paint can dry too quickly or too slowly and cause the knockdown texture to soften, sag, or blister.
You should monitor temperature and humidity, paint within the manufacturer’s recommended range, and avoid windy days.
Use fans or heaters cautiously to control drying; improper environmental control ruins texture and wastes effort.
Alternatives if Preserving Texture Isn’t Possible or Desired
If preserving the knockdown isn’t an option, you can retexture the ceiling with a new knockdown, orange peel, or skip trowel, or skim it smooth with joint compound for a clean look.
You could also install ceiling panels or planks for a more finished, low-maintenance surface.
Consider hiring a professional for large areas, tricky repairs, or when you want a flawless finish.
Retexturing options (re-knockdown, orange peel, skip trowel)

Because preserving the original knockdown texture isn’t always possible or wanted, you can choose from several retexturing options—re-knockdown, orange peel, or skip trowel—each giving a distinct look and finish.
You can match the original by re-knockdown, get subtle dimpling with orange peel, or create directional, rustic lines with skip trowel.
Choose based on room style, lighting, and maintenance preferences.
Skimming with joint compound for a smooth ceiling
Skimming a knockdown ceiling with joint compound gives you a clean, modern look by covering texture rather than matching it. You can expect to spend a day or two on prep and multiple thin coats.
You’ll tape seams, sand between coats, and feather edges for uniformity. Prime after smooth sanding, then paint.
Expect dust, ventilation, and patience for flawless results.
Installing ceiling panels or planks
When smoothing the ceiling isn’t practical or you want a different look, installing ceiling panels or planks offers a fast, low-dust way to cover texture and refresh the room.
You can use lightweight PVC, MDF, or tongue-and-groove wood, cut to fit, and attach to furring strips or directly to joists.
Paint or stain panels after installation for a crisp, uniform finish.
When to hire a professional
If preserving the existing knockdown texture isn’t feasible or you want a different finish, hire a pro to avoid costly mistakes and get predictable results.
You should call a pro when the ceiling has extensive damage, uneven substrate, or you lack scaffolding and experience.
Professionals handle texture removal, skim coats, and new finishes efficiently, guarantee proper ventilation and cleanup, and warranty their work for peace of mind.
Best Practices and Tips to Maintain Knockdown Texture After Painting
Choose a durable, low-sheen paint—eggshell or flat with a quality brand like Benjamin Moore, Sherwin-Williams, or Behr—to keep your knockdown texture looking crisp without highlighting imperfections.
Wipe stains gently, fix leaks promptly, and avoid heavy scrubbing or repainting with high-gloss coats that can flatten the texture.
In humid rooms like bathrooms and kitchens, use moisture-resistant paints and improve ventilation to prevent peeling and mold.
Recommended paint finishes and brands
Because the right finish preserves the knockdown’s shadows and highlights, you’ll typically want a flat or matte ceiling paint—or an ultra-flat, low-sheen product designed for ceilings—to hide imperfections while keeping texture visible.
Flat finishes minimize glare and touch-ups, while satin or eggshell can be used sparingly in high-moisture rooms if you need extra durability, though they’ll slightly reduce the texture’s contrast.
Choose quality brands like Benjamin Moore, Sherwin-Williams, Farrow & Ball, or Behr; use ceiling-specific formulas (e.g., Benjamin Moore’s Waterborne Ceiling Paint or Sherwin-Williams’ ProClassic Interior Ceiling) and test a small area first to confirm appearance.
Maintenance tips to avoid future damage
Now that you’ve picked the right finish to protect and showcase the knockdown texture, keep it looking sharp with a few simple maintenance habits.
Dust gently with a microfiber duster monthly, spot-clean stains with a mild detergent and soft sponge, avoid abrasive scrubbing, fix small cracks or chips with matching paint and caulk promptly, and control humidity to prevent peeling or mold.
Seasonal and room-specific considerations (bathrooms, kitchens)
When humidity spikes or cooking steam fills the air, your knockdown ceiling needs tailored care to stay intact and mold-free. In bathrooms and kitchens, you should prioritize ventilation, regular quick inspections, and gentle cleaning to prevent moisture buildup and grease from breaking down paint or texture.
Use exhaust fans, a dehumidifier in damp seasons, and wipe splatters promptly. Touch up with mildew-resistant paint.
Troubleshooting Scenarios and Fixes
If your knockdown texture looks flattened after painting, you’ll want to restore the peaks by lightly misting and retexturing the area or applying a targeted skim coat of texture compound.
If you see roller marks or lines, sand the ridges smooth, feather the edges, and re-roll with a light, consistent pressure using a quality roller cover.
For paint drips caught in recesses, carefully remove dried drips with a putty knife or scraper, sand, spot-prime, and touch up with matching paint and texture.
Painted texture looks flattened how to restore appearance
Because paint can settle into the low spots and reduce contrast, a newly painted knockdown ceiling often looks flattened compared with its original textured appearance.
To restore depth, lightly mist with a low-pressure sprayer and dry-brush a slightly darker glaze into recesses, then wipe excess.
Alternatively, use a touch-up spritz of flat paint on raised areas to recreate shadow and highlight contrast.
Visible roller marks or lines corrective steps
Although a knockdown ceiling should have a uniform finish, visible roller marks or lines can stand out and ruin the texture’s look. You’ll want to address them quickly to avoid reworking the whole surface.
Lightly sand raised lines with fine-grit paper, vacuum dust, then feather a thin coat of matching flat paint using a high-density roller and long, even strokes.
Inspect and touch up seams.
Paint drips in recessed areas removal and repair
Spot and address drips in recessed areas as soon as you notice them to prevent visible ridges and uneven drying.
Gently scrape excess with a clean putty knife, feathering edges to match surrounding texture. Let it dry, then sand lightly if needed.
Reapply thin, stippled touch-ups with a brush or small roller, blending into the knockdown pattern until the repair is indistinguishable.
FAQ
You’ve probably got a few quick questions about how paint affects the look and coverage of a knockdown ceiling, whether a sprayer will work without removing texture, and how many coats you’ll need.
You’ll also want to know if hiring a pro makes sense for large rooms or texture removal, and whether paint alone will hide stains like water marks or nicotine.
Read on for concise answers and practical tips so you can decide the right approach.
Will paint change the color depth or shadows in knockdown texture?
Will paint affect the perceived depth and shadows of a knockdown texture? Yes—paint can slightly soften highlights and deepen shadow contrast depending on sheen and color.
Flat or matte finishes preserve more texture; glossier paints reflect light and reduce apparent depth.
Choose mid to low sheen and match paint color to existing tones to keep texture definition without flattening the surface.
Can I use a paint sprayer on a knockdown ceiling without removing texture?
Yes—you can use a paint sprayer on a knockdown ceiling without removing the texture, but you’ll need the right gear and prep to avoid over-saturation and overspray.
Use an HVLP or airless sprayer with a medium nozzle, thin paint per manufacturer, practice spray passes, keep distance consistent, and mask walls, fixtures, and floors thoroughly to protect surfaces and maintain texture integrity.
How many coats of paint are typically needed?
How many coats do you need for a knockdown ceiling?
Typically two coats provide even coverage and maintain texture—one primer or sealer if stains or drastic color changes exist, then an acrylic flat or matte ceiling paint.
Use a roller or sprayer for uniformity, let proper drying time between coats, and inspect under varied light to decide if a third touch-up coat is necessary.
Is it better to hire a pro for large ceilings or popcorn/knockdown removal?
Thinking about tackling a large knockdown or popcorn ceiling yourself? If the area’s huge, ceilings are high, or popcorn contains potential asbestos, hire a pro.
Pros have scaffolding, specialized tools, and experience to preserve or safely remove texture without damage. For smaller, accessible rooms you might DIY, but don’t risk safety, code compliance, or costly mistakes on complex jobs.
Will painting cover stains like water marks or nicotine without additional prep?
If you skip prep and just roll paint over water stains or nicotine, the discoloration will usually bleed through and show up as splotches or yellowing.
You need to clean, dry, and treat stains first. Use a stain-blocking primer or shellac for nicotine and tannins, and a mildew/kilz-type primer for water marks.
Then repaint for consistent coverage and longevity.
