Can You Paint Over Chrome Finish? The Honest Answer and How to Do It Right
You can paint over chrome, but it’ll only last if you remove the shine, scuff the surface, and use the right primers and paints so the finish bonds. Clean thoroughly, sand to roughen, apply an adhesion promoter or etch primer, then use a primer suited to metal or plastic before painting and clear-coating. Expect wear on high-use parts and consider replating for valuable items. Keep going to learn the exact steps, products, and troubleshooting tips.
Can You Paint Over Chrome Finish? Quick Answer
Yes—you can paint over chrome, but only when you properly prep it and the piece isn’t meant to stay high-gloss or highly functional.
You should paint chrome for cosmetic updates or minor fixtures that won’t see heavy wear, and skip it for precision parts, high-temperature items, or where the original finish is needed.
If you’re unsure, test a small area first and consider professional replating for valuable or heavily used pieces.
Direct short answer for homeowners and DIYers
Wondering if you can paint over chrome? Yes — with prep.
You can paint over chrome finish, but success depends on proper cleaning, sanding or etching, and using adhesion primer plus appropriate paint.
For homeowners and DIYers, follow manufacturer steps, work in ventilated space, and expect durable results only if you prep thoroughly.
Skip shortcuts to avoid peeling or chipping.
When painting chrome is advisable vs when it’s not
The short answer is that painting chrome can make sense in some situations and not in others, depending on the part’s function, exposure, and your willingness to prep and maintain it.
Paint chrome when the piece is decorative, indoors, or low-touch.
Avoid painting structural, high-heat, or frequently handled items.
If you can’t commit to thorough prep and periodic touch-ups, don’t paint it.
How Chrome Finishes Work (Basic Understanding)
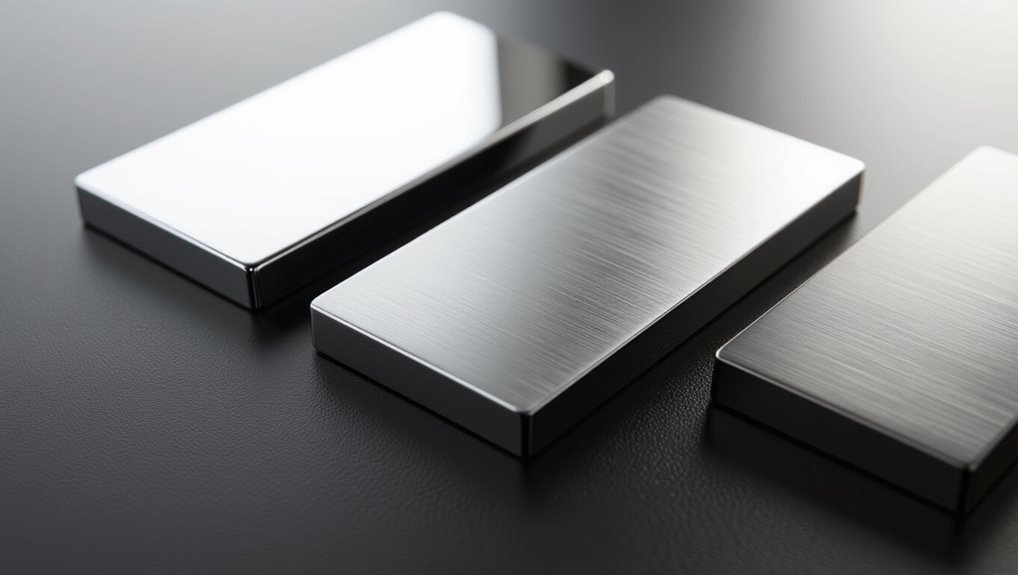
Chrome plating is a thin metallic layer applied to steel, aluminum, or plastic to give you a shiny, corrosion-resistant surface. It comes as solid chrome, chrome-plated plastic, or chrome-look trim.
You’ll find chrome hard to paint because its smooth, nonporous finish resists adhesion and is often designed to repel corrosion and wear. Knowing which chrome type you’re dealing with is key to choosing the right prep and coating approach.
What is chrome plating and common chrome finishes
Plating mixes art and chemistry to give metal surfaces that bright, mirror-like look you see on bumpers, faucets, and trim.
Chrome plating deposits a thin chromium layer over nickel or copper for durability and shine.
You’ll encounter decorative chrome (thin, highly reflective) and hard chrome (thicker, wear-resistant).
Finishes vary from mirror to satin, each offering different appearance and protective qualities.
Why chrome is challenging to paint (adhesion, smoothness, corrosion resistance)
Because chrome finishes are engineered to repel contaminants and resist wear, getting paint to stick is harder than it looks.
You’ll face ultra-smooth, nonporous surfaces that reduce mechanical grip, low surface energy that rejects coatings, and corrosion-resistant layers that block chemical etching.
To succeed, you must abrade, clean, and use proper adhesion promoters; skip steps and paint will flake.
Types of chrome surfaces: solid chrome, chrome-plated plastic, chrome-look trim
When you’re deciding how to refinish a shiny metal part, it helps to know there are three common chrome types: solid chrome (heavy metal with a chrome surface), chrome-plated plastic (plastic cores coated to look metallic), and chrome-look trim (thin decorative finishes like vacuum-metallized or painted chrome effects).
You’ll treat each differently: sandable solid chrome, delicate plating needing stripping, and fragile trim often requiring replacement.
What You Need to Know Before Painting Chrome
Before you start, you’ll need to identify whether the chrome is plated on metal or plastic because each substrate needs different prep and primers.
You should also plan for proper ventilation and PPE, and be aware of possible lead or chrome hazards on older parts.
Finally, gather the right tools and materials—abrasives, adhesion promoter, primer, and paint—so you’re ready to work safely and effectively.
Assessing the substrate: metal vs plastic
To get a durable paint job on chrome, you need to identify whether the chrome layer is over metal or plastic, because each substrate requires different prep and primers.
Metal needs rust removal, sanding to bare spots, and metal-etching primer.
Plastic needs scuffing with fine abrasive, plastic adhesion promoter, and flexible primer.
Test a small area to confirm adhesion before full coating.
Safety considerations (ventilation, PPE, lead/chrome hazards)
Now that you’ve identified whether the chrome sits over metal or plastic, you need to think about safety—paint fumes, dust from sanding, and old finishes can pose real health and fire risks.
Work outdoors or in a well-ventilated area, wear a respirator rated for solvents and particulates, safety goggles, and gloves.
Test for lead or chrome plating hazards; stop and get professional help if detected.
Tools and materials overview
Anyone tackling chrome painting should gather the right tools and materials up front so the job goes smoothly and lasts.
You’ll need quality supplies and the proper prep to guarantee adhesion and durability. Key items include cleaners, sandpaper, primer, and paint.
Gather protective gear and masking supplies too.
- Cleaner/degreaser
- Sandpaper (400–800 grit)
- Adhesion primer
- Chrome-compatible paint
Step-by-Step Guide: How to Paint Over Chrome the Right Way
Before you start, you’ll want to follow a clear sequence: clean the chrome thoroughly, sand or scuff it to the right grit, then use an adhesion promoter or etch primer.
Next, pick a primer suited to metal or plastic and decide between spray or brush application for your chosen paint, planning coats and drying times.
I’ll walk you through specific products, grit recommendations, and techniques for each step so you get a durable finish.
Step 1 Clean the surface thoroughly (products and technique)
Since paint won’t stick to grease or residue, start by degreasing and decontaminating the chrome so the primer can bond properly.
Wipe with a lint-free cloth and a solvent like isopropyl alcohol or dedicated citrus degreaser. Rinse, dry, then remove remaining contaminants with a tack cloth.
For stubborn oils, use a mild detergent, rinse thoroughly, and let the surface air-dry.
Step 2 Sanding and scuffing: grit recommendations and methods

When the chrome is clean and dry, you’ll need to scuff the surface so primer can bite—use fine abrasives and steady, even pressure to avoid gouging the metal.
Start with 400–600 grit for light scuffing; move to 800–1000 grit for smoothing. Use a sanding block or Scotch-Brite pad, wipe debris frequently, and inspect for uniform dulling before priming.
Step 3 Using adhesion promoter/etch primer: product types and application
Now that the chrome is uniformly dulled and clean, you’ll need a product that forces paint to stick: an adhesion promoter or an etch primer.
Choose a solvent-based adhesion promoter for plastics or a zinc/phosphoric acid etch primer for bare metal.
Apply thin, even coats per manufacturer instructions, allow proper flash time, and sand lightly between coats if specified before moving to a sealing primer.
Step 4 Choosing the right primer for metal vs plastic
Step 4: Pick a primer that matches the substrate—metal and plastic need different chemistry to bond and resist flaking.
For metal, use a corrosion-resistant etch or self-etching primer that bonds to chrome.
For plastic, choose a plastic-specific adhesion primer or a flexible, universal adhesion promoter.
Follow manufacturer instructions and verify full cure before topcoating to prevent peeling and guarantee durability.
Step 5 Applying paint: spray vs brush, paint types, coats and drying times
With the primer fully cured, it’s time to apply paint and choose the method that fits your part and skill level.
Use spray for smooth, even coats on curves; brush for small touch-ups.
Pick enamel for durability or acrylic for easy cleanup.
Apply thin, even coats—usually two to three—allowing manufacturer-recommended flash and full dry times between coats for best adhesion and finish.
Step 6 Clear coat and finishing for durability and gloss
Seal the job by applying a clear coat to protect the paint and bring out the gloss—this layer locks in color, adds abrasion and chemical resistance, and gives you the polished look chrome originally had.
Use multiple thin, even passes with a compatible automotive or enamel clear, flash between coats per instructions, avoid runs, and finish with light wet-sanding and polishing for uniform high-gloss durability.
Step 7 Curing time and post-paint care
Allow the paint to cure fully before you handle the piece—curing times can range from a few hours for surface tack to several days or even weeks for full chemical resistance depending on the paint and clear coat you used.
During curing, keep the piece dust-free, dry, and at recommended temperature.
Avoid heavy handling, waxing, or exposing it to chemicals until the manufacturer’s full cure time has passed.
Product Recommendations and Materials Comparison
Now you’ll compare specific products and materials so you can pick the right combo for your chrome project.
I’ll cover top primers for chrome-plated metal and chrome plastics, contrast paint types like acrylic, enamel, automotive, and high-heat, and recommend adhesion promoters plus clear coats.
This will help you match adhesion, durability, and finish needs before you start.
Best primers for chrome-plated metals
When you’re painting chrome-plated metal, choosing the right primer makes the biggest difference in adhesion and durability; not all primers bond to smooth, non-porous chrome, so you’ll want products formulated for metal and chemically etching surfaces.
| Primer | Type | Best for |
|---|---|---|
| 3M Metal Primer | Self-etching | Automotive chrome |
| Rust-Oleum Adhesion | Bonding | Trim and fixtures |
| SEM Trim Prep | Prep/primer | Small parts |
Best primers for chrome-plated plastics
Because chrome-plated plastics are smooth, nonporous, and often backed by a thin plastic substrate, you’ll need primers formulated specifically to etch or chemically bond to both chrome and plastics; standard metal primers usually won’t stick. Use adhesion promoters like plastic etch primers or self-etching primers. Test adhesion first.
| Primer Type | Best Use |
|---|---|
| Plastic etch | Strong bond |
| Self-etch | Quick prep |
| Two-part epoxy | Durable |
| Adhesion promoter | Flexible substrates |
Paint types compared: acrylic, enamel, automotive, high-heat
While each paint type can cover chrome with the right prep, you’ll get different durability, finish, and ease-of-use depending on whether you choose acrylic, enamel, automotive, or high-heat formulations.
Acrylic is user-friendly and fast-drying but less durable.
Enamel gives a hard, glossy finish.
Automotive spray paints resist chips and UV.
High-heat paints withstand exhaust and grills without degrading.
Recommended adhesion promoters and clear coats
If you want paint to stick reliably to chrome, start with a quality adhesion promoter formulated for metal and chrome surfaces.
Choose silane-based or etching primers (e.g., Dupli-Color Metal Cast, SEM Trim Adhesion Promoter).
Follow with a compatible base coat—automotive urethane or enamel—and finish with a durable clear coat like 2K polyurethane for UV and scratch resistance.
Common Problems and Mistakes When Painting Chrome
When painting chrome you’ll run into a few predictable problems — poor adhesion that leads to peeling, orange-peel texture or runs, and chemical blistering from reactions between coatings and chrome.
You should know what causes each issue and how to fix or prevent them, and recognize when repainting won’t work and the piece needs stripping or replacement.
Addressing surface prep, correct primers and thin, even coats usually solves most failures before they start.
Poor adhesion and paint peeling: causes and fixes
Because chrome is nonporous and slick, paint often struggles to stick and can start peeling soon after you finish the job.
To prevent this, sand lightly, clean with solvent, and apply a quality etching primer. Use thin, even coats and allow full curing between layers.
If peeling occurs, strip to bare metal, re-prepare the surface, and repaint following those steps.
Orange peel, runs, and uneven finish: prevention and correction
Although chrome’s smooth surface can yield a glossy result, you’ll often run into orange peel, runs, or uneven texture unless you control spray technique, paint viscosity, and environmental conditions.
To prevent issues, thin paint per instructions, keep consistent gun distance and speed, and spray in light overlapping passes.
Fix minor defects with wet sanding and recoat; heavy flaws need stripping and starting fresh.
Chemical reactions and blistering: what triggers them
Fixing orange peel and runs won’t help if the paint later blisters or peels off the chrome.
You’ll get blisters when solvents, moisture, or incompatible primers react with the chrome or trapped contaminants. Acidic cleaners, poor adhesion promoters, or painting over oil leave pockets that expand.
Prevent problems by thoroughly cleaning, using compatible primers, allowing solvents to evaporate, and avoiding moisture before curing.
When repainting fails: when to strip or replace chrome
When repainting keeps failing despite proper prep and compatible products, it’s time to contemplate stripping or replacing the chrome rather than chasing more coatings.
You should strip when corrosion, pitting, or adhesion loss recurs.
Replace if chrome is thin, warped, or structurally compromised.
Factor cost, availability of replacement parts, and desired finish longevity before deciding—temporary paint fixes won’t solve underlying metal damage.
Alternatives to Painting Chrome
If you’re not set on traditional paint, there are practical alternatives worth considering.
You can use Plasti Dip or other peelable coatings for temporary coverage, or choose vinyl wraps and chrome covers for precise, reversible results.
For a long-term fix, weigh re-chroming or professional refinishing against DIY paint regarding cost, durability, and finish quality.
Plasti Dip and peelable coatings: pros and cons
Although plasti dip and other peelable coatings aren’t permanent, they give you a fast, reversible way to change chrome’s look without sanding or stripping.
They let you test colors or finishes knowing you can peel them off later. You can spray easily, avoid chemical prep, and remove mistakes.
However, durability, texture, and resistance to solvents or heavy wear are weaker than baked paints.
Vinyl wraps and chrome covers
Because vinyl wraps and snap-on chrome covers let you change chrome without permanent work, they’re a popular alternative to painting—you can get dramatic results fast and reverse them later.
You apply wraps for color, texture, or protection, and covers for trim-specific changes. Both avoid sanding and primer, let you test styles, and are removable—ideal if you want flexibility without committing to paint or costly refinishing.
Re-chroming and professional refinishing vs DIY paint
When you want a finish that matches factory chrome in durability and shine, re-chroming or professional refinishing will outperform any DIY paint job.
You’ll get proper surface prep, plating or durable coatings, and expertise that prevents peeling, corrosion, and uneven gloss.
Expect higher cost and longer turnaround, but the result lasts longer and preserves value compared with painted chrome alternatives.
Maintenance, Longevity, and Best Practices
Once you paint chrome, you’ll need a clear routine to keep the finish looking good and to catch wear early.
Learn simple touch-up techniques, when a spot needs recoat versus full refinishing, and how cleaning products and exposure to moisture or abrasion shorten lifespan.
With the right care plan and timely repairs, your painted chrome can stay serviceable much longer.
How to maintain painted chrome surfaces
A few simple habits will keep painted chrome looking great and extend its lifespan:
Wipe regularly with a soft, damp cloth and mild detergent; avoid abrasive cleaners or pads.
Dry thoroughly to prevent water spots.
Use gentle car or furniture polish sparingly for shine.
Protect high-contact areas with clear sealant or felt pads.
Inspect periodically and address chips promptly to prevent corrosion.
Touch-up techniques and when to recoat
If you spot small chips or scratches in painted chrome, act quickly to touch them up before moisture reaches the metal and the damage spreads.
Clean, sand lightly, prime with an adhesion promoter, and use matching touch-up paint in thin layers.
Recoat when wear becomes visible or after several years; test adhesion first and always cure between coats for durable results.
Environmental and usage factors that affect lifespan
Because exposure and how you use chrome greatly determine how long paint or touch-ups last, pay attention to conditions like humidity, salt, UV, and abrasion.
You should store items indoors when possible, rinse salt and contaminants promptly, use UV-resistant clear coats, and avoid harsh cleaners.
Frequent inspection and gentle maintenance will catch failures early and extend the coating’s effective life.
Cost and Time Estimates
You’ll want to compare a DIY cost breakdown—sandpaper, primer, paint, masking tape, and any rental tools—plus the few hours the project will take.
Expect materials for a small job to run $30–$150 and a weekend for prep and coats, while a pro refinishing job can cost $150–$600 and take a day or two.
We’ll compare those estimates and the tradeoffs between time, cost, and finish quality.
Typical DIY cost breakdown (materials, tools, time)
When planning a DIY chrome-paint project, break costs into three clear categories—materials, tools, and your time—so you’ll know where money’s going and where you can save.
Expect materials (primer, paint, clear coat, sandpaper) $15–60, basic tools (spray gun or brushes, masking tape) $10–80, and labor: 3–8 hours depending on prep and drying.
Budget modestly for touch-ups.
Professional refinishing vs DIY: estimated costs and timelines
While tackling chrome refinishing yourself can save money upfront, hiring a pro usually delivers faster, more consistent results—so weigh cost against convenience and longevity. You’ll pay roughly $50–$200 DIY (materials, 4–8 hours) versus $150–$600 pro (1–3 days). Choose DIY for savings; choose pros for durability and speed.
| Option | Typical Range |
|---|---|
| DIY cost/time | $50–$200 / 4–8 hrs |
| Pro cost/time | $150–$600 / 1–3 days |
Real-World Scenarios and Case Examples
When you’re tackling chrome in real life, the challenges differ by object — automotive bumpers and trim need durable prep for road wear, faucets and plumbing fixtures require smooth, water-resistant coatings, and chrome-plated plastic on appliances calls for special primers to avoid peeling.
You’ll see different timelines, costs, and failure modes in each case, so methods that work on metal won’t always work on plastic.
Use these examples to pick the right prep, primer, and paint for the specific chrome surface you’re working on.
Painting chrome bumpers and trim (automotive)
1 common project car dilemma is whether you can paint chrome bumpers and trim—and how they’ll hold up. You can, but prep matters: sand, de-grease, etch primer, then flexible adhesion primer and automotive paint.
Expect thinner coverage and potential chipping on high-impact edges; consider professional powder coating or vinyl wrap for durability.
Test on a small section first.
Painting chrome fixtures (plumbing, faucets)
Painting chrome plumbing fixtures and faucets is entirely doable, but you’ll need careful prep and the right products for a durable result.
You’ll strip grime, scuff with fine sandpaper, and use an etching primer designed for metal.
Choose a water-resistant enamel or epoxy topcoat, mask surrounding surfaces, and allow full cure.
Expect occasional touch-ups; heavy wear areas may need replacement instead.
Painting chrome-plated plastic parts (appliance trim)
Curious whether you can refinish that shiny appliance trim? You can — but first verify it’s chrome-plated plastic, not metal.
Sand gently with fine grit, clean thoroughly, apply plastic adhesion promoter, then prime with a plastic-compatible primer.
Use thin coats of high-quality paint and clear coat for durability.
Test on a hidden area first to confirm adhesion and heat resistance.
Frequently Asked Questions (FAQ)
You’ve probably got specific questions—like whether you can paint chrome without sanding or if spray paint will stick.
You’ll also want to know how long painted chrome lasts, whether you can restore shine afterward, and if removing the chrome plating first is worth it.
Below are clear, practical answers to those common concerns.
Can you paint chrome without sanding?
Can you paint chrome without sanding? You can, but it’s risky.
Paint may peel or chip because smooth chrome lacks tooth for adhesion. If you skip sanding, use a strong adhesion promoter or etching primer and thoroughly clean and de-grease the surface.
Expect shorter durability than a properly prepped job. For lasting results, light sanding is still recommended.
Will spray paint stick to chrome?
While spray paint can stick to chrome, it won’t hold well unless you prep the surface—clean, de-grease, and scuff or use a proper adhesion promoter or etching primer first.
After prepping, apply light, even coats and allow proper flash time. Skip rushing; curing matters.
Without these steps, paint will chip, peel, or flake quickly, wasting effort and materials.
How long does painted chrome last?
How long painted chrome lasts depends on prep, paint quality, and use—properly prepped and primed chrome that’s coated with a durable paint and sealer can last several years under normal conditions, while poor prep or heavy wear will make it chip or peel in months.
You’ll extend life by sanding, using adhesion promoter, applying multiple thin coats, and sealing. Regular gentle care prevents premature failure.
Can you restore chrome shine after painting?
Yes — you can often restore a chrome-like shine after painting, but how successful you’ll be depends on the paint type and how it’s finished; lightly scuffed or aged paint can be buffed and topped with a metallic or chrome-effect coating, while fully opaque or heavily damaged paint may need stripping back to bare chrome or re-plating for a true mirror finish.
You can wet-sand, polish, then apply a chrome spray or clear topcoat.
Is it better to remove chrome plating before painting?
Should you strip chrome before painting? Yes — removing chrome gives the best adhesion and durability.
If you leave chrome, paint may peel or chip over time even with primers.
Use chemical stripper or media blasting, then clean, sand, and apply an appropriate primer for metal.
Stripping adds time but prevents costly rework and guarantees a longer-lasting, professional-looking finish.