Can You Paint Stairs With Wall Paint? What You Need to Know First
You can paint stairs with wall paint in low-traffic or decorative areas, but you shouldn’t expect long-lasting results. Wall paint lacks the abrasion resistance and toughness of floor or porch paints, so you’ll need excellent prep, a quality primer, multiple thin coats, and a durable topcoat or clear sealer plus non-slip additives for safety. It’s fine for occasional-use steps or risers, not for busy indoor or outdoor stairs, and below you’ll find the how-to, limits, and alternatives.
Quick Answer Can You Paint Stairs with Wall Paint?
Yes—you can use wall paint on stairs for low-traffic or decorative steps where durability isn’t critical.
You shouldn’t use it on high-traffic treads, slippery surfaces, or wood that needs tough wear resistance.
Below we’ll explain when wall paint is acceptable and when you should choose floor or porch paint instead.
Short direct answer
You can use wall paint on stairs in a pinch, but it’s not ideal—wall paint won’t hold up as well to heavy foot traffic or abrasion, so you’ll need to prepare the surface thoroughly and seal it with a durable topcoat or choose a paint formulated for floors.
If you ask “can you paint stairs with wall paint,” expect shorter lifespan and higher maintenance; plan for protection.
When it’s acceptable and when it’s not
If your stairs get light, occasional use—like a seldom-used guest room or decorative risers—wall paint can work temporarily, provided you prep properly and add a protective topcoat.
For main stairways, high-traffic homes, or outdoor steps, though, pick a floor or trim paint designed for abrasion and slip resistance.
Test adhesion, add non-slip additives, and plan to refinish sooner if wear appears.
How Stair Surfaces Differ from Walls
Stairs aren’t the same as walls: they can be wood, concrete, carpet, or metal, and each material needs different prep and products.
You’ll also have much higher traffic and abrasion on treads, so durability matters more than on a vertical surface.
Finally, you’ve got to take into account safety—slip resistance and edge visibility are critical when choosing coatings.
Material types (wood, concrete, carpet, metal)
Material matters: stair surfaces—wood, concrete, carpet, and metal—behave very differently from painted walls, so you’ll need to choose products and prep methods that match each substrate.
For wood, sand, prime, and use durable floor or trim paint.
For concrete, etch and use masonry paint.
For carpet, painting’s usually impractical.
For metal, de-rust, prime with metal primer, then use enamel.
Traffic, abrasion, and wear factors
You’ve picked the right products for wood, concrete, carpet, or metal—but now think about how people use stairs versus walls.
Stairs get constant foot traffic, scuffs, dragging, and concentrated wear at nosing and edges. You’ll need harder‑wear finishes, frequent touchups, and paint that resists abrasion and impact.
Expect faster degradation than walls and plan maintenance accordingly.
Safety considerations (slip resistance, visibility)
Because people walk, slide, and carry things on stairs, surfaces need more than the look of wall paint—they need slip resistance and clear visual cues.
You should choose paint or coatings with anti-slip additives, textured finishes, and high-contrast nosing strips.
Also make certain non-gloss sheens reduce glare, and maintain markings.
Prioritize safety-rated products and proper application to prevent slips and trips.
What Wall Paint Is Composition and Properties
You’ll usually find wall paints in latex, acrylic, or enamel formulations, each offering different durability and finish levels from flat to high gloss.
Pay attention to adhesion and flexibility—latex and acrylic bend with temperature changes better, while enamel gives tougher, more scuff-resistant surfaces.
Those composition and property differences are key when you’re considering whether a wall paint can handle stair traffic.
Common wall paint types (latex, acrylic, enamel)
Paint comes in three everyday families you’ll encounter when choosing wall coatings: latex, acrylic, and enamel.
You’ll find latex (water-based) easy to clean and fast-drying. Acrylic offers better adhesion and UV resistance for tougher spots. Enamel (often oil- or alkyd-based) gives harder, more chip-resistant surfaces.
Choose based on substrate, moisture exposure, and how much wear the stairs will face.
Typical finish levels and durability
After picking between latex, acrylic, or enamel, you’ll want to evaluate finish level and how that affects durability.
Gloss and semi-gloss resist scuffs, wipe clean easily, and suit high-traffic treads. Satin hides imperfections but wears faster. Flat or eggshell won’t hold up on stairs.
Choose higher-sheen for longevity, then pair with proper prep and a durable topcoat or sealer for extra protection.
Adhesion and flexibility characteristics
While wall paints can look fine on stairs, their adhesion and flexibility differ from floor-specific coatings, so you should check composition before using them on treads.
You’ll find many wall paints lack elastomers and abrasion resistance, so they can crack or peel under foot traffic and movement.
Choose formulas labeled for floors or high-traffic surfaces, or add primers and flexible topcoats to improve performance.
Risks and Problems When Using Wall Paint on Stairs
If you use wall paint on stairs, you’ll likely see durability problems and premature wear because it’s not made for heavy foot traffic.
It can also create a slip hazard since most wall paints lack anti-slip properties, and you’ll notice chipping, scuffing, and ongoing maintenance headaches.
Finally, the finish may look wrong—uneven sheen and wear will show where people step most.
Durability and premature wear
Because stairs see constant foot traffic and spot impacts, wall paint usually can’t hold up long-term on treads and risers.
You’ll notice scuffs, chipping, and thin areas where finish wears away within weeks or months.
Wall paint lacks the abrasion resistance and flexible formulation stair surfaces need, so you’ll face frequent touch-ups, accelerated deterioration, and a need for more durable coatings or protective finishes.
Slip hazard and lack of anti-slip properties
Those scuffs and chips aren’t just cosmetic — they also expose slick, untreated surfaces that raise your risk of slips and falls.
Wall paint usually lacks textured additives and durable topcoats needed for traction. If you use it, you’ll create smooth, slippery steps, especially when wet or when wearing socks.
Opt for anti-slip treatments or stair-specific coatings to maintain safe footing.
Chipping, scuffing, and maintenance issues
When you paint stairs with wall paint, expect the finish to show wear quickly—wall paint isn’t formulated to handle constant foot traffic, dragging shoes, and kicks against risers.
You’ll see chips, scuffs, and scratches along treads and edges. Repairs become frequent; touch-ups stand out without matching sheen or layering.
Expect more sanding, patching, and recoating to maintain appearance and safety.
Appearance problems (sheen, uneven wear)
Although wall paint can look fine at first, its low-durability sheen quickly betrays high-traffic stairs: you’ll notice glossy spots on edges, dull patches where shoes scuff, and an inconsistent overall finish as different areas wear at different rates.
You’ll also get color fading, visible brush marks, and uneven sheen between treads and risers; frequent touch-ups become necessary and the stairs look tired fast.
When Wall Paint Can Be Used on Stairs (Situations & Limits)
You can sometimes get away with wall paint on low-traffic, decorative, or temporary stairs where durability isn’t critical.
It works best indoors and is usually unsuitable for exterior steps exposed to weather or heavy wear.
If you’re repainting over an existing, durable finish the wall paint may hold up, but it’ll struggle on bare wood or metal unless you prime and topcoat appropriately.
Low-traffic, decorative, or temporary stairs
If stairs see only occasional use—like a decorative set in a showroom, a temporary display, or a seldom-used guest staircase, you can get away with wall paint for short-term aesthetics; just expect faster wear and plan for touch-ups or a future repaint with a floor-rated product.
Use durable primer, choose a semi-gloss for easier cleaning, and keep weight and moisture low to extend life.
Indoor vs outdoor applications
When deciding whether to use wall paint on stairs, consider where the stairs sit: indoor stairs face milder temperatures, less UV, and lower moisture, so wall paint can work short-term in low-traffic areas.
While outdoor stairs endure sun, rain, freeze-thaw cycles, and dirt that will quickly break down wall paint and cause peeling, fading, and slippery surfaces.
Indoors, expect limited durability; outdoors, avoid wall paint.
Overcoating existing finishes vs bare substrate
Outdoor conditions aside, the surface you’re painting matters more than whether the paint is labeled for walls.
If you’re overcoating a sound, glossy finish, sand and prime with a bonding primer first; wall paint may adhere.
On bare wood or concrete, use a floor/trim-grade primer and durable topcoat—wall paint alone won’t resist traffic, moisture, or abrasion without proper substrate prep and protective finish.
Recommended Alternatives to Wall Paint for Stairs
If you want stairs that stand up to traffic, consider floor paints or porch and floor enamels designed for wear.
For heavy-duty protection choose two-part epoxy or polyurethane coatings, or pick specialty stair paints with anti-slip additives for safety.
On wood stairs, a stain and sealer combo can preserve the grain while giving durable protection.
Floor paints and porch & floor enamels
Although wall paints might seem like a quick fix, you’ll get far better results with products made specifically for floors—floor paints and porch/floor enamels are formulated for heavy foot traffic, better adhesion, and abrasion resistance so they last longer on stairs.
Choose oil- or water-based floor enamel, prep thoroughly, and use non-slip additives for safety.
- Durable finish
- Easy maintenance
- Slip-resistant options
Two-part epoxy and polyurethane coatings
When you need maximum durability and chemical resistance on stairs, two-part epoxy and polyurethane coatings are the go-to option; they cure into a hard, abrasion-resistant film that stands up to heavy foot traffic, spills, and scuffing far better than wall paint.
You’ll get tough, long-lasting protection, but expect more prep, precise mixing, strong fumes, longer cure times, and professional application for best results.
Specialty stair paints with anti-slip additives
Because stairs need both traction and durability, specialty stair paints with built-in or optional anti-slip additives give you a practical, safer alternative to wall paint.
You’ll get formulas designed for foot traffic, abrasion resistance, and easy cleaning.
Choose grit level for your household, follow surface prep and application instructions, and test a small area to verify adhesion, appearance, and slip resistance before finishing the whole staircase.
Stain and sealer options for wood
If you prefer the natural look of wood over painted risers and treads, stains paired with clear sealers give you durable, attractive stairs that show grain and resist wear.
Choose oil-based stains for deep penetration or water-based for quicker drying and lower odor.
Topcoat with polyurethane, conversion varnish, or a hard acrylic sealer; add a slip-resistant additive for safety.
Step-by-Step Guide: Preparing and Painting Stairs Safely
Before you start, assess the stair material and condition so you know what repairs and prep are needed.
Then pick a durable paint or coating, gather the right tools and safety gear, and clean, sand, and fix surfaces thoroughly.
Finish by choosing an appropriate primer and apply it where required to guarantee adhesion and longevity.
Step 1 Assess the stair material and condition
Start by looking closely at each stair: note the material (wood, concrete, metal, or carpeted), the finish (raw, sealed, or previously painted), and any damage like rot, loose boards, chips, or rust.
Check tread firmness, handrail stability, and nosing integrity.
Photograph problem areas, mark repairs, and decide if replacement, patching, or thorough cleaning is required before painting.
Step 2 Choose the right paint or coating
Now that you’ve inspected each stair and noted repairs, choose a paint or coating suited to the material and traffic level.
For wood, pick a durable enamel or floor-specific polyurethane; for concrete, use masonry or epoxy floor paint.
Select a satin or semi-gloss sheen for cleanability, and consider anti-slip additives or textured coatings to improve traction without compromising durability.
Step 3 Gather tools and safety equipment
Gather a concise kit of tools and safety gear so you can work efficiently and avoid accidents:
you’ll need sandpaper or a sander, a tack cloth, brushes and a roller with an appropriate nap, paint trays, painter’s tape, a putty knife and wood filler or patching compound, plus drop cloths to protect surrounding areas.
Wear gloves, safety glasses, and a mask.
- Gloves
- Safety glasses
- Dust mask
Step 4 Surface preparation: cleaning, sanding, and repairs
Before you paint, clean, sand, and repair each stair so the finish will adhere and look professional:
Remove dust, dirt, and grease with degreaser and a scrub brush, then rinse and dry.
Sand worn or glossy areas to dull the surface, fill cracks and gouges with wood filler or epoxy, and sand smooth.
Vacuum and tack-cloth before painting.
Step 5 Priming: when and what primer to use
Step 5 is priming: you’ll choose and apply a primer that promotes adhesion, blocks stains, and evens out the surface so your paint lasts under heavy foot traffic.
Pick a primer suited to substrate—wood, MDF, or previously painted finishes. Use a bonding or stain-blocking primer for tannin bleed or glossy surfaces.
Let it dry fully and sand light between coats for a smooth, durable base.
Step 6 Application techniques for treads and risers
Start by deciding the finish and tools you’ll use for each surface—treads need tougher, non-slip coatings while risers can handle a smoother, more decorative paint—and set up a consistent sequence so you work efficiently (for example, paint all risers first, then treads).
Use brushes for edges and corners, a short-nap roller for flat areas, thin even coats, allow full drying between coats, and sand lightly for adhesion.
Step 7 Adding anti-slip texture or tape
Once the paint’s fully cured, add anti-slip texture or tape to make each step safe and durable.
Measure and mark tread areas, then apply textured additive, non-slip strips, or adhesive tape centered on each tread.
Press firmly, trim edges, and follow manufacturer pressure recommendations.
Test a small area for adhesion.
Clean debris and check grip before regular use to guarantee safety.
Step 8 Drying, curing times, and recoat intervals
Before you walk away, understand that drying, curing, and recoat times differ between paint types and environmental conditions, so follow the manufacturer’s specs and factor in temperature, humidity, and ventilation.
Wait full dry time before light foot traffic, and the recommended cure before heavy use.
Recoat only after the specified tack-free interval.
Use fans or dehumidifiers to speed safe drying without shortcuts.
Step 9 Final inspection and maintenance schedule
After the paint has dried and cured, give the stairs a careful final inspection to verify coverage, adhesion, and safety features like non-slip surfaces and secure nosing.
Check for drips, thin spots, or tackiness. Tighten loose screws, replace worn tread tape, and note areas needing touch-up.
Schedule quarterly inspections and annual repainting or touch-ups depending on traffic to maintain appearance and safety.
Comparison: Wall Paint vs Floor/Stair Paints
You’ll want to compare wall paint and floor/stair paints on durability, slip resistance, finish, cost, application ease, and best uses so you pick the right product for your stairs. Below is a quick comparison to help you weigh the trade-offs before you start. Use it to decide whether a wall paint shortcut will hold up or if you should opt for a purpose-made floor or stair paint.
| Feature | Wall Paint | Floor/Stair Paint |
|---|---|---|
| Durability | Lower for high-traffic areas | Higher, formulated for wear |
| Slip resistance | Usually smooth, can be slippery | Often textured or additive-friendly |
| Best use | Vertical surfaces, low-traffic steps | High-traffic stairs, outdoor/entry steps |
Durability, slip resistance, finish, cost, ease of application
While wall paint can cover stairs in a pinch, it won’t match the durability, slip resistance, or finish of products made for floors and stairs; those specialized paints are formulated to withstand foot traffic, resist scuffing, and often include gritty additives or texture options to improve traction.
Whereas wall paints are softer, more prone to wear, and usually glossy or flat in ways that become slippery or show marks quickly.
You’ll pay more for stair paint, but it lasts longer, offers better grip, and often requires primers or thinner coats for proper adhesion.
While wall paint is cheaper and easier to apply but needs frequent touch-ups.
Best uses and limitations for each type
Because staircases get concentrated foot traffic and moisture, you should match the paint type to the job: use wall paint only for low-traffic, decorative steps or temporary fixes, and choose floor- or stair-specific paints when you need durability, abrasion resistance, and built-in slip control.
Wall paint’s limits are poor wear and cleaning; stair paints cost more but resist scuffs, moisture, and slipping, lasting longer.
Common Mistakes to Avoid
Don’t skip proper surface prep or a primer, because paint won’t stick well to dirty or glossy stairs.
Avoid using low-durability wall paint on high-traffic steps and remember to add or choose a finish with slip resistance.
Also don’t paint when temperatures or humidity are outside the paint’s recommended range, or you’ll risk poor curing and premature wear.
Skipping surface prep or primer
If you skip prepping the stairs or applying a primer, the paint won’t adhere properly and you’ll end up with peeling, uneven coverage, or rapid wear in high-traffic areas.
Clean, sand, and remove old finish or contaminants first. Use a primer suited to the substrate to guarantee adhesion and uniform color.
Proper prep saves time and prevents costly touch-ups or full rework later.
Using low-durability wall paint on high-traffic stairs
When you use ordinary wall paint on high-traffic stairs, it won’t stand up to constant foot traffic, scuffs, and abrasion—so expect quick wear, chipping, and frequent touch-ups.
Choose stair-specific or high-durability enamel instead. You’ll save time and money by selecting formulations designed for floors, higher abrasion resistance, and better bonding.
Otherwise you’ll repaint repeatedly and risk uneven, unsafe surfaces.
Ignoring slip-resistance requirements
Although a fresh coat of paint can look great, skipping slip-resistance on stairs creates a real safety hazard you’ll regret. Smooth wall paints and glossy finishes become dangerously slick with shoes, socks, or moisture.
You should always add a non-slip additive, choose a textured topcoat, or install tread strips. Prioritize grip—especially on edges and landings—to prevent falls and liability.
Painting in wrong conditions (temperature/humidity)
Beyond grip, environmental conditions play a big role in whether your paint job holds up.
If you paint in too-cold or too-humid conditions, drying slows, adhesion weakens and finish blushes or peels.
Check paint can temperature range and aim for moderate humidity.
Don’t rush—wait for suitable weather or use climate control.
Proper conditions guarantee durability and safer, longer-lasting stairs.
Tips and Best Practices
When painting stairs, pick a sheen and color that balance traction, durability, and the look you want.
You can add discreet anti-slip options and follow simple maintenance to keep the finish safe and lasting.
If the job feels beyond your skills—structural issues, tricky nosing, or high-traffic stairs—call a pro.
Choosing the right sheen and color for safety and aesthetics
How shiny should your stair paint be, and what color will keep each step clear and attractive?
Choose a durable, low- to medium-sheen (eggshell or satin) for wear resistance without glare.
Pick contrasting tread and riser shades or use subtle tonal differences to define edges.
Stay away from ultra-gloss and very dark, featureless hues that hide depth and increase slip perception.
How to add anti-slip without ruining appearance
Anyone can add traction without wrecking your stairs’ look by choosing subtle, integrated solutions that blend with the paint.
Apply a clear anti-slip additive to the topcoat for invisible grip, or use thin, color-matched non-slip tape on edges.
Keep patterns minimal, match tones, and test small areas first.
Aim for low-profile fixes that preserve design while preventing slips.
Maintenance tips to extend painted stair life
Keeping traction and appearance together means you’ll also need a simple maintenance routine to keep painted stairs looking good and lasting longer.
Sweep or vacuum regularly, wipe spills immediately, and use pH-neutral cleaners.
Add felt pads to furniture and avoid dragging heavy items.
Touch up chips promptly with matching paint, reapply clear sealer yearly in high-traffic zones, and inspect for wear every season.
When to call a professional
If you’re unsure about surface preparation, structural issues, or achieving a durable, non-slip finish, call a professional—especially for high-traffic or historic stairs where mistakes can be costly.
Hire a pro if you lack tools, time, or confidence with primers, specialty paints, or non-slip additives. They’ll guarantee safety, proper bonding, and clean edges, and can advise on warranties or long-term maintenance.
Cost and Time Estimates
You’ll usually spend less on materials if you tackle the job yourself—think primer, paint, sandpaper, and a few brushes or rollers—while a pro adds labor and possible surface repairs.
Expect several hours of prep per flight of stairs, a few hours to paint, and at least 24–48 hours of curing before heavy use.
We’ll compare typical DIY material costs to professional quotes so you can weigh time versus expense.
Typical material costs for DIY vs professional job
Anyone tackling a stair-painting project will want a clear breakdown of costs and time:
DIY material costs typically run $30–$150 for primer, wall paint, sandpaper, tape, and brushes/rollers; add $20–$60 for non-slip additives.
Hiring a pro raises material markup plus labor; expect total charges of $300–$1,200 depending on stair count, finish complexity, and required prep.
Time required for prep, painting, and curing
Because stair-painting involves multiple stages—cleaning and sanding, priming, painting, and curing—you should plan the project over several days rather than a single afternoon.
Expect 2–4 hours prep, 1–2 hours per coat for painting, and at least 24–48 hours between coats for curing.
Allow a full 3–7 days before heavy use to guarantee paint hardens and adhesion holds.
Before-and-After Care and Warranty Considerations
After painting, wait the full curing time on the can before walking on the stairs to avoid scuffs and tacky spots.
Keep a small amount of the paint and a matching brush or touch-up pen on hand for quick fixes and use recommended topcoats for extra durability.
Also check the manufacturer’s specs and warranty terms—some warranties require specific primers, primers, or topcoats and won’t cover premature wear from improper curing or heavy traffic.
How long to wait before using stairs
If you want the paint to cure properly and hold up to foot traffic, wait at least 24–48 hours before light use and 7 days for heavy or abrasive activity.
Full cure can take 2–4 weeks depending on paint type, humidity, and temperature.
During curing, avoid dragging furniture, rugs, or heavy loads.
Keep traffic minimal, control humidity and temperature, and follow manufacturer dry-time recommendations for warranty compliance.
Touch-up strategies and products
1 smart touch-up can keep painted stairs looking professional for years: use matching paint (ideally leftover from the original project), the same sheen, and compatible primer to avoid visible differences.
Keep touch-up tools ready—fine brush, small roller, and blending sponge.
Clean area, sand lightly, feather edges, and apply thin coats.
Protect with recommended clear topcoat for durability and easy maintenance.
Manufacturer warranties and product specs to check
Keeping touch-ups consistent helps, but you also need to check manufacturer warranties and product specifications before you commit to a paint-and-topcoat system for stairs.
Verify designated substrate, traffic ratings, recommended primers, drying and cure times, and compatible topcoats.
Note exclusions (outdoor use, heavy commercial traffic), maintenance requirements, and whether DIY application voids coverage.
Keep receipts and document prep for claims.
FAQ
Got questions? You’ll find quick answers here about using regular interior latex on wood, making painted treads non-slip, painting outdoor concrete, which finishes work best for treads and risers, and how often you’ll need to repaint.
Read on for clear, practical tips and safety notes.
Can I use regular interior latex paint on wooden stairs?
Can you use regular interior latex paint on wooden stairs? You can, but it isn’t ideal.
Latex adheres well and offers color, yet it lacks the durability and abrasion resistance of floor or stair-specific enamels.
If you choose latex, prep thoroughly, use a tougher topcoat or sealer, and expect more frequent touch-ups to maintain finish and resist scuffs.
How do I make painted stairs non-slip?
If you go ahead with regular latex or a stair-specific enamel, you’ll also want to address traction—paint alone can get slippery, especially when wet or worn.
Add grit: mix anti-slip additive into the topcoat or scatter fine silica sand while wet.
Use non-slip stair tape or adhesive treads on high-traffic spots.
Keep finishes clean and reapply texture as it wears.
Is it okay to paint outdoor concrete stairs with wall paint?
While you can use interior wall paint on outdoor concrete stairs in a pinch, you shouldn’t—wall paint won’t hold up to moisture, temperature swings, or heavy foot traffic.
Instead, choose products made for exterior concrete: masonry or porch-and-patio paints, or concrete stains and sealers.
Prep thoroughly—clean, repair cracks, etch if needed—and follow manufacturer instructions for durability and safety.
What finish is best for stair treads and risers?
For stair treads and risers, pick a finish that balances slip resistance, durability, and appearance—matte or low-sheen for treads to hide wear and reduce slipperiness, and a slightly glossier, easier-to-clean finish for risers if you want contrast or durability.
Use durable floor or porch paint or add non-slip additive on treads. Seal with a clear, abrasion-resistant topcoat where appropriate.
How often will painted stairs need repainting?
How long will your painted stairs last before they need a fresh coat? Expect 2–5 years on treads with regular traffic; risers and low-traffic areas can go 5–10 years.
Durability depends on paint quality, prep, primer, and protective topcoat. Scuffs, peeling, or dull finish signal repainting.
Touch up high-wear spots sooner to extend overall lifespan and avoid full refinishing.
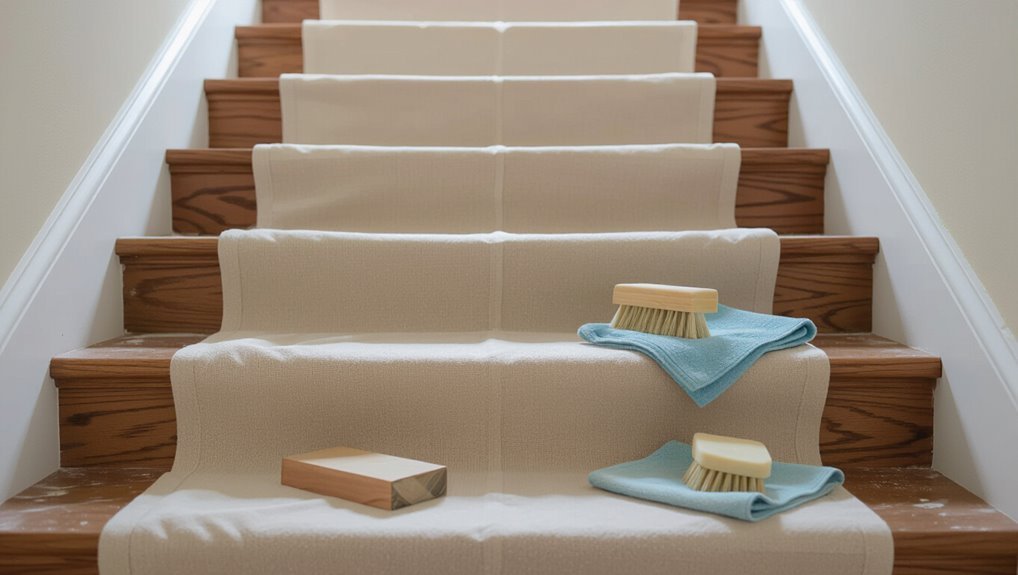
Visuals and Resources
You’ll find a step-by-step photo guide that shows prep and application for painting stairs with wall paint.
Follow the images to match each prep step and avoid common mistakes.
There’s also a quick printable checklist you can use on the job to stay organized.
Photo guide for prep and application
Start by laying out clear, labeled photos that show each prep and application step—cleaning, sanding, priming, taping, and brushing or rolling—to give you an exact visual workflow.
Photograph close-ups of damage areas, grit levels, primer coverage, taped edges, and brush strokes.
Include before/after riser and tread shots, proper drying times noted on images, and a final shot showing safe, cured stairs ready for use.
Quick checklist printable for painting stairs
Because a concise checklist keeps the job on track, this printable gives you a single-page visual and resource guide for every stair-painting step—from prep and materials to drying checks and safety reminders—so you can glance, follow, and finish without backtracking.
Use it to confirm supplies, sequence tasks, and note drying times. Print, hang, and tick off as you go.
- Prep & safety
- Materials & tools
- Drying & inspection