
Can You Put Molding on Textured Walls? Here’s How to Make It Work
Yes — you can put molding on textured walls, but you’ll need to adapt your approach based on texture depth. Light textures like orange peel usually only need light sanding or backer strips for a snug fit, while heavy knockdown, popcorn, or stucco often require skim-coating, backer boards, or flexible molding to avoid gaps. Use adhesive plus nails, seal seams with flexible caulk, and choose profiles that bridge irregularities; keep going to learn step-by-step prep and options.
Can You Put Molding on Textured Walls? Quick Answer
Yes — you can put molding on textured walls, especially if the texture is light or you’re willing to prep the surface.
Heavier textures may need skimming, sanding, or backer board for a clean fit.
I’ll outline when each approach makes sense and how to get a tight seam.
Short direct answer ( Yes/No and when )
You can put molding on textured walls, and it’s usually best to do it when the texture is light to moderate or when you’re willing to take extra prep steps for heavy texture.
Yes — you can install molding on textured walls; small texture needs minimal caulking, medium needs sanding and fill, and heavy texture requires skim-coating or foam backerboard for a smooth, secure install.
Why Texture Matters for Installing Molding
You’ll find that wall texture directly affects how molding sits and how well adhesives or caulk bond to the surface.
Different textures—knockdown, orange peel, popcorn, and heavy stucco—each create unique gaps, high spots, or uneven contact that can complicate fit and finishing.
Knowing the texture you’re working with helps you choose fastening methods, backer options, and prep steps to get a tight, clean installation.
How wall texture affects adhesion and fit
Because textured walls create uneven contact surfaces, molding doesn’t sit or stick the same way it does on smooth drywall.
You’ll get gaps where high spots prevent full contact, and adhesives may bridge voids instead of bonding.
Sealants and backer blocks help, as does sanding or skim-coating targeted areas.
Measure, test-fit, and plan for caulking to guarantee a tight, secure installation.
Common types of wall textures and challenges (knockdown, orange peel, popcorn, heavy stucco)
Those fixes—sanding high spots, adding backer blocks, and planning for caulk—matter differently depending on the texture you’re facing.
You’ll adjust technique for each finish:
- Knockdown: irregular peaks—sand and use flexible caulk.
- Orange peel: light texture—minimal sanding, backer strips help.
- Popcorn: remove or build out—adhesion’s hard.
- Heavy stucco: rough surface—use strong adhesive and shim for fit.
What You’ll Need Before You Start
Before you begin, gather a simple tools-and-materials checklist: a miter saw or miter box, caulk and adhesive, nails or a brad gun, sandpaper, and paint supplies.
Choose molding that works with textured walls—MDF and polyurethane are forgiving, pine gives a classic look, and flexible molding handles curves and uneven surfaces.
With the right tools and material choice, installation will go much smoother.
Tools and materials checklist
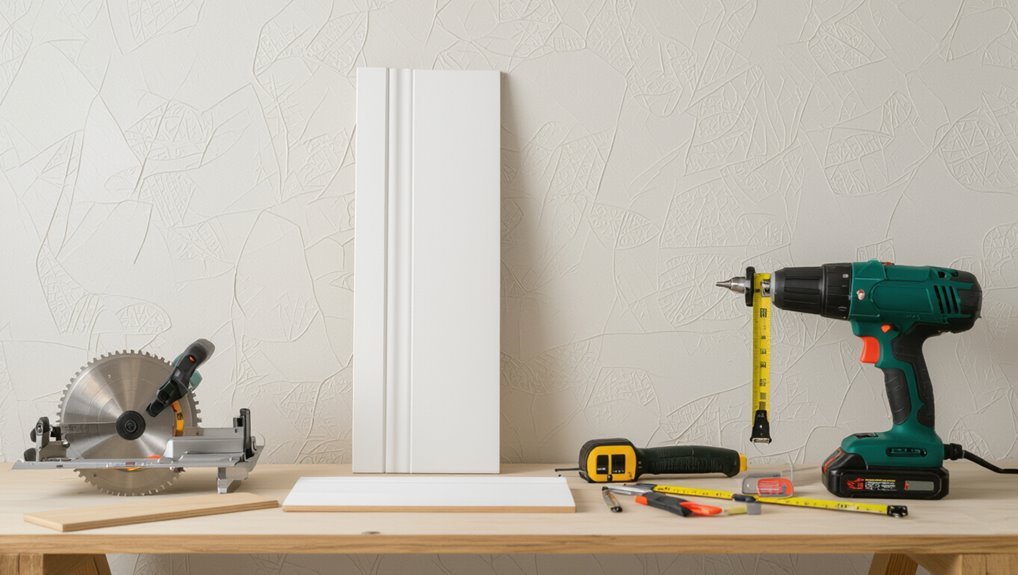
You’ll need a compact set of tools and materials to tackle molding on textured walls efficiently:
- Tape measure, pencil, level, and speed square.
- Miter saw or hand miter box, coping saw, and utility knife.
- Construction adhesive, caulk, finishing nails, and a nail set.
- Sandpaper, paint/primer, putty, respirator, and safety glasses for clean, safe installation.
Materials selection: molding types that work best with textured walls (MDF, pine, polyurethane, flexible molding)
Choosing the right molding makes installation on textured walls much easier, so pick materials that can bridge uneven surfaces and resist denting or cracking.
Use MDF for smooth painted profiles and affordability, pine for a traditional solid option you can sand, polyurethane for lightweight, moisture-resistant detailed trim, and flexible molding for curved or highly textured sections—each offers different sanding, cutting, and adhesion needs.
How to Prepare Textured Walls for Molding Step-by-Step
Before you start cutting or gluing, you’ll want to inspect and measure the wall carefully so you know what you’re working with.
Clean the surface and remove any loose texture, then choose a leveling method—skim coat, spot-sanding, or back-cutting the molding—based on how smooth you need the finish to be.
Finally, test-fit your crown, baseboard, and casing, and plan where to use adhesive versus nails or screws for a secure install.
Step 1: Inspect and measure the wall
Step 1: Inspect and measure the wall — take a careful walk along the surface to note texture depth, seams, and any irregularities that will affect molding fit; measure the wall height and length at several points, since textured walls often vary and you’ll want precise dimensions before cutting molding.
- Note texture depth.
- Mark seams and cracks.
- Measure multiple heights.
- Record total lengths.
Step 2: Clean the surface and remove loose texture
Clear the area and give the wall a thorough wipe-down, then scrape away any loose or flaking texture so your molding will sit flush.
Use a damp sponge with mild detergent, rinse, and let dry.
Gently chip off stubborn bits with a putty knife, vacuum dust, and wipe again.
Check for adhesion issues and mark spots needing repair before installing molding.
Step 3: Leveling options skim coat vs. spot-sanding vs. back-cutting molding
Now you’ll choose how to level the textured wall so molding sits cleanly: skim-coating the whole surface, spot-sanding high areas, or back-cutting the molding to match the texture. Skim-coat for uniformity, spot-sand for minimal work, back-cut when texture is deep. Pick based on effort, finish, and budget.
| Option | Best for |
|---|---|
| Skim-coat | Full coverage |
| Spot-sand | Small highs |
| Back-cut | Deep texture |
| Hybrid | Mixed walls |
Step 4: Cutting and test-fitting crown, baseboard, and casing
With your wall surface leveled to suit the molding—skim-coated, spot-sanded, or back-cut—you’re ready to cut and test-fit crown, baseboard, and casing.
Measure twice, mark coping or miter angles, and cut precise joints.
Dry-fit each piece, checking seams against the textured wall and adjacent profiles.
Trim as needed for tight contact and consistent reveal before fastening.
Step 5: Adhesives and fasteners where to use adhesive, nails, and screws
Decide which fastener will hold best before you start fastening: use a quality construction adhesive to bridge gaps and bond molding to uneven, textured surfaces, but rely on finish nails or screws where structural support or tight seams matter.
Press molding firmly, nail into studs or blocking when possible, and countersink nails. For heavy profiles, predrill and use screws; for light trim, adhesive plus brads usually suffice.
Step 6: Sealing gaps and finishing touches (caulk, joint compound, paint)
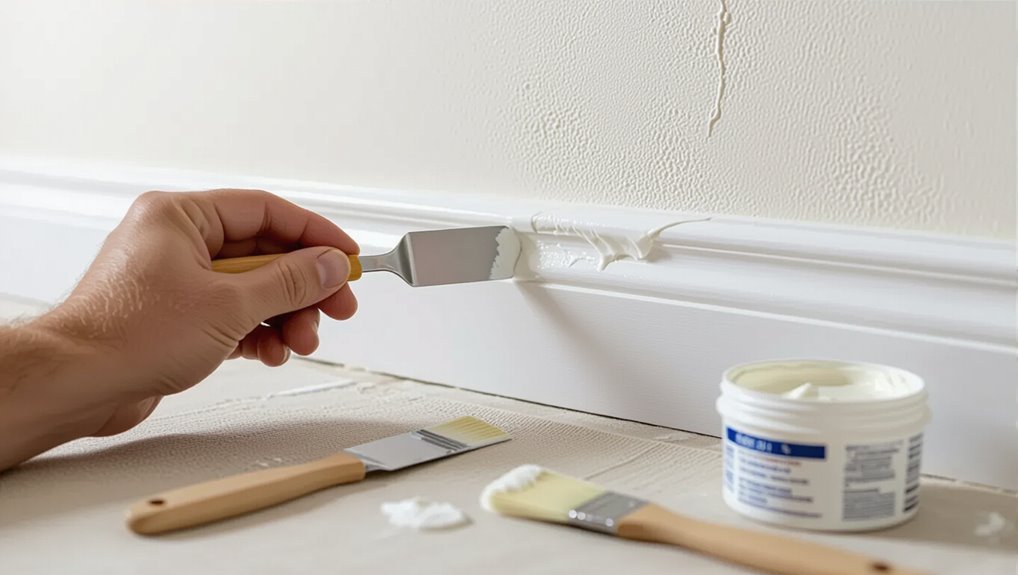
After the molding’s secured, you’ll seal gaps and finish surfaces so the trim looks seamless against textured walls.
Run paintable caulk into joints and where trim meets texture; smooth with a wet finger or tool.
For larger voids, apply thin layers of joint compound, sand lightly after drying, prime, then paint.
Clean edges and inspect for any touch-ups before final coat.
Alternative Methods When You Can’t Smooth the Wall
If you can’t get the wall smooth, consider increasing the reveal or using a shadow gap so gaps read as intentional design.
You can also install a mounting strip or French cleat to create a true flat surface for the molding.
Finally, choose flexible or thicker trim that can bridge the texture and sit cleanly against the wall.
Use larger reveal or shadow gap to hide gaps
When you can’t get a wall perfectly smooth, increasing the reveal or installing a shadow gap gives you a clean, intentional break that hides irregularities and makes the joint look deliberate rather than sloppy.
You’ll set a consistent gap between molding and wall, paint or darken it for contrast, and let the shadow mask uneven textures.
It’s simple, modern, and forgiving.
Install a mounting strip or French cleat for a flat surface
A shadow gap or larger reveal hides irregularities, but sometimes you need an actually flat plane to attach molding securely—so install a mounting strip or French cleat.
Screw a straight, level strip into studs, then fasten the molding to it. A French cleat offers removable support and precise alignment.
This avoids patching texture and guarantees tight, durable joints on uneven walls.
Choose flexible or thicker trim to bridge texture
Though you can’t smooth the wall, you can still get clean-looking trim by choosing pieces that flex or have enough depth to bridge the texture.
Pick flexible polyurethane or rubberized molding that conforms to bumps, or opt for thicker, deeper profiles that span valleys without gaps.
Use adhesive and finishing caulk to seal edges, and fasten securely so the trim stays tight against uneven surfaces.
Comparison: Finishing Options vs. Wall Prep Effort
You can pick a no-prep route with forgiving molding styles that hide texture, use minimal prep plus adhesives and caulk for a cleaner look, or commit to a full skim coat for a seamless finish.
Each choice trades off time, cost, and how perfect the result will be.
Think about how much prep you’ll tolerate versus how polished you want the molding to look.
No prep + forgiving molding styles
Skip the sanding and still get great results: some molding styles—like deep, chunky casings, wide picture-frame trim, and flexible MDF profiles—hide gaps and texture better than thin, delicate profiles, so you can fit them right over textured walls with minimal prep.
Choose bolder, thicker sections and forgiving profiles; they’ll mask uneven seams, reduce visible gaps, and speed installation without elaborate wall smoothing.
Minimal prep + adhesive/caulk approach
One simple way to handle textured walls is to rely on construction adhesive and paintable caulk instead of extensive sanding or skim-coating; this method lets you bond trim securely and fill gaps quickly so you can get to finishing faster.
Press molding firmly, brad-nail for support, then run caulk along edges. Smooth, paint, and touch up texture mismatches as needed for a clean look.
Full skim coat + seamless finish
While a full skim coat takes more time and skill than adhesive-and-caulk, it gives you a truly seamless finish that removes texture variations and makes molding sit flush with the wall. You’ll sand, prime, and apply joint compound smoothly, then paint. It’s ideal if you want perfection and plan to install heavyweight or intricate trim.
| Effort | Result | Cost |
|---|---|---|
| High | Seamless | Moderate–High |
| Prep | Durable | Professional-friendly |
Common Problems When Adding Molding to Textured Walls and How to Fix Them
When you add molding to textured walls you’ll run into a few predictable problems—visible gaps from uneven texture, caulk or paint that cracks with movement, molding that won’t sit flush, and fasteners that split the trim.
You can fix gaps with backer rod and flexible caulk, prevent cracking by allowing movement and using paintable elastomeric caulk, and shim or sand uneven spots so the molding sits flat.
For fastener issues, predrill, use the right screws or finish nails, and reinforce weak areas with glue or blocking.
Visible gaps between molding and wall causes and fixes
Because textured walls rarely lie flat, you’ll often see small gaps where molding meets the surface; these gaps come from uneven texture, bowed studs, or imperfect cuts.
To fix them, shim or scribe molding to match contours, use adhesive and finish nails for secure contact, then fill gaps with painter’s caulk or matching spackle and sand smooth before priming and painting for a seamless look.
Cracking caulk or paint due to movement prevention and repair
Gaps sealed with caulk and paint can still fail if the trim and wall move differently, so you’ll want to understand why cracking happens and how to prevent it.
Use flexible, paintable silicone or a high-quality acrylic latex caulk, avoid rigid adhesives, and allow seasonal movement by nailing into studs with finish nails.
When cracks appear, remove old caulk, clean, and re-caulk.
Molding not sitting flush on uneven surfaces remedies
If your molding won’t sit flush against a textured wall, it’s usually because the high and low spots on the surface prevent full contact.
You’ll need to identify where the gaps are and choose the right combination of shims, backer strips, or flexible caulk to level the piece before fastening.
Press molding into place, tack with finishing nails, add thin shims behind low areas, then fill small gaps with paintable flexible caulk.
Fastener issues and splitting solutions
Once you’ve shimmed and caulked so the molding sits flat, the next challenge is keeping fasteners from pulling, walking, or splitting the trim on textured walls.
Pre-drill pilot holes, use finish nails with glue or construction adhesive, and counter-sink nails slightly.
For brittle trim, switch to brad nails or use screws with narrow shanks.
Fill holes, sand, and touch up paint for a seamless finish.
Best Practices and Pro Tips
When you pick a molding profile for textured walls, choose one with a deeper back or reveal to bridge irregularities.
Use a mix of adhesive and strategic nailing, stagger fasteners, and spread adhesive evenly to prevent gaps.
Finish with flexible caulk and paint techniques that hide seams, and consider hiring a pro for complex textures or tight tolerances.
Choosing the right molding profile for textured surfaces
Although textured walls can disguise minor gaps, choosing the right molding profile matters because it affects fit, shadow lines, and how seams will hide (or highlight) surface irregularities.
Pick profiles with flatter backs and wider contact areas to bridge unevenness, favor simple, bold shapes that cast forgiving shadows, and avoid delicate, narrow moldings that’ll exaggerate bumps and misalignments.
Fastening patterns and adhesive application tips
Because textured walls sit unevenly, you’ll need a fastening pattern and adhesive approach that bridges high and low spots without crushing the texture.
Stagger nails every 12–16 inches into studs and use finish nails at edges.
Apply a high-quality construction adhesive in continuous beads along the back, pressing molding gently to seat.
Clean excess immediately and use caulk sparingly for gaps.
Painting and finishing techniques to conceal imperfections
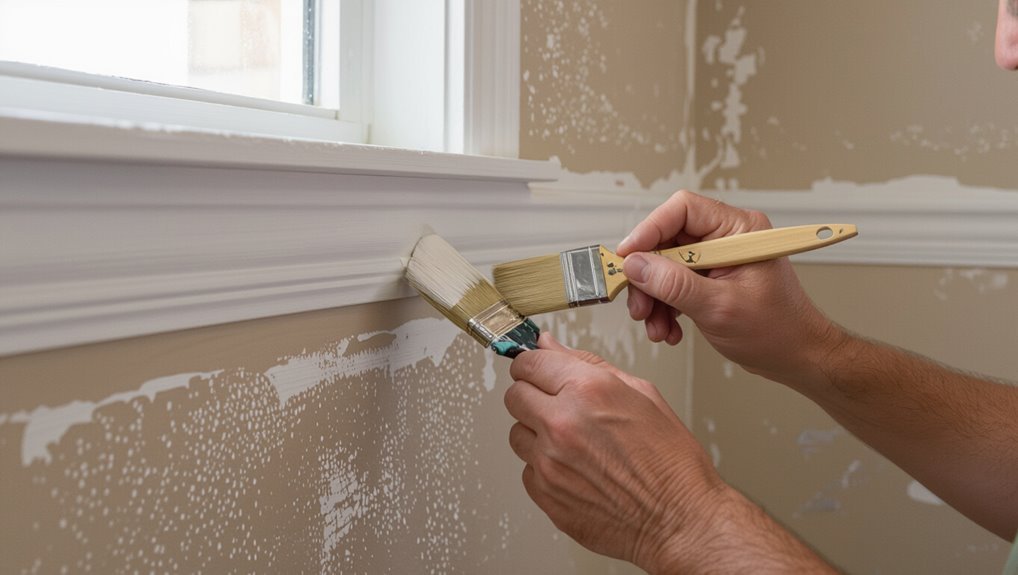
Once the molding’s fastened and adhesive’s set, focus on painting and finishing to hide any small gaps or unevenness from the textured wall.
Caulk seams thinly, smoothing with a wet finger.
Prime patched areas, then use a high-quality brush for trim and a roller for walls to match texture.
Finish with two coats of paint; touch up edges for a seamless look.
When to hire a pro vs. DIY
Wondering whether you should tackle molding on textured walls yourself or call in a pro?
If you’ve got straight cuts, simple profiles, and steady hands, DIY saves money and gives control.
Hire a pro for complex textures, ornate moldings, uneven walls, or if you lack tools/time.
Pros guarantee tight seams, seamless caulking, and proper adhesion—worth it for high-visibility rooms or resale.
Cost and Time Estimates
You’ll want to weigh typical material and labor costs for each approach—simple trim, backer boards, or full substrate work—to choose what fits your budget.
Expect DIY installs to take a weekend for basic jobs and cost mainly materials, while pros charge hourly or per-linear-foot rates that raise total cost but cut time substantially.
I’ll outline specific price ranges and realistic time estimates so you can compare options.
Typical material and labor cost ranges for each approach
When budgeting for molding on textured walls, expect costs to vary widely based on material choice, molding profile, and whether you hire pros or DIY; typical ranges: materials $0.50–$15/ft, basic labor $2–$6/ft, detailed work higher.
| Approach | Cost range |
|---|---|
| DIY (materials) | $0.50–$15/ft |
| Pro installation | $2–$12+/ft |
Time estimates for DIY vs. professional installation
Although textured walls add prep and trimming time, you can expect DIY molding projects to take anywhere from a single afternoon for a simple chair rail in one room to several weekends for crown or detailed casing.
Pros typically finish the same work in a fraction of that time. You’ll spend extra hours sanding, caulking, and matching textures; pros streamline with tools and experience.
Before-and-After Scenarios (Case Examples)
You’ll see three clear before-and-after scenarios: a minimal-prep orange peel job where molding’s installed quickly, a moderate-prep case that uses spot-skimming for crown molding, and a full-prep approach that skim-coats the wall for a smooth, high-end finish.
Compare time, cost, and final appearance for each so you can pick the right level of work.
Then we’ll show photos and notes that illustrate what to expect.
Minimal prep case: quick install on orange peel
If you’re tackling a quick install on orange peel walls, focus on minimal prep that still gives a clean result: wipe dust, mark stud locations, and test-fit trim.
Use flexible adhesive and finish nails into studs where possible. Fill small gaps with paintable caulk, sand lightly, then prime and paint trim.
This keeps labor low while hiding texture without extensive skim work.
Moderate prep case: spot-skim for crown molding
Moving up from a quick orange-peel install, spot-skimming lets you get crown molding to sit flat without reworking the whole wall.
You sand high bumps, apply thin joint compound to low spots behind the molding, feather edges, and sand smooth.
This targeted approach saves time, keeps texture elsewhere, and yields tight seams so caulk and paint create a clean, professional result.
Full prep case: skim-coating for a smooth, high-end finish
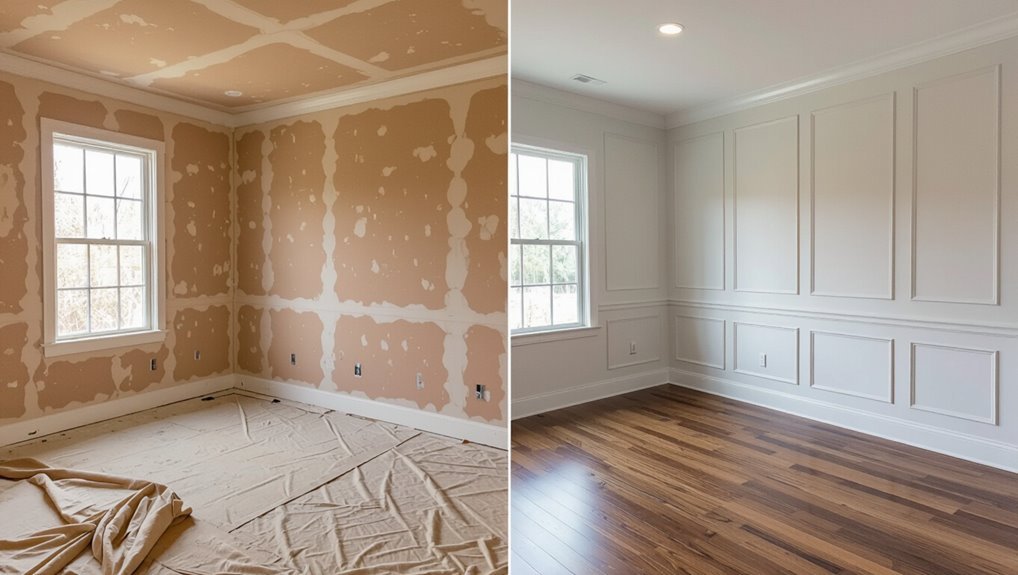
When you want a truly seamless, high-end look, skim-coating the entire wall gives crown molding a flawless surface to sit against.
You’ll strip texture, apply thin coats of joint compound, sand between layers, and prime for uniform adhesion. This takes time and skill but yields crisp molding lines, tight seams, and a luxury finish that photos and resale value will both appreciate.
FAQ
You probably have a lot of specific questions about how molding works with textured walls, so here are clear answers to common concerns.
You’ll learn whether molding can hide different textures, when it’s safe to nail into textured drywall, and how well caulk and paint can hide gaps or imperfections.
You’ll also get tips on matching new molding to existing textured trim.
Can molding hide all types of wall texture?
Wondering whether molding can cover up your wall texture? You can conceal mild to moderate textures—orange peel, light knockdown, or subtle stippling—by choosing wider, thicker molding and backing with caulk or trim adhesive.
Heavy textures like popcorn or deep knockdown may still show through unless you first skim, apply a flat backer, or select very substantial profiles; evaluate texture depth before deciding.
Is it okay to nail molding into textured drywall?
If your texture was light enough that molding can hide it, it’s usually fine to nail trim directly into textured drywall—but there are a few caveats.
You should locate studs or use proper drywall anchors to secure heavy trim. Countersink nails slightly and use adhesive for extra strength.
Avoid forcing long nails through thick texture, which can crack or pull loose sections and weaken the hold.
Will caulk always hide gaps between molding and textured walls?
Can caulk completely hide gaps between molding and textured walls? Not always.
Caulk fills small, shallow gaps and smooths minor irregularities, but deep or uneven voids will show through or crack over time. You should select a high-quality, flexible caulk, apply it carefully, and sand or skim as needed.
For large gaps, use backing material or patching compound before caulking.
Can I paint molding the same color as textured walls to hide flaws?
Often a matching paint color does help conceal minor gaps and texture discrepancies between molding and textured walls, but it isn’t a cure-all.
You can use the same hue to draw less attention to imperfections, especially with satin or eggshell finishes.
Still, lighting and shadow may reveal edges, so prep—sanding, caulking, and smooth paint application—remains important for the best, least noticeable result.
How do I match molding to existing textured trim?
Wondering how to match new molding to textured trim? Start by comparing profiles and texture depth; bring a sample piece to the job.
Choose molding with a similar grain or add texture with flexible caulk or joint compound.
Prime and paint both pieces together for consistent sheen and color.
Test finishes in inconspicuous spots, adjust sanding or glazing until the match reads seamless.
