
Does Scotch Tape Rip Paint Off Walls? What to Use Instead
You can use Scotch tape on walls sometimes, but it can pull paint off—especially on old, uncured, flat, or chalky finishes and when left on too long. Test a hidden spot first and peel slowly at a low angle; warming the tape with a hair dryer helps. For safer options, use painter’s tape, low‑tack putty, adhesive hooks, or Command strips for lightweight items. Keep going and you’ll find tips on testing, removal, and better alternatives.
Quick Answer Does Scotch Tape Rip Paint Off Walls?
Short answer: usually no, but it can if the paint is old, poorly bonded, or very delicate.
You’re most likely to see damage when tape’s left on for a long time, applied to flat or chalky finishes, or removed roughly.
Test a small hidden spot first to avoid surprises.
Short, direct conclusion
If you’re careful, Scotch Tape usually won’t rip paint off walls, but it can pull loose or delicate paint—especially on older, poorly adhered finishes.
So, does scotch tape rip paint off walls? Usually not, but you shouldn’t assume safety.
Test a hidden spot first, use low-tack alternatives when needed, and remove tape slowly at a low angle to minimize risk.
When tape is most likely to damage paint
When paint’s already old, loose, or applied over a greasy or unprimed surface, tape is far more likely to pull it away.
You’ll also risk damage if you use high-adhesion tape, leave tape stuck for days, peel it off quickly or at the wrong angle, or apply tape to newly painted walls that haven’t fully cured.
Test first on a hidden spot.
How Scotch Tape Interacts with Painted Surfaces
You’ll want to understand that Scotch tape’s acrylic or rubber-based adhesive bonds differently to surfaces depending on paint type and finish.
Flat and eggshell paints grip tape more weakly, while satin to high-gloss finishes can let the adhesive stick harder and lift when removed.
Adhesion also changes with paint age, temperature, humidity, and how well the surface was prepped.
Composition of Scotch tape adhesive
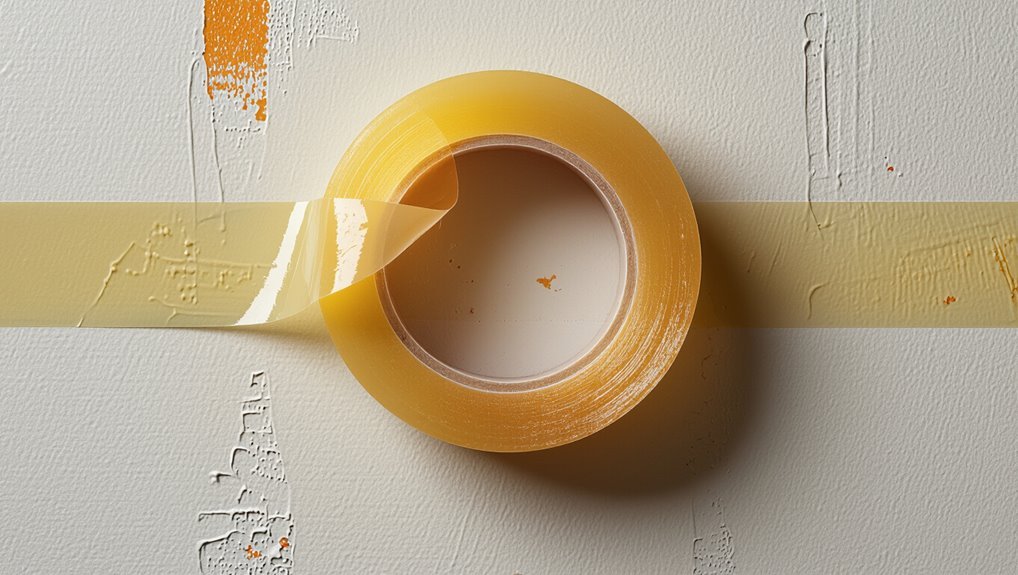
Scotch tape’s adhesive is typically a pressure-sensitive acrylic or rubber-based formula that sticks on contact and keeps its bond without heat or solvent activation.
You should know acrylic variants age cleaner and resist yellowing, while rubber adhesives offer stronger initial tack but can leave residue.
Both transfer stress to paint when removed, so you’ll want low-tack alternatives or proper removal techniques to avoid damage.
Types of wall paint and finish (flat, eggshell, satin, semi-gloss, high-gloss)
Knowing how adhesives behave helps you predict their effect on painted walls, because paint type and sheen change how much stress the tape applies and how easily it lifts.
Flat paint is porous and more likely to peel; eggshell and satin have slight sheen and moderate adhesion; semi-gloss and high-gloss are hard, smooth, and resist tape but can lift poorly adhered paint or finish if pulled abruptly.
Factors that influence adhesion and paint removal (age of paint, temperature, humidity, surface prep)
When tape meets painted walls, several factors determine whether it sticks or strips finish: older paint that’s become brittle or poorly adhered peels more easily, high humidity or recent temperature swings soften binders and raise tack, and rough or dirty surfaces prevent uniform contact so the adhesive grabs unevenly.
You’ll also notice fresh paint, cooler temps, and clean, smooth prep reduce removal risk; test first.
Common Scenarios Where Tape Causes Paint Damage
When you stick posters or lightweight decorations with regular tape, the adhesive can peel paint when you remove them.
You’ll notice painters’ masking tape behaves differently from general-purpose tape, so using the right type for short-term jobs matters.
Left on for weeks or exposed to sun, many tapes harden and bond to finishes, increasing the chance of damage.
Hanging lightweight items (posters, decorations)
If you’re putting up posters or lightweight decorations, scotch tape can seem like the easy fix—but it often peels paint or leaves stubborn residue.
Instead, use removable adhesive strips, poster putty, or small command hooks designed for painted surfaces.
Test any product on an inconspicuous spot first, follow weight limits, and remove slowly at the correct angle to avoid lifting paint or leaving marks.
Temporary painters’ masking vs. general-purpose tape
Because painters’ masking tape is formulated to peel cleanly while general-purpose tapes cling, you’ll want to choose the right tape for temporary jobs to avoid ripped paint or stubborn residue.
Use low-tack painters’ tape for fresh or delicate finishes and remove it within the manufacturer’s recommended window.
Avoid heavy-duty or duct tape on painted walls, since their stronger adhesives often lift paint when you pull them off.
Long-term adhesion and sun/exposure effects
Short-term low-tack tape behaves differently after days or weeks in sun and moisture, so check conditions before leaving any tape in place.
You’ll see adhesion strengthen, adhesive bleed, or paint soften; remove tape sooner in heat.
Visualize risks:
- Edge curling in hot sun
- Sticky residue after humidity
- Faded paint under protected strips
- Brittle adhesive that flakes paint
Act early to avoid damage.
How to Test Whether Tape Will Damage Your Paint
Before you stick any tape to a large area, try a small patch test on an inconspicuous spot and leave it for the length of time you expect to use the tape.
Check the patch for lift, residue, or color change — and note how long it stayed adherent without harming the finish.
If the paint peels, discolors, or leaves residue within that safe time limit, choose a gentler tape or an alternative.
Small patch test procedure
Start by choosing a small, inconspicuous spot—like inside the trunk, behind a fender, or at the door jamb—so you can check results without making any mistakes obvious.
Clean the area, apply a 1–2 inch tape strip, press firmly, wait a set interval, then peel back slowly at a 45° angle.
Note adhesion and any paint lift; document location and time.
Interpreting test results and safe time limits
When you peel the test strip, look for three things—how firmly the tape stuck, whether any adhesive stayed behind, and if the paint or clearcoat lifted or dulled—and record each observation so you can compare different tapes and exposure times.
If tape removes paint or leaves residue, don’t use it.
Short exposures (minutes to a few hours) are usually safe; avoid leaving tape days or weeks.
Safe Alternatives to Scotch Tape (Primary Solutions)
You’ve got safer options than Scotch tape for walls and temporary displays, and knowing what fits each job saves you time and damage.
Consider these primary solutions as you plan:
- Painter’s tapes (blue, green, delicate) for different surfaces and edges
- Command strips, removable hangers, and their pros/cons for weight and wall type
- Restickable adhesives, low-tack putty, adhesive hooks, magnets, and mechanical mounts for posters and light items
Start by matching the method to the surface and object weight before you stick anything up.
Painter’s tape types and when to use each
If you need clean paint lines without risking surface damage, painter’s tape is the go-to alternative to Scotch tape because it’s formulated to stick firmly yet remove cleanly; different types are designed for specific surfaces and paint jobs. Choose low-tack for delicate wallpaper, medium for trim, and high-adhesion for rough or exterior surfaces.
| Type | Surface | Best use |
|---|---|---|
| Low-tack | Delicate | Wallpaper, fresh paint |
| Medium | Smooth | Trim, baseboards |
| High-adhesion | Rough | Brick, stucco |
Command strips and removable hanging systems pros and cons
Though they don’t look like tape, Command strips and similar removable hanging systems give you a strong, damage-free hold for pictures, hooks, and lightweight shelving. They peel off cleanly when you want to move things.
You’ll appreciate easy installation, weight-rated options, and clean removal, but watch surface compatibility, temperature limits, and adhesive aging. Heavier items still need anchors or studs for safety.
Restickable adhesives (e.g., poster tack) and putty
When you need a low-profile, reusable hold for posters, lightweight décor, or temporary fixes, restickable adhesives like poster tack and mounting putty work better than tape in many cases.
You can press small amounts onto corners or backs, reposition without residue, and remove cleanly if you follow product instructions.
Test on an inconspicuous spot first to verify paint compatibility.
Low-tack painter’s putty and adhesive hooks
Because you want a temporary, wall-safe hold without sticky residue, low-tack painter’s putty and adhesive hooks give two distinct, reliable options.
Use putty for lightweight posters and photos; press, reposition, and remove without tearing paint.
Choose low-tack adhesive hooks for hanging keys, lightweight frames, or decorations; follow weight limits and removal instructions to avoid damage.
Both clean up easily.
Magnetic and mechanical mounting options
If you need a firmer, longer-lasting hold than putty or low-tack hooks provide, magnetic and mechanical mounting options give reliable alternatives that won’t gum up surfaces.
Use magnetic strips or plates for lightweight items on metal surfaces, tension rods for curtains or displays, and wall anchors with screws or picture rails for heavier frames.
They secure items without tape damage and allow easy repositioning.
Step-by-Step Guide: Removing Scotch Tape Without Ripping Paint
Grab a few simple tools—hair dryer, plastic scraper, mild solvent, microfiber cloth, and touch-up paint—before you start.
Warm the tape with a hair dryer, then peel it back slowly at a low angle to avoid lifting paint.
If residue remains, use a safe solvent and clean cloth, and touch up any minor paint nicks afterward.
Tools and materials needed
You’ll only need a few simple tools and materials to remove Scotch tape without damaging paint.
Gather items that give control, gentle heat, and safe cleaning.
- Hair dryer or heat gun on low
- Plastic scraper or old credit card
- Goo gone or rubbing alcohol
- Soft microfiber cloths
Work carefully, test a hidden spot, and keep edges lifted slowly.
Step 1 Warm the adhesive (hair dryer method)
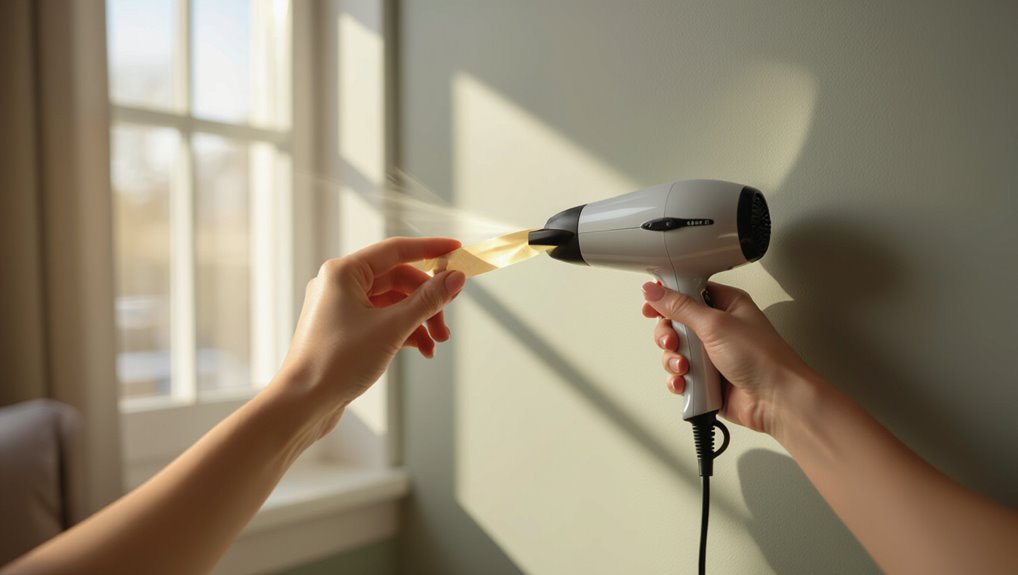
Start by directing warm air over the tape to soften the adhesive and make lifting safer.
Hold the hair dryer about 6–8 inches away, move it steadily for 30–60 seconds, and test the edge with your fingernail.
Heat reduces tackiness without damaging paint when you avoid prolonged exposure.
Use medium heat and pause if the wall feels too hot to touch.
Step 2 Peel at a low angle slowly
Peel the tape back slowly at a low, shallow angle—about 30 degrees or less—to reduce stress on the paint and let the softened adhesive release gradually.
Grip the tape close to the wall and move steadily, keeping the strip taut. If you hit resistance, pause, warm the spot again, and continue; jerking or ripping increases the chance of paint lifting or chipping.
Step 3 Remove residue safely (solvents and cleaning solutions)
3. If adhesive remains, soften it first with a warm, damp cloth for several minutes.
Use mild options: dish soap solution, rubbing alcohol on a cotton ball, or a commercial adhesive remover labeled safe for painted surfaces.
Test in an inconspicuous spot.
Gently rub residue in one direction, re-wetting as needed.
Rinse with clean water and pat dry to avoid streaks or damage.
Step 4 Repair minor paint damage (touch-up tips)
Once the adhesive and residue are gone, check the paint for tiny nicks, scratches, or uneven spots that can show up where tape was stuck.
Lightly sand rough edges, clean dust, and apply matching touch-up paint with a fine brush or cotton swab.
Feather strokes outward, let dry, and add a second thin coat if needed.
Match sheen for seamless repair.
Preventing Paint Damage When Using Any Tape or Adhesive
Before you stick anything down, test a small hidden area, clean the surface, and make sure paint is fully cured.
Know how long the adhesive should stay—follow recommended dwell times and remove tape promptly to avoid residue or peeling.
Also mind temperature and humidity, since extreme conditions can weaken adhesion or lift paint.
Best practices before applying tape
Take a few minutes to prep the surface and surroundings so your tape won’t pull paint or leave residue.
Clean with a mild detergent, rinse, and let dry completely. Test a small, inconspicuous spot with the chosen tape.
Remove loose or flaking paint and sand glossy finishes lightly. Use low-tack painter’s tape for delicate surfaces and press edges firmly for a secure, even seal.
Recommended dwell times and removal timing
When you leave tape in place, the adhesive can bond more firmly over time, so plan removals based on the tape type and the paint manufacturer’s recommendations.
Remove delicate painter’s tapes within 14 days; stronger tapes within 24–72 hours.
Pull slowly at a low angle.
Visualize:
- a corner lifted gently
- a steady, slow peel
- paint staying intact
- clean edge revealed
Environmental precautions (temperature, humidity)
If humidity’s high or temperatures swing outside the paint maker’s recommended range, tape adhesive can soften or harden, increasing the risk of bleed-through or paint lift—so check your paint and tape specs and only apply tape in stable, moderate conditions.
Work when walls are dry, avoid extreme heat or cold, and acclimate tape and room to recommended temperatures for at least 24 hours before applying.
Common Mistakes That Cause Paint to Peel
Don’t grab high-tack tape for delicate finishes — it can pull paint right off.
Leaving tape on too long or ripping it up fast or at the wrong angle also increases the risk.
Always test a small, hidden area first so you know how the surface will react.
Using high-tack tape on delicate finishes
Although high-tack tape promises a strong hold, using it on delicate or previously painted surfaces can strip finish and pull off paint when removed.
You should test a small, hidden area first and choose low-tack painter’s tape for sensitive finishes.
Peel slowly at a 45° angle, warm stubborn adhesive slightly, and avoid pressing tape firmly to fragile or aged paint.
Leaving tape on for extended periods
Leaving tape on painted surfaces for days or weeks can bond the adhesive to the finish and pull paint off when you finally remove it.
You should remove masking or tape within 24–48 hours when possible.
If tape’s been left too long, warm it gently with a hair dryer to soften adhesive before peeling slowly.
Test a corner first to avoid surprises.
Peeling too quickly or at the wrong angle
If you pull tape off too fast or yank it at a steep angle, you’ll lift fresh paint along with the adhesive.
You should peel slowly and low, pulling the tape back over itself at about a 45-degree angle to reduce stress on the paint film.
Go steady, keep a consistent angle, and stop if you see paint lifting so you can adjust technique.
Not testing first
When you skip a test patch, you’re gambling with weeks of work—different paints, primers, and surfaces react unpredictably, and what looks fine at the store can fail once applied.
Always try a small, discreet area before committing. You’ll spot adhesion issues, color shifts, or finish problems early, letting you choose proper primers, adjust technique, or pick a different product without ruining a whole wall.
When Paint Damage Requires Professional Repair
If you see widespread bubbling, large cracks, or plaster crumbling, you’ll want a professional to assess whether a repaint or plaster repair is needed.
Expect costs to range from modest spot fixes to several hundred or more for full replastering and repainting, depending on scope and materials.
A pro can recommend the right fixes—patching, skim coats, or full recoat—and give a clear price estimate.
Signs you need a professional repaint or plaster repair
Though small chips and scuffs you can fix yourself are common, some paint and plaster problems signal you should call a pro: widespread cracking, bulging or blistering, large areas of flaking, persistent damp stains, or crumbling plaster that won’t hold a patch.
If damage spans several square feet, keeps returning, exposes lath or masonry, or causes loose dust, get professional assessment and repair.
Cost considerations and typical fixes
Now that you know which problems need a pro, budget and repair options are the next concerns you’ll face.
Minor touch-ups might cost $50–$200 for paint and labor; drywall patching runs $150–$500.
Extensive plaster or full repainting can reach $500–$2,500.
Get written estimates, check references, and choose repairs that match your wall type to avoid repeat damage.
FAQ
You’ll want clear answers to common concerns like whether different Scotch tape types lift paint and if painter’s tape is truly safe on every wall.
Ask how long removable tape can stay up, which household solvents won’t harm finishes, and what steps prevent damage on older or poorly adhered paint.
These FAQs will help you choose and use alternatives without risking your walls.
Will all Scotch tape variants remove paint?
Do all Scotch tape variants strip paint off surfaces? Not necessarily.
Adhesive strength, backing material and how long it stays put determine risk. You’ll find light-duty transparent tapes less likely to lift fresh or delicate paint, while heavy-duty packing or duct-style tapes can pull finish.
Test a small hidden spot first, peel slowly at an angle, and avoid prolonged adhesion to reduce damage.
Is painter’s tape completely safe for all walls?
Is painter’s tape really safe for every wall surface? You shouldn’t assume it is.
Tape varieties and wall finishes differ; delicate or poorly cured paint, textured drywall, wallpaper, and some vinyl surfaces can lift.
Test a small hidden area first, use low-tack products for sensitive finishes, and peel slowly at a low angle to minimize risk.
How long can I leave removable tape on the wall safely?
How long you can leave removable tape on the wall depends on the tape type, your wall finish, and the conditions where it’s applied.
Generally, high-quality painter’s or removable mounting tape can stay up for days to a few weeks.
Check packaging for manufacturer limits, test a small area first, and remove tape slowly and at a low angle to reduce paint lift risk.
What household solvents are safe for removing adhesive residue?
When adhesive residue won’t come off with warm soapy water, reach for mild household solvents like rubbing alcohol, white vinegar, or citrus-based cleaners; they break down sticky polymers without harsh chemicals.
Test a hidden spot first. Apply sparingly, wait a minute, then rub gently with a soft cloth.
Rinse with water and dry. Avoid abrasive scrubbing to protect the paint finish.
Can I prevent damage on older or poorly adhered paint?
If your paint is old, chalky, or already peeling, take extra precautions before applying or removing tape to avoid pulling it off.
Test a small hidden area first. Use low-tack painter’s tape, press gently, and remove slowly at a 45° angle while warming the adhesive with a hairdryer.
If paint lifts, stop and use alternative hanging methods like adhesive hooks or picture wire.
