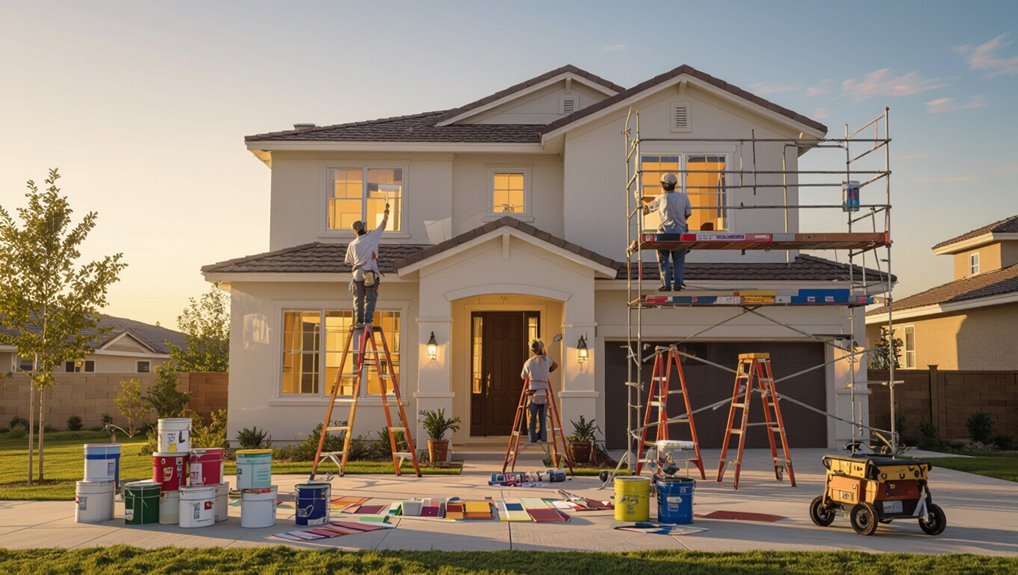
How Much Is Exterior House Painting: Cost Breakdown and Estimates
You’ll typically pay $1,800–$7,500 to paint a single‑story exterior, with most homeowners spending $3,000–$4,500 for a mid‑range job. Costs hinge on your home size, siding type, condition, paint quality, and local labor rates—labor often makes up 60–75% of the total. Prep, repairs, and multi‑story or complex trim raise costs. Plan a 10–20% contingency for surprises, and keep going to see example budgets, negotiation tips, and prep checklists.
Quick Answer: Exterior House Painting Cost Ranges
You can expect to pay roughly $1,800 to $7,500 to paint a typical single-story house exterior, depending on size, siding type, and finish quality; most homeowners land between $3,000 and $4,500 for an average-sized home with mid-range materials and professional labor.
You’ll weigh cost factors like regional differences, paint types, project timelines, color choices, finish options, weather considerations, painter selection, surface preparation, and safety measures.
How to Use This Guide to Estimate Your Project
Start by measuring the total exterior surface area so you can estimate paint quantity and primer needs.
Then assess the home’s current condition—peeling, rot, or trim repairs will change the scope.
Finally, add up materials and local labor rates to produce a realistic project estimate.
Measure Surface Area
Before estimating paint needs and costs, measure the surfaces you’ll cover so your calculations are accurate.
Use clear surface area measurement and estimation techniques with calculation tools. Apply tape measuring tips for calculating dimensions, wall height, roof pitch and note surface irregularities for area conversion and paint coverage.
- Measure length
- Measure height
- Subtract openings
- Adjust for texture
Assess Existing Condition
Once you’ve measured the surfaces, evaluate the existing condition to determine prep needs and realistic costs.
Inspect siding, trim, and wood rot to estimate surface preparation and adjust the project timeline for weather considerations.
Think about color selection and paint finish early, check local regulations, discuss painter selection and warranty options, and note any structural repairs that affect scope before calculating materials.
Calculate Materials & Labor
Now you’ll convert your measurements and condition assessment into a realistic estimate by calculating required materials and labor; use your square footage, surface type, and prep needs to tally paint gallons, primer, caulk, nails, and masking supplies.
Then multiply estimated painter-hours by local labor rates to get the labor cost.
- List material types and paint finishes.
- Factor surface preparation and drying times.
- Add equipment rental and painter qualifications.
- Plan color selection, weather considerations, and project scheduling.
How House Size Drives Paint Cost
Your home’s size is the biggest factor in paint cost because square footage directly determines how much paint and labor you’ll need.
The number of stories matters too—taller houses need more time, safety equipment, and often higher prices for access.
Finally, complex surfaces like porches, trim, and siding types increase the total surface area and the prep work, which raises costs.
Square Footage Impact
Because the total square footage determines how much surface you’ll need to cover, it directly drives labor, paint quantity, and overall cost for exterior painting.
You should assess square footage variations to estimate paint coverage and time.
Consider these factors:
- Total wall area
- Trim and details
- Number of coats
- Waste and touch-ups
Number Of Stories
If your house has multiple stories, expect the paint job to cost more because taller walls and extra vertical surface increase labor time, safety requirements, and equipment needs.
You’ll notice single story benefits like faster access and lower scaffold costs, while multi story challenges add time for lifts, harnesses, and weather delays.
Plan for higher labor and rental fees accordingly.
Surface Area Complexity
When a home’s footprint grows, so does the amount of paint, primer, and labor you’ll need—larger walls, more trim, and extra architectural details all increase material quantities and crew hours.
You should plan surface preparation techniques, paint application methods, weather considerations, paint finish options, durability factors, color selection tips, environmental impacts, seasonal timing, local regulations, and maintenance requirements.
- Measure area
- Count details
- Match finishes
- Schedule season
Cost Examples: Small (1,200 Sq Ft)
For a small 1,200 sq ft home, expect a straightforward exterior paint job to cost considerably less than larger houses—typically between $3,000 and $6,000 depending on siding type, prep needs, and paint quality.
You’ll pay less for minimal repairs and standard lacquer; choose color selection tips wisely and compare finish types for durability.
Get three quotes, confirm timeline, and ask about warranty.
Cost Examples: Medium (2,000 Sq Ft)
For a medium 2,000 sq ft home, you’ll typically see a price range that reflects more surface area and complexity than a smaller house.
You’ll want to look at a clear cost breakdown—labor, paint and materials, prep work, and any repairs or trim work that add up.
I’ll walk you through typical figures for each component so you can compare bids and plan your budget.
Typical Price Range
A typical 2,000 sq ft house will usually cost between $4,000 and $10,000 to paint exterior surfaces, depending on factors like siding type, paint quality, and regional labor rates.
You’ll balance choices and expectations by considering:
- Paint quality and brand
- Painting techniques and prep time
- Color trends influencing labor complexity
- Local labor rates and seasonality
Cost Breakdown By Component
Breaking down costs helps you see where your budget goes and where to trim expenses on a 2,000 sq ft exterior paint job.
You’ll account for paint color choices, surface texture repairs, prep techniques, and material choices.
Factor environmental factors, seasonal timing, regional variations, project scope, DIY considerations, and long term maintenance to estimate labor, materials, and unexpected contingency accurately.
Cost Examples: Large (3,500+ Sq Ft)
Estimating exterior paint costs for a large home (3,500+ sq ft) hinges on roofline complexity, siding type, and how much prep you need—you’ll typically see prices range substantially, from roughly $8,000 to $25,000 or more depending on those factors and regional labor rates.
- large house considerations: access and crew size
- paint quality impact: longer life, higher upfront cost
- prep level: repairs, power washing
- timeline: faster work costs more
Cost Differences by Siding Type
When planning paint costs, you’ll see wood and vinyl require different approaches—wood often needs more prep and primers, while vinyl usually needs milder cleaners and specialty paints.
Masonry and stucco bring their own pricing quirks, like thicker coatings and patching for porous surfaces.
I’ll compare typical cost ranges and prep needs so you can pick the right budget for your siding.
Wood Vs. Vinyl Costs
A few key factors make wood and vinyl siding cost very differently to paint, so you’ll want to weigh material, prep, and maintenance before deciding.
You’ll compare wood durability and aesthetic appeal against vinyl maintenance and cost efficiency; consider paint adhesion, surface preparation, environmental impact, and insulation benefits.
- Wood: higher prep, better look
- Vinyl: less prep, lower cost
- Long-term upkeep varies
- Choose by budget and goals
Masonry And Stucco Pricing
If you’ve weighed wood and vinyl options, it helps to compare those to masonry and stucco, which bring very different painting demands and price points.
You’ll consider masonry techniques and stucco finishes, focusing on paint adhesion, surface preparation and moisture concerns.
Color selection and texture impact affect weather resistance.
Expect specialized repair methods and application tools, so labor and materials usually cost more.
Cost to Paint Wood Siding
Because wood siding needs regular upkeep to stay watertight and attractive, you’ll typically spend more to paint it than you’d on vinyl or aluminum; expect the average cost to range from about $1.50 to $4.50 per square foot depending on prep work, paint quality, and local labor rates.
Because wood siding needs regular upkeep, expect painting to cost about $1.50–$4.50 per sq ft, higher than vinyl.
You’ll factor in wood siding maintenance and specialized painting techniques.
- Inspect/repair
- Prime/seal
- Two coats paint
- Cleanup/testing
Cost to Paint Vinyl Siding
Painting vinyl siding usually costs less than painting wood because vinyl needs less prep and isn’t prone to rot; expect roughly $0.75 to $2.50 per square foot depending on siding condition, paint quality, and whether you want a color change or just a refresh.
You’ll save on labor since vinyl siding durability reduces repairs.
Choose paint color selection carefully—darker shades can fade faster and may need higher-quality coatings.
Cost to Paint Stucco
Vinyl siding and stucco require different approaches, so expect different price points when you move from one to the other.
You’ll consider stucco texture, paint types, and surface preparation before bidding. Weather conditions affect timing; color selection and application methods change costs.
Maintenance tips matter for longevity; weigh contractor options for repairs and finish.
- Surface prep
- Paint type
- Application method
- Maintenance plan
Cost to Paint Brick
1 main factor that drives the cost to paint brick is how much surface prep you need; if the mortar’s deteriorating, the brick’s chalking, or previous coatings must be stripped, expect higher labor and material charges.
You’ll weigh cost factors like paint types, surface preparation, weather considerations, contractor selection, color choices, project timelines, maintenance tips, warranty options, and eco friendly options when planning.
Cost to Paint Fiber Cement
Because fiber cement is dense and holds primer and paint well, you’ll usually pay moderate labor costs but benefit from longer-lasting results that reduce repaint frequency.
You should note fiber cement benefits and maintenance considerations when planning. Consider paint longevity and color selection for curb appeal.
- Durable substrate
- Moisture resistant
- Lower repaint cadence
- Wide color options
How Coats (One vs. Two) Affect Cost
If your siding only needs a refresh, one coat can be adequate and will save on paint and labor.
Choosing two coats adds durability and longer-lasting protection, but it increases both material costs and crew time.
We’ll compare when a single coat is acceptable and when the extra coat is worth the added expense.
One Coat: When Adequate
When the existing siding is in good shape and you’re using a high-quality paint with strong hide, one coat can be enough to deliver reliable coverage and save on labor and materials.
You should consider:
- surface preparation quality
- project suitability and color contrast
- weather considerations during paint application
- finish selection for paint longevity and overall cost efficiency
Two Coats: Durability Benefits
While a single coat can work in ideal conditions, applying two coats will give your siding noticeably better protection and coverage.
You’ll gain durability factors like improved surface protection and color retention, plus weather resilience across seasonal considerations.
Choose finish options and proper application techniques to reduce maintenance intervals, realize long term savings, and minimize environmental impact through fewer repaints.
Labor And Material Impact
Adding a second coat raises both labor and material costs, but it also changes where your money goes: you’ll pay more for paint and for the extra hours contractors spend on prep, application, and cleanup.
Yet those expenses often reduce long-term repainting and touch-up costs.
- labor rates, painter expertise
- material prices, quality variations
- project duration, preparation work
- regional differences, seasonal trends, surface types, color choices
When Primer Is Required and Its Cost
Primer matters any time you’re covering bare wood, metal, or patched areas, because it bonds the surface, hides stains, and guarantees your topcoat lasts.
Primer’s essential: it bonds bare wood, metal, and patches, hides stains, and ensures your topcoat endures.
You should pick primer types based on surface preparation, weather conditions, and desired paint adhesion.
Understand primer benefits for exterior longevity, compare costs, and learn application techniques.
Cost comparisons show primers add modest upfront expense but prevent costly repainting.
Paint Quality and Brand: Price vs. Lifespan
Because the paint you choose determines how long your exterior will look good, you should balance upfront cost against expected lifespan and performance.
Consider product comparisons for brand reputation, paint durability, weather resistance, finish types, and eco friendly options.
Factor color choices and maintenance requirements plus application techniques when weighing cost vs. quality.
- Compare brands
- Check durability
- Assess finishes
- Plan maintenance
Does Color Change Affect Price (Dark→Light)?
If you switch from a dark color to a much lighter one, expect the job to cost more because darker pigments often need extra coats or special prep to block bleed-through and guarantee even coverage.
You’ll pay for additional primer, more labor, and possibly tint-matching.
Consider color selection impact: light vs. dark choices change materials and time, so factor that into your estimate.
Prep Work Costs: Power Washing and Scraping
Before you pick a color, you’ll want to budget for prep: power washing to remove dirt and mildew and scraping to get rid of loose paint.
Power washing typically costs by the hour or square footage, while scraping and surface repair are priced by labor and the extent of damage.
Knowing these costs upfront will help you compare quotes and avoid surprises.
Power Washing Costs
Power washing is often the first step in prepping your home’s exterior, and it can dramatically affect both the final look and the longevity of the paint job.
You’ll factor in power washing techniques, equipment, safety, surfaces and preparation to maximize power washing benefits and cost saving.
Consider:
- Frequency
- Equipment choice
- Surface sensitivity
- Safety measures
Scraping And Surface Prep
When you’re prepping for exterior paint, scraping and surface prep remove loose paint, rust, and debris so the new finish bonds properly and lasts longer.
You’ll use scraping techniques—hand scrapers, power tools, and chemical strippers—for stubborn areas, then sand and prime.
Proper surface preparation prevents peeling, guarantees uniform coverage, and typically adds labor and materials to your estimate, affecting overall cost.
Repair Add-Ons: Rotten Wood, Rust, and Caulking
If you want a durable, professional-looking exterior, you’ll need to address common repair add-ons like rotten wood, rusted metal, and failing caulk before painting.
You’ll evaluate rotten wood, choose material options, and factor repair costs, prep requirements, and weather considerations.
Consider rust treatment and caulking techniques, get professional advice or DIY repairs, and follow maintenance tips.
- Inspect
- Replace
- Treat
- Seal
Trim, Fascia, and Soffits: Typical Painting Costs
When you budget for exterior painting, don’t forget that trim, fascia, and soffits often carry separate line items.
Trim painting costs are usually quoted per linear foot or hour, while fascia and soffit pricing can vary with height, accessibility, and material.
Knowing those distinctions helps you compare estimates and avoid surprises.
Trim Painting Costs
Trim, fascia, and soffits greatly affect your home’s curb appeal and protection. Painting them usually costs less per linear foot than full walls but can add up depending on detail, height, and prep work.
You’ll consider trim materials, trim styles, trim colors, trim maintenance, trim installation, trim durability, trim painting techniques, trim preparation, trim cost saving, and trim design trends.
- Prep
- Paint type
- Detail
- Access
Fascia And Soffit Pricing
1 key factor in fascia and soffit pricing is access—you’ll pay more for high eaves, steep roofs, or scaffolding needs because painters must work safely and efficiently.
You’ll also cover surface prep, primer, and premium paint. Expect added costs for fascia maintenance, soffit repairs, rotten wood replacement, and detailed trim work.
Get an itemized estimate to compare labor and materials.
Doors and Windows: Separate Painting Line Items
Doors and windows often require separate line items because they demand different prep, materials, and labor than siding or trim—you’ll need careful masking, sanding, and sometimes specialty primers or rubbers for hardware.
Doors and windows merit separate line items—different prep, materials, and careful masking for hardware and finishes.
You should budget for door frames and window trim with attention to surface preparation, paint finishes, color selection, and weather resistance.
- DIY tips
- contractor recommendations
- hardware masking
- touch-up costs
Decks, Porches, and Stairs: Extra Exterior Paint Costs
Decks, porches, and stairs often add significant costs because they need different products, prep, and safety considerations than walls or trim. You’ll pay for specialized coatings, sealing for deck maintenance, attention to porch aesthetics, and stair safety features to boost paint longevity.
| Area | Typical Cost | Notes |
|---|---|---|
| Deck | $$ | Sealer, anti-slip |
| Porch | $$ | Trim, decor finish |
| Stairs | $$ | Treads, nosing |
| Combined | $$$ | Efficient bundling |
Heights, Access, and Their Price Impacts
If your house is single-story, you’ll generally pay less than for multi-story work because it’s easier to reach and faster to paint.
When crews need scaffolding or aerial lifts for taller homes, expect higher labor and equipment charges.
You should also factor in safety rules and permit costs that can add time and expense on complex jobs.
Single-Story Versus Multi-Story
Because height and access directly affect labor, safety measures, and equipment, you’ll pay more for multi-story painting than for a single-story job.
You’ll weigh cost efficiency, aesthetic impact, maintenance requirements, neighborhood standards, weather considerations, project duration, homeowner preferences, hiring contractors, DIY challenges, and color selection.
- Single-story: easier access, lower risk.
- Multi-story: higher labor, safety needs.
- Scheduling affects duration.
- Prep dictates final quality.
Scaffolding And Lift Needs
When your home requires work above ground level, scaffolding and aerial lifts become central cost drivers because they change labor time, crew size, and safety requirements.
You’ll pay more for setups that need assembly, haul-in, permits, or operator certification.
You’ll evaluate scaffolding types and lift options by height and access.
Safety considerations raise crew time, and rental costs vary by day, week, and equipment.
Safety Regulations And Permits
Although rules vary by locality, safety regulations and permit requirements for work at height directly affect both project planning and costs.
You’ll need to follow safety standards and permit regulations, keep compliance guidelines on file, and prioritize risk management to avoid fines or delays.
- Local permits
- Inspection fees
- Certified access equipment
- Worker training
Ladders, Scaffolding, and Lifts: Rental vs. Included
If your home has multiple stories or steep sections, you’ll need reliable access equipment and you’ll want to know whether the painter’s quote includes ladders, scaffolding, or lifts—or if you’ll be billed separately for rentals. You should weigh ladder safety, scaffold types, lift options, rental costs, access solutions, equipment maintenance, height considerations, project efficiency, safety protocols, and rental comparisons.
| Option | Consideration |
|---|---|
| Ladders | ladder safety, height considerations |
| Scaffolds/Lifts | scaffold types, lift options, rental costs |
Labor vs. Material Cost Breakdown (%)
You’ll want to know roughly what percent of your quote goes to labor versus materials so you can spot fair pricing.
Materials typically cover paint, primer, caulk, and supplies, while labor often accounts for the largest single share of the bill.
Don’t forget contractors also build overhead and profit into their rates, which affects the final percentages you’ll see.
Labor Cost Percentage
When you’re planning an exterior paint job, labor often makes up the biggest slice of the budget—typically 60–75% of the total cost—because skilled prep work, masking, repair, and multiple paint coats take time and expertise.
You should use labor cost analysis and monitor labor market trends to set expectations:
- Prep complexity
- Crew size
- Time per coat
- Skill level
Material Cost Breakdown
Labor often dominates your exterior painting bill, but materials still shape both cost and quality—you’ll want to see exactly how paint, primers, caulk, and sundries slice into the remaining 25–40% of the budget.
You’ll weigh paint types, finish options, color selection, and paint durability against surface preparation, application methods, upkeep frequency, environmental factors, weather considerations and regional influences to choose wisely.
Overhead And Profit
Think of overhead and profit as the business layer that turns raw materials and crew hours into a reliable exterior paint job you can depend on.
You’ll see typical splits and markup strategies; pricing transparency helps you compare bids.
Consider these percentages:
- Materials: 25%
- Labor: 50%
- Overhead: 15%
- Profit: 10%
Use this to evaluate quotes.
Regional Pricing: Why ZIP Code Matters
Because local costs and demand shape every estimate, your ZIP code can change the price of an exterior paint job considerably.
You’ll see regional trends and pricing fluctuations driven by local labor rates, material availability, weather impacts, market demand, and broader economic factors.
Know that painting seasons vary by area, so compare nearby ZIP codes to understand true local cost drivers before hiring.
Seasonal Pricing: Best and Worst Times to Book
When you schedule exterior painting, it can shave hundreds off your bill, since peak seasons drive up demand and off-season work can score discounts and faster completion times.
Scheduling exterior painting off-peak can trim hundreds from your bill, with discounts and quicker completion.
You’ll weigh seasonal trends, pricing fluctuations, temperature considerations, weather impacts, best scheduling, and demand spikes to pick the best window.
- Spring: mild, busy
- Summer: hot, expensive
- Fall: perfect, steady
- Winter: cheaper, risky
Contractor Experience: How It Changes Quotes
If you hire a seasoned contractor, you’ll usually pay more upfront, but you’ll also get more accurate quotes, fewer surprises, and smoother project management.
You should evaluate contractor qualifications and experience levels to understand pricing strategies tied to market trends. Use negotiation tactics based on reputation factors and expected service quality, and confirm realistic project timelines so you know what tradeoffs justify higher bids.
How to Read and Compare Exterior Painting Estimates
Now that you know how experience affects quotes and timelines, you’ll want to focus on reading and comparing the estimates contractors give you.
Check for estimate transparency and use a consistent method to compare quotes:
- Verify scope and exclusions.
- Note materials and brands.
- Look at timeline and crew size.
- Confirm payment terms and warranties.
You’ll make smarter hiring decisions this way.
Line-Item Checklist to Request From Every Painter
Ask each painter for a clear line-item checklist so you can compare the scope of work side-by-side.
Have them list materials and brands so you know exactly what’s being used and whether it meets your standards.
Make sure labor, timelines, and any extras or allowances are spelled out to avoid surprises.
Scope Of Work
Because a clear scope of work prevents costly surprises, you should get a detailed, line‑item checklist from every painter before signing anything.
Include project timeline, surface preparation, paint finishes and paint durability, plus color selection and contractor communication.
Note environmental considerations, local regulations and seasonal impacts. Provide project documentation.
- Prep tasks
- Painting steps
- Cleanup/extras
- Signoffs
Materials And Brands
Once you’ve nailed the scope and timeline, get a line‑item list of every material the painter plans to use so you know exactly what you’re paying for. Ask for paint types, finish options, brand comparisons, product reviews, durability ratings, application methods, surface compatibility, eco considerations, color trends, and premium choices.
| Item | Details |
|---|---|
| Paint types | |
| Finish options | |
| Brands | |
| Eco notes | |
| Durability |
Labor And Extras
When you review bids, get a clear, line‑item labor and extras list so you know what the crew will actually do and what’ll cost extra; this should cover prep, masking, caulking, minor carpentry, primer, number of coats, trim work, cleanup, and disposal.
- Verify labor costs and additional fees.
- Confirm project scope and scheduling flexibility.
- Ask hiring tips, insurance verification, contractor selection.
- Use negotiation strategies to limit unexpected expenses and guarantee service quality.
Questions to Ask Before Hiring a Painter
How do you separate a good painter from a great one?
Ask about painter qualifications, past exterior projects, warranty terms, surface prep, and paint brands they’ll use.
Confirm the project timeline, daily work hours, cleanup, and who supervises crews.
Request a written estimate detailing scope, exclusions, and change-order procedures so you avoid surprises and guarantee clear expectations before work begins.
Verifying Licensing, Insurance, and References
As you narrow choices with detailed estimates and project plans, make sure you verify a painter’s licensing, insurance, and references before anyone starts work.
Confirm licensing verification and contractor credentials, review insurance coverage, and run reference checks to confirm service guarantees, safety standards, project timelines, and quality expectations.
- Ask for license number
- Request insurance proof
- Call past clients
- Check guarantees
When DIY Saves Money : And When It Doesn’t
You can save a lot by doing the prep work and painting yourself if you’ve got the time and help for the heavy labor.
But be realistic about your skills and the safety risks—high ladders, lead paint, and complex surfaces can erase those savings.
We’ll compare where DIY cuts costs and where hiring pros is wiser.
Time And Labor Savings
Whether you tackle exterior painting yourself or hire pros, the biggest savings come down to time and labor—and those savings aren’t always what they first seem.
You should weigh time efficiency and project planning against costs. Consider:
- Prep time vs. paid labor
- Equipment rental
- Weather delays
- Opportunity cost
Choose based on your schedule, skills, and true hourly value.
Skill And Safety Limits
If you’re comfortable on ladders and know how to prep, prime, and spot-treat wood and trim, DIY can cut costs considerably; but when tasks require roofing access, tall scaffolding, lead-paint remediation, or complex repairs, hiring pros is safer and often cheaper once you factor in injury risk, code compliance, and warranty protection.
Do a skill assessment, surface evaluation, and project planning; prioritize ladder safety, safety equipment, proper preparation, painting techniques, equipment rental, weather considerations, and risk management.
DIY Cost Breakdown: Materials, Tools, and Time
When you tackle exterior painting yourself, you’ll save on labor but still need to budget carefully for materials, tools, and your time. This section breaks down the actual costs so you can compare DIY versus hiring pros.
- DIY preparation: surface preparation, minor repairs, primer.
- Paint selection: quality, color consultation, gallons needed.
- Tool rentals: ladders, sprayers, brushes, PPE; factor rentals.
- Cost forecasting and project scheduling: time, contingencies, permits.
Safety, Permits, and Code Considerations
Before you start, check whether local permit requirements apply for exterior work—some municipalities require permits for scaffolding, lead paint handling, or significant façade changes.
You’ll also need proper safety gear and practices, like fall protection, respirators for old paint, and secure ladders.
Knowing the rules and using the right equipment will keep the job legal and protect you and your crew.
Permit Requirements Overview
Although painting might seem straightforward, you’ll often face local rules that affect how and when work can proceed; permits, inspections, and safety codes can change both scope and cost.
You should know permit types, application process, fees structure, timeline expectations, local regulations, inspection requirements, permit exemptions, and contractor responsibilities:
- Confirm local regulations.
- Check permit types.
- Estimate fees and timeline.
- Verify inspections and exemptions.
Safety Equipment And Practices
1. You must prioritize safety gear, perform a hazard assessment, and use fall protection when painting. Keep first aid kit accessible and follow local codes.
| Item | Purpose | Tip |
|---|---|---|
| Helmet | Impact | Secure fit |
| Harness | Fall protection | Inspect straps |
| Gloves | Chemical | Nitrile |
| Kit | First aid | Restock |
| Checklist | Hazard assessment | Update |
Eco-Friendly Paints and Low-VOC Cost Impacts
When you choose eco-friendly or low-VOC paints, you’ll often pay a bit more up front, but you also cut down on fumes, disposal hassles, and long-term health risks—benefits that can offset the initial cost difference for many homeowners.
Choosing low‑VOC paints may cost more up front but reduces fumes, disposal hassles, and long‑term health risks.
You’ll get eco friendly options with measurable low VOC benefits and added resale appeal.
- Reduced fumes
- Safer disposal
- Slight premium
- Marketable feature
Longevity: Cheap Paint Now vs. Premium Later
If you pick the cheapest paint to save up front, you’ll likely pay more over time because lower-quality formulas fade, peel, and need recoating sooner than premium options. You’ll weigh paint durability, cost comparison, long term investment, surface protection, quality assurance, maintenance frequency, color retention, environmental impact, application techniques, and brand reputation.
| Emotion | Reality |
|---|---|
| Frustration | Frequent recoats |
| Relief | Longer protection |
| Regret | Poor finish |
| Pride | Smart investment |
Warranties: Types and Are They Worth It?
Choosing a higher-quality paint can reduce how often you repaint, but warranties play a big role in protecting that investment.
Higher-quality paint cuts repainting frequency, but solid warranties are key to safeguarding that investment.
You should weigh warranty types, warranty benefits, coverage limits, warranty duration, common exclusions, claim process, customer satisfaction, and warranty transferability before deciding.
Consider:
- Manufacturer vs contractor
- What’s covered
- How long it lasts
- Transfer rules and claims
Typical Timeline: How Long the Project Should Take
Because exterior painting involves prep, repairs, priming, and multiple coats, you should expect the whole job to take anywhere from a few days to a couple of weeks depending on house size, condition, and weather. You’ll plan around project factors like preparation stages, drying times, crew efficiency, weather considerations, timeline variations, scheduling conflicts, and project coordination.
| Phase | Typical Days |
|---|---|
| Prep | 1–3 |
| Repair | 1–4 |
| Paint | 2–6 |
| Drying/Touchups | 1–3 |
Unexpected Costs and Recommended Contingency (%)
When you start a painting project, hidden problems—rot, extensive caulking, lead paint mitigation, or damaged trim—can quickly add significant expense, so plan ahead with a contingency.
Account for hidden issues—rot, lead paint, or trim damage—by building a 10–20% contingency into your painting budget.
You should account for unexpected expenses and hidden fees. Consider a 10–20% contingency for emergency repairs, project delays, material shortages, labor fluctuations, and seasonal costs.
- Risk assessment
- Contingency %
- Prioritize repairs
- Monitor costs
How to Measure Square Footage and Surface Area
Start by measuring each wall, window, door, and trim piece you’ll paint so you can calculate accurate square footage and order the right amount of paint.
Record heights and widths, subtract openings, and total wall areas. Use those figures for square footage calculation and surface area measurement to determine coats needed, primer, and paint volume.
Double-check measurements before ordering.
Cost Variations for Multi-Story and Complex Rooflines
If your home has multiple stories, expect height-related labor costs to raise the bill because crews need more time and safety measures.
You’ll likely need scaffolding or specialized access equipment, which adds rental and setup fees.
Complex rooflines demand extra prep and tight-detail painting, so factor in higher labor and material costs.
Height-Related Labor Costs
Because working higher up adds time, risk, and equipment needs, your labor costs climb noticeably on multi-story homes and properties with complex rooflines.
You’ll face height adjustments, ladder safety and scaffolding types choices, multi-story challenges, access methods and roofline considerations that create labor premiums.
Safety protocols, height restrictions, and longer project timelines drive pricing.
- Risk
- Time
- Skill
- Compliance
Access And Scaffolding Needs
Higher elevations and tricky rooflines don’t just increase labor — they force choices about how you’ll reach the work safely and efficiently. You’ll weigh scaffolding types and access solutions during project planning, balancing cost, time, and safety measures. Choose systems that fit height, slope, and access to minimize delays and extra rentals.
| Option | Benefit |
|---|---|
| Frame scaffold | Stable platform |
| Aerial lift | Fast setup |
| Suspended scaffold | Good for facades |
| Ladders | Cheap, limited |
Complex Roofline Prep
When your roofline twists through multiple stories, dormers, valleys, and steep pitches, prepping for paint becomes more labor- and equipment-intensive, and you’ll see that reflected in the estimate.
You’ll pay more for roofline intricacies and specialized preparation techniques.
Typical cost drivers include:
- Scaffold/boom setup
- Safety harness systems
- Detailed sealing/repairs
- Extended labor hours
Painting Historic Homes: Special Preservation Costs
If you’re tackling a historic house, expect preservation requirements and specialized work to raise costs compared with a standard repaint.
You’ll follow restoration guidelines and local regulations, use historic preservation techniques and period specific finishes, and prioritize paint material selection and traditional color palettes for historical accuracy.
Environmental considerations, skilled labor costs, and ongoing maintenance strategies all add expense, but preserve character and value.
Repaint vs. Siding Replacement: Cost Comparison
Preserving a historic facade can prompt you to weigh whether a fresh paint job will do the job or if full siding replacement is a better long-term investment.
You’ll compare Repaint Benefits versus Siding Longevity, balancing Cost Efficiency and Material Choices.
Consider Aesthetic Appeal and Weather Resistance when estimating lifespan and budget.
- Short-term savings
- Long-term durability
- Maintenance needs
- Material trade-offs
When to Repaint: Signs You Need Work Now
Although a well-painted exterior can last years, you’ll want to act as soon as certain signs appear to avoid costly repairs. Watch for signs fading, peeling paint, weather damage, mildew growth, and color inconsistencies. Use homeowner surveys, neighborhood trends, and inspection tips to decide timing. Consider seasonal factors and DIY readiness before scheduling professional work.
| Sign | Action |
|---|---|
| Peeling paint | Repair/paint |
| Mildew growth | Clean/prime |
| Color inconsistencies | Spot test |
| Weather damage | Inspect/replace |
Prioritizing Painting Tasks to Control Expenses
When money’s tight, start by tackling the areas that prevent further damage and costlier repairs later: prioritize trim and eaves with peeling paint, caulk and seal gaps that let moisture in, and address mildew or rot before repainting surfaces.
- Budgeting strategies and essential priorities.
- Task scheduling across project phases.
- Expense management and cost saving tips.
- Planning timeline, seasonal considerations, DIY vs. professional, strategic investments.
Cost-Saving Strategies That Don’t Sacrifice Quality
If you want to cut exterior painting costs without sacrificing quality, focus on smart prep, selective upgrades, and reliable materials that last. You can use budget friendly techniques like DIY minor prep, buying quality materials in bulk, and scheduling off-season work. Compare warranties and prioritize surface repairs to extend paint life.
| Task | Save | Impact |
|---|---|---|
| Prep DIY | Low cost | High |
| Bulk paint | Lower unit price | Medium |
| Selective upgrades | Targeted spend | High |
How to Negotiate Quotes Without Losing Value
Start by comparing at least three detailed quotes so you know where costs differ and what each contractor includes. Then use that information to ask for targeted adjustments—like matching a competitor’s paint brand, removing optional add-ons you don’t need, or spreading payments—to lower price without cutting essential work.
- Prioritize scope
- Use negotiation tactics
- Request itemized changes
- Conduct value assessment
Financing Options for Exterior Painting Projects
Wondering how to pay for an exterior paint job without draining savings? You’ll weigh financing options like contractor financing, payment plans, and credit options against loan alternatives.
Use project budgeting and budget planning to compare interest, fees, and timelines.
Prioritize cost management by splitting costs into phases, choosing low-interest solutions, and getting clear terms before signing so you avoid surprises.
How Exterior Paint Affects Curb Appeal and Resale
When buyers or passersby see a freshly painted exterior, they instantly form expectations about how well the rest of the home has been cared for.
A freshly painted exterior signals care and quality, shaping expectations about the rest of the home’s upkeep.
So a well-chosen color and clean finish can lift curb appeal and justify a higher asking price. You’ll influence resale value by improving perceived upkeep and style.
- First impressions
- Color strategy
- Quality finish
- Market alignment
Checklist: Prepare Your Home Before Painters Arrive
A fresh coat of paint can boost curb appeal and resale value, but you’ll get the best result if you prepare the site before painters arrive.
Clear walkways, trim plants, move outdoor furniture, cover grills, secure pets, and remove wall decorations.
Use a prep checklist and confirm painter communication about access, parking, power, and timing so work proceeds smoothly and on schedule.
Frequently Asked Questions
Will Painting the Exterior Require HOA or Neighborhood Approvals?
Yes — you’ll often need HOA or neighborhood approvals before painting; check neighborhood guidelines, submit your color selection for review, and follow any required forms or timelines so your project won’t be delayed or rejected.
Can Paint Impact Home Energy Efficiency or Thermal Performance?
Yes — your paint choice can affect energy use: light color selection reflects sunlight, reducing heat gain, while darker hues absorb it. Combined with proper thermal insulation and reflective coatings, paint helps improve your home’s thermal performance.
Do Painters Dispose of Old Paint and Debris, and How?
Yes — coincidentally, you’ll find painters do dispose of old paint and debris responsibly: they use paint disposal methods like hazardous-waste dropoffs, recycling, solidifying leftover paint, and follow environmentally friendly practices to minimize contamination and landfill impact.
Are There Tax Credits or Rebates for Using Energy-Efficient or Reflective Paint?
Yes—you can qualify for some federal, state, or utility rebates and tax incentives when you choose energy efficient options; check local programs, as reflective paint benefits may earn credits or rebates through energy-efficiency or cool-roof initiatives.
How Do Warranties Transfer if I Sell My House After Painting?
They usually transfer if your contract allows — don’t expect magical immortality. You’ll need paperwork; warranty duration and paint quality determine coverage. You’ll sign transfer forms, notify the maker, and the buyer then claims repairs.
Conclusion
Now that you’ve seen the numbers and options, you can approach your exterior paint project with confidence — like a conductor stepping up to lead a well-rehearsed symphony. Prioritize quality over the cheapest bid, prepare your home thoroughly, and negotiate smartly so you don’t sacrifice value. With the right choices and a bit of planning, you’ll boost curb appeal, protect your investment, and enjoy a refreshed home that feels like new.