How to Calculate Square Footage for Painting Walls Accurately
You can accurately calculate wall square footage by measuring each wall’s width and height in feet, multiplying to get area, and recording totals; subtract standard openings (doors ~21–24 sq ft, windows ~12–15 sq ft) and any built‑ins. For irregular or sloped walls, split shapes into rectangles or triangles, sum areas, then multiply by coats and add 5–15% for waste. Check the paint’s coverage per gallon and round up to buy enough — keep going to see tips for tricky layouts and primer needs.
Quick Method: Calculate Wall Square Footage
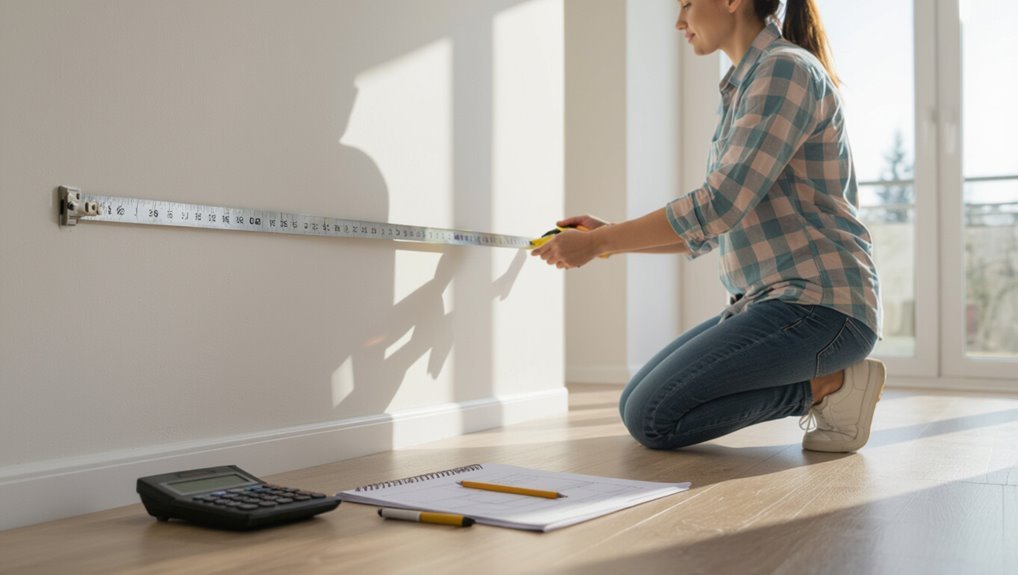
Start by measuring each wall’s width and height in feet. Then multiply those two numbers to get the square footage of that wall.
Measure each wall’s width and height in feet, then multiply them to find the wall’s square footage.
You’ll record wall dimensions, add each wall’s area for a room total, and subtract doors/windows.
Use quick calculations to estimate paint needs: total square footage divided by coverage per gallon gives gallons required.
Double-check totals before buying.
Tools You Need Before Measuring
Before you start measuring, gather the right tools so you don’t waste time mid-job.
You’ll want a tape measure or laser measurer and a notepad or app for recording dimensions, plus a level for accuracy.
Also have surface prep supplies like a scraper, patching compound, and a damp cloth to guarantee measurements reflect the true paintable area.
Measuring Tools Checklist
You’ll need a few reliable tools to measure walls accurately: a tape measure (25–30 ft), a laser distance measurer for large spaces, a notepad or measuring app, a pencil or marker, a level or straightedge, and a calculator.
Use consistent measuring techniques, double-check tool accuracy, note each dimension clearly, mark high and low points with the level, and record totals for straightforward area calculations.
Surface Preparation Supplies
After you’ve gathered measuring tools, get the surface ready so your dimensions reflect the true paintable area. You’ll need surface preparation items and essential tools: scraper, sandpaper, patching compound, cleaner, and tack cloth to remove flaking paint, dust, and grease before measuring.
| Item | Purpose | When to Use |
|---|---|---|
| Scraper | Remove loose paint | Peeling areas |
| Sandpaper | Smooth edges | After patching |
| Compound | Fill holes | Before sanding |
| Cleaner | Degrease | All surfaces |
Measure a Rectangular Wall (Wall Square Footage)
Measuring a rectangular wall is simple: multiply the wall’s height by its width to get square footage.
Measuring a rectangular wall is easy — multiply its height by its width to find the square footage.
You’ll record wall dimensions for accurate paint preparation, subtract openings (doors, windows), and round up for waste. Use a tape measure and note units.
- Measure height
- Measure width
- Subtract openings
- Round up for waste
Measure Walls With Sloped or Vaulted Ceilings
Sloped and vaulted ceilings change how you measure because wall heights vary across their width. So break each wall into simple shapes—rectangles and triangles—measure each section, then add their square footages together and subtract openings.
Use straightforward measurement techniques: record base lengths and varying heights at key wall angles, calculate area for each shape, then total areas for sloped ceilings or vaulted ceilings.
Measure Alcoves, Nooks, and Partial Walls
When you measure alcoves, nooks, and partial walls, break irregular shapes into simple rectangles or triangles and measure each piece.
Subtract openings like windows, doors, or built-in shelves from your totals. That way you’ll get an accurate square footage without overestimating paint needs.
Measure Irregular Shapes
Irregular spaces like alcoves, nooks, and partial walls need to be broken into simple shapes so you can measure them accurately; treat each section as a rectangle, triangle, or circle, record its dimensions, and add the areas together for the total square footage.
Use consistent measuring techniques for irregular shapes and note units.
- Sketch the shape
- Measure segments
- Calculate each area
- Sum totals
Account For Openings
Now that you’ve broken complex walls into simple shapes, it’s time to subtract openings so your paint estimate isn’t inflated.
Measure alcoves, nooks, doors and windows individually, noting widths and heights. Subtract their areas from total wall square footage.
Small partial walls and cutouts can affect coverage—account for openings impact to preserve measurement accuracy and avoid buying excess paint.
Subtract Doors and Standard Windows
Before you subtract anything, measure each door and standard window so your math stays accurate: typical interior doors measure about 21–24 sq ft (3 ft × 7 ft) and standard single windows are usually around 12–15 sq ft.
When subtracting square footage, record each opening and subtract from total wall area; this keeps calculating openings precise.
- List doors
- List windows
- Multiply counts by size
- Subtract totals
Subtract Sliding Doors and Large Picture Windows
After you’ve accounted for doors and standard windows, move on to sliding doors and large picture windows, since they can subtract a lot of surface area from your paintable walls. Measure sliding door dimensions and picture window measurements, then subtract their area from total wall square footage. Use this quick reference:
| Feature | Typical Sizes |
|---|---|
| Sliding door | 6’×7′ |
| Picture window | 5’×4′ |
| Notes | Adjust per actual measurements |
Handle Baseboards, Trim, and Chair Rails
Count the linear feet of baseboards, trim, and chair rails so you can decide whether to paint around them or include them in your square footage calculations.
Count linear feet of baseboards, trim, and chair rails to decide whether to paint around them or include in square footage.
Measure each wall for trim measurement and note areas for baseboard painting.
Consider chair rail considerations and plan edge finishing.
- Measure lengths
- Subtract or include
- Note profile changes
- Add touch-up time
Measure Multiple Rooms Efficiently
Now that you’ve marked trim and baseboard lengths, move on to measuring multiple rooms efficiently so you don’t waste time redoing measurements.
Use efficient measuring techniques: group rooms by similar dimensions, measure full wall lengths and heights, and use a laser measure for speed.
Do basic room layout planning to sequence work logically, minimizing back-and-forth and saving time on the job.
Record Measurements to Avoid Errors
When you record measurements, start by noting each wall’s height so your calculations are accurate.
Then write down the horizontal distances for every wall and label which room they belong to.
Finally, mark doors, windows, and any obstacles so you can subtract those areas later.
Measure Wall Heights
Measure each wall from floor to ceiling at several points—near corners and in the center—so you catch any variations from settling or uneven floors.
You’ll note the wall height and use simple measurement techniques to average values, avoiding errors when calculating area. Record each reading clearly and mark anomalies for later review.
- Use a tape measure
- Measure at corners
- Measure midpoints
- Note and average readings
Record Horizontal Distances
Start by walking the room and taking each horizontal measurement — wall-to-wall lengths, window and door widths, and any alcoves — and write them down immediately so you don’t rely on memory.
Use clear horizontal measurement techniques: label each measurement with wall identifiers, note units, and double-check totals.
You’ll guarantee accurate distance recording and prevent calculation mistakes when totaling square footage.
Note Openings And Obstacles
2 things can throw off your paint estimate: openings like windows and doors, and obstacles such as built-in shelves or radiators—note each one and record its dimensions so you subtract their area from the total wall square footage.
Measure openings types and obstacle dimensions precisely, write them down, and adjust your totals.
- Windows
- Doors
- Built-ins
- Radiators
Calculate Total Paintable Square Footage
Before you can figure out how much paint to buy, add up every wall and ceiling area you’ll actually paint—subtracting windows, doors, and built-ins—so you get an accurate total paintable square footage.
Measure height × width for each section, tally totals, and note paint type and surface texture since they affect coats and prep.
Record the final square footage clearly for ordering.
Convert Square Footage to Gallons (Coverage)
Now that you’ve got your total square footage, convert it to gallons by using the paint’s coverage per gallon on the label.
Remember to multiply for the number of coats you’ll apply and add a bit extra for wastage and overlap.
This guarantees you buy enough paint without overspending.
Paint Coverage Per Gallon
Coverage tells you how much area a single gallon of paint will actually cover, and converting your wall square footage into gallons helps you buy the right amount without over- or under-ordering.
Use paint types and coverage factors from the label to estimate gallons. Calculate area ÷ coverage per gallon, then round up.
- Measure walls
- Subtract openings
- Check label coverage
- Divide and round
Number Of Coats
If you plan to apply more than one coat, account for that when converting square footage to gallons so you don’t run short mid-job.
Decide on number of coats options based on surface color, primer use, and desired finish. Multiply your total square footage by coats, then divide by the paint’s coverage per gallon.
Remember paint layer considerations like drying time and adhesion when planning gallons.
Wastage And Overlap
Because brushes, rollers, and edges always steal a bit of paint, you should add a waste allowance when converting your square footage to gallons—typically 5–15% depending on technique and surface complexity.
- Estimate base gallons from coverage.
- Add 5–15% for waste management.
- Account for overlap techniques and edging.
- Adjust for texture, porosity, and extra coats.
Estimate Extra Coats and How They Affect Gallons
When you plan for extra coats, remember each additional layer increases the paint you’ll need, so factor them into your gallon estimate from the start. Use extra coat calculations and paint coverage adjustments: determine single‑coat gallons, multiply by coats, add 10% for touchups.
| Coats | Gallons |
|---|---|
| 1 | 2 |
| 2 | 4 |
Include Primer or Stain‑Blocker in Your Estimate
If the surface needs primer, include its coverage in your square‑foot calculations just like you’d paint.
Check the primer’s spread rate on the label and adjust the required gallons accordingly.
For stained or high‑tannin areas, account for a stain‑blocking primer which often needs extra coats or higher coverage.
When Primer Is Needed
Although it adds another step, you should include primer or a stain‑blocker in your estimate whenever surfaces are bare, patched, stained, have high tannin content, or show previous adhesion problems; you’ll choose primer types and application techniques based on substrate and stain severity.
Consider these triggers:
- New drywall or bare wood
- Water or smoke stains
- Knotty or tannin‑rich wood
- Flaking or peeling paint
Calculate Primer Coverage
Now you’ll figure out how much primer (or stain‑blocker) to budget by matching the product’s coverage rate to the surface area and number of coats needed; check the label for square feet per gallon, then divide your total square footage by that number and round up to account for waste and porosity.
Consider primer types and coverage factors — latex, oil, shellac vary — and plan coats accordingly.
Adjust For Stain‑Blocking
Because stains and tannins can bleed through finished paint, include a stain‑blocking primer or stain‑blocking additive in your material estimate and count the extra coat into your square footage math.
You’ll assess stain types and surface conditions to pick product and coverage. Calculate primer coat area same as paint, then add for touchups and porosity.
- Water stains
- Smoke/tar
- Wood tannins
- High‑porosity surfaces
Add Waste and Touch‑Up Allowances
When you’re finishing your estimate, add a waste allowance and a small buffer for touch‑ups so you don’t run short on paint after cutting in, trimming, or correcting missed spots.
Plan 5–10% extra for waste management and account for porous surfaces or complex trims.
Keep a separate small can for touch up techniques, noting color, finish, and where you applied each coat.
Pick a Sheen: How Finish Affects Coverage
The sheen you choose affects not just appearance but how much paint you’ll need, because glossier finishes reflect more light and tend to show imperfections that can require extra coats or priming.
Consider sheen impact and finish durability when estimating coverage and coats.
- Flat: hides flaws, less durability
- Eggshell: modest durability, easier touch-ups
- Satin: good durability, washable
- Semi-gloss/Gloss: highest durability, may need priming
Estimate for Color Changes and Deep Colors
If you’re changing to a darker or dramatically different color, plan on extra coats and more paint than your basic square-foot calculation suggests.
You’ll need to factor in color contrast and how many coats the deep hue requires to hide the old shade.
Also consider finish selection—glossier paints may show fewer imperfections but sometimes need more precise application, affecting time and paint quantities.
Read Can Labels: Calculate Coverage Per Coat
Because paint cans list coverage per coat, you should read them carefully to turn your square-foot totals into actual gallons needed.
Check the paint can for coverage options (sq ft/gal), recommended coats, and surface type. Note variations for priming or porous walls.
Match your total square footage to the listed coverage to calculate gallons, rounding up for waste and touch-ups.
- Read label
- Note sq ft/gal
- Count coats
- Round up
Use Online Paint Calculators (And When to Double‑Check)
When you’re unsure about math or want a quick estimate, online paint calculators can save time by converting your measurements, coat count, and paint coverage into gallons with a few clicks.
Use reputable online resources, enter accurate room dimensions and number of coats, and check calculator accuracy by comparing results to label coverage.
Double‑check odd ceilings, textured walls, or trims before ordering.
Common Measuring and Buying Mistakes to Avoid
Online calculators help, but you’ll still run into problems if you don’t watch for common measuring and buying mistakes.
Online calculators are handy, but common measuring and buying mistakes can still derail your paint project.
Avoid these pitfalls so your project stays on budget and finishes right.
- Misreading tape measures — common measuring mistakes that waste paint.
- Forgetting to subtract windows/doors.
- Buying too little due to optimistic yield estimates — buying errors.
- Ignoring surface texture and primer needs.
Final Checklist: Confirm You’ve Bought the Right Paint
Before you tape a drop cloth or open the can, run through a quick checklist to confirm you’ve got the right paint for the job.
Check color swatches in the room light, verify coverage matches your square footage estimate, confirm finish types (matte, eggshell, semi-gloss) suit the surface, and guarantee you followed paint selection tips for durability and cleanability.
Keep receipts and extra touch-up.
Frequently Asked Questions
How Do Humidity and Temperature Affect Paint Coverage During Application?
Humidity effects slow drying and can cause milky finish or poor adhesion, while temperature impact alters viscosity and drying speed; you’ll get thinner coverage in heat and trapped moisture in high humidity, so adjust timing and application accordingly.
Can Textured or Popcorn Ceilings Require Different Paint Calculations?
Yes — textured or popcorn ceilings need different paint calculations. Picture a rough, moonlike surface: texture impact raises coverage needs, and taller ceiling height increases area, so you’ll buy more paint and allow extra coats.
Should I Count Closets and Pantry Interiors in Total Square Footage?
Yes — you should include closet dimensions and pantry size in your total square footage; small interiors still need paint, so measure height and wall lengths, subtracting doors or built-ins to avoid overbuying supplies and paint.
How Do Mural or Accent Walls Change Paint Quantity Estimates?
Want to factor complexity? You’ll need more paint for mural designs and accent colors because detailed patterns, extra coats, and color changes increase coverage needs; plan extra primer, touch-up supplies, and a waste allowance to avoid shortfalls.
Do Primer and Paint From Different Brands Interact to Change Coverage?
Yes — they can. You’ll see brand compatibility affect primer adhesion and paint bonding, which alters coverage consistency. Always test a small area, follow manufacturer recommendations, and use compatible products to avoid uneven absorption or peeling.
Conclusion
You’ve measured, calculated, and read the labels—yet one small misstep can turn careful planning into a last‑minute trip to the store. Precision meets procrastination: when you take exact measurements and still leave buying to guesswork, neat walls become chaotic touchups. Trust your numbers, trust the can’s coverage, and buy a little extra—better to have a stray quart waiting than an empty brush staring back at you. Finish calm, not frantic.