How to Clean an Airless Paint Sprayer After Using Stain the Right Way
You should flush your airless sprayer immediately after staining, using the manufacturer-recommended solvent (mineral spirits for oil-based stains, water for water-based), run it until the expelled fluid is clear, then pump a short burst through the gun and tip. Relieve pressure, disconnect hose, disassemble the tip, guard, and filters for a final wipe and soak, inspect seals, and lubricate before reassembly. Follow proper disposal rules, and keep going to learn full step-by-step care.
How to Clean an Airless Paint Sprayer After Using Stain Quick Answer
The fastest safe way to clean a sprayer after stain is to flush it immediately with the manufacturer’s recommended solvent until the liquid runs clear.
If you can stop right after staining, clean it right away to prevent clogging and dried residue; if you need to wait, at least seal the intake and tip and plan to flush within a few hours.
Follow safety steps like wearing gloves and working outdoors or in a ventilated area.
One-sentence summary of the fastest safe cleaning method
If you want the fastest safe clean after using stain, flush the sprayer immediately with the manufacturer-recommended solvent—usually mineral spirits for oil-based stains or water for water-based stains—running it until the expelled fluid runs clear.
Then pump a short burst of clean solvent through the gun and tip before disassembling for a final wipe-down.
For how to clean airless paint sprayer after using stain, rinse, purge, and inspect seals.
When immediate cleaning is required vs. acceptable delays
When you’ve sprayed stain that dries quickly or contains heavy pigments and solvents, clean the sprayer immediately to prevent clogs and hardened residue.
For slower‑drying water‑based stains you can delay a few hours if you flush the system with the right solvent before storage—otherwise aim to rinse and purge within 24 hours and disassemble for inspection as soon as practical.
You should prioritize immediate cleaning for oil‑based or tacky stains; for water‑based stains, flushing and same‑day disassembly usually suffice to avoid damage.
Basic Understanding What You’re Cleaning and Why It Matters
You’re cleaning a high-pressure pump, hose, gun, and tip where stain can settle, dry, or react with metal.
If you don’t remove residue properly you’ll get clogs, corrosion, and lost performance that can ruin finishes and shorten the sprayer’s life.
Different stains—oil-based, water-based, and gel—need specific solvents and steps, so know which one you used before you start.
What an airless paint sprayer is and how stain behaves inside it
An airless paint sprayer is a high-pressure pump that forces stain through a tiny tip to atomize it into a fine spray. Knowing how stain behaves inside that system helps you target the spots that clog or degrade performance.
Stain flows through hose, valve, filter, and tip; solvents evaporate, solids settle, and sticky residues form on internal surfaces, so you’ll clean those areas thoroughly.
Risks of improper cleaning (clogs, corrosion, performance loss)
If you skip thorough cleaning, residue and solvent buildup will quickly turn a reliable sprayer into a problem machine.
You’ll face clogged tips and filters, internal corrosion from lingering chemicals, and weakened pump seals. Fluid paths will restrict, pressure will fluctuate, and finish quality will suffer.
Neglect also increases repair costs and downtime, so clean promptly and follow recommended flushing and drying steps.
Types of stains (oil-based, water-based, gel stains) and impact on cleaning steps
Left unaddressed clogs and corrosion often come from not matching your cleaning method to the material you sprayed, so start by identifying the stain type before flushing the system. You’ll use water for water-based stains, mineral spirits for oil-based, and stronger solvents plus thorough scrubbing for gel stains.
| Stain | Solvent | Notes |
|---|---|---|
| Water-based | Water | Easiest |
| Oil-based | Mineral spirits | Flammable |
| Gel | Solvent + scrub | Viscous |
| Dry residue | Mechanical | Inspect filters |
Safety Preparation Before Cleaning
Before you start cleaning, put on gloves, safety eyewear, and a respirator to protect your skin, eyes, and lungs.
Set up a well-ventilated workspace with drop cloths and containment to catch spills.
Follow local disposal rules for stain residues and wash water so you don’t contaminate drains or soil.
Personal protective equipment (gloves, eyewear, respirator)
When you’re preparing to clean an airless paint sprayer, gear up with the right personal protective equipment: chemical-resistant gloves, splash-proof eyewear, and a properly fitted respirator.
Choose gloves rated for solvents, inspect eyewear for scratches, and make sure the respirator uses appropriate cartridges for organic vapors.
Replace damaged gear, fit everything snugly, and don’t skip PPE when flushing or disassembling the sprayer.
Safe workspace setup (ventilation, drop cloths, containment)
Although you’ve already got your PPE on, set up a safe workspace with good ventilation, protective drop cloths, and containment to control overspray and solvent runoff.
Open windows or run a fan to exhaust fumes, lay heavy-duty cloth or plastic under the sprayer, and use barriers or trays to catch spills.
Keep ignition sources away and maintain clear exit paths for quick response.
Proper disposal rules for stain residues and wash water
Acknowledge that stain residues and wash water are hazardous waste and handle them accordingly: don’t pour them down drains, into soil, or storm sewers.
Contain rinse water in sealed containers and label them. Check local regulations for hazardous-waste drop-off or disposal.
Use absorbents for spills, bag and dispose per rules.
Clean tools with minimal water, then recycle or dispose of residues at approved facilities.
Tools, Materials, and Setup You’ll Need
Before you start cleaning, gather the essential tools: the pump, hose, spray tip, filters, and the wrenches you’ll need to disassemble parts.
Pick cleaning agents based on the stain — water for latex, mineral spirits for oil-based paints, detergent for light soils, or a specialized cleaner for stubborn buildup.
Consider optional accessories like a flushing pump, tip cleaner, or a parts tray to speed up and simplify the process.
Essential tools list (pump, hose, spray tip, filters, wrenches)
To clean an airless paint sprayer properly, you’ll need a compact set of tools: the pump housing or drain kit, a flexible hose, the correct spray tip and guard, intake and manifold filters, and a few wrenches or spanners to disassemble fittings.
- A reliable pump kit that won’t fail you.
- A kink-free hose you trust.
- A sharp, correct spray tip for tidy results.
- Cleanable filters and snug wrenches.
Cleaning agents by stain type (water, mineral spirits, detergent, specialized cleaners)
Now that you’ve got the basic tools—pump kit, hose, tips, filters, and wrenches—sorted, pick cleaning agents that match the type of material you’ve been spraying. Use water for water‑based stains, mineral spirits for oil‑based, mild detergent for light cleanup, and specialized cleaners for stubborn residues.
| Stain Type | Cleaner | Notes |
|---|---|---|
| Water | Water | Flush thoroughly |
| Oil | Mineral spirits | Ventilate area |
| Light | Detergent | Gentle, cheap |
| Tough | Specialized | Follow label instructions |
Optional accessories that speed cleaning ()
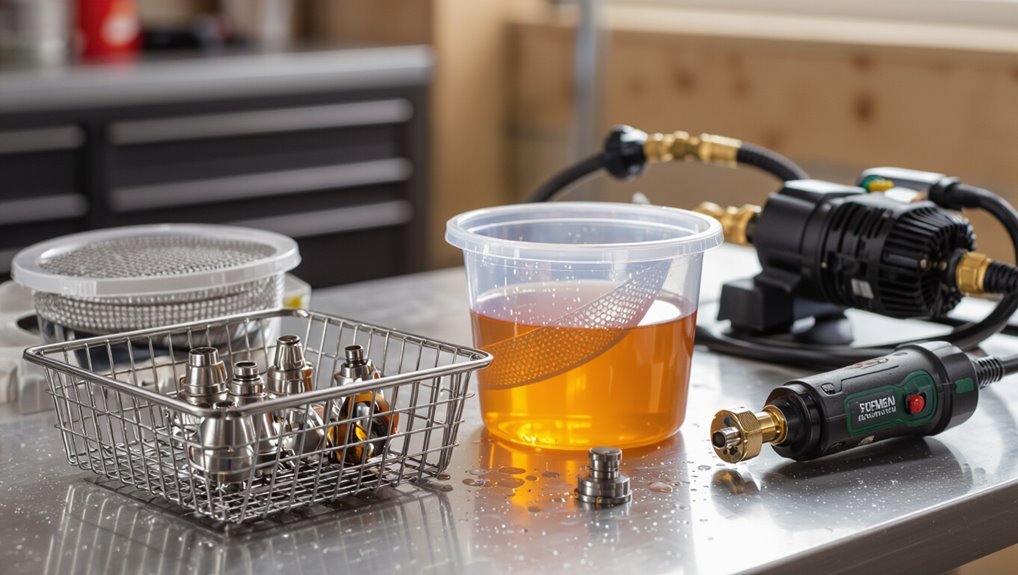
A few well-chosen accessories can cut cleaning time dramatically and make the job less messy: consider a flush kit with quick-connect fittings, a dedicated pump saver bottle, a small parts brush set, disposable tip guards, and a portable parts washer or pressure tank to circulate cleaning fluid.
You’ll also want lint-free rags, funneled storage containers, replacement seals, and a magnetized tray to keep fasteners organized.
Step-by-Step Cleaning Process
Before you start, you’ll purge and flush the system to remove excess stain.
Then you’ll remove and store leftover stain, disassemble the spray tip, guard, and inlet strainer, and flush the unit with the correct cleaning fluid (water for water-based, solvent for oil-based).
Finish by manually cleaning the spray tip, filter, and suction tube.
Pre-clean steps purge and flush the system
When you’re ready to purge and flush the system, relieve pressure and clear the hose and gun to prevent clogs and chemical exposure.
Shut off and engage pressure-relief, then trigger the gun to expel residual stain into a waste container.
Disconnect hose, flush with appropriate solvent through pump and hose until runs clear, then run clean water to neutralize solvent before disassembly.
Step 1: Remove and safely store remaining stain
Start by containing any remaining stain—pour it back into its original container or into a clearly labeled, sealable waste jug that’s compatible with the product.
Wear chemical-resistant gloves and eye protection, wipe spills immediately with absorbent cloths, and transfer usable stain through a funnel to avoid drips.
Seal containers tightly, label them with date and color, and store in a cool, ventilated area away from heat.
Step 2: Disassemble external parts (spray tip, guard, inlet strainer)
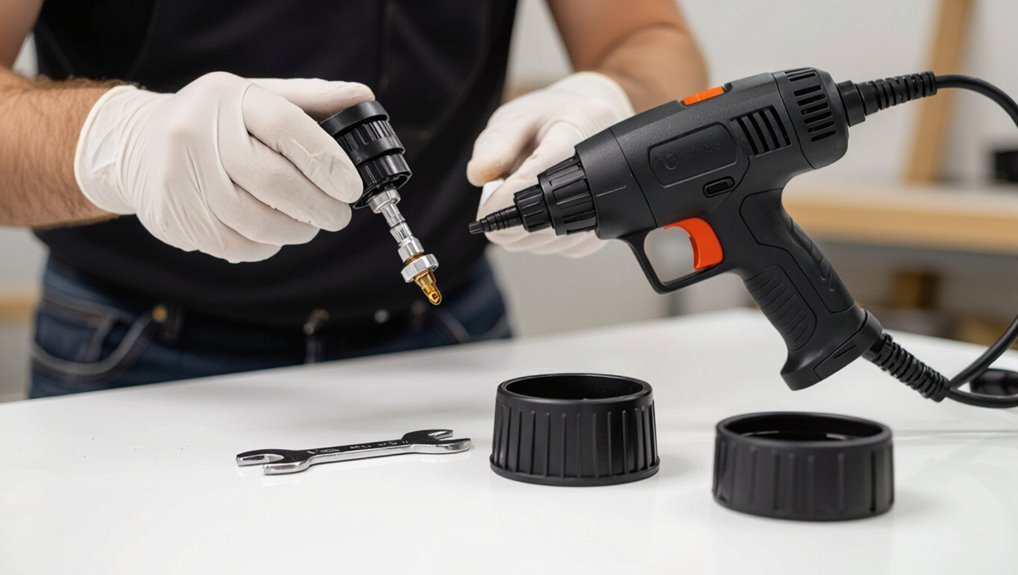
With the remaining stain secured, loosen the spray tip, guard, and inlet strainer to access the parts that contact paint.
Remove each piece carefully, keeping small parts together. Check seals, O-rings, and screens for clogging or damage.
Use a soft brush to dislodge dried stain and inspect the tip orifice for wear.
Set components aside for cleaning and inspection.
Step 3: Flush with appropriate cleaning fluid (water for water-based; solvent for oil-based)
Flush the pump and hose using the correct cleaning fluid for the coating you used: water for water-based stains and the manufacturer-recommended solvent for oil-based products.
Run fluid through the system until it exits clear, cycling the spray gun trigger to purge internal passages.
Monitor pressure and fluid color, then stop when clean.
Dispose of rinse waste per local regulations and store remaining solvent safely.
Step 4: Clean the spray tip, filter, and suction tube manually
Now that the system’s been flushed and the rinse runs clear, focus on the parts that still hold residue: the spray tip, inline filter, and suction tube.
Remove the tip and soak it briefly in appropriate cleaner, gently clear the orifice with a soft brush or needle.
Open the filter housing, rinse or replace the filter, and wipe or flush the suction tube until it’s spotless.
Step 5: Run the pump with cleaning fluid to clear internal passages
Start the pump and circulate a dedicated cleaning fluid (water for water-based paints, solvent for oil-based) through the system to dislodge any residue in the internal passages.
Keep the gun trigger open and direct flow into a waste container, watching pressure gauges. Run until flow looks consistent, then shut off pump.
Follow safety precautions for solvents and dispose of waste properly.
Step 6: Rinse cycle(s) until fluid runs clear
After the pump has cleared most paint, run one or more rinse cycles to remove remaining residue until the outgoing fluid is completely clear.
Keep the gun trigger open and direct flow into a waste container while you watch the pressure and flow.
Repeat rinses, switching to fresh solvent as needed, until no color or particles appear.
Flush hose and gun thoroughly, then drain remaining fluid.
Step 7: Lubricate and reassemble parts for storage
Inspect and lightly lubricate all O-rings, seals, packings, and the piston rod before reassembly to prevent corrosion and guarantee smooth operation.
Remove excess solvent, apply a thin film of manufacturer-recommended grease to moving parts, and replace worn components.
Reassemble in reverse order, tighten fittings snugly (don’t overtighten), and store the sprayer in a clean, dry place away from freezing temperatures.
Step 8: Final test spray and inspect for blockages
Prime the gun and trigger a short test spray onto a safe surface to confirm the sprayer runs smoothly and that paint flows evenly.
Check spray pattern for gaps or sputtering, listen for irregular motor sounds, and inspect the tip, filter, and hose for clogs.
If you spot blockage, shut down, relieve pressure, and clean or replace the offending component before storing the unit.
Troubleshooting Common Problems During Cleaning
If the spray tip or filter’s clogging, you’ll learn how to spot it and clear it safely without damaging parts.
I’ll show safe methods to remove hardened stain from the pump and when to stop and use a gentler solvent or mechanical removal.
If discoloration or smell won’t go away, I’ll explain when deep-cleaning won’t cut it and which parts you should replace.
Clogged tip or filter identification and clearing techniques
When your sprayer’s flow drops or the spray pattern turns uneven, a clogged tip or filter is often to blame; you’ll want to identify which component is blocked before you try to clear it.
First inspect the tip for dried stain or debris; remove and soak in solvent.
Check inline and gun filters, tapping them gently or replacing if fouled, then reassemble and test.
Hardened stain inside pump safe removal methods
Scrape or flush out hardened stain inside the pump carefully to avoid damage: you’ll want to first relieve pressure, disconnect the spray hose, and drain any remaining material.
Then inspect the inlet, outlet, and valve assemblies to locate hardened buildup. Use plastic picks, nylon brushes, and manufacturer-approved solvents in short cycles; avoid metal tools.
Reassemble only after confirming smooth valve movement and complete residue removal.
Persistent discoloration or smell when to deep-clean or replace parts
After you’ve cleared hardened residue and verified valve movement, check for lingering discoloration or a persistent smell that won’t wash away with normal flushing; these signs mean parts may need a deeper cleaning or replacement.
Strip and soak removable components in solvent, scrub seals and hoses, inspect gaskets for staining or odor absorption, and replace any parts that retain color or smell despite thorough cleaning.
Comparison Cleaning Methods by Stain Type and Tools
When you clean water-based stains you’ll mostly use flushing with water and a mild detergent, while oil-based stains need solvents and extra rinses to prevent residue.
You’ll weigh hand-cleaning for tight spots, pressure-flush for speed, and ultrasonic cleaners for thoroughness on small parts.
Compare each method’s time, effectiveness, and safety to pick the right approach for the stain and tool.
Water-based stain vs oil-based stain: step differences
Because water-based and oil-based stains use different solvents and drying behaviors, you’ll need slightly different cleaning steps and tools for each to keep your airless sprayer working well. Rinse water-based stain with warm water and mild detergent; flush until clear. For oil-based, use mineral spirits or recommended solvent, then rinse. Replace seals if needed.
| Stain Type | Cleaning Tip |
|---|---|
| Water-based | Flush with warm water |
| Oil-based | Use solvent, then rinse |
Hand-cleaning vs pressure-flush vs ultrasonic cleaners pros and cons
You’ve already seen how water- and oil-based stains demand different solvents and rinses; now compare the cleaning methods that actually remove those residues: hand-cleaning, pressure-flushing, and ultrasonic cleaning.
You’ll use hand-cleaning for small jobs and delicate parts, pressure-flush for hoses and guns, and ultrasonic for thorough internal cleaning.
Choose based on stain type, time, cost, and equipment access.
Mistakes to Avoid When Cleaning an Airless Sprayer
Don’t use the wrong solvent or mix cleaners that react—doing so can damage seals and internal parts.
You’ll also want to clean and inspect seals and components rather than skipping them.
Finally, dispose of waste properly and always run a test spray after reassembly to confirm everything works.
Using the wrong solvent or mixing incompatible cleaners
When you reach for the wrong solvent or mix incompatible cleaners, you can seriously damage seals, hoses, and pump components—and make cleanup harder, not easier.
Always check manufacturer recommendations and solvent compatibility before you pour. Don’t combine solvent types or use harsh chemicals that swell or dissolve parts.
Rinse thoroughly with the approved cleaner, and dispose of mixed solvents safely to avoid corrosion and performance loss.
Neglecting seals and internal parts during cleaning
Missing a few small seals or skipping internal components during cleanup seems harmless, but it quickly leads to leaks, clogs, and costly repairs.
You should disassemble seals, valves, and the pump area, inspect O-rings and diaphragms, and clean or replace worn parts.
Regularly lubricate and reassemble correctly to maintain pressure, prevent contamination, and extend the sprayer’s service life.
Improper disposal of cleaning wastes
If you pour leftover paint, solvent, or wash water down a drain or into the yard, you’ll contaminate waterways and risk fines, clogged plumbing, and harm to wildlife.
Instead, collect rinsate and used solvent in labeled, sealed containers. Take them to a hazardous-waste facility or follow local disposal rules.
Don’t dump, dilute, or burn wastes—handle them responsibly to avoid legal and environmental consequences.
Skipping test spray after reassembly
Because you’ve reassembled the sprayer, don’t assume it’s ready—always run a quick test spray to verify seals, tip alignment, and spray pattern.
You’ll catch leaks, clogs, or misaligned tips before wasting material or damaging surfaces.
Use water or compatible solvent, adjust pressure and tip angle, inspect pattern for consistency, then correct issues immediately to guarantee safe, efficient operation.
Prevention and Best Practices to Minimize Future Cleaning
To cut down on future cleaning, follow a simple routine maintenance schedule and stick to a quick post-job flush checklist after every stain job.
Store your sprayer and parts properly between uses and choose tips, filters, and accessories that resist clogging. Those small habits will save time and keep your sprayer performing reliably.
Recommended routine maintenance schedule
Set a simple weekly and monthly routine you can stick to so small issues never become major repairs.
You’ll protect performance and avoid costly downtime. Follow this schedule to feel confident and in control:
- Clean tip and guard after each job to prevent clogging.
- Flush hoses weekly to remove residue.
- Inspect seals and filters monthly for wear.
- Lubricate pump annually and record checks.
Best storage practices between stain jobs
1 simple habit will keep your sprayer ready for the next staining job: store it clean, dry, and protected.
Flush all residue, wipe external parts, and allow components to air dry fully.
Reassemble loosely, cap openings, and place the unit in a cool, dry spot away from sunlight and freezing temperatures.
Check seals and hoses before each use to prevent surprises.
Choosing tips, filters, and accessories to reduce clogging
When you pick the right tips, filters, and accessories, you’ll cut clogging down dramatically and spend far less time on maintenance; choose tip sizes that match your material’s viscosity, install fine mesh inlet and manifold filters, and add a gun-mounted filter or strainer to catch debris before it reaches delicate components.
Routinely replace worn tips, keep spare seals, and use anti-clog nozzles to maintain consistent flow.
Quick post-job flush checklist
Picking the right tips and filters makes cleanup easier, but a quick, consistent post-job flush keeps your sprayer behaving over the long run.
Rinse material cup, suction tube, and gun until clear. Run flush solution through pump and hose, then purge air and residual fluid.
Inspect and clean tip, filter, and seals. Dry parts, reassemble, and store with light lubricant to prevent corrosion.
Maintenance Checklist Before, During, After Each Stain Job
Before you start, during the job, and after you finish, follow a short maintenance checklist to keep your airless sprayer running reliably and to prevent costly clogs or damage.
- Inspect seals, hoses, and tips — fix leaks immediately.
- Strain stain and test spray to avoid surprises.
- Flush thoroughly between colors and during long breaks.
- Clean filters, store empty, and note needed parts for next use.
FAQ
You’ll find quick answers to common concerns about sitting stain, solvent use, tip and filter lifespan, running the sprayer dry, and proper disposal.
I’ll explain how long stain can damage the unit, why mineral spirits won’t clean water-based products, when to swap tips and filters, and whether it’s safe to run the pump dry.
I’ll also cover safe, legal ways to dispose of solvents and rinse water.
How long can stain sit in an airless sprayer before it ruins it?
How long can stain sit in your airless sprayer before it causes damage?
If you leave stain in the machine more than 24–48 hours, pigments and binders begin to thicken and clog filters, hoses, and the pump.
Overnight might be okay if sealed and cool, but you should flush and clean as soon as possible to prevent buildup and costly repairs.
Can I use mineral spirits to clean water-based stains?
Can you use mineral spirits to clean water-based stains? No — mineral spirits won’t dissolve water-based stains effectively and can create hazardous mixes.
Instead, flush your sprayer with warm water and a mild detergent, then rinse until clear.
For stubborn residue, use a manufacturer-approved water-based cleaner or ammonia solution in small amounts.
Always follow safety and disposal guidelines.
How often should I replace spray tips and filters?
After flushing out water-based stains with water and mild detergent, check your sprayer’s tip and filters before storing them.
Replace tips when spray pattern widens, becomes uneven, or after about 100–200 hours of heavy use.
Change inline and suction filters whenever they clog, after using coarse materials, or at least every season.
Keep spare tips and new filters on hand.
Is it safe to run the sprayer dry during cleaning?
Is it safe to run your airless sprayer dry during cleaning? You shouldn’t. Running dry can damage the pump, seals, and internal components by eliminating lubrication and causing overheating.
Flush until clear solvent flows and suction draws only air briefly at the end, but avoid prolonged dry operation. If you hear unusual noises or see erratic pressure, stop and re-prime immediately to prevent harm.
What’s the proper way to dispose of cleaning solvents and rinse water?
Wondering how to dispose of cleaning solvents and rinse water safely?
You shouldn’t pour them down drains, storm sewers, or onto soil.
Collect used solvents and contaminated rinse water in labeled, sealed containers.
Take them to a household hazardous waste facility or approved recycling center.
Follow local regulations for transport and disposal, and never mix different chemicals—keep records of what you drop off.
Closing Notes When to Seek Professional Service
If your sprayer keeps clogs, loses pressure, or leaks despite thorough cleaning, you should consider professional repair.
Weigh the cost of a deep professional cleaning and parts against buying a replacement—sometimes repair saves money, but a worn pump or motor can make replacement the smarter choice.
Talk to a technician to get an estimate and a clear recommendation before you decide.
Signs the sprayer needs professional repair
When your sprayer starts showing persistent performance problems—like sputtering that doesn’t clear after cleaning, sudden pressure loss, or visible damage to the pump or hoses—you should consider professional repair.
Also watch for overheating, unusual noises, leaks you can’t locate, repeated clogging despite proper maintenance, or erratic spray patterns.
If you can’t diagnose or fix these safely, get a technician to inspect and repair it.
Cost vs benefit of professional deep cleaning vs replacement
Not every problem warrants a trip to the shop, but persistent issues you couldn’t fix yourself should prompt a quick cost-benefit check between professional deep cleaning and replacement.
Compare repair cost, remaining machine lifespan, and downtime. If cleaning restores performance for a fraction of replacement cost, choose service; if repairs approach half the price of replacement or failures recur, replace to save time and avoid repeat expenses.