How to Clean Bathroom Walls Before Painting for Best Adhesion
You’ll get best adhesion by thoroughly cleaning, de-greasing, and removing any mildew before priming. Start by inspecting for mold, stains, peeling paint, or soft spots, then wash walls with a mild detergent, TSP substitute, or citrus degreaser for oily areas. Scrub mildew with an antifungal cleaner, rinse well, patch and sand repairs smooth, and dull glossy finishes with 120–150 grit before priming. Follow safety and disposal steps, and keep reading for step-by-step tips and troubleshooting.
Who This Guide Is For and What You’ll Learn
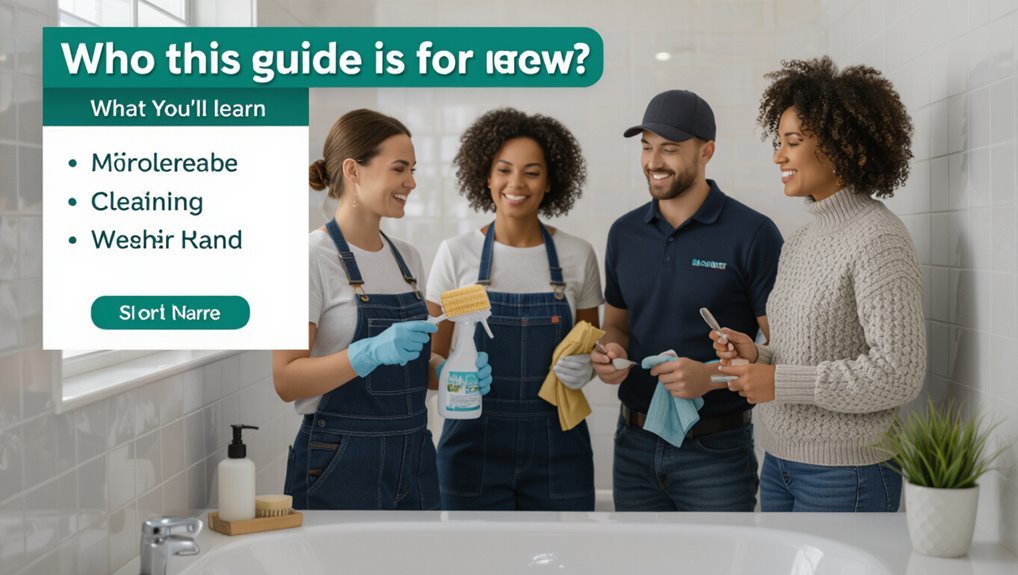
Whether you’re prepping a rental, revitalizing a master bath, or tackling a DIY weekend project, this guide walks you through exactly what you need to clean bathroom walls before painting.
You’ll learn targeted bathroom preparation steps, how contaminants affect paint adhesion, which cleaners and tools to use, and when to repair surfaces.
You’ll finish ready to prime and paint with confidence.
Quick 5-Step Cleaning Checklist Before Painting
Before you paint, check the wall for cracks, peeling paint, and soft spots so you know what needs repair.
Tackle grease and mildew with an appropriate cleaner—scrub, rinse, and repeat until the surface looks clean.
Finish with a thorough rinse and let the walls dry completely before you prime or paint.
Surface Inspection
Start by giving your bathroom walls a close once-over so you can spot trouble fast: check for mold, peeling paint, water stains, cracked grout, and any loose or flaking areas that’ll stop new paint from adhering. You’ll perform a quick mold assessment and evaluate wall integrity, noting spots needing repair before cleaning.
| Issue | Action |
|---|---|
| Mold | Mark/inspect |
| Flaking | Scrape/repair |
| Stain | Assess/remove |
Grease And Mildew Removal
Tackle grease and mildew with a focused, five-step routine so your paint will stick and look professional:
Scrub vents and corners with detergent.
Apply a mildew-killing solution to affected areas.
Degrease with a citrus or trisodium phosphate mix.
Spot-treat stubborn stains.
Neutralize cleaners.
Follow mildew prevention habits and grease management techniques to stop recurrence before you prime and paint.
Final Rinse And Dry
Now that you’ve removed grease and mildew, finish with a careful rinse and thorough drying to make sure paint will adhere evenly.
Use final rinse techniques: wipe walls with clean water on a sponge, then rinse with a second clean cloth.
For drying methods, squeegee excess water, ventilate, and run a fan or dehumidifier until walls are bone dry before priming and painting.
Why Cleaning Matters for Paint Adhesion in Bathrooms
Because bathrooms collect soap scum, oils, and mildew, you need to clean walls thoroughly before painting so the new coat can stick properly.
Bathrooms trap soap scum, oils, and mildew — clean walls thoroughly so fresh paint adheres and lasts.
You’ll reduce mold risks and counter moisture impact, ensuring paint bonds and lasts. Clean surfaces prevent peeling, staining, uneven sheen, and wasted effort.
- Remove residue
- Kill spores
- Dry completely
- Sand glossy spots
- Use proper primer
Signs Your Walls Need Deep Cleaning or Repair
After you’ve removed soap scum and killed mildew, inspect the walls for clear signs that they need deeper cleaning or repair before painting. Look for stains, bubbling, peeling, mold spots, or soft drywall; these demand deep cleaning or wall repairs to guarantee adhesion.
| Issue | Indicator | Action |
|---|---|---|
| Stain | Discoloration | Clean |
| Bubbling | Paint lifts | Scrape |
| Soft drywall | Spongy touch | Replace |
| Mold | Black spots | Treat |
| Peeling | Flakes | Sand |
Tools and Materials for Bathroom Wall Prep
Before you start scrubbing, gather the right tools and materials so the job goes smoothly.
You’ll need basic supplies like sponges, scrub brushes, drop cloths, and a tack cloth, plus cleaning solutions such as trisodium phosphate or a mildew cleaner for stubborn grime.
Having everything ready will save time and help you get the walls clean and paint-ready.
Tools And Materials
A few basic tools and the right cleaners will make prepping your bathroom walls faster and more effective.
You’ll use targeted cleaning techniques and focused surface preparation to guarantee paint sticks. Gather gear that speeds work and prevents damage.
- Microfiber cloths
- Sponge with scrub pad
- Soft-bristle brush
- Sanding block (fine)
- Painter’s tape and drop cloths
Cleaning Solutions And Supplies
When you prep bathroom walls for painting, choose cleaners and supplies that cut soap scum, mildew, and grease without damaging paint or drywall.
Pick mild detergent, TSP substitute, diluted bleach for mildew, and a commercial mildew remover if needed.
Use microfiber cloths, non-abrasive sponges, soft-bristle brushes, and a pump sprayer.
Match cleaning agents to surface types for safe, effective prep.
Choose Safe Bathroom Cleaners : Pros and Cons
Since you’ll be applying paint afterward, pick cleaners that remove soap scum and mildew without leaving residues that interfere with adhesion.
You should weigh safety, surface compatibility, and ventilation; consider natural alternatives and an effectiveness comparison before choosing. Clean thoroughly, rinse, and let dry.
- Non‑bleach mildew cleaners
- Mild detergent solutions
- Vinegar-based options
- Commercial degreasers
- Specialty paint‑prep cleaners
DIY Cleaner for Soap Scum and Grease
If you want an effective, inexpensive cleaner for soap scum and grease, mix 1 part distilled white vinegar with 1 part warm water and add a tablespoon of liquid dish soap per cup of solution; spray, let sit a few minutes, scrub with a non‑abrasive pad, then rinse and dry.
You’ll use DIY soap solutions and straightforward grease removal techniques to prep walls for painting.
When to Use Commercial Mildew Removers or Bleach
If you spot heavy black mold or mildew that household cleaners won’t remove, you’ll want to use a bleach solution to kill spores and lighten stains.
For stubborn stains or areas with porous surfaces, consider a commercial mildew remover formulated for paint prep.
Always wear gloves, eye protection, and run good ventilation or a fan to keep fumes from building up.
When To Use Bleach
When you spot dark, fuzzy mildew or a musty odor on bathroom walls, reach for a mildew-specific cleaner or a diluted bleach solution—both kill mold spores but work best in different situations.
Use bleach when stains are extensive, porous, or recurrent; wear protection, ventilate, rinse thoroughly.
Consider bleach alternatives for sensitive surfaces and adjust cleaning frequency to prevent return.
- Extensive stains
- Porous tile/grout
- Recurrent mold
- Poor ventilation
- Sensitive occupants
When To Choose Commercial Removers
Bleach and home remedies handle many mildew jobs, but you’ll want a commercial mildew remover in specific situations: heavy, stubborn growth that won’t budge, textured or porous surfaces where DIY mixes can’t penetrate, or when a product with added inhibitors and surfactants will save time and reduce scrubbing. Consider commercial remover benefits and an effectiveness comparison below.
| Situation | DIY | Commercial |
|---|---|---|
| Light mildew | Good | Excellent |
| Heavy growth | Poor | Best |
| Porous surfaces | Limited | Effective |
| Time needed | Longer | Faster |
Safety And Ventilation Requirements
1 clear rule: always prioritize ventilation and protective gear before you reach for a commercial mildew remover or bleach.
You should meet local ventilation standards, wear proper safety equipment, and limit exposure. Use stronger chemicals only for persistent mold, and follow label instructions.
- open windows and run exhaust fan
- use respirator and gloves
- avoid mixing chemicals
- test a small area
- rinse thoroughly afterward
How to Patch-Test Cleaners on Drywall, Plaster, and Tile
Before you clean the whole wall, test your chosen cleaner on a small, inconspicuous spot of drywall, plaster, or tile to make sure it won’t damage the surface or remove paint.
Use simple patch testing methods: apply a tiny amount, wait, blot, and inspect for discoloration or softening.
Repeat on each material to confirm cleaner compatibility before full application.
Removing Soap Scum and Hard Water Stains : Step-by-Step
Start by identifying whether you’re dealing with soap scum (filmy, greasy residue) or hard water stains (mineral spots and white crust).
That determines which cleaners and tools you’ll use so you don’t damage the surface.
Then remove residue safely with a tested cleaner, soft cloth or nonabrasive pad, and gentle rinsing.
Identify Stain Types
When you’re prepping bathroom walls for paint, identifying soap scum and hard water stains lets you choose the right cleaner and method so you don’t waste time or damage surfaces.
Use stain identification to distinguish residue by texture, color, and location. Recognize common stain types to plan treatment and avoid guessing.
- greasy film
- chalky white buildup
- rust-colored streaks
- cloudy spots
- concentrated edges
Remove Residue Safely
Now that you’ve matched stains to their likely causes, you can remove soap scum and hard water buildup with the right supplies and a clear plan.
Gather nonabrasive scrubber, white vinegar, baking soda, mild detergent and gloves.
Test a small area. Work top-down, apply vinegar, scrub residue types gently, rinse, repeat for stubborn spots.
Use safe methods to protect paint-ready surfaces.
Killing and Removing Mold and Mildew Safely : Step-by-Step
Mold and mildew thrive in damp bathrooms, but you can kill and remove them safely by following a clear, step-by-step approach that protects you and prevents regrowth.
Use gloves, mask, and ventilation; test cleaners; scrub with antifungal solution; rinse and dry; apply mold prevention measures and mildew treatment to stop return.
Wear gloves and a mask, vent the room, test cleaners, scrub with antifungal solution, then rinse, dry, and prevent regrowth
- Protect yourself
- Choose an appropriate cleaner
- Scrub thoroughly
- Rinse and dry completely
- Prevent future growth
Removing Wax, Silicone, and Cleaning-Film Residue
After you’ve dealt with mold and mildew, you’ll often find other residues—old wax from candles, silicone from sealant work, or a hazy cleaning-film—that can stop primer and paint from sticking. Use wax removal techniques: warm and scrape gently, then clean with mineral spirits. For silicone scraping methods, score and peel, finishing with isopropyl alcohol.
| Problem | Solution |
|---|---|
| Wax | Warm, scrape |
| Silicone | Score, peel |
| Cleaning film | Alcohol wipe |
| Final step | Rinse, dry |
Removing Grease, Deodorant, and Splatter Stains Before Painting
First, identify whether the marks are greasy fingerprints, deodorant smears, or paint splatter so you can pick the right cleaner.
Use a degreasing detergent or citrus-based cleaner for oil, a mild all-purpose cleaner or rubbing alcohol for deodorant, and a gentle scraper plus soapy water for dried splatter.
Rinse the area well and let it dry completely before priming or painting.
Identify Stain Types
Before you start scrubbing, take a few minutes to identify the stains on your bathroom walls—grease, deodorant buildup, and splatters each demand different cleaners and techniques.
Use stain identification to pick targeted stain removal approaches so you won’t waste time or damage surfaces.
- Visible sheen or sticky residue
- Powdery white marks near fixtures
- Drip patterns and splatter edges
- Faint yellowing zones
- Recurrent spots after cleaning
Choose Appropriate Cleaner
While you’ll tailor products to each stain, start by matching cleaners to the soil—grease needs a degreaser or strong dish soap, deodorant buildup responds to a mild alkaline cleaner or vinegar solution, and splatters often come off with a general-purpose cleaner and some gentle scrubbing.
Test cleaners on a hidden spot, consider natural alternatives for sensitive finishes, and prioritize cleaning effectiveness over fragrance or brand.
Rinse And Dry Thoroughly
After cleaning, rinse the walls with clean water to remove residue from degreasers, alkaline cleaners, or vinegar solutions so paint will stick evenly.
Use proper rinse techniques and effective drying methods so no film or moisture remains before priming. Wipe, squeegee, ventilate, blot, and wait until surfaces are bone dry.
- Wipe with microfiber
- Squeegee excess
- Ventilate room
- Blot corners
- Wait 24 hours
Cleaning Tile Walls and Grout Before Painting
Start by removing loose dirt and soap scum from tile and grout so the paint will adhere properly; you’ll want a clean, dry surface before any primer or paint goes on.
Scrub grout lines with a stiff brush and baking soda paste or a gentle commercial grout cleaning product.
Wipe tiles with a degreaser, rinse thoroughly, dry, and inspect for mildew before proceeding with primer.
Preparing Textured Walls, Vinyl-Coated Drywall, and Plaster
Start by evaluating the texture of your walls so you know whether you’re dealing with heavy knockdown, light orange peel, vinyl coating, or plaster.
Next, remove dirt, grease, and mildew with an appropriate cleaner and a soft brush or sponge.
Finish by repairing cracks or holes, sanding smooth where needed, and applying the right primer for each surface before painting.
Assess Surface Texture
If you’re preparing textured walls, vinyl-coated drywall, or plaster, you’ll need to identify the surface type and its condition before cleaning so you choose the right method and avoid damage.
Use texture assessment and surface evaluation to plan repairs, cleaning, and priming.
Consider:
- Grain and pattern depth
- Vinyl coating presence
- Plaster hardness
- Loose texture areas
- Moisture damage signs
Remove Dirt And Grime
Scrub away surface dirt and grime gently but thoroughly so paint will adhere and the texture won’t trap contaminants; use a soft-bristled brush or non-abrasive sponge with a mild detergent solution for textured walls, a low-sudden-pressure rinse for vinyl-coated drywall, and a light, controlled wiping for plaster to avoid crumbling.
| Surface | Cleaning techniques |
|---|---|
| Textured | Brush + mild detergent |
| Vinyl-coated | Low-pressure rinse |
| Plaster | Light wiping |
Repair And Prime Surfaces
Patch and sand any nicks, holes, or loose texture so the surface’s profile is consistent before priming; use a suitable filler for textured walls, a joint compound for vinyl-coated drywall, and a lightweight gypsum or plaster repair for plaster.
Then feather the edges and sand smooth. You’ll address surface imperfections with proper repair techniques, then prime for adhesion.
- Inspect for hidden damage
- Match texture before filling
- Use compatible primers
- Sand between coats
- Seal porous areas
Rinsing and Drying Correctly to Prevent Re-Soiling
When you finish cleaning, rinse thoroughly with clean water to remove cleaner residue and loosened grime—leftover soap or dirt will attract new soil and ruin paint adhesion.
Use gentle rinse techniques: low-pressure hose or sponge with overlapping passes. Wring sponges and change rinse water often.
Apply drying methods like microfiber towels and portable fans, ensuring walls are completely dry before painting to prevent re-soiling.
Identifying and Repairing Water Damage Before Painting
Even after you’ve rinsed and dried walls thoroughly, moisture damage can lurk beneath the surface and will sabotage new paint if you don’t spot and fix it first.
Inspect for water stains, soft spots, mold, peeling, and bubbling. Trace moisture sources, stop leaks, dry thoroughly, treat mold, and replace compromised drywall.
Inspect for stains, soft spots, mold, peeling or bubbles—find leaks, stop moisture, dry thoroughly, treat mold, replace damaged drywall.
- check stains
- find leak origins
- dry fully
- treat mold
- replace rot
Patching Holes and Cracks for a Smooth Paint Surface
Start by clearing loose debris from holes and cracks with a putty knife or stiff brush so filler can bond to solid material.
For hole filling and crack sealing, choose appropriate drywall repair compound, apply patch techniques for larger gaps, then press, layer, and feather edges for surface smoothing.
Once dry, inspect and add finishing touches before priming and painting.
When and How to Sand Walls for Primer Adhesion
You should sand patched areas and any glossy or uneven spots to help primer grip the surface.
Use a sanding block or fine-grit paper in light, even strokes, then vacuum and wipe with a damp cloth to remove dust.
Once the surface’s smooth and clean, you’re ready to apply primer.
When To Sand
Although primer can hide minor imperfections, you’ll still need to sand when surfaces are glossy, patched, or have loose paint so the primer can bond properly.
You’ll sand after cleaning and repairs, during surface preparation, using appropriate sanding techniques to dull gloss and feather edges for adhesion.
- Glossy finishes
- Recent patches or spackle
- Flaking or loose paint
- Raised texture or drips
- Cleaned but shiny residue
Sanding Techniques Overview
1 clear pass with the right grit can make all the difference when prepping walls for primer; you’ll want to use medium-grit sandpaper (around 120–150) to dull glossy finishes and feather edges around patches, switching to finer grit only for smoothing previously sanded areas.
Use consistent pressure, work in small sections, follow sanding techniques that prioritize grit selection and avoid gouging the surface.
Post-Sanding Surface Prep
After sanding, wipe the walls with a damp microfiber cloth or tack cloth to remove all dust. Let them fully dry, and then inspect for any leftover rough spots or glossy patches that might need a light touch with finer grit before priming.
You’ll use post sanding techniques to guarantee even surface priming; address imperfections, clean again, and mask trim.
- Recheck smoothness
- Spot-sand glossy areas
- Vacuum and tack cloth
- Remove sanding residue
- Confirm dry, dust-free surface
Choosing the Right Primer After Cleaning and Repairs
Since you’ve cleaned and repaired the walls, the next step is picking a primer that matches the surface and the paint you’ll use; the right primer improves adhesion, blocks stains, and creates an even base so your finish coat looks its best.
Choose primer types—latex for drywall, oil or shellac for stains and mildew—and apply proper adhesion techniques like scuffing, thin even coats, and recommended dry times.
How to Test Surface Porosity and Adhesion Before Priming
Before you prime, check how porous and well your cleaned surface will accept coatings so you don’t guess at adhesion or waste paint.
You’ll do quick surface testing and an adhesion assessment to pick proper prep steps.
- Tape pull test for bond strength
- Water droplet test for porosity
- Sand small area to check tooth
- Repair and retest after fixes
- Note substrate differences
Stain-Blocking Primer Options for Persistent Stains
When stubborn stains bleed through cleaned walls, choose a primer designed to seal and block tannins, water marks, smoke, and grease so your topcoat won’t discolor or fail. You’ll match stain types to primer types—oil-based for heavy tannins, shellac for smoke, water-based for mild water stains—to guarantee lasting adhesion and coverage.
| Primer | Best for |
|---|---|
| Oil-based | Tannins |
| Shellac | Smoke |
| Water-based | Light watermarks |
| Specialty | Grease |
How Humidity and Ventilation Affect Prep and Drying
Although you might be enthusiastic to paint right away, humidity and ventilation directly control how well cleaning products rinse away, how quickly walls dry, and whether new primer and paint will adhere properly.
You’ll monitor humidity impact and prioritize ventilation importance to avoid tacky finishes and adhesion failure.
- Drying time increases with high humidity
- Poor airflow traps moisture
- Faster rinse removal with vents
- Ideal RH speeds curing
- Use fans to stabilize conditions
Safety: Ventilation, Gloves, Masks, and Mold Handling
Because cleaning bathroom walls can stir up dust, chemicals, and mold spores, you’ll want to protect your lungs, skin, and eyes with proper ventilation, gloves, and a suitable mask. Use ventilation methods like fans and open windows, wear nitrile gloves and an N95, and handle mold carefully.
| Item | Purpose | Tip |
|---|---|---|
| Fan | airflow | point out |
| Mask | filter | fit check |
| Gloves | barrier | dispose |
Dilution Ratios and Contact Times for Common Cleaners
If you want effective cleaning without damaging paint or tile, follow recommended dilution ratios and let solutions sit the full contact time to kill grime and mold.
You’ll balance cleaning effectiveness with surface compatibility by matching cleaner strength to material and rinsing thoroughly after contact times.
- Bleach: 1:10, 10 minutes
- Vinegar: 1:1, 5–10 minutes
- Detergent: manufacturer, 2–5 minutes
- Hydrogen peroxide: 3%, 10 minutes
- Commercial mold remover: follow label, specified times
Eco-Friendly Cleaning and Disposal Practices for Prep Waste
When you finish scrubbing and rinsing, sort and dispose of prep waste thoughtfully to protect waterways and avoid hazardous mix-ups: bag used rags, paint chips, and solvent-soaked materials separately.
Use eco friendly products to minimize toxins. Label waste and follow local hazardous-waste guidelines for sustainable disposal.
Rinse tools where allowed, capture rinse water for proper disposal, and never pour chemicals down drains.
Time-Saving Tips for Multi-Bath or Large Bathroom Projects
After you’ve sorted and safely disposed of prep waste, shift focus to streamlining the actual cleaning and painting across multiple bathrooms or a large space.
Use multi bath efficiency and large bathroom strategies to save time and keep quality consistent. Coordinate tasks, prep stations, and teams so you move quickly between rooms.
- Batch similar tasks
- Use portable supplies
- Standardize checklists
- Time-box work blocks
- Delegate inspections
Common Mistakes That Ruin Adhesion After Cleaning
One common mistake is skipping a final rinse—residual cleaners and grime block paint from bonding properly, so you’ll get peeling or blotchy coverage even on freshly cleaned walls.
You also risk leaving soap scum, wax, or loose residue by over-scrubbing without removing dust, ignoring adhesion factors like surface pH, or using incompatible cleaning techniques that leave films.
Test small areas first.
Quick Pre-Paint Checklist and Troubleshooting Tips
Checklist: run through these quick pre-paint steps so your bathroom walls are ready and problems are easy to spot—wipe and rinse the surface, repair holes or loose tile grout, sand glossy spots, degrease around vents and fixtures, remove mildew with a proper cleaner, and tape off trim and hardware.
You’ll do pre paint preparation and a focused wall surface evaluation to prevent issues.
- Check for moisture
- Test adhesion
- Spot-prime stains
- Re-sand glossy areas
- Confirm ventilation
Frequently Asked Questions
Can I Paint Over Bathroom Wallpaper After Cleaning?
Yes — you can often paint over bathroom wallpaper after cleaning, but you’ll assess wallpaper types first; you’ll prime properly for paint durability, repair loose seams, and consider removing heavily textured or vinyl-covered paper for best results.
How Long Should Cleaned Walls Sit Before Priming?
About 24 hours — studies show improper drying raises paint failure risk by up to 30%. You should use thorough cleaning methods, let surfaces achieve full drying time, and only prime when walls feel completely dry and cool to the touch.
Will Bathroom Exhaust Fans Affect Paint Curing?
Yes — exhaust fan placement and humidity control matter: you’ll want the fan near the shower, run it during and after painting to lower moisture, and avoid direct airflow on wet paint so curing stays even and dust-free.
Can Scented Cleaners Interfere With Paint Adhesion?
Yes — scented cleaners can interfere with paint adhesion. You should choose cleaners with paint compatibility, use recommended cleaning methods, and guarantee thorough wall preparation so residues, fragrances, or oils don’t prevent proper paint bonding.
Should Baseboards Be Removed Before Wall Cleaning?
Straightaway: you don’t have to remove baseboards, but removing them makes baseboard removal and wall cleaning easier and yields cleaner edges; it’s often worth the extra effort, so don’t cut corners and do it right.
Conclusion
You’ve prepped your bathroom walls like a mechanic tuning an engine — thorough, deliberate, and aimed at peak performance. Stick to the checklist, tackle grime and mildew first, and don’t skip rinsing or drying. Proper cleaning isn’t optional; it’s the foundation that helps paint bond and last. With these steps, you’ll avoid peeling, blotches, and rework, saving time and money. Now wipe down, let it cure, and paint with confidence.