How to Distress Furniture With Paint and Stain for a Gorgeous Vintage Look
You can easily give furniture a gorgeous vintage vibe by layering paint and stain, then selectively wearing those layers away to mimic real age. Start by cleaning and prepping, choose paint for opaque contrast or stain for warm grain, and apply a base coat before using sanding, scraping, glazing, or wax resist to reveal underlying tones. Finish with a protective topcoat for durability and subtle sheen—keep going to learn the exact tools, steps, and tips.
Quick Answer Can You Distress Furniture with Paint and Stain for a Vintage Look?
Yes — you can distress furniture by layering paint and wiping or sanding to expose the stain or bare wood for a worn, vintage look.
Choose paint when you want soft, opaque color and chippy edges, and use stain when you want to deepen grain and highlight natural wood with subtler wear.
Start with a sealed base, experiment on a scrap, and pick the method that matches the age and character you want.
One-sentence summary of the process
Distress furniture with paint and stain by layering paint, sanding back key areas, and applying a stained glaze or wipe to deepen and age the exposed wood.
This creates a vintage look that’s customizable by color, sanding pattern, and stain intensity.
You’ll prep, paint, sand selectively to reveal wood, then seal or glaze so the distressed finish lasts; learn how to distress furniture with paint and stain.
Ideal results and when to choose paint vs. stain
1 clear rule: pick paint when you want opaque color and dramatic contrast, and pick stain when you want the wood’s grain to show through and a subtler, more natural patina.
You’ll choose paint for bold, shabby-chic effects and layering. Use stain to enhance vintage warmth, highlight grain, and preserve wood character.
Combine both for depth—paint over stain or vice versa, then distress.
Basic Understanding What Distressing Means and Why It Works
When you distress furniture, you’re intentionally wearing away paint or stain to mimic age—paint gives chippy, layered looks while stain highlights wood grain for antique or industrial styles.
You’ll see finishes ranging from shabby chic and farmhouse to rugged industrial or refined antique depending on technique and products.
Hardwoods, softwoods, and painted pieces all respond differently, so choose materials and furniture types that suit the finish you want.
Definition of distressing (paint vs. stain)
Although it might look like random wear, distressing is a deliberate technique you use to make paint or stain appear aged and naturally worn, highlighting edges, texture, and detail to add character.
With paint, you remove or sand top layers to reveal base colors or bare wood; with stain, you manipulate penetration and wiping to emphasize grain, depth, and contrast for an authentic, lived-in look.
Types of finishes produced (shabby chic, farmhouse, industrial, antique)
Distressing can create several distinct looks—shabby chic, farmhouse, industrial, and antique—each defined by how you apply wear, color, and texture to paint or stain.
You’ll coax soft pastels and gentle sanding for shabby chic, muted neutrals and simple rub-throughs for farmhouse, rough edges and dark metals for industrial, and layered glazing with selective wear for an authentic antique patina.
Materials and furniture types best suited for distressing
Those looks come alive because of the materials and pieces you choose—some woods and hardware take wear better and look more believable after paint or stain is aged.
Pick solid woods (pine, oak, maple) over veneers, metal or cast-iron hardware, and simple moldings.
Avoid laminate, thin plywood, or lacquered finishes that peel oddly.
Lightweight, sturdy furniture gives the best, authentic distressed results.
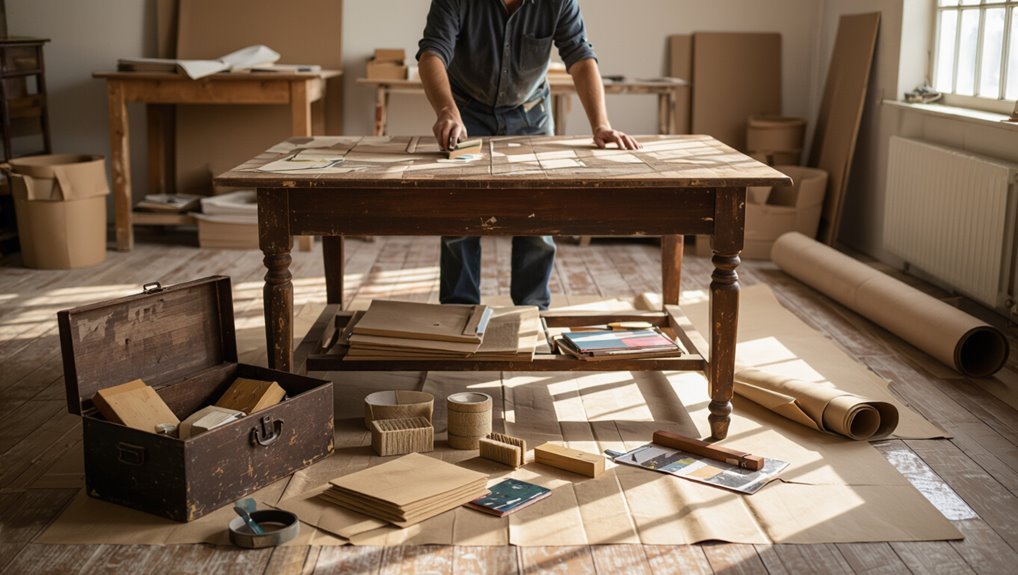
Tools, Materials, and Workspace Preparation
Before you start distressing, gather essential tools—sandpaper, scrapers, brushes, rags, and a hammer or chain for texture—and choose your paints, stains, and topcoats, noting the differences between water-based and oil-based products.
Wear safety gear, work where there’s good ventilation, and follow product instructions to avoid fumes and skin contact.
Protect your floors and nearby surfaces with drop cloths or cardboard to keep the mess contained.
Essential tools list
You’ll need a few specific tools, materials, and a well-prepared workspace to get consistent, professional-looking distressed finishes.
Gather essentials, organize for safety, and prep surfaces before you start.
- Sandpaper (various grits) and sanding block
- Synthetic brushes and foam applicators
- Clean rags and tack cloths
- Screwdrivers, putty knife, and clamps
- Drop cloths, respirator, and good lighting
Paints, stains, and topcoats explained (water-based vs. oil-based)
When choosing finishes for a distressed piece, decide whether you want water-based or oil-based products since each behaves differently during application and aging. You’ll prefer water-based for quick drying and easy cleanup; oil-based gives richer ambering and longer open time. Choose compatible topcoats and test layers.
| Type | Drying | Look |
|---|---|---|
| Water-based | Fast | Clean |
| Oil-based | Slow | Warm |
| Hybrid | Moderate | Balanced |
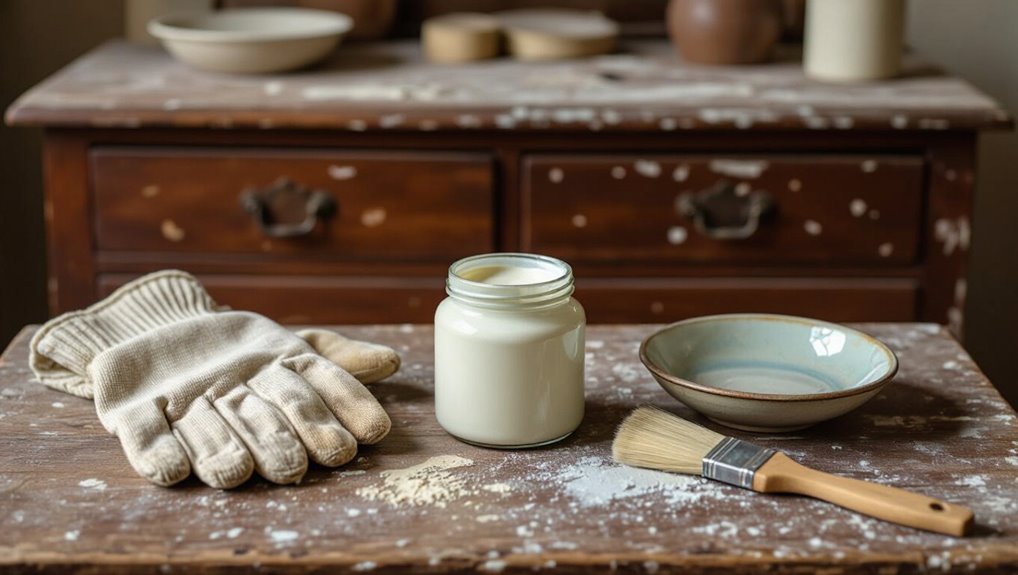
Safety gear and ventilation
Since sanding, painting, and staining kick up dust and fumes, don’t skip proper safety gear and ventilation—you’ll protect your lungs, eyes, and skin and keep solvents from building up to dangerous levels.
Wear a NIOSH-rated respirator for particles or organic vapors, safety goggles, and nitrile gloves.
Run fans, open windows, and use a box fan exhaust to move air out; take breaks outside.
Preparing your workspace and protecting floors
Now that you’ve got your safety gear and ventilation set, turn attention to the workspace itself: pick a well-lit, flat area with room to move around the piece and lay out supplies.
Cover floors with drop cloths or cardboard, tape seams, and protect nearby furniture.
Create a staging zone for brushes, rags, and finishes so you’ll work cleanly and avoid spills or tracking mess.
Quick Preview Before You Start (Quick Answer Expanded)
You should expect a simple distressing project to take a few hours for a small piece and a day or more for larger furniture, with difficulty ranging from easy (basic sanding and paint) to moderate (layering paint and stain).
Quickly decide whether you want a painted base with stained accents or a stained base with painted highlights by considering the look you want and how much sanding or masking you’re willing to do.
If you’re short on time or skill, pick the method with fewer steps—usually paint-first for layered color, stain-first if you want natural wood showing through.
Time estimate and difficulty level
Although distressing furniture can seem like a long process, most small pieces take only a few hours to a single afternoon once you get the hang of the steps.
You’ll spend extra time on larger pieces or layered techniques. Skill level: beginner-friendly with basic tools and patience; intermediate projects need more sanding, glazing, or sealing.
Plan drying times into your schedule.
Quick decision checklist: paint-first or stain-first
Wondering whether to paint first or stain first? Decide by wood type, desired look, and technique.
If you want raw wood grain showing with colored accents, stain first, then paint selectively and sand edges.
For opaque coverage, paint first; sand to reveal base, then add stain for antiquing only in crevices.
Consider adhesives, sealers, and test a scrap before committing.
Step-by-Step Distressing Process
Start by inspecting and prepping the piece so you know what repairs, cleaning, and sanding are needed.
Then apply a base coat or stain for smooth coverage before building depth with layered colors—dry brushing, glazing, or milk paint techniques work well.
Finish with distressing methods like sanding, scraping, hammering, chains, or wax resist to reveal character and age.
Step 1 Inspect and prepare furniture
Before you touch paint or sandpaper, take a careful look over the piece to spot loose joints, missing hardware, deep dents, or previous finishes that need removal; addressing these issues now will save time and guarantee your distressing looks intentional and holds up.
Check drawer function, test wobble, note wood type and existing stains, and decide which elements you’ll preserve or replace before starting.
Step 2 Clean, sand, and repair surface

Now that you’ve inspected the piece and noted repairs, clean, sand, and fix the surface so your distressing will look intentional and last.
Wipe away dirt and grease with degreaser, remove loose finish with medium-grit sandpaper, smooth edges with fine grit, and fill cracks or gouges with wood filler.
Let repairs cure, then sand flush and remove dust before painting.
Step 3 Apply base coat or stain (techniques for smooth coverage)
1 coat of base color or a light stain will set the tone for your distressing, so apply it evenly and deliberately to get smooth, consistent coverage.
Work in thin layers, brushing with the grain and keeping a wet edge to avoid lap marks.
Use a foam brush or high-quality synthetic brush, thin paint if needed, and sand lightly between coats for a flawless base.
Step 4 Layering colors for depth (dry brushing, glazing, milk paint tips)
With a smooth base coat in place, you’ll build visual depth by layering colors and finishes that mimic years of wear.
Start with thin washes or glazes to tint recesses, then dry-brush lighter tones on raised areas for highlights.
Use milk paint flakes for authentic crazing or a hammered, chippy look.
Blend edges gently and seal between layers to control opacity.
Step 5 Distressing techniques (sanding, scraping, hammering, chain, wax resist)
Start by deciding how worn you want the piece to look. Then work through distressing techniques from subtle to bold so you can stop at the exact level of age you like.
Sand edges and raised details with fine or coarse grit; scrape paint in corners; tap with a hammer or chain for dents; use wax resist to block paint and reveal layers for realistic wear.
Step 6 Adding stain over paint for aged effects (wiping, blotting, selective application)
Once you’ve achieved the worn look you want with sanding and scraping, it’s time to add stain over the paint to bring depth and age to the finish.
Work in small areas: apply stain, then wipe or blot to control intensity.
Use selective application along edges, creases, and hardware impressions to mimic natural wear, letting layers dry between treatments for subtle variation.
Step 7 Blending and blending tools (rags, brushes, steel wool)
Blend the stained and painted areas gently so changes look natural rather than forced.
Use soft cotton rags for wiping and feathering edges, a dry brush for subtle streaks, and fine steel wool to scuff high spots.
Work in small sections, test frequently, and blend until shifts vanish.
Keep movements light and consistent to preserve texture without overworking the finish.
Step 8 Seal and protect (clear topcoat options and application)
Although the distressed look is mostly complete, you’ll want to lock in the finish with a clear topcoat that both protects and complements the paint and stain.
Choose polyurethane for durability, water-based for clarity and low odor, or wax for soft sheen.
Apply thin, even coats with a synthetic brush or foam applicator, sanding lightly between coats for a smooth, long-lasting surface.
Step 9 Final touches (antiquing glaze, hardware aging, rub-through)
With your topcoat dry, it’s time to add the finishing details that give distressed furniture real character: antique glaze to deepen crevices, intentional rub-through to reveal underlying layers, and hardware aging to match the piece’s worn look.
Apply glaze sparingly, wipe excess, sand edges for natural wear, and patinate knobs with metallic paints or liver of sulfur for cohesive, believable aging.
Styles and Techniques by Look (Supporting List)
Now we’ll look at specific styles you can recreate, with clear steps for each look.
You’ll get shabby-chic distressing, farmhouse whitewashing, rustic dark-stained aging, and a two-tone layered paint method that lets stain bleed through.
Follow the brief steps for each to choose the finish that fits your piece.
Shabby chic distressing steps
When you want furniture that feels comfortably worn and romantic, shabby chic distressing gives you soft edges, layered paint, and gentle wear that looks intentional rather than rough.
You’ll sand selectively, layer pastel paints, glaze for depth, rub edges with wax, and seal lightly to preserve softness.
- Sand edges and corners
- Apply thin pastel layers
- Use glazing for antique depth
- Rub areas with clear wax
- Seal with matte finish
Farmhouse whitewashed finish steps
If you like the soft wear of shabby chic but want a brighter, more rustic look, farmhouse whitewashing gives your piece that sun-faded, lived-in charm by letting the wood grain show through a thin, milky paint layer.
- Sand lightly to reveal grain.
- Mix paint with water (1:1).
- Brush on thin coats.
- Wipe back while wet.
- Seal with matte wax or poly.
Rustic dark-stained aged finish steps
1 way to get a timeworn, rugged look is to layer dark stain and selective distressing so the finish reads aged but still rich.
You’ll sand edges, add thin stain washes, burnish with steel wool, glaze for depth, and seal with satin wax for subtle sheen.
- Sand edges and corners
- Apply thin stain layers
- Use steel wool to burnish
- Add glaze for depth
- Seal with satin wax
Two-tone layered paint with stain bleed-through

Because layered paint and intentional stain bleed-through mimic decades of wear, you’ll get a rich, lived-in look that balances color contrast with underlying wood tones.
Start by staining, paint a lighter coat, then sand key areas to reveal stain.
Add a darker topcoat selectively, scuff edges, and seal.
You’ll create depth and authenticity that reads vintage, not manufactured.
Common Mistakes and How to Fix Them
You’ll run into common issues like over-sanding, uneven distressing, drippy paint, brush marks, and blotchy stain, but most have straightforward fixes.
I’ll show how to correct finish problems such as yellowing or incompatible products and how to deal with sealing mistakes like sticky or cloudy topcoats.
Follow the troubleshooting tips below and you’ll be back on track fast.
Over-sanding or uneven distressing fixes
If your distressing looks patchy or you’ve sanded through too much paint, don’t panic—these issues are fixable with a few targeted steps.
Lightly blend edges with fine-grit sandpaper, then feather surrounding areas for uniformity.
Reapply thin paint layers where needed, let them cure, and re-distress selectively.
Finish with a clear or tinted topcoat to unify color and protect the repair.
Drippy paint, brush marks, and blotchy stain fixes
Catch runs and brush strokes early—drips, visible brush marks, and blotchy stain often come from heavy application, wrong tools, or uneven absorption, and they’re fixable with quick, simple corrections.
Wipe drips with a damp rag before drying, sand smooth between coats, thin paint for better flow, switch to a high-quality brush or foam, and precondition bare wood to even stain absorption.
Finish yellowing or incompatibility how to correct
Ever noticed your once-bright finish turning amber or cloudy after topcoating?
You probably used an oil-based topcoat over a water-based paint or a reactive stain. Strip or sand the affected layer back to sound paint, clean thoroughly, then apply a compatible finish—water over water, oil over oil—or use a barrier sealer like shellac.
Test on scraps first to prevent repeats.
Sealing mistakes (sticky finishes, cloudy topcoats) troubleshooting
When a finish goes sticky or turns cloudy after sealing, you’ll want to diagnose the cause quickly so you don’t waste time redoing work.
Check for incompatible products—oil over water or vice versa—poor curing, humidity, or trapped solvents.
Lightly sand tacky areas, wipe with mineral spirits, then recoat with a compatible topcoat.
Test on scrap before full application.
Best Practices and Pro Tips
You’ll want to choose paint and stain colors that create clear contrast while matching the piece’s style and room palette.
Be intentional about where and how much you distress so wear looks natural, and use sealers and heat- and moisture-resistant finishes for high-use areas.
Also consider low-VOC paints and stains for a safer, more sustainable result.
Color selection and contrast guidelines
Picking the right colors and contrasts can make distressing look intentional instead of accidental, so start by deciding whether you want high-contrast drama or a subtle, aged patina.
Choose a dominant hue, pick a complementary underlayer, and test on scrap wood. Balance warm vs. cool tones and use glazing for soft shifts.
- Use tonal families
- Pick bold trim sparingly
- Sample finishes first
- Keep undertones consistent
- Use diluted stain for depth
Controlling authenticity: where and how much to distress
After settling on colors and contrast, decide exactly where wear should show so the aging feels deliberate rather than random.
Focus distress on natural contact points—edges, corners, drawer fronts, and armrests.
Use light sanding, scraping, or a wire brush for subtle wear; add heavier marks sparingly.
Step back frequently, compare both sides, and keep symmetry and storytelling consistent for believable, controlled aging.
Long-term durability tips (moisture, heat, frequent use)
Because distressed finishes expose more surface texture and thinner paint layers, plan protective steps to keep moisture, heat, and heavy use from undoing your work.
Seal with a durable topcoat—polyurethane, water-based poly, or spar varnish—matching sheen to style.
Add felt pads, coasters, and heat guards.
Reinspect high-wear areas annually and touch up or recoat before damage becomes permanent.
Eco-friendly and low-VOC options
While protecting distressed pieces from wear, you can also keep your workspace and home healthier by choosing low-VOC paints, stains, and topcoats.
Look for water-based chalk and milk paints, plant-derived stains, and certified low-VOC sealers.
Ventilate while you work, wear a mask for fine sanding, and test finishes on scraps to guarantee adhesion and the vintage look you want without toxic off-gassing.
Quick Comparison Paint vs. Stain for Distressing
You’ll notice paint and stain create very different looks and feels—paint sits on the surface and can be distressed to reveal layers, while stain soaks in and shows wood grain.
Consider durability and upkeep: paint may chip and need touch-ups, stain usually wears more gracefully but can require re-oiling or resealing.
Also weigh cost and time—painting often takes longer with priming and layering, whereas staining can be quicker and cheaper for a natural finish.
Visual and tactile differences
Although both paint and stain can give furniture an aged look, they differ noticeably in how they read to the eye and touch: paint hides wood grain and creates a solid, often chalky surface, while stain soaks into the wood and preserves texture, showing knots and grain variations. You’ll feel smooth, opaque paint versus warm, tactile stained wood.
| Paint | Stain |
|---|---|
| Opaque finish | Shows grain |
| Smooth feel | Textured feel |
Durability and maintenance comparison
Because distressing changes both surface and structure, durability and upkeep differ sharply between paint and stain:
You’ll find painted finishes chip where layers are removed, needing touch-ups and protective topcoats to resist wear.
Stain soaks into wood, offering longer-lasting color but less surface masking; it shows scratches and needs resealing periodically.
Choose based on expected traffic and how often you’ll refinish.
Cost and time comparison
When you compare paint and stain for distressing, paint usually costs more up front and takes longer because it needs multiple coats, drying time, and protective topcoats.
In contrast, stain is cheaper and faster since it penetrates quickly and often needs only one or two passes plus a sealer.
You’ll spend more time sanding, layering, and drying with paint; stain lets you finish and seal sooner.
Project Examples and Case Studies
You’ll see a small side table walkthrough with clear step highlights and before-and-after photos to copy for your own projects.
Then you’ll read about a dresser makeover that outlines the challenges encountered and the practical solutions used to overcome them.
Finally, you’ll get notes on a chair/bench mixed-media finish so you can adapt those techniques to your pieces.
Small side table step highlights and before/after

Take a close look at this small side table project to see how simple distressing techniques transform a tired piece into something charming and lived-in.
You sanded edges, layered chalk paint, wiped back to reveal base color, added light stain accents, and sealed with matte wax.
The before shows faded, plain wood; the after reveals depth, character, and a cozy vintage vibe you can recreate.
Dresser makeover challenges and solutions
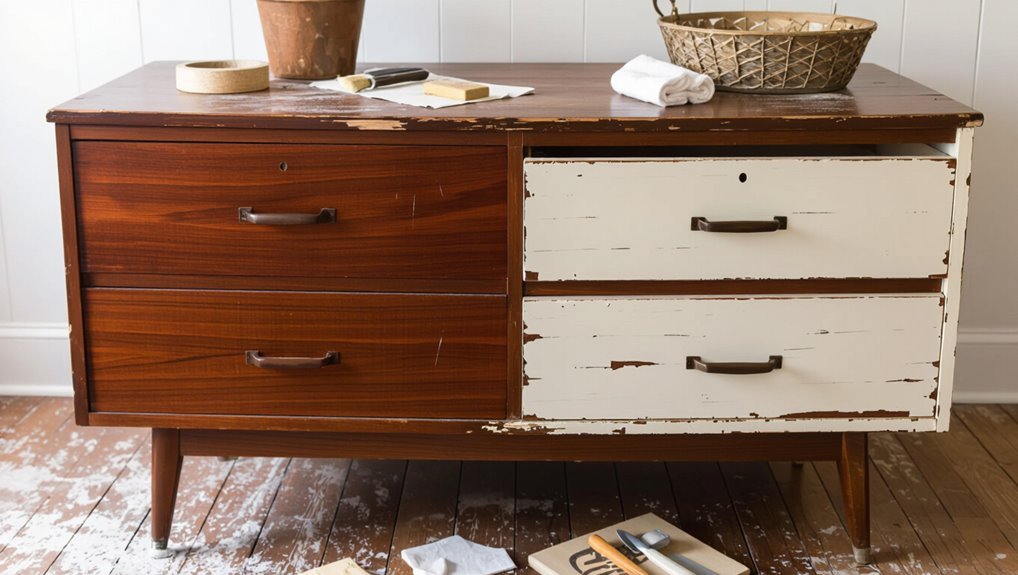
Moving from a petite side table to a full dresser brings bigger rewards — and bigger challenges — but the same basic distressing skills apply.
You’ll manage stripped finishes, sticky hardware, and warped drawers by planning sections, using proper sanding blocks, and stabilizing joints.
Test stain and paint on hidden areas, work in stages, and refit or replace hardware for smooth operation and cohesive vintage character.
Chair/bench with mixed-media finish technique notes
A chair or bench lets you combine paint, stain, and unexpected materials to create layered, lived-in character. You’ll find the techniques scale differently than with dressers—small seats demand tighter brushwork, thinner distressing lines, and careful edge treatment.
Work in zones: seat, legs, and rails. Mix chalk paint, rubbed wax, metallic leaf, or fabric insets. Seal with a durable topcoat for everyday use.
Frequently Asked Questions (FAQ)
You probably have practical questions about durability, maintenance, and whether certain surfaces like laminate or veneer can be distressed.
You’ll also want to know if you should strip old paint, which finishes are safe for kids and pets, and how to match distressing to existing vintage pieces.
Below are clear answers to those common concerns.
How long does a distressed finish last and how do I maintain it?
Although the exact lifespan depends on use and finish type, a distressed finish can last many years if you care for it properly.
Regular dusting, avoiding harsh cleaners, and using coasters prevent wear.
Reapply a clear topcoat or paste wax every 1–3 years based on traffic.
For scratches, touch up paint and blend with light sanding and stain.
Handle gently to preserve the patina.
Can I distress laminate or veneer furniture?
If your furniture is laminate or thin veneer, distressing takes a different approach than with solid wood because those surfaces can’t handle heavy sanding or deep gouging.
You can still age them: scuff lightly with fine-grit sandpaper, use paint techniques like dry-brushing or crackle medium, and add faux wear with stains or waxes.
Test first and seal gently to protect the finish.
Is it better to strip old paint or paint directly over it?
Wondering whether to strip old paint or paint over it? If the existing finish is flaking, thick, or incompatible, strip down to a stable surface for better adhesion and truer distressing.
If it’s sound, clean, sand lightly, and prime—painting over saves time.
Consider layers you want revealed: full strip for raw wood, paint-over for layered, vintage character.
What finishes are kid- and pet-friendly?
Once you’ve decided whether to strip or paint over, you’ll want finishes that keep kids and pets safe while standing up to wear.
Choose water-based, low-VOC polycrylic or acrylic polyurethane for durability and quick drying.
For a softer, natural feel, use hardwax oil or tung oil blends that cure non-toxic.
Always ventilate, follow manufacturer safety, and let items fully cure before use.
How to match distressing to existing vintage pieces?
When you’re trying to blend a newly distressed piece with vintage furniture, study the original’s wear patterns and materials first so your distressing reads as natural.
Match paint layers, exposed base wood, and typical contact points—edges, corners, drawer fronts. Use similar tools and grit, replicate staining depth and patina, and step back frequently to compare.
Subtle inconsistencies add authenticity; avoid overdoing it.
Quick Materials and Process Checklist
Before you start, check your supplies against a simple pre-project checklist so you won’t stop mid-task for missing tools or finishes.
Keep a one-page, step-by-step cheat sheet nearby to follow the process in order and track drying times.
With both in hand, you’ll work faster and avoid common mistakes.
Pre-project checklist
1 simple checklist will keep your distressing project running smoothly: gather materials, prepare the workspace, and plan your finish sequence.
You’ll confirm supplies, ventilation, tools, and timing so work won’t stall. Quick prep saves time and prevents mistakes.
- Sandpaper (various grits)
- Paints and stains
- Drop cloths and tape
- Respirator and gloves
- Clean rags and brushes
Step-by-step one-page cheat sheet
Keep this one-page cheat sheet taped near your workspace so you can follow the quick materials and process checklist at a glance:
- Gather materials: sandpaper, primer, paint, glaze/stain, brushes/rags
- Prep: clean, remove hardware, sand smooth
- Base coat: apply thin, even paint; dry fully
- Distress: sand edges, remove paint selectively
- Finish: stain/glaze for depth, seal with clear coat and reattach hardware