
How to Do an Orange Peel Wall Texture Like a Professional
To get a pro orange-peel texture, start by patching, sanding, and priming your drywall so the surface is clean and uniform. Use the right ready-mix or premix compound, thinning it gradually and straining if needed to prevent lumps. Dial in your HVLP or airless settings, test-spray on scrap, and keep a wet edge with consistent overlap and spray distance. Once it cures, lightly sand only high spots, then prime and paint for a crisp finish—keep going to master the fine details.
Choose Orange Peel Finish Material Type
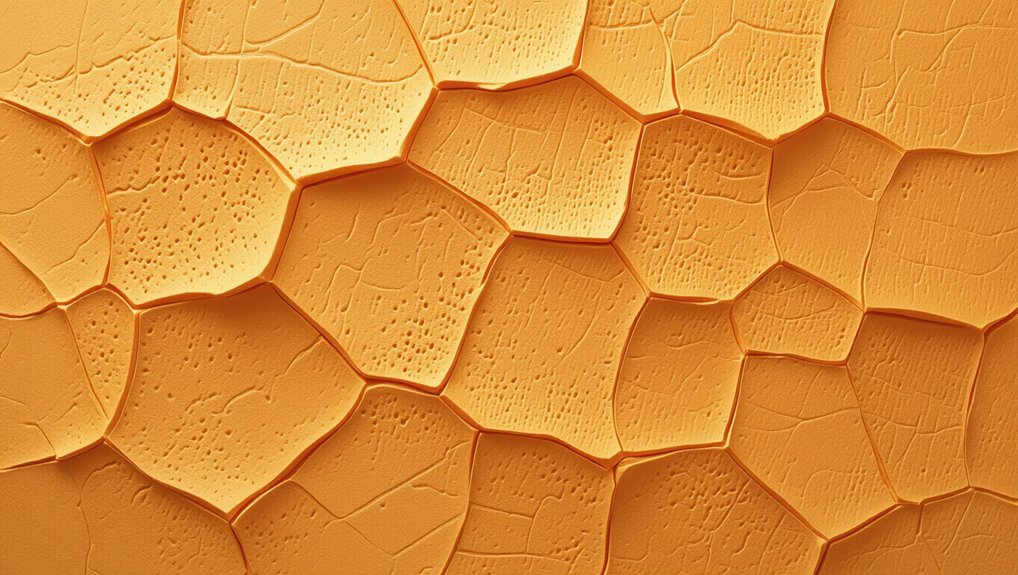
Choosing the right orange peel finish material type sets the tone for how your wall looks and how easy it’s to apply. You’ll pick among premixed drywall texture, ready-to-spray compounds, or concentrate powders mixed with water.
Compare texture materials by coverage, clumping risk, and how they match your finish types. For smoother walls, you’ll choose a fine-sand compound; for bolder dimples, use a medium grade.
Before you start, focus on surface preparation: clean dust, patch holes, and prime. Apply with consistent application techniques using the right nozzle.
Follow product recommendations for drying times, and pick color options that complement paint. Use maintenance tips: avoid harsh scrubbing, touch up fast.
Prep Drywall vs Plaster for Orange Peel
Before you spray or roll orange peel texture, prep the wall surface correctly by treating drywall and plaster differently.
For drywall prep, you focus on joints and fastener dimples: tape, skim, and do surface smoothing until flat, then clean dust. Use moisture control by sealing the whole board if it’s new or has uneven suction.
Tape and skim drywall joints and fastener dimples, smooth flat, then clean dust; seal new boards for even moisture control.
For plaster prep, check for loose edges and repair soft areas; keep edges stable and tighten any chalky spots. Then match primer selection to the substrate.
After priming, plan your texture application so the finish hits evenly across both materials.
Fix Cracks, Sand, and Prime for Orange Peel
Fix every crack you find and get the wall genuinely smooth before you apply orange peel.
Do thorough crack repair: widen hairlines slightly, remove dust, then fill with joint compound or a patching compound, feathering edges.
Let it fully cure, then sand until you can’t feel ridges or seams. Use a shop light to spot flaws during surface preparation; wipe sanding dust away with a damp cloth.
Prime the entire patched and surrounding areas with a stain-blocking primer or bonding primer, following label dry times.
After it dries, you’re ready for orange peel.
Pick the Best Sprayer for Orange Peel Walls
Picking the right sprayer makes orange peel look crisp instead of blotchy.
Start by choosing sprayer types that match your coating: use an HVLP sprayer for water-based products, and consider an airless sprayer for thicker finishes.
Next, set your nozzle or tip based on the manufacturer’s texture specs, because too wide a pattern creates big drops.
Control your overlap and keep a steady distance so the finish lays evenly.
Compare sprayer brands by checking parts availability, adjustable pressure, and consistent fan control.
If you can, test on scrap drywall before committing.
Thin Your Coating to Orange Peel Thickness
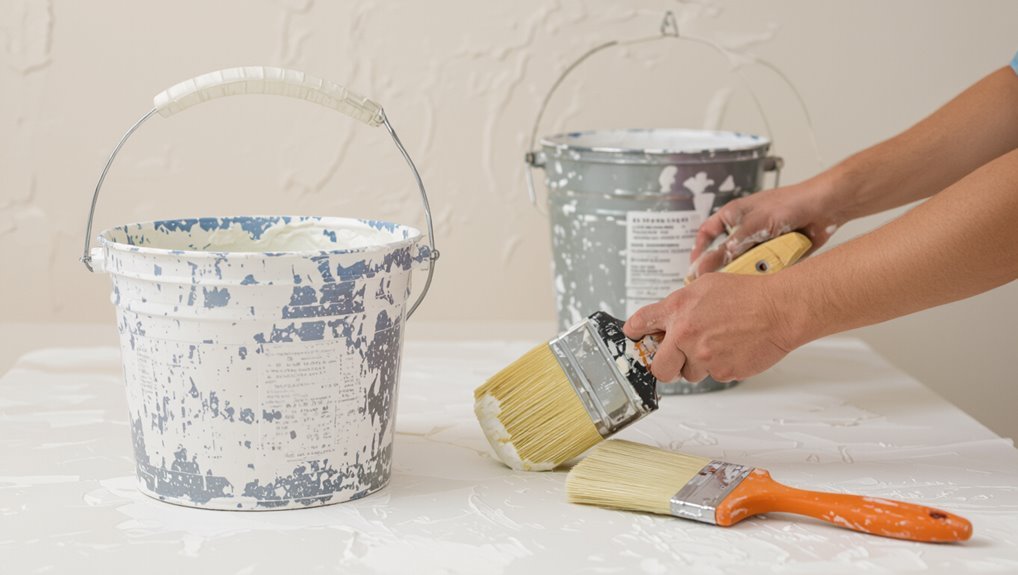
To get consistent orange peel, start by mixing your coating thoroughly so it stays uniform.
Then thin it with water gradually, since too much water will flatten the texture and too little will leave heavy peaks.
Spray a small test section, adjust thickness as needed, and repeat until the orange peel looks even across the wall.
Mix For Consistent Orange Peel
To get a consistent orange peel, thin your base coating just enough that it flows like paint, not like paste, so it lands and textures evenly.
Use mixing techniques that prevent lumps: strain dry materials if needed, then add coating to water or thinner gradually while stirring.
Keep your paddle speed steady and scrape the sides and bottom so pigment and binder stay uniform.
Aim for texture consistency that self-levels briefly, then holds a smooth sheen when you lift the mix.
If it strings or looks watery, remix with more base.
Test a small patch before rolling the wall.
Adjust Thickness With Water Gradually
Adjust the coating thickness a little at a time by adding water gradually, because the mix needs to flow and land uniformly without running.
Start with your prepared batch, then check the water ratio as you stir. Add a small splash, mix thoroughly, and stop to test on scrap drywall.
You want orange peel texture that beads and sprays evenly, not sagging.
Repeat with gradual adjustments: thin slightly, test again, and fine-tune until the stipple ridge size matches your target.
Don’t pour in water all at once—you’ll lose control of thickness and pattern.
Set Sprayer PSI for Tight Orange Peel Bumps
Set your sprayer PSI in the tight-orange-peel range—typically around 1500–1800 PSI—so the finish forms small, close bumps instead of broad “droplets.” Start at the lower end, then test on scrap drywall or a hidden spot and bump the pressure up only if the pattern looks too flat. Use sprayer maintenance tips to keep tips and filters clean, so your flow stays consistent. Apply pressure adjustment techniques in small steps: watch the ridge size and spacing, then hold steady.
| PSI Range | Visual Result | Action |
|---|---|---|
| 1400–1500 | Bumps too soft | Increase |
| 1500–1700 | Tight orange peel | Maintain |
| 1700–1800 | Bumps too spiky | Decrease |
Choose Tip Size for Your Desired Orange Peel
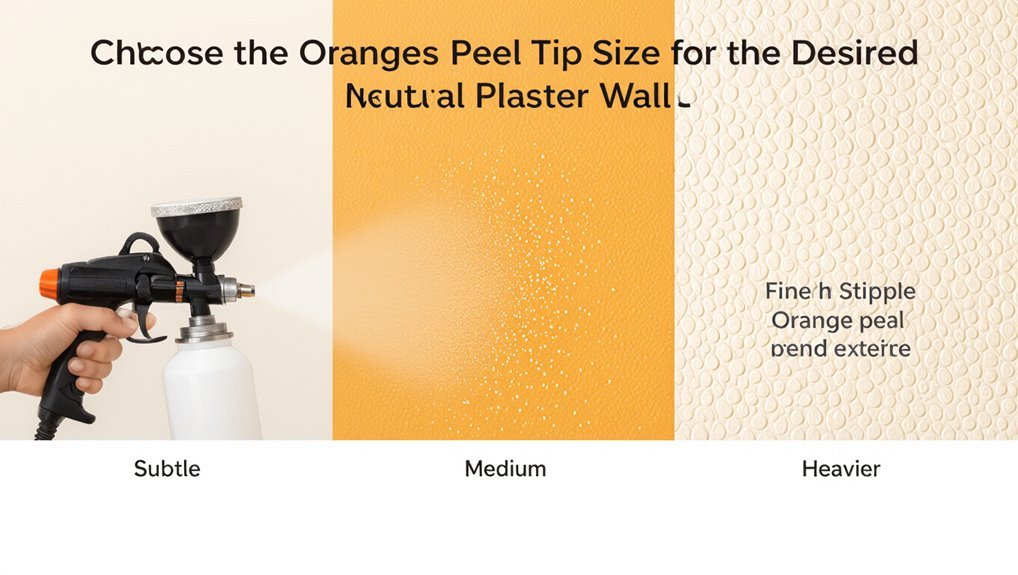
Pick a tip size that matches the orange peel look you want—smaller tips create tighter, finer bumps while larger tips give a looser texture.
Swap orifice sizes and adjust the spray pattern so the ripple lands exactly where you need it.
Test on a scrap surface first, then fine-tune the tip and orifice until the bumps look consistent.
Match Tip Size To Texture
Matching your tip size to the orange peel texture starts with understanding that smaller tips atomize the paint more tightly, while larger tips lay down more material per pass. Choose your texture tools based on the look you want: fine stipple needs a tighter spray, while heavier orange peel benefits from wider flow. Use consistent pressure and overlap to keep texture even; tweak tip size before you adjust any other settings. Try these targets with your application techniques:
| Goal | Tip size | Result |
|---|---|---|
| Light | small | fine grain |
| Medium | mid | classic peel |
| Heavy | large | bold stipple |
Adjust Orifice For Desired Ripple
To dial in your orange peel ripple, you need to choose the right spray tip diameter and treat the “orifice” like your texture control knob—smaller openings create tighter, finer droplets and a sharper peel, while larger openings push more material and produce a looser, heavier ripple.
Start with orifice adjustment on a scrap wall: set the sprayer pressure, then spray short passes. If the texture feels grainy or too tight, open the orifice slightly. If it looks flat, narrow it a touch.
Keep watching ripple effects; consistency comes from steady trigger timing and even arm speed.
Set Distance and Trigger Time for Orange Peel
| Goal | What to adjust |
|---|---|
| Too flat | Move closer slightly |
| Too bumpy | Back off a bit |
| Blobs form | Shorten trigger bursts |
| Uneven pattern | Slow your pass |
Test on scrap until spray lays consistent dots. Then texture the whole wall smoothly.
Protect Edges for Clean Orange Peel Lines
Before you start texturing, protect every edge so your orange peel stays crisp instead of splattering over trim.
Do edge protection first: check surface preparation, then clean dust so paint adhesion holds.
Use masking techniques around baseboards, window trim, and outlets; choose high-quality tape and press it firmly.
Apply tape application in straight, sealed lines, and cover corners carefully for corner coverage—overlap tape slightly to block bounce.
When you spray, keep tight spray control and stop short of taped borders.
Remove tape after the texture sets, keeping clean lines sharp and intact.
Use Quick Roll Touch-Ups Between Orange Peel Passes
After you’ve taped and protected every edge, you can use quick roll touch-ups between orange peel passes to keep the texture even. You’ll reduce streaks by rolling lightly while the surface stays workable.
Use smart quick roll techniques: keep a consistent pressure, overlap each touch-up slightly, and reload your roller only when it starts to skip. Aim for uniform dimples, not extra buildup.
- Roll in one direction, then tip off lightly
- Feather only the ridges, not the whole wall
- Match prior gloss so it blends seamlessly
These touch-up strategies prevent heavy, uneven spots.
Overlap Sprays to Avoid Heavy Orange Peel Spots
Overlap your sprays as you work so you don’t stack too much material in one spot. Aim for a consistent spray technique: trigger the sprayer before you enter each pass, then release after you pass the edge.
When you overlap, keep each band slightly lighter so the ridges blend instead of building. Watch the wall closely for heavy “islands” where your pattern repeats. If you see thicker texture, slow down your overlap or shorten the spray duration on the next pass.
Maintain even texture consistency across corners, outlets, and ceiling connections.
Keep a Wet Edge for Consistent Orange Peel
To get consistent orange peel, you’ve got to maintain a wet edge as you spray.
Work in small, consistent sections so each pass blends before the surface starts to tack up.
If it begins to set, stop and re-wet or reposition your next spray area to avoid dull, uneven texture.
Maintain A Wet Edge
To keep your orange peel texture consistent, you must maintain a wet edge as you spray—don’t let one section dry before you coat the next. You rely on wet edge techniques, so you’re maintaining moisture across the whole pass.
Keep your pace steady, and overlap each spray path slightly before the surface skins over. Watch for dullness; when it starts to dull, you’re losing the wet edge.
Use these checkpoints:
- Spray left to right without stopping
- Keep the nozzle distance steady
- Overlap patterns by about 1–2 inches
Work Small Consistent Sections
Work in small, consistent sections so the finish stays uniform and you never lose control of the texture.
Define your work area first, confirm surface preparation, then keep a steady timing strategy: overlap each pass before the previous flashes.
Match your spray technique and application speed, aiming for pattern uniformity instead of chasing perfection.
Move methodically, starting and stopping off the wall edges so you don’t create ridges.
If the can or sprayer sputters, pause—equipment maintenance prevents blotchy finish quality.
Keep a clean workspace to avoid debris on fresh texture.
Adjust Orange Peel for Temperature and Humidity
When temperatures swing or humidity spikes, your orange peel texture won’t land the same way—so you need to adjust your mix and spray settings before you ever load the hopper.
Do temperature adjustments first: warm air speeds drying, so slightly thin or slow your fan to keep the stipple consistent. For humidity considerations, watch for longer open time; you’ll often need a touch more material or a drier pass. Use quick test sprays, then lock in your settings.
- Track the air temp and wall temp
- Adjust material viscosity in small steps
- Recalibrate pressure and spray distance
Fix Orange Peel That’s Too Rough or Too Smooth
First, check the wall for evenness so you can spot where the texture is too rough or too smooth.
Next, reduce or increase your spray pressure in small steps and test on a scrap to dial it in.
If needed, adjust your thinning level so the coating sprays and lays down consistently.
Assess Surface Texture Evenness
Start by running your hand lightly over the cured surface under angled light, because it reveals high spots and dull areas you can’t see straight on.
Then do quick texture assessment and surface evaluation from multiple angles. If it’s too rough, you’ll feel abrupt ridges; if it’s too smooth, light will reflect evenly without depth.
Use a flashlight sweep and compare sections:
- Mark problem zones with painter’s tape
- Check edges and corners twice
- Press lightly, don’t scrape, to feel texture variation
Adjust Spray Pressure Settings
Once you’ve mapped the uneven areas from your light-and-hand check, you can dial in spray pressure to correct the texture.
Start by spraying on scrap cardboard, then compare the finish to your target orange peel size. If the wall looks too rough, lower pressure slightly or slow your pass to reduce bounce. If it’s too smooth, raise pressure a touch and keep your distance consistent.
Use pressure regulation techniques: adjust in small increments, re-test each change, and maintain steady trigger timing.
Before and after, follow sprayer maintenance tips—clean tips, check seals, and keep hoses clear—so pressure stays stable.
Choose Proper Thinning Level
To dial in a true orange peel, you need to thin the coating to the right level before you spray. If you thin too little, you’ll get a rough, heavy texture; thin too much, and the pattern turns flat and smooth.
Use proven thinning techniques, then test on scrap drywall to confirm your fan and droplet size. Consistency importance matters more than guesswork—keep viscosity steady while you work. Aim for a creamy flow that holds peaks briefly.
- Mix in small increments
- Stop and remix if it separates
- Re-check after each batch
Remove Runs, Sags, and Spatter on Orange Peel
Address any runs, sags, or spatter on your orange peel immediately so the surface stays crisp. Spot drips while paint is still workable, then lightly skim the ridge with a clean drywall knife. Wipe the blade often to remove imperfections, and avoid pressing flat. For sags, feather the edge outward, keeping the orange-peel bumps intact to repair texture. If spatter lands on smooth areas, mist a fine mist of water or thinner, then dab with a sponge and re-spray lightly.
| Problem | Quick fix |
|---|---|
| Runs | Skim ridge |
| Sags | Feather edges |
| Spatter | Dab then mist |
| Ridged passes | Light skim |
| Dust nibs | Sand/knock down |
Match Orange Peel Texture Across All Wall Sections
Plan a consistent orange peel pattern so every wall section lands on the same look.
Use the same spray gun setup—tip size, pressure, and distance—so the texture size stays uniform.
When you hit panel edges, overlap slightly and blend the shifts while the coat is still workable.
Plan Consistent Texture Pattern
Keep your orange peel texture consistent by treating every wall section like part of one continuous pattern, not separate jobs.
Before you spray, mark layout lines so you know where each pass begins and ends, and plan your direction to avoid stops and starts. Aim for texture consistency by repeating the same spacing and rhythm across corners, ceilings, and cut-ins.
Use a quick dry run to visualize overlaps so pattern repetition looks intentional.
- Work from a fixed reference point, like a corner
- Overlap passes by about 50% for smooth blending
- Keep your pattern aligned at trim and edges
Use Same Spray Setup
Set up your sprayer once and stick with it for every wall section. Adjust pressure, fan width, and material flow until the first test panel shows tight orange peel without heavy spatter.
Keep your nozzle distance and pass speed consistent, because your spray technique drives texture consistency. Load the same product batch, strain if needed, and remix on schedule to prevent thickness changes.
Start each new section with the same gun angle, overlap each pass about one-third, and avoid pausing mid-spray. When you finish, don’t swap tips or settings—clean later to keep the finish uniform.
Blend Transitions Between Panels
Once you’ve dialed in the orange peel for each panel, you need to blend the edges so the wall reads as one continuous texture.
Focus on seamless changes by slightly feathering each pass over the boundary line while the coating stays workable. Keep your spray distance and pattern identical across every panel design area, then overlap the final coat by 1–2 inches.
Watch for dry ridges; fix them immediately with a light, misted follow-up.
Use these checks:
- Feather edges before the first coat skins
- Maintain consistent fan speed and overlap
- Re-spray only the dull spots, not whole panels
Plan Spray Direction for Crisp Corner Orange Peel
Plan your spray direction so you can hit the corner from two angles without overloading it: start by spraying slightly across the corner to “wrap” the texture onto both faces, then switch to a perpendicular pass that levels the buildup at the edge. Use a controlled spray angle and keep your corner technique consistent. Aim for even texture consistency so bumps land symmetrically; protect edge definition by easing pressure as you cross the seam.
| Pass | Target |
|---|---|
| 1 | Wrap both faces |
| 2 | Level the edge |
| 3 | Spot-check uniformity |
| Corner | Slow, steady trigger |
Cure Orange Peel, Then Lightly Sand if Needed
Let the orange peel texture cure fully before you touch anything—most sprays need at least 24 hours, though humidity and temperature can extend that.
Let the orange peel texture cure fully before touching—most sprays need at least 24 hours, longer if humidity or temperature is high.
You want solid cure methods so the peaks don’t smear or crumble. After curing, check the surface under side light and feel for sharp ridges.
If needed, use careful sanding techniques: a light pass with 120–220 grit to knock down only high spots. Wipe away dust, then reassess before any further work.
- Wait for complete hardening, not just surface dry
- Test one small area before sanding everything
- Sand lightly; don’t flatten the texture
Prime and Paint Over Orange Peel for Best Finish
Prime the wall before you paint to lock down the texture and prevent uneven absorption from showing through. Use bonding primer or a stain-blocking product, and apply it evenly with a roller so the orange peel texture doesn’t drink paint.
Follow good prime techniques: thin only as directed, keep a consistent nap, and let each coat dry fully.
When you paint, choose the right paint selection—an interior acrylic latex with a smooth, forgiving finish like satin or eggshell. Cut edges first, then roll in small sections, back-rolling lightly to level highs without flattening the pattern.
Let it cure before judging sheen.
Frequently Asked Questions
Can I Orange-Peel Over Paint, or Must I Strip First?
Yes, you can orange-peel over existing paint in many cases, but you must confirm paint compatibility first. Clean, sand, and patch for good surface preparation. If paint’s peeling or glossy, you should strip or skim to prevent texture failure.
What’s the Ideal Orange-Peel Thickness to Hide Drywall Joints?
You can hide joints without going too thick—don’t worry about overdoing it. For texture application, aim for 1/16–1/8 inch “peak-to-valley.” You’ll get coverage after proper drywall preparation, with light pressure, even passes, and quick dry checks.
How Do I Prevent Orange Peel From Showing Through Flat Paint?
Prevent orange peel from showing through flat paint by prepping the wall smooth, priming correctly, and matching paint compatibility with your texture application. Roll evenly, avoid overworking, and let full cure time pass before priming or topcoating.
Why Does Orange Peel Sometimes Look Mottled or Uneven?
Orange peel looks mottled because uneven texture consistency and rushed application technique leave ridges like uneven waves—some catch light, others hide it. You may vary spray distance, pressure, or coating thickness, causing patchy shadows.
How Long Should I Wait Before Cleaning or Handling Orange-Peel Walls?
Wait at least 24 hours before touching, cleaning, or doing wall maintenance. Let drying time finish fully—usually 48 hours for humidity-heavy areas. After that, gently wipe with a damp microfiber, avoiding harsh scrubbing until the paint cures longer.
Conclusion
Now you’ve got the tools, prep steps, and spray know-how—so don’t rush the finish. Once you match the texture across every wall and nail your sprayer distance, the real test starts: curing. Wait for it to set, then check for any rough spots. If you lightly sand, you’ll earn that smooth, “pro” look before paint. And when you prime and roll on color… that orange peel magic either clicks—or it doesn’t.
