
How to Use a Paint Sprayer on Exterior Walls for a Flawless Coat
To get a flawless coat on exterior walls, start by cleaning, scraping loose paint, fixing cracks, and priming bare or stained areas. Mask windows and protect plants, then choose the right sprayer and tip for your paint thickness and siding texture. Test spray on scrap, thin only if the manufacturer recommends, and use the right pressure. Spray 12–18 inches out with 40–60% overlap and a tight wet-edge so you avoid runs, dry spray, and stripes, then do a final evenness check and cleanup; keep going to nail the details.
Choose an Exterior Paint Sprayer That Fits
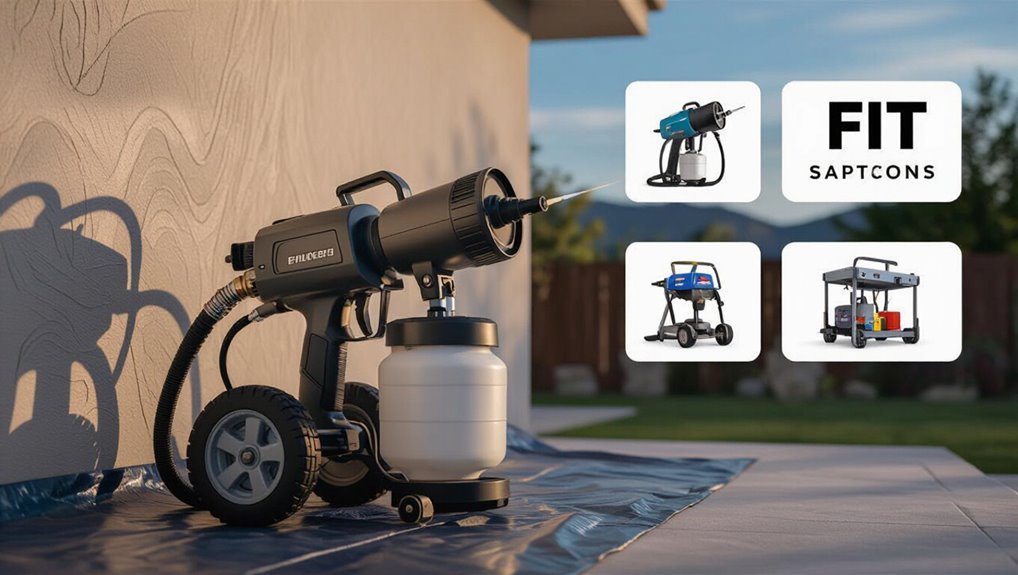
Choosing the right exterior paint sprayer makes everything faster and more consistent, so start by matching the tool to your job.
Pick sprayer types based on wall size and texture: airless for speed, HVLP for control, and a handheld for touchups. Your paint selection matters too—thicker stains need proper strainers and hoses.
Choose airless for speed, HVLP for control, and a handheld for touchups—plus strainers and hoses for thicker paints.
Use surface preparation to prevent defects before you dial in spray techniques: keep a steady distance, overlap passes, and avoid heavy buildup.
Plan paint finishes by adjusting pressure and fan width. Follow equipment maintenance and safety precautions, and account for weather considerations like wind and humidity.
Pick the Best Sprayer Tip for Exterior Paint
Picking the right sprayer tip matters because it controls your spray pattern, flow rate, and how smooth your finish looks on exterior surfaces.
Match tip sizes to your paint viscosity and wall texture so you avoid dry spray or runs. Choose a fan pattern that fits windows and wide sections, and test on scrap siding before you commit.
You’ll get more consistent results from reputable best sprayer brands with reliable tip geometry. Use a medium fan for siding, a narrower tip for edges, and a wider tip for faster coverage on smooth stucco.
1) Select tip size:
2) Pick pattern:
3) Test first:
4) Adjust technique.
Pressure Settings for Siding, Stucco, Trim
When you spray siding, keep your pressure moderate so you don’t drive paint too deep into the material.
For stucco, you’ll usually need a slightly higher setting to push paint into the texture and cover evenly.
For trim, lower the pressure and use a tighter control so edges stay sharp instead of blowing out.
Choose Pressure For Siding
To get clean coverage without damage, you need the right PSI for each surface. When you spray siding materials, start low, then increase until paint atomizes without blasting, especially under changing environmental conditions.
Match your spray techniques to the panel texture, keeping a steady distance to prevent runs. Consider safety precautions like goggles and gloves, and confirm your paint selection fits the siding.
Plan color choices for visibility, and check weather impacts: humidity and wind can shift cure time and overspray. Maintain equipment maintenance by cleaning tips often.
Use these settings as a guide:
1) 1200-1500 PSI vinyl
2) 900-1200 PSI wood
3) 700-1000 PSI fiber cement
4) 1000-1300 PSI composite.
Set Pressure For Stucco, Trim
Set your sprayer pressure for stucco and trim based on how easily they erode and how fine the surface texture is—start at the low end of the recommended range and work up in small steps.
For stucco, begin around 25–35 psi and test on scrap; keep the nozzle 12–16 in. away to avoid gouging or blowing out the stucco texture.
For trim materials, drop pressure to 20–30 psi, then increase slightly only if coverage is patchy.
Use a fan tip for broad coats and adjust until edges stay crisp, not misted.
Thin Paint for a Clean, Even Spray Pattern
Pick the right viscosity so your sprayer atomizes paint evenly without runs or dry spray.
If you need to thin it, use a clean solvent that matches the paint so the consistency stays smooth.
Before you start, test spray on a scrap area and adjust until the pattern looks uniform.
Choose Correct Viscosity Levels
Before you start spraying, match your paint’s viscosity so it flows cleanly through the gun and lays down an even pattern on the exterior wall.
You control this with viscosity measurement and by tuning paint consistency to what your sprayer needs. Start by checking the spec cup or chart, then test a short pass on scrap siding.
If the fan splits or sputters, you thicken too much—adjust. If it runs or stripes, thin slightly until it lays flat and uniform.
- Verify viscosity measurement first
- Adjust paint consistency gradually
- Spray test on scrap
- Lock settings before coverage
Thin Paint With Clean Solvent
Thin your paint with clean, manufacturer-approved solvent until it sprays smoothly and atomizes into a uniform fan. You need the right paint consistency: too thick will sputter and orange-peel, too thin will sag and run.
Use measured amounts of solvent, stirring thoroughly after each addition. Follow the manufacturer’s recommended thinning ratio, then fine-tune with small increments while watching flow at the sprayer inlet.
For thinning techniques, strain the mixture through a paint filter, and keep it covered to avoid skinning. Maintain the same mixture throughout to keep coverage even on exterior surfaces.
Test Spray Pattern Before Use
Once your paint is thinned to the right consistency, you should test it on a scrap piece of exterior material or an inconspicuous spot.
Hold the sprayer 12–16 inches away and trigger briefly to judge the spray pattern and how the coating settles on the test surface.
If you see dry spray, slow down or thin slightly; if it runs, back off air pressure or add more paint viscosity.
- Check width and overlap of the spray pattern.
- Inspect edges for splatter or uneven coverage.
- Verify nozzle output stays consistent.
- Adjust speed, pressure, and material thickness before wall work.
Dial In Coats and Coverage Thickness
Dialing in your coats and coverage thickness is what turns a sprayer from “paint everywhere” into a clean, professional finish. You control build by adjusting pressure and speed, then confirm coverage techniques by watching how fast sheen levels out. Keep an eye on paint consistency: too thin runs, too thick clogs and stripes. Aim for even overlap each pass; most exteriors need two medium coats rather than one heavy one. Use these targets:
| Goal | What to adjust |
|---|---|
| First coat | Reduce speed slightly |
| Even flash | Lower pressure |
| Full hiding | Add another pass |
| No runs | Thicken mix slightly |
| Smooth finish | Match overlap */25-30%* |
Test Your Spray Fan on Scrap Material
Before you spray the wall, test your pattern on scrap to adjust the spray fan for even coverage.
Check how the paint lays down—then verify your distance and overlap so you don’t leave thin spots or heavy runs.
Take a moment to tweak the fan and settings until the coverage looks consistent.
Adjust Spray Fan Pattern
Test your paint sprayer fan pattern on scrap material before you touch the exterior wall.
Then use spray pattern adjustment to fine-tune the output: start with a light pass, watch where the paint lands, and correct immediately. You want even edges, not heavy misting or bare streaks.
Adjust the nozzle or tip settings until the fan matches your target. As you dial in fan width selection, keep your wrist steady and maintain a consistent distance to avoid wobble.
- Start wide, then narrow.
- Increase pressure gradually.
- Shift nozzle alignment.
- Repeat passes quickly.
Check Coverage On Scrap
After you’ve adjusted the spray fan pattern, you’ll get reliable coverage only if you confirm it on scrap first.
Grab a piece of cardboard, plywood, or siding offcut and test with the same settings you’ll use outdoors. Stand the sprayer as you plan to work, then spray short passes.
Look for an even, solid coat with no striping, pinholes, or heavy edges. If the pattern spits or fades, tweak pressure, material viscosity, or nozzle speed, then test again.
This quick check sharpens your paint sprayer techniques and supports exterior wall maintenance, saving waste and rework.
Verify Distance And Overlap
Use scrap to verify your spray distance and overlap by standing at your desired working height and spraying steady, controlled passes. Move side to side, keeping your wrist level, and stop when the pattern looks even.
Inspect the scrap: you want full coverage without dry gaps or heavy ridges. Adjust the nozzle distance, then test again until the fan width matches your overlap goal. While you’re at it, confirm sprayer maintenance—clean the tip, check pressure, and clear any partial clogs.
Choose the right settings for your paint selection, since viscosity changes fan behavior.
- Mark a grid on scrap
- Target 50% overlap
- Note drips or dry streaks
- Repeat after nozzle tweaks
Clean Exterior Walls Before You Spray
Before you start spraying, clean your exterior walls thoroughly so paint bonds properly and doesn’t trap dirt or mildew. You should use strong wall cleaning techniques: scrub loose grime, rinse thoroughly, and let surfaces dry completely. Focus on high-traffic areas, corners, and seams where residue hides. Check for peeling or soft spots, and scrape them back to solid edges before you proceed. Proper exterior surface preparation means removing oils, dust, and chalky film from prior coatings. Use these steps to stay consistent:
| Step | Tool | Goal |
|---|---|---|
| Wash | Hose/brush | Remove dirt |
| Scrub | Degreaser | Cut oils |
| Rinse | Water spray | Lift residue |
| Dry | Fans | Ready to bond |
Remove Mildew, Dust, and Chalk Buildup
Before you spray, inspect the exterior walls for mildew and algae, and treat any spots you find.
Then scrub off dust and chalk buildup with a stiff brush and an appropriate cleaner so the surface holds paint evenly.
Rinse thoroughly and let the wall dry completely before you start spraying.
Inspect For Mildew And Algae
Start by walking the exterior walls in daylight and under an angled light, because mildew, algae, and chalky residue often hide in shadows until you spot the gray-green staining and dusty buildup.
As you inspect, look for dark blotches near sprinklers, north-facing corners, and shaded seams.
Don’t start spraying yet—plan mildew removal and algae prevention after you confirm the extent.
Use a flashlight to check texture changes, and tap lightly to see if residue releases.
Focus on these signs:
- Fuzzy or spotted patches
- Wet-looking streaks after rain
- Fading paint at joints
- Powdery edges that retain dirt
Scrub Off Dust And Chalk
Once you spot the dusty buildup and chalky edges, you need to scrub them off so your new finish bonds well.
Wear gloves, then rinse the wall with clean water to loosen surface grime. Use a stiff brush with a mild detergent solution and scrub in small sections, focusing on corners and rough siding.
For tough spots, spot-treat with a mildew remover, then rinse thoroughly.
After cleaning, do a chalk assessment: rub a fingertip or cloth; if it whitens, scrub again until it doesn’t.
Finish with dust removal, letting the surface dry completely before you spray.
Repair Cracks, Holes, and Loose Paint First
Inspect the exterior wall closely and fix any cracks, holes, or loose paint before you spray.
Scrape away failing paint edges until you reach solid substrate, then sand smooth to remove raised rims. Fill cracks with a patch or caulk designed for exterior use, and perform crack repair while seams are clean and dry.
For deeper holes, use spackle or epoxy filler, then feather the repair edges so the surface stays even. Address rust or damaged spots before filling. Good paint adhesion starts with tight, stable surfaces.
- Scrape and sand loose paint
- Clean dust and debris
- Patch and feather edges
- Let fillers cure fully
Mask Windows, Doors, and Landscaping Carefully
Mask off windows, doors, trim, and nearby fixtures before you spray so overspray doesn’t stick where you don’t want it. You should use window protection that seals edges tightly, and secure plastic or painter’s tape without gaps.
Fit door shields around frames and handles, and keep spray away from hinges.
Before you mask landscaping, do solid surface preparation by watering the surrounding soil lightly, then lay landscape coverings over mulch and plants. Press coverings flat at the border so paint mist can’t drift through.
Take a moment to check corners and vents.
Cover Lights and Hardware to Prevent Damage
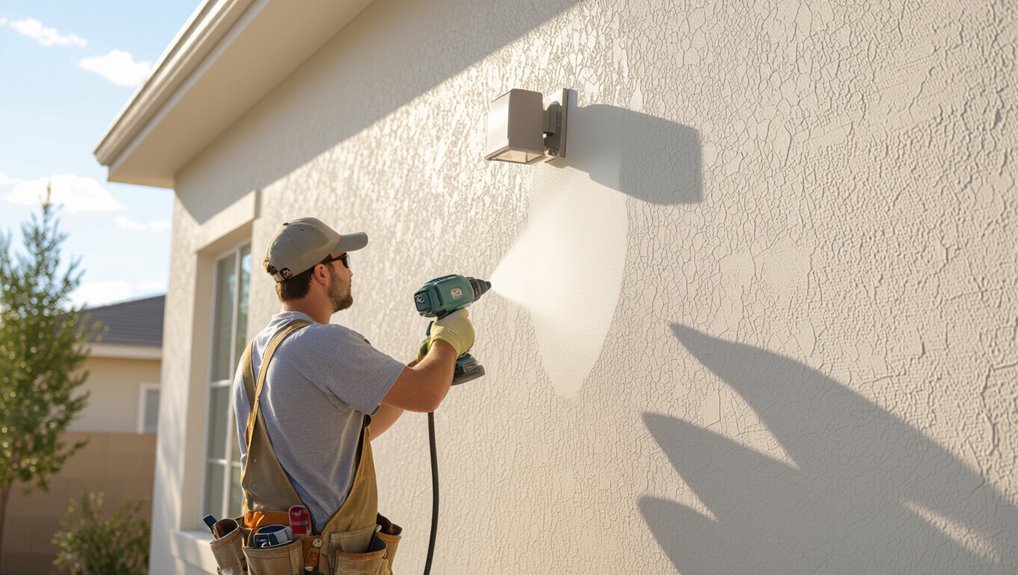
Before you start spraying, cover exterior lights, door hardware, and any nearby fixtures so paint mist doesn’t land on visible surfaces or interfere with moving parts.
Use tight covering techniques: tape clean edges, press plastic or paper snugly, and create a small “hood” over fixtures to shield lenses and switches.
For hardware protection, remove items if you can; otherwise bag them, then cover with painter’s tape.
Walk around the perimeter and check gaps around brackets.
- Cover vents and registers
- Wrap light bases securely
- Bag hinges and knobs
- Seal tape edges firmly
Prime for Better Adhesion and Long Life
Prime the exterior walls so your topcoat bonds tightly and lasts longer. Before spraying, clean and dry surfaces, then spot-prime stains, chalking, and bare spots using paint adhesion techniques that remove contaminants. Choose a primer matched to your siding and masonry; that choice drives durability. Follow solid primer application methods: stir well, keep a wet edge, and thin only per label. Apply a uniform coat at correct coverage, especially around seams and corners. Use this checklist:
| Area | Goal | Tip |
|---|---|---|
| Bare wood | Seal | Use bonding primer |
| Rust spots | Block bleed | Spot prime only |
| Smooth masonry | Grip | Scuff before coating |
| Whole wall | Even base | Maintain overlaps |
Plan Your Spray Route to Avoid Double-Coats
Once the primer sets, you can plan your spray route so every pass lays color without overlap build-up or missed bands.
Map each wall section before you trigger the sprayer, keeping consistent travel speed. Start at a corner and work in steady, parallel lines, then step back to check your edges before you continue.
Map each wall section first, start at a corner, spray in steady parallel lines, then step back to confirm clean edges.
- Mark cutlines and seams to prevent double passes.
- Spray with controlled overlap, just enough for uniformity.
- Maintain sprayer maintenance checks mid-job to avoid pattern drift.
- Match paint selection to your coverage goals, so you don’t feel forced to recoat early.
Set Stance and Distance for Even Coverage
Stand with a stable, balanced stance so you stay steady as you spray, keeping your body aligned with the wall.
Maintain a consistent spray distance to avoid thin spots or heavy buildup.
Overlap each pass slightly to blend edges and get uniform coverage across the entire surface.
Choose Stable, Balanced Stance
Plant your feet shoulder-width apart and keep your body square to the wall as you spray, so you can control the gun without wobbling.
Maintain solid body alignment from shoulders to hips, letting your weight sit evenly.
Use firm foot positioning—one foot slightly ahead if you need comfort—so you can pivot smoothly while keeping the sprayer steady.
Brace your stance on firm ground, not loose debris or wet spots.
Lock your elbows softly, not rigidly, and keep your wrists neutral to reduce fatigue.
- Shoulder-width stance
- Square torso posture
- Even weight distribution
- Stable foot positioning
Maintain Consistent Spray Distance
Keep your spray distance consistent—about 12 to 18 inches from the wall—so the paint lays down evenly across the whole surface.
You should keep your body locked into a stable posture and move your arm smoothly, not fast or slow. If you drift closer, you’ll overload and risk runs; if you pull back, you’ll thin coverage and create mottling.
Watch the spray pattern: it should stay crisp, not fuzzy or spitting. For reliable spray techniques, stop periodically, check the nozzle and filters, and follow sprayer maintenance to prevent partial clogs.
Adjust as needed on corners.
Overlap Passes For Uniform Coverage
To get uniform coverage, set your stance and distance first, then overlap each pass by about 50% as you spray.
Stand side-on, keep your wrist steady, and move at a constant pace so your spray technique doesn’t bunch up edges or leave skips.
Before you start, complete surface preparation—clean, patch cracks, and let repairs dry—so each layer bonds evenly.
Then follow a simple pattern:
- Use the same arm speed every pass.
- Keep the nozzle angle square to the wall.
- Overlap 40–60% for full coverage.
- Stop and start off the wall edges, not mid-span.
Keep a Steady Pace Across the Whole Wall
Move at a consistent pace from one end of the wall to the other, so the paint lays down evenly instead of getting thicker in some spots.
Maintain a steady pace as part of your wall technique: keep your wrist and shoulder moving together, not in starts and stops.
Watch the wet paint line; if it swells or dulls, slow down or speed up slightly and correct right away.
Keep the sprayer parallel to the surface at the same distance, and use the same trigger pressure the whole pass.
Finish each section smoothly before you stop.
Overlap Passes to Prevent Striping
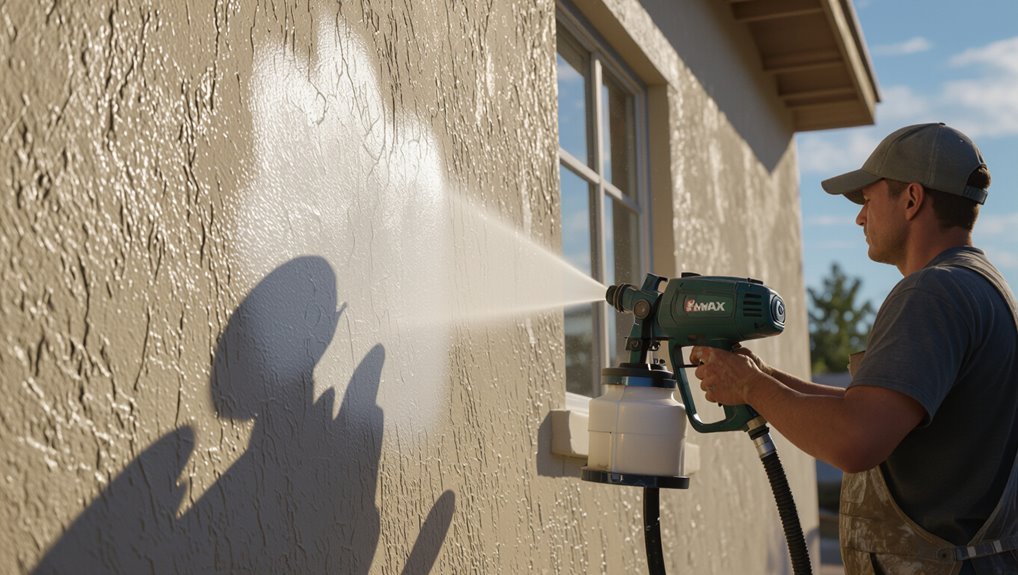
To prevent striping, keep your overlap consistent as you move across the wall.
Use the wet-edge technique so each new pass slightly covers the last while it’s still tacky.
Stay mindful of your speed and spacing so the finish levels out evenly.
Maintain Consistent Overlap
Maintain a consistent overlap by spraying each new pass halfway over the previous one, so you don’t leave dry lines between coats.
For smooth paint application, keep your overlap steady from pass to pass. After surface preparation, mark a stopping point and pace yourself so the sprayer speed stays uniform, even around corners and trim.
If you notice gaps, immediately correct by lightly re-spraying while the coat is still building.
- Keep the same overlap width on every pass.
- Maintain constant trigger pressure.
- Match pass speed to wall texture.
- Re-check edges and cut-ins often.
Use Wet-Edge Technique
Use the wet-edge technique by overlapping each new spray pass while the previous one still looks wet, so the paint blends and you don’t get visible striping.
Keep your gun moving at a steady speed and stop at natural breaks, like corners or trim. You should watch the sheen: once the edge dulls, it’s past your wet edge timing and you’ll start seeing lines.
This is one of the key wet edge benefits, especially on large exterior walls with changing light and fast drying.
Plan your pass length, then overlap consistently every time.
Keep the Gun Level for a Uniform Finish
Keeping the spray gun level as you move it across the exterior wall helps you lay down a consistent coat.
Keep your wrist steady and let the nozzle distance stay uniform, so the spray pattern hits the surface evenly. You prevent stripes and drips by maintaining the same height while you track each pass.
Before starting, verify sprayer maintenance: clean the tip, confirm correct pressure, and check for clogs. Choose the right paint selection for your project, since viscosity affects how level passes look.
- Hold gun parallel to the wall.
- Move at a steady speed.
- Maintain constant nozzle distance.
- Overlap each pass slightly.
Spray Corners and Edges With Controlled Fan Passes
Spray corners and edges by breaking the job into tight, controlled fan passes instead of trying to blast them in one go.
Use your spray technique to overlap each pass about 50%, keeping the nozzle perpendicular as you approach trim, soffits, and wall joins. Move steadily, stopping briefly at corners so paint builds without runs.
Use spray passes overlapping by about 50%, keep the nozzle perpendicular near trim and wall joins, and slow briefly at corners to prevent runs.
For edge control, reduce speed at the first sign of buildup, then continue outward to blend. Keep a consistent distance and adjust pressure or flow if the fan starts to spit.
Let those edges tack before you make another round.
Back-Roll or Back-Brush for Better Bond
After you’ve laid down your coat, back-roll or back-brush immediately to improve adhesion and coverage, especially on rough siding and textured stucco. You’ll lock in paint where the sprayer can’t fully wet the surface, boosting back roll benefits and ensuring a consistent finish.
Use a roller lightly loaded and keep it moving to avoid lifting fresh paint, or use back brush techniques to press coating into grooves and cracks. Work in small sections, keep edges wet, and maintain light, even pressure so the paint bonds tightly.
- Back-roll for flat, textured areas
- Back-brush for tight grooves and seams
- Stay wet-edge to blend passes
- Don’t overwork after it sets
Avoid Runs by Adjusting Volume and Speed
Dial in the correct paint flow by testing a small area, then adjust your sprayer until it lays down an even coat without sagging.
Match your speed to the surface so the wet edge stays consistent, and keep the pressure steady.
Use consistent overlap passes—about the same width each time—so you avoid buildup that causes runs.
Dial In Correct Paint Flow
To prevent runs and dry spray, you need to fine-tune your sprayer’s paint flow by pairing the nozzle volume with your walking speed.
Check paint viscosity first: thin or thicken until it sprays smoothly, not in spits.
Then adjust pressure in small steps, keeping a consistent fan pattern. If you see puddling, reduce volume; if you see gaps, increase volume slightly.
Maintain proper spray maintenance by flushing and clearing the tip between changes, because clogs ruin flow and cause streaks.
- Test on scrap.
- Adjust volume/pressure.
- Confirm even fan.
- Clean tip often.
Match Speed To Surface
You’ll avoid runs and misty dry spray by matching your walking speed to how much paint the sprayer lays down.
As you spray, adjust your pace based on the paint type and the wall’s texture, so each pass leaves a wet, even film. If you move too slowly, paint pools and runs; speed up and reduce flow slightly.
If you move too fast, you get dry spray and rough texture; slow down and open the pattern to deliver more paint.
Always follow surface preparation, because dust, flaking, or moisture changes absorption and requires speed tweaks.
Maintain Consistent Overlap Passes
Use a steady overlap on every pass so you lay down an even film without puddling.
Keep your wrist and boom height consistent, and adjust speed when the pattern starts to build. If you see runs, you’re moving too slow or the volume’s too high—reduce pressure slightly and quicken your stroke.
If coverage looks dry, slow down a touch or increase flow.
Do sprayer maintenance between sections so the fan stays uniform, and confirm paint selection suits the siding texture.
- Overlap 50% each pass
- Match speed to flow
- Adjust pressure to prevent runs
- Check pattern after every break
Prevent Sagging on Trim and Horizontal Lines
Sagging usually happens when wet paint runs over trim edges or accumulates along horizontal lines, so control the flow from the start. Set your paint consistency so it sprays smoothly without excessive drip, and verify with a test pattern.
Use steady, parallel application techniques: trigger the sprayer before the stroke, release after, and keep a constant distance. When you reach trim, reduce fan width and slow slightly to avoid buildup at corners.
For horizontal bands, work in thin passes, overlapping lightly, then back off before paint pools. If you see a sag, stop immediately and level it before it sets.
Reduce Overspray With Better Angles and Barriers
Angle your sprayer so the spray tracks where you want it, not past the edge of the wall.
Use shielding and barriers around doors, windows, and landscaping, and keep a steady distance so you don’t blow paint into unintended areas.
Overlap each pass slightly while you maintain that distance, so coverage stays even and overspray stays minimal.
Angle To Direct Spray
- Tip nozzle slightly downward
- Hold a steady, square stance
- Maintain ideal distance
- Track overlap for uniform coverage
Use Shielding And Barriers
Shield the surface and control the spray path to cut overspray and keep your exterior finish clean.
Use shielding techniques before you trigger the sprayer: place tarps, masking plastic, or rigid panels to block bounce-back from corners, trim, and vents.
Overlap your barriers tightly so gaps don’t let mist drift onto windows, siding, or landscaping.
Keep barrier edges slightly higher than the working line, and tack or weigh them down to prevent flutter.
If wind picks up, pause and reset your angles.
Choose barrier materials rated for paint exposure and easy cleanup.
Maintain Distance And Overlap
Maintain consistent standoff and overlap as you spray—aim for about 12–18 in. from the wall so the fan pattern hits where you need it without blooming mist.
Use distance measurement to keep coverage consistency; sweep side to side, angling slightly to reduce overspray. Keep passes overlapping by about half the fan width, and adjust for paint viscosity so edges don’t dry too fast.
Before each session, check equipment setup and sprayer maintenance, then do nozzle cleaning to protect spray patterns.
- Hold 12–18 in standoff.
- Overlap half-fan width.
- Watch sprayer maintenance, nozzle cleaning.
- Adjust for environmental factors.
Clean Up Overspray Without Ruining Surfaces
Once you finish spraying, start cleaning overspray as soon as the area’s still damp; waiting too long lets paint bond to siding, trim, and windows.
Use gentle overspray removal techniques: wipe with a soft cloth or sponge lightly misted with water or the right solvent for your paint type, then rinse. Keep pressure low and work from edges toward the center to avoid smearing.
Use gentle overspray removal: wipe with a soft cloth or sponge misted with water or the right solvent, then rinse—low pressure helps prevent smearing.
For tough spots, use plastic scrapers, not metal. Protect nearby surfaces with surface protection strategies—masking, drop cloths, and wax paper around openings—so cleanup stays fast and damage-free.
Recheck corners, railings, and glass.
When to Stop and Reload for Cleaner Coats
Stop spraying when your pattern starts to thin or your edges look dry, not when you finish the job.
Pause, then reload so you maintain steady output and steady coat consistency. Watch for fades, dry spray mist, or streaking—those signs mean your reload timing is off.
To keep coats clean and even:
- Spray a short pass, then inspect the edges.
- Reload immediately once coverage drops.
- Keep pressure consistent to match coat consistency.
- Stir paint between batches to avoid settling.
Fix Clogs and Spitting From Paint Delivery Issues
Address clogs and spitting right away so your exterior walls get a smooth, even finish instead of speckled blotches.
Start with clog prevention: strain paint, keep filters clean, and follow maintenance tips like flushing the lines after each session.
If paint spits, you likely have wrong paint viscosity or uneven pressure—adjust spray pressure for consistent flow.
Pause, relieve pressure, and check hoses for kinks or debris.
Use a troubleshooting guide: inspect the nozzle for buildup, then apply proper nozzle care and restart with a slower trigger to test.
Unclog a Spray Tip Without Damaging It
If your spray tip clogs, you can clear it without damaging the nozzle—just treat it gently.
Stop spraying, relieve pressure, and point the tip away from you. Remove the tip and check for dried paint. Use warm water or the proper solvent to soak it, then flush with cleaner until the paint flow runs clear.
For spray tip maintenance, never poke the orifice with metal; it’ll scar and ruin your pattern. Reinstall, test on scrap, and adjust settings only if needed.
- Release pressure fully
- Soak, then flush
- Avoid metal tools
- Test for steady paint flow
Fix Uneven Color From Dry Spray or Settings
If you see patchy, chalky areas, you likely have dry-spray from spraying too far, too fast, or with the wrong settings.
Adjust your pressure and switch to the right tip size, then test on scrap until the coat lays down wet and even.
If it still looks off, recoat after the first layer dries so you blend and level the color.
Identify Dry Spray Causes
Uneven color from dry spray usually comes down to paint drying mid-flight or spraying under the wrong conditions, not to your roller technique.
You can spot dry spray causes by watching misty, dusty specks that land first, then dull patches where coverage thins.
Use this checklist for common mistakes.
- Spray in heat, wind, or low humidity that flashes solvent before it reaches the wall.
- Move too fast or start/stop without overlapping, leaving partial dry spots.
- Use paint that’s too thick or improperly mixed, increasing spitting.
- Apply over dusty, damp, or unprimed surfaces that repel flow.
Adjust Pressure And Tip Size
Once you’ve identified the dry-spray culprits, correct the spray settings to stop color from coming out spotty. Dial pressure down until droplets land wet, not dusty, then choose a tip sized for your paint types. If you see mist, reduce pressure or move slightly slower and closer; if you see runs, increase pressure slightly or speed up. Do quick tests on scrap, adjusting sprayer maintenance issues first, like clogged filters.
| Symptom | Tip action | Pressure goal |
|---|---|---|
| Dusty edges | Smaller tip | Lower |
| Orange peel | Larger tip | Moderate |
| Runs | Larger tip | Raise slightly |
Recoat For Even Color
Recoat right after your first pass so the finish levels instead of flashing off unevenly. Watch for dull patches or dry-spray speckling, then correct immediately.
Keep your sprayer settings consistent, and overlap each stroke 50% to protect color consistency and build finish durability.
- Let only a brief tack time pass, then spray again.
- Lightly mist hot or over-wet spots, don’t flood them.
- Recheck fan pattern and tip wear before continuing.
- Final pass should be uniform, maintaining steady distance.
Afterward, inspect corners and edges from multiple angles for any banding.
Touch Up Missed Spots With Feathered Passes
After you’ve sprayed the main coat, inspect the wall under side lighting and mark any missed spots.
Grab a small brush or roller and use feathering techniques to blend the repair into the surrounding finish, keeping edges thin.
For tiny pinholes, dab lightly with the tip of the brush, then stop—don’t flood the area.
If the patch looks raised, lightly sand once cured and wipe away dust.
Match your exterior paint and apply touch up methods in thin coats, overlapping each feathered pass slightly.
Let it dry fully before you step back and recheck.
Avoid Lap Marks Between Spraying Sessions
To prevent lap marks between spraying sessions, you need to manage the “wet edge” and the timing of each pass—keep the previous coat tacky when you start again.
Keep the previous coat tacky by managing the wet edge and pass timing—so you start the next session without lap marks.
Use smart spraying techniques: overlap each pass 50% and keep your nozzle perpendicular at a steady distance.
Plan your paint types and climate conditions so the first section doesn’t skin over. If you must pause, stop at a natural break, then resume with the fan already moving.
Maintain consistent pressure, speed, and pattern to avoid ridges.
- Track tack time between sections
- Overlap 50% each pass
- Resume at natural breaks
- Match pressure and travel speed
Blend Touch-Ups to Hide Patch Lines
Once you’ve patched a small area, blend the touch-up while the surrounding paint still has some “give” so you don’t leave a hard patch line.
Feather the sprayer pass outward 6–12 inches, keeping a light trigger pull and consistent distance.
Use color blending techniques by matching your existing sheen and slightly over-spraying until the patch disappears from the normal viewing angle.
For texture matching, don’t flood the surface; apply in short bursts, then stop. Let it flash, then repeat if needed.
Once dry, inspect under side lighting and spot-spray tiny gaps immediately.
Keep Coats Consistent Between Wall Sections
As you move from one wall section to the next, keep a wet edge so you don’t get visible seams.
Aim for a uniform spray pattern and overlap each pass by about half the spray width, even around corners and breaks.
If your timing drifts, pause and reestablish your rhythm before the next section starts drying.
Match Wet-Edge Timing
Matching wet-edge timing keeps your finish uniform, and it starts with how you move across wall sections. You must treat each pass like a continuous job: don’t pause between sections.
Your wet edge importance means you start the next section before the previous one skins over. Use timing techniques—keep your pace steady, and overlap only during wet coverage, not after dry.
Work from an established wet area into the next bay, maintaining the same spray distance and trigger rhythm.
- Plan section order
- Start next pass early
- Keep trigger rhythm constant
- Stop only mid-line
Maintain Uniform Spray Overlap
To keep your finish uniform, maintain a consistent spray overlap as you move between wall sections.
Plan your passes so each new stripe overlaps the previous one by about 25–50%, keeping edges from thinning or building up. Use the same trigger speed and wrist angle every time, and keep your distance steady so your spray pattern stays even.
When you reach a corner or break, don’t pause; feather the trigger and continue with the same overlap.
Before resuming, check for clogs or pressure changes as part of equipment maintenance.
Adjust Settings for Textured Stucco and Rough Walls
Before you spray textured stucco or other rough exterior surfaces, dial in your settings so you don’t end up with heavy runs, clogged tips, or uneven coverage.
Start by lowering pressure and opening the fan slightly, since the bumps trap paint. Use a wider tip and keep your distance consistent to avoid spits.
Test on scrap wall sections, then tweak until coverage looks even without pooling.
Apply textured surface techniques by moving steadily, not stopping, and overlap only lightly.
Follow these stucco application tips:
- Set pressure low
- Use a larger tip
- Adjust fan width
- Spray a test patch first
Techniques for Smooth Vinyl and Wood Siding
Before you spray, prep the siding by cleaning it and scraping any loose paint so the surface is smooth and ready.
Next, choose the correct nozzle and tip for vinyl or wood, then keep your pressure and distance consistent as you work.
Use steady, even passes with proper overlap so coverage stays uniform and you don’t miss any spots.
Prepare Siding Surface Thoroughly
Clean and prep your siding so the sprayer lays down an even finish. Start with a thorough wash: remove dirt, mildew, chalking, and loose paint using a siding-safe cleaner, then rinse and let it dry completely.
Next, do sanding techniques for smooth spots—feather edges, knock down bumps, and scuff glossy areas without gouging wood or vinyl.
Fill cracks, caulk gaps, and scrape any failing coating. Complete surface preparation by wiping dust, checking for peeling seams, and ensuring the siding is firm, dry, and intact before spraying.
- Wash, rinse, dry
- Sand feathering and scuffing
- Repair cracks and caulk
- Wipe dust and inspect thoroughly
Choose Correct Nozzle And Tip
Choosing the right nozzle and tip makes or breaks your finish on vinyl and wood siding. You should match spray width to the board pattern: use flat fans for smooth coverage on flat faces, and wider nozzle types for larger spans.
For siding, start with moderate tip sizes to control overspray and reduce runs. Keep the tip distance consistent so the fan stays even; too close causes heavy texture, too far turns the coat patchy.
Test on scrap, adjust pressure slightly, then lock your setup before spraying the full run.
Maintain Even Overlap Coverage
Once you start spraying, overlap each pass by about 50% so the previous fan blends seamlessly into the next.
Maintain even overlap coverage as you move across vinyl and wood siding, keeping a steady pace and consistent arm distance. Use your spray technique to prevent skips at corners, and watch the wet edge so it stays uniform. Adjust paint consistency if the fan starts to run or fades between strokes.
- Keep the nozzle parallel to the wall.
- Maintain a constant trigger pressure.
- Cross over edges without building ridges.
- Inspect from different angles, then touch up immediately.
Protect Surrounding Areas From Drips and Drift
Before you spray, shield anything you don’t want coated—windows, doors, siding you aren’t touching, landscaping, and walkways—because paint drips and overspray spread fast.
Use plastic sheeting and painter’s tape to create solid drip protection, sealing edges and corners. Lay down drop cloths where overspray could land, and cover vents, lights, and outlets.
Keep your sprayer pointed and maintain consistent distance to improve drift management. Work from top to bottom and pause before pulling the trigger off-surface.
Inspect frequently and touch up stray marks immediately.
Spray in Weather That Helps Exterior Paint Cure
Spray only when the weather supports a steady cure—because exterior paint needs the right temperature, low humidity, and minimal wind to form a durable film.
Check the forecast before you start, and aim for the ideal temperature range so the coating flashes off evenly.
Keep an eye on humidity levels; if the air is too wet, you risk soft paint that won’t harden well.
Wind can push droplets away, so choose calm conditions.
Use a quick test patch first, then spray full sections.
- Ideal temperature: stay within the product’s range.
- Humidity levels: choose lower moisture days.
- Minimal wind: protect from drift.
- Dry surfaces: avoid misty conditions.
Use Dry Times to Avoid Smudges and Defects
After you’ve chosen weather that helps the paint cure properly, you still need to respect dry times to protect the finish.
Wait between coats and don’t rush back over tacky areas; you’ll smear edges and leave lap marks.
Use drying techniques like letting the surface flash-dry before applying a second pass, keeping your nozzle distance consistent so each layer deposits evenly.
Plan timing strategies: start early enough for full dry before dew, wind shifts, or evening cool-down.
If the wall feels cool or slightly sticky, pause. Let it fully dry, then continue for a smooth, durable coat.
Clean Your Exterior Paint Sprayer After Use
Once you finish coating the exterior wall, you should clean your paint sprayer right away to prevent dried paint from clogging the nozzle and ruining the tip.
Flush the system with the correct solvent or water until it runs clear, then wipe the exterior clean.
Use best cleaning techniques: remove the tip, clean the filter, and check the needle for residue.
Follow sprayer maintenance tips by inspecting hoses for leaks, keeping O-rings lubricated, and drying parts thoroughly.
Afterward, store the cleaned unit upright and cap it.
- Flush until clear
- Disassemble and rinse
- Clean nozzle/needle/filter
- Inspect and dry fully
Store Hoses, Tips, and Filters to Prevent Future Clogs
Proper storage protects your sprayer from the next clog. After cleanup, you should drain the hose completely, then coil it without tight bends for safer hose maintenance.
Rinse and dry the spray tip before reinstalling; use proper tip selection so residue won’t collect. Remove and inspect filters, then do thorough filter cleaning and let them dry fully.
For storage solutions, hang the gun and keep the hose elevated off the ground. Cover the inlet and outlets with caps, and store everything indoors at steady temperature to prevent gumming and blockage.
Common Sprayer Problems and Quick Fixes
Troubleshoot your paint sprayer fast before a small problem turns into wasted time on the exterior. Use this troubleshooting guide for error identification and quick fixes.
Start with job planning and surface preparation, then check equipment care, spray technique, and paint selection for matching paint types. Review maintenance tips before spraying; dry material buildup often causes spitting, uneven flow, or clogs.
- Clogging: strain paint, clean tip, verify filters.
- Spitting: thin correctly, adjust pressure, replace worn nozzle.
- Orange peel: slow your pass; keep distance consistent.
- Runs: reduce flow, widen fan, follow user safety.
Estimate Coverage and Buy the Right Amount
Estimating coverage before you open the paint can saves you from delays and mismatched batches. Measure your exterior walls’ square footage, then subtract windows and doors.
Check the paint label for coverage per gallon at your chosen paint type, and multiply by the wall area, adding 10–15% for waste and extra coats.
Your surface preparation affects how much you’ll use: rough, peeling, or unsealed spots soak more paint. If you’re spraying, plan for even buildup and keep a wet edge.
Buy the amount for the full job, and mix batches in one pail if needed.
Rent vs. Buy: Pick What’s Best for Your Job
After you’ve figured out your total square footage and how much paint you’ll likely need, the next decision is whether to rent or buy your sprayer.
Match your project size to your budget. For short usage frequency, choose rental options to reduce upfront spending and simplify your cost analysis. For frequent work, weighing buying decisions and long term investment can pay off, especially if you’ll tackle more projects.
Consider equipment maintenance: rentals shift risk, while ownership demands cleaning, seals, and storage.
Use this quick checklist:
- Project size
- Usage frequency
- Convenience factor
- Equipment maintenance/long term investment
Final Quality Check for Evenness and Gaps
Once you’ve finished spraying the last section, walk the wall in good light and get close enough to spot the details you’d normally miss.
Do a gap inspection along corners, seams, and trim lines; look for thin spots, runs, and missed edges. Check for uniform sheen and even coverage, then compare neighboring areas for proper color matching.
Do a close gap inspection along corners, seams, and trim lines to catch thin spots, runs, or missed edges and ensure even coverage.
If you spot issues, do final touch ups right away, but confirm your paint consistency matches the approved spray mix.
Verify drying conditions and review environmental factors like wind and humidity.
Finally, maintain equipment maintenance—clean tips and filters—to prevent future unevenness.
Choose Primer/Topcoat Compatibility for Exterior Systems
To keep your exterior finish looking uniform after you’ve verified the evenness and filled any gaps, match your primer and topcoat as a system. You need strong paint adhesion, so align your primer types with your planned topcoat selection.
Use weather considerations to guide sheen and chemistry, not just color. Before you spray, nail surface preparation; clean, sand, and patch so primers bond. Follow product recommendations for compatible brands, film build, and dry times.
1) Check labels for system compatibility.
2) Prime matching porosity.
3) Select topcoat for UV and moisture.
4) Adjust application techniques for finish durability.
Troubleshoot Pattern Issues: Orange Peel, Misting, Stripes
When you spray exterior walls, pattern problems usually come from air pressure, gun setup, or surface readiness—so slow down and diagnose before you repaint.
For orange peel, you likely dry the coat: lower pressure, slow your pass, and keep the tip clean for sprayer maintenance.
For misting, check for clogged filters, worn seals, and improper distance; keep the fan centered and overlap 50%.
For stripes, you move inconsistently or trigger at edges; maintain a steady speed, keep the same trigger timing, and correct uneven substrate.
These common problems show up fast—fix the cause, then spray again with the right settings.
Frequently Asked Questions
How Do I Prevent Paint Drying Mid-Spray on Hot, Windy Days?
To prevent paint drying mid-spray on hot, windy days, keep a thinner-than-usual paint consistency, mist surfaces lightly, and use consistent spray technique with overlapping passes. Work in smaller sections, hold a steady distance, and pause briefly between sides to avoid lap marks.
What’s the Best Way to Thin Paint Without Ruining Finish Appearance?
Thin paint slowly until paint consistency matches your sprayer’s specs; do small test sprays. In one study, 80% of finish defects come from application issues. Use thinning techniques like manufacturer-recommended reducer, and strain, mixing thoroughly for a clean look.
Can I Spray Different Paint Sheens on Exterior Surfaces and Blend Them?
Yes, you can spray different paint sheens on exterior surfaces, but only if sheen compatibility matches; test color mixing on scrap first, then blend wet edges consistently. Use uniform pressure and overlapping passes, and avoid mixing glossy with flat.
How Long Should I Wait Before Spraying a Second Coat on Siding?
Wait until the first coat feels fully dry to the touch and tack-free, typically 24–48 hours, depending on siding preparation techniques, temperature, and humidity. Use drying time considerations to avoid lifting, runs, or uneven sheen.
What Respirator and Eye Protection Are Recommended for Exterior Paint Spraying?
Use a proper respirator: N95 for light dust, but for exterior paint choose half-face elastomer with organic vapor cartridges, and a P100 prefilter. Wear snug chemical splash goggles plus a face shield if overspray’s heavy.
Conclusion
Once you dial in your sprayer—right tip, steady pressure, properly thinned paint, and correct coats—you’ll glide across exterior walls like a pro and avoid those “oops” moments. Do a quick final pass to catch any missed spots, thin gaps, or rough edges before the paint decides to set. With the right primer/topcoat combo and a quick pattern check, you’ll get a smooth, flawless look—no drama, just great results.
